Welcome to our comprehensive guide on how to format a hard drive for security cameras. Whether you are a home or business owner looking to enhance your surveillance system, formatting the hard drive is an essential step in ensuring optimal performance and data integrity. In this article, we will walk you through the step-by-step process of formatting your hard drive, providing you with important tips and considerations along the way.
Why is formatting a hard drive important for security cameras?
Formatting a hard drive for your security cameras is crucial for several reasons. First and foremost, it allows you to erase any existing data on the drive, ensuring a fresh start and preventing any potential security breaches. Additionally, formatting optimizes the drive’s performance by organizing its file system and removing any corrupted or fragmented files. This helps to maintain smooth and reliable operation of your surveillance system, ensuring that it captures and stores video footage efficiently.
Ready to get started?
Before we begin the formatting process, it is essential to back up any important data that you want to preserve. Formatting erases all existing data on the drive, so ensure that you have made copies of any files that you wish to keep. Once you have backed up your data, you can proceed with the formatting process, which we will guide you through in the following steps.

Best Practices for Formatting a Hard Drive
When it comes to formatting a hard drive for security cameras, there are several best practices that should be followed to ensure optimal performance and data security.
1. Backup your data: Before formatting the hard drive, it is crucial to backup any important data or footage stored on it. This will prevent any loss of critical information and provide a safety net in case of unexpected issues during the formatting process.
2. Use the right file system: Choosing the correct file system is essential for compatibility and performance. For security camera systems, it is recommended to format the hard drive using a file system such as NTFS or exFAT. These file systems offer efficient storage management and support larger file sizes.
3. Securely erase data: Prior to formatting a hard drive, it is wise to securely erase all existing data. This can be done using specialized software that overwrites the entire drive with random data multiple times, making it extremely difficult to recover any sensitive information.
4. Partition the hard drive: Partitioning the hard drive can provide additional organization and separation of data. It allows for the creation of multiple logical drives within a single physical drive, making it easier to manage and locate specific files or footage when needed.

5. Format the hard drive: Once all necessary precautions have been taken, it is time to format the hard drive. This can be done using the disk management tool in the operating system. Be sure to select the correct drive and file system, and follow the instructions provided by the tool.
6. Regular maintenance: After formatting the hard drive, it is important to perform regular maintenance tasks such as disk defragmentation and error checking. These processes help optimize the performance and reliability of the drive, ensuring smooth operation for the security camera system.
Conclusion
By following these best practices for formatting a hard drive, security camera system owners can ensure that their data is securely stored and easily accessible when needed. Taking the time to backup data, choose the right file system, securely erase data, partition the drive, and perform regular maintenance will go a long way in maintaining the integrity of the drive and optimizing the performance of the security camera system.
Overview of Formatting a Hard Drive for Security Cameras
When setting up a security camera system, it is crucial to properly format the hard drive to ensure reliable and efficient recording and storage of surveillance footage. Formatting a hard drive involves preparing it for use by creating a file system that is compatible with the security camera system.

Step 1: Compatible File System
An important step in formatting a hard drive for security cameras is selecting a compatible file system. The most commonly used file system for security camera systems is the NTFS (New Technology File System) format. NTFS is supported by most security camera systems and offers a number of benefits, including efficient storage, support for large file sizes, and better security features.
Step 2: Backup Existing Data
Prior to formatting the hard drive, it is advisable to backup any existing data to prevent data loss. Formatting erases all data on the drive, so it is important to transfer any important data to another storage device or system before proceeding.
Step 3: Formatting the Hard Drive
Once the necessary data backups have been made, the next step is to format the hard drive. This can typically be done using the built-in formatting tools provided by the operating system or specific software provided by the security camera system manufacturer. Follow the instructions provided by the manufacturer or refer to the operating system’s documentation for the specific steps required to format the hard drive.
Step 4: Assigning Drive Letter
After formatting the hard drive, it is important to assign a drive letter to the newly formatted drive. Assigning a drive letter makes it easier to access and manage the hard drive within the operating system. This can be done using the Disk Management utility in Windows or other similar tools provided by the operating system.
Step 5: Testing and Monitoring
After formatting and assigning a drive letter, it is recommended to test the hard drive to ensure that it is functioning properly. Check if the security camera system recognizes and can write to the formatted hard drive. Additionally, regularly monitor the hard drive’s performance and available storage space to ensure proper functioning and avoid potential issues.

By following these steps, you can ensure that your hard drive is properly formatted and ready to provide reliable storage for your security camera system.
The Importance of Choosing the Right File System
When formatting a hard drive for security cameras, one of the most crucial considerations to keep in mind is the choice of a suitable file system. The file system is responsible for organizing and managing data on the hard drive, determining how files are stored, accessed, and protected.
Reliability
One of the primary factors to consider when choosing a file system for security cameras is its reliability. The file system should be capable of withstanding continuous read and write operations, ensuring that the stored footage remains intact and accessible. Additionally, a reliable file system helps prevent data corruption and minimizes the risk of file loss.
Security
Another crucial aspect is the security of the file system. Security cameras often record sensitive information, such as surveillance footage and confidential data. Therefore, it is essential to choose a file system that provides robust security features, such as encryption and access control, to protect against unauthorized access or tampering.
A file system with built-in encryption mechanisms ensures that even if the hard drive falls into the wrong hands, the data remains protected. Additionally, access control features enable administrators to restrict permissions, allowing only authorized personnel to view or modify the stored data.
By implementing a secure file system, you can significantly enhance the confidentiality and integrity of the recorded footage, maintaining the privacy of individuals under surveillance.
In conclusion, when formatting a hard drive for security cameras, the choice of a suitable file system plays a vital role in ensuring the reliability and security of the stored data. By selecting a file system that excels in these aspects, you can enhance the overall performance and functionality of your security camera system.
Step-by-Step Guide to Formatting a Hard Drive
Formatting a hard drive is an essential process when setting up a new security camera system. It ensures compatibility with the cameras and removes any previous data, giving you a fresh start. Here’s a step-by-step guide on how to format a hard drive effectively:
Step 1: Back up your data
Before formatting the hard drive, it’s crucial to back up any important data stored on it. This will prevent the loss of valuable information and files.

Step 2: Connect the hard drive
Connect the hard drive to your computer using the appropriate cables. Make sure it is properly connected and recognized by the system.
Step 3: Open Disk Management
Go to the Start menu and type “Disk Management” in the search bar. Click on the Disk Management app to open it.
Step 4: Locate the hard drive
In the Disk Management window, locate your hard drive from the list of available drives. It should be labeled with a drive letter and its size.
Step 5: Delete existing partitions
Right-click on each partition on the hard drive and select “Delete Volume.” Confirm the deletion when prompted. This step removes all existing partitions and data from the hard drive.
Step 6: Create a new partition
Right-click on the unallocated space on the hard drive and select “New Simple Volume.” Follow the on-screen instructions to create a new partition and specify its size. Assign a drive letter to the new partition when prompted.
Step 7: Format the partition
Right-click on the newly created partition and select “Format.” Choose the desired file system, such as NTFS, and select a volume label if desired. Click on “Start” to begin the formatting process.
Step 8: Complete the formatting
Wait for the formatting process to complete. The time it takes may vary depending on the size of the hard drive. Once finished, the formatted hard drive will be ready to use with your security camera system.
Formatting a hard drive for security cameras is an important step that should not be skipped. By following this step-by-step guide, you can ensure a properly formatted and compatible hard drive for your surveillance needs.
Recommended Tools to Use for Formatting
When it comes to formatting a hard drive for security cameras, using the right tools is essential to ensure a seamless and effective process. Here are some of the recommended tools that you can use:
- Windows Disk Management: This built-in tool in Windows operating systems allows you to manage, format, and partition your hard drives. It provides a user-friendly interface and various options for formatting.
- Disk Utility: If you are using a Mac operating system, Disk Utility is a powerful tool that can help you format your hard drive. It offers a range of formatting options and ensures compatibility with Mac systems.
- Third-Party Software: There are also several third-party software options available that offer advanced features for formatting a hard drive. Some popular choices include EaseUS Partition Master, MiniTool Partition Wizard, and AOMEI Partition Assistant. These tools provide additional functionalities and flexibility for the formatting process.
- Secure Erase Software: If you require additional security measures, using secure erase software can ensure that the data on the hard drive is completely wiped and cannot be recovered. Some recommended secure erase tools include Darik’s Boot and Nuke (DBAN), KillDisk, and Parted Magic.
It is important to choose the appropriate tool based on your operating system and specific requirements. Always make sure to backup important data before formatting a hard drive to prevent any data loss.
Considerations for Partitioning the Hard Drive
When formatting a hard drive for security cameras, it is important to consider the partitioning of the drive. Partitioning involves dividing the hard drive into separate sections, or partitions, which can be useful for organizing data and improving performance. Here are some considerations to keep in mind:
1. Size of partitions: Determine the appropriate size for each partition based on your specific requirements. Consider factors such as the amount of storage needed for video footage and the number of cameras being used. It is generally recommended to allocate more space to partitions that will be used for video storage.
2. File system: Choose the appropriate file system for each partition. Depending on the operating system and the specific requirements of your security cameras, you may opt for file systems like FAT32, NTFS, or exFAT. Research the capabilities and limitations of each to make an informed decision.
3. Security: Consider implementing security measures for each partition to protect sensitive data. Set up access controls and encryption to prevent unauthorized access and mitigate potential risks.
4. Performance: Partitioning can help improve performance by separating different types of data. For example, create separate partitions for the operating system, video footage storage, and other files. This can optimize read and write speeds and prevent fragmentation.
5. Backup and recovery: Plan for regular backups of your partitions to ensure the safety of your data. In case of any system failures or data corruption, having backups will enable a faster recovery process and minimize any potential loss.
By carefully considering these factors, you can create a well-organized and secure hard drive for your security cameras, enhancing their effectiveness and reliability.
Setting up the Hard Drive for Maximum Security
When it comes to setting up a hard drive for security cameras, ensuring maximum security is crucial. By following the steps below, you can optimize your hard drive to enhance the security of your surveillance system.
1. Formatting the Hard Drive
Before setting up the hard drive, it is essential to format it properly. Make sure to choose the file system that is compatible with your security camera system. Common file systems used for security cameras include FAT32 and NTFS. Formatting the hard drive will erase all existing data, so make sure to backup any important files.
2. Partitioning the Hard Drive
Partitioning the hard drive can provide an added layer of security. By dividing the hard drive into multiple partitions, you can isolate different aspects of your surveillance system. For example, you can create separate partitions for recording footage and storing backups. This can help prevent unauthorized access and minimize the risk of data loss.
You can use specialized software to partition the hard drive or utilize the built-in disk management tools in your operating system.
3. Encrypting the Hard Drive
Encrypting the hard drive is a vital step to ensure the security of your surveillance system. By encrypting the data on the hard drive, you can protect it from unauthorized access even if the hard drive is stolen.
There are various encryption methods available, such as BitLocker for Windows or FileVault for macOS. Choose a robust encryption method that suits your operating system and ensure you set a strong password or passphrase.
4. Setting up Access Controls
Controlling access to the hard drive is crucial for maintaining the security of your surveillance system. Configure access controls to restrict who can read, write, or modify the data on the hard drive.
Create separate user accounts with unique login credentials, and assign appropriate permissions to each account. This will help prevent unauthorized access to the hard drive and protect your surveillance footage.
5. Regularly Updating Software and Firmware
Regularly updating the software and firmware of your security camera system is essential for maintaining maximum security. Software and firmware updates often include security patches and bug fixes that help protect your system from vulnerabilities.
Stay up to date with the latest releases from the manufacturer of your security camera system and regularly check for updates. Install the updates as soon as they become available to ensure your system is equipped with the latest security measures.
| Tip: | Consider implementing a backup solution for your hard drive to further enhance security. Regularly backing up your surveillance footage to an external storage device or cloud storage can help mitigate the risk of data loss. |
|---|
Ensuring Compatibility with Security Camera Systems
When formatting a hard drive for security camera systems, it is important to ensure compatibility between the hard drive and the cameras being used. This ensures that the hard drive can properly store and retrieve video footage recorded by the cameras.
Camera System Specifications
Before formatting the hard drive, it is crucial to review the specifications provided by the manufacturer of the security camera system. The specifications will outline the supported file systems and maximum storage capacities that are compatible with the system.
For example, some security camera systems may only support FAT32 or exFAT file systems, while others may also support NTFS.
Choosing the File System
Based on the camera system specifications, select the appropriate file system for formatting the hard drive. This can usually be done through the operating system’s built-in disk management tools or third-party formatting software.
It is recommended to use a file system that is widely supported and offers sufficient storage capacity for the security camera system.
Formatting the Hard Drive
Once the file system has been chosen, proceed to format the hard drive according to the camera system specifications. This will erase all existing data on the hard drive, so be sure to back up any important files before proceeding.
During the formatting process, the operating system will allocate the necessary space and create the file system structures required by the camera system.
Verifying Compatibility
After formatting the hard drive, it is essential to verify its compatibility with the security camera system. Connect the formatted hard drive to the camera system and check if it can properly detect and record footage onto the drive.
If any issues arise, consult the camera system’s documentation or contact the manufacturer for further assistance.
Conclusion
Ensuring compatibility between the hard drive and the security camera system is crucial for proper functioning and reliable video storage. By reviewing the camera system specifications, choosing the appropriate file system, and verifying compatibility, you can confidently format a hard drive that works seamlessly with your security camera system.
Storage Capacity Recommendations for Security Camera Footage
When setting up a security camera system, it is crucial to consider the storage capacity needed to store the recorded footage. The amount of storage required will depend on several factors, including the number of cameras, the resolution of the cameras, and the length of time you want to keep the footage.
Number of Cameras
The first factor to consider is the number of cameras in your system. Each camera will generate its own video feed, so the more cameras you have, the more storage capacity you will need. As a general rule of thumb, allocate at least 1 terabyte (TB) of storage for every four cameras.
Camera Resolution
The resolution of your cameras is another important consideration. Higher resolution cameras produce more detailed footage, but they also require more storage space. If you have cameras with high-resolution capabilities, such as 4K or 8K, you will need to allocate more storage space accordingly. As an estimate, each camera with a resolution of 4K will require approximately 1-2 TB of storage per month.
Note: Keep in mind that these estimates can vary based on factors such as compression methods and the level of motion in the footage. It is recommended to consult the camera manufacturer or a security professional for more accurate storage estimations based on your specific setup.
Retention Period
The length of time you want to retain the recorded footage will also impact the storage capacity requirements. Different businesses or individuals may have different retention policies based on their specific needs or legal requirements. As a general guideline, it is recommended to store the footage for at least 30 days. Ensure that you have enough storage capacity to accommodate the length of your desired retention period.
By considering these factors, you can determine the appropriate storage capacity for your security camera footage. It is important to ensure that you have enough storage to maintain a reliable and efficient surveillance system.
Regular Maintenance and Backup Strategies
Regular maintenance and backup of your security camera hard drive is essential to ensure smooth and reliable performance. By following a few simple strategies, you can increase the lifespan of your hard drive and prevent data loss.
1. Schedule regular inspections: Set a schedule to inspect your hard drive periodically for any physical damage or signs of wear. Look out for unusual noises, vibrations, or overheating, as these could be indicators of potential problems.
2. Keep your hard drive clean: Dust and debris can accumulate on your hard drive, leading to overheating and performance issues. Use a soft cloth or compressed air to clean the exterior surfaces regularly. Ensure that the ventilation system is not blocked or obstructed.
3. Update firmware and software: Manufacturers often release firmware and software updates to improve performance and address security vulnerabilities. Regularly check for updates provided by the manufacturer and install them promptly.
4. Perform regular disk checks: Use disk checking tools to scan and repair any errors on your hard drive. This will help to prevent data corruption and ensure the integrity of your recorded footage.
5. Implement a backup strategy: Set up a regular backup schedule that copies your video footage to an external storage device or cloud storage. In the event of a hard drive failure, you can easily recover your data and ensure business continuity.
6. Test your backups: Regularly test the backups to ensure they are functioning correctly and can be successfully restored. This will give you peace of mind knowing that your data is protected and can be easily accessed when needed.
| Benefits of Regular Maintenance and Backup |
|---|
| – Minimizes the risk of data loss |
| – Extends the lifespan of your hard drive |
| – Ensures smooth and reliable performance |
| – Enables quick recovery in case of hardware failure |
| – Provides peace of mind and confidence in your security system |
By implementing these regular maintenance and backup strategies, you can ensure the longevity and effectiveness of your security camera hard drive. Taking proactive steps to protect your data will save you time, effort, and potential loss in the long run.
FAQ,
Why do I need to format a hard drive for security cameras?
Formatting a hard drive for security cameras is essential to ensure proper functioning and optimal performance of the system. By formatting the hard drive, you can remove any existing data or partitions, configure it to the required file system, and prepare it to store the footage from the security cameras.
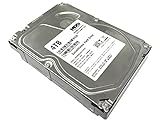
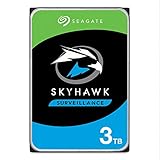
What type of hard drive should I use for security cameras?
When selecting a hard drive for security cameras, it is recommended to choose a surveillance-grade hard drive specially designed for continuous, 24/7 video recording. These hard drives are built to handle the demands of security camera systems and can provide reliable storage with high performance and data integrity.
What file system should I choose when formatting a hard drive for security cameras?
The choice of the file system depends on the requirements of your security camera system. The most commonly used file system for security cameras is NTFS (New Technology File System), as it provides better security, reliability, and support for large file sizes. However, some systems may require a different file system, such as exFAT or FAT32. It is recommended to consult the documentation or manufacturer’s guidelines for your specific security camera system to determine the compatible file system.