
Installing security cameras at your home or workplace is an effective way to ensure the safety of your property. However, simply installing them is not enough. To fully utilize the potential of your security cameras, you need to connect them to the internet to access their features remotely. In this article, we will guide you through the process of getting your security cameras online and enjoying the benefits of remote monitoring and surveillance.
Step 1: Choose the Right Camera System
Before diving into the technicalities of getting your cameras online, it is crucial to ensure that you have the right camera system. Look for a system that offers Wi-Fi connectivity or a wired connection option, depending on your preference and the layout of your property. It is also essential to consider other factors such as camera resolution, storage options, and desired features like night vision or motion detection.
Step 2: Set Up Your Network
The next step is to set up your network and ensure a stable internet connection. Make sure your modem and router are in good working condition. Connect your cameras to your network either through a wired connection or by accessing the Wi-Fi network. If you choose a wireless connection, ensure that your cameras are within range of your Wi-Fi signal for optimal performance.

Step 3: Configure Your Cameras
Once your cameras are connected to your network, you will need to configure them. This typically involves accessing the camera’s settings via a dedicated mobile app or a web browser interface. Follow the manufacturer’s instructions to set up your cameras, including assigning them unique names, creating passwords, and enabling the desired features.
By following these steps, you will successfully get your security cameras online and be able to monitor your property from anywhere in the world. Whether you are at home, at work, or on vacation, you can have peace of mind knowing that your security cameras are keeping an eye on what matters most to you.
Choose the Right Security Camera System
When it comes to securing your property, choosing the right security camera system is essential. With so many options available in the market, it can be overwhelming to make the right choice. Here are some factors to consider to help you choose the right security camera system:
1. Purpose: Determine the purpose of installing the security camera system. Do you want to monitor your property remotely, deter potential burglars, or gather evidence for future investigations? Understanding your purpose will help you select the right features and specifications.

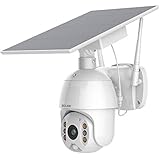
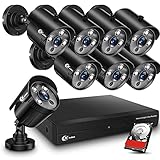
2. Camera Types: There are different types of security cameras available, including dome, bullet, and PTZ (pan-tilt-zoom) cameras. Dome cameras offer a discreet installation, bullet cameras are more visible and deterrent, while PTZ cameras can move and zoom to cover larger areas. Choose a camera type that suits your needs.
3. Resolution: Resolution determines the image quality of the security camera. Higher resolution cameras provide clearer and more detailed images. For outdoor surveillance, consider cameras with at least 1080p resolution to capture finer details and faces.
4. Night Vision: If you need surveillance during the night, ensure that the security camera system has reliable night vision capabilities. Look for cameras with infrared (IR) LEDs that can illuminate the area with invisible light for optimal visibility in low-light conditions.
5. Storage: Consider how the security camera system stores video footage. Some systems offer local storage through built-in hard drives, while others store footage in the cloud. Decide what works best for you based on your storage needs and budget.
6. Connectivity: Ensure that the security camera system supports the connectivity options you require. Most systems offer Wi-Fi connectivity for easy installation and remote access. If you need more stable and reliable connections, consider wired systems.

7. Scalability: If you anticipate expanding your surveillance coverage in the future, choose a security camera system that allows for scalability. Look for systems that support adding more cameras or integrating with other security devices.
By considering these factors, you can choose the right security camera system that meets your specific requirements and provides the level of security you need for your property.
Set Up Your Security Cameras
Setting up your security cameras properly is essential to ensure the safety and security of your home or business. Follow these steps to get your security cameras online and functioning effectively:
1. Choose the right location:
Before installing your security cameras, identify the areas you want to monitor. Look for high-risk areas such as entrances, windows, and blind spots. Ensure that the cameras have a clear vision and are not obstructed by any objects.
2. Install the cameras:
Follow the manufacturer’s instructions to install your security cameras. Mount them securely using the provided brackets or stands. Ensure that the cameras are placed at an appropriate height to capture clear images and are protected from vandalism or tampering.
3. Connect to a power source:
Most security cameras require a power source. Connect the cameras to a nearby power outlet or use a power over Ethernet (PoE) adapter if they support it. Ensure that the power source is reliable and uninterrupted to ensure continuous surveillance.
4. Connect to a network:
To get your security cameras online, you need to connect them to your network. Use Ethernet cables to connect the cameras to your router or network switch. Follow the manufacturer’s instructions for configuring the network settings, including assigning IP addresses.
5. Set up camera software:
Install any required software or apps provided by the camera manufacturer. Use these tools to configure the camera settings, including motion detection, scheduling, and remote access. Set up user accounts and passwords to secure the cameras and prevent unauthorized access.
6. Test and adjust:
Once everything is set up, test the cameras to ensure they are working correctly. Check the camera feeds, adjust the angles if necessary, and test the motion detection features. Make any necessary adjustments to optimize the camera positioning and settings for the best surveillance coverage.

7. Monitor remotely:
Take advantage of the remote monitoring capabilities of your security cameras. Access the camera feeds through the provided software or app, using your smartphone, tablet, or computer. Ensure that you have a secure connection and check the feeds regularly to stay updated on any suspicious activities or events.
By following these steps, you can set up your security cameras effectively and ensure that you have reliable surveillance in place to protect your property.
Connect Your Cameras to a Network
Connecting your security cameras to a network is essential for accessing the live footage remotely. Follow these steps to get your cameras online:
-
Choose a Network
Select a network to connect your cameras to. It can be your home Wi-Fi network or a separate one specifically for your cameras.
-
Configure Your Cameras
Access the camera settings and navigate to the network configuration section. Enter the network name (SSID) and password for the chosen network.
-
Wireless Connection
If your cameras support wireless connectivity, connect them to the network using Wi-Fi. Make sure to position the cameras within the Wi-Fi signal range for a stable connection.
-
Wired Connection
If you prefer a wired connection, connect the cameras to the network using Ethernet cables. Ensure that the cables are securely plugged into both the cameras and the router.
-
Verify Connection
Once the cameras are connected, check the network settings on your cameras. Confirm that the cameras have successfully obtained an IP address from the network.
-
Enable Remote Access
To access your cameras remotely, enable port forwarding on your router. Consult the camera’s user manual or manufacturer’s website for specific instructions on how to enable remote access.
-
Test the Connection
After configuring remote access, test the connection by accessing the camera’s live feed from a different network or through a mobile app. Ensure that the video is streaming smoothly.
Following these steps will ensure that your security cameras are successfully connected to your network, allowing you to monitor your property remotely. Remember to prioritize security by regularly updating your camera’s firmware and using strong, unique passwords for remote access.

Configure Your Router for Remote Access
If you want to access your security cameras remotely, you will need to configure your router to allow external connections. Here are the steps to do so:
1. Check your router’s user manual
Start by finding the user manual for your router. It will contain specific instructions on how to access its settings interface.
2. Access the router’s settings
Open a web browser on a computer connected to the same network as your router. Enter the router’s IP address in the browser’s address bar and press Enter. This will take you to the router’s settings page.
3. Log in to the router
Provide the login credentials for your router, which are usually found on the router itself or in the user manual. This will give you access to the router’s configuration settings.
4. Enable port forwarding
Look for the port forwarding or virtual server settings in the router’s interface. Create a new port forwarding rule and set the external port to a specific number (e.g., 8000) and the internal port to the port your security camera is using. Assign your security camera’s IP address as the internal IP.
5. Set up a static IP address
For the port forwarding to work correctly, it is recommended to set up a static IP address for your security camera. This ensures that the camera always receives the same IP address from the router.
6. Save the settings
Once you have completed the port forwarding and static IP setup, save the changes in the router’s settings. The router will apply the new settings, and you can now access your security cameras remotely.
Note: The specific steps may vary depending on the make and model of your router. Refer to your router’s user manual or the manufacturer’s website for detailed instructions.
Create an Account with a Cloud Security Service
If you want to get your security cameras online and access them remotely, you can take advantage of a cloud security service. Here is a step-by-step guide on how to create an account with a cloud security service:
1. Research and choose a reliable cloud security service provider. Look for companies that offer features such as remote access, video storage, and mobile app integration.
2. Visit the website of the chosen cloud security service provider. Look for a “Sign Up” or “Create Account” button and click on it.
3. Fill out the registration form with the required information. This usually includes your name, email address, and a secure password. Make sure to create a strong password to protect your account.
4. Read and accept the terms and conditions of the cloud security service. It’s important to familiarize yourself with the service’s policies regarding data storage, privacy, and usage.
5. Verify your email address. Some cloud security service providers may require email verification to complete the registration process. Check your inbox for a verification email and follow the instructions provided.
6. Once your email is verified, log in to your newly created cloud security service account using your registered email address and password.
7. Set up your security cameras with the cloud security service. Depending on the service provider, this may involve entering the camera’s serial number or scanning a QR code to connect it to your account.
8. Configure the settings for your security cameras. This includes options such as motion detection, scheduled recording, and remote access permissions.
9. Install the mobile app provided by the cloud security service on your smartphone or tablet. This will allow you to access your security cameras from anywhere with an internet connection.
10. Congratulations! You have successfully created an account with a cloud security service. You can now enjoy the benefits of remote access and video storage for your security cameras.
Set Up Remote Viewing on Your Mobile Device
If you want to access your security cameras remotely using your mobile device, follow these steps:
- Start by downloading and installing the mobile app provided by your security camera manufacturer. This app will allow you to remotely access your cameras.
- Once the app is installed, open it and sign in to your account. If you don’t have an account, you may need to create one and register your cameras with the app.
- After signing in, you will be prompted to add your cameras to the app. Follow the instructions provided by the app to add each camera to your account.
- Once your cameras are added, you can customize the settings according to your preferences. Some apps allow you to set up motion detection, notifications, and other features.
- Now, you should be able to view the live feed from your security cameras on your mobile device. Simply open the app and select the camera you want to view. You can also switch between different cameras if you have multiple ones set up.
- For optimal remote viewing experience, make sure you have a stable internet connection on your mobile device. If you are using mobile data, ensure that you have sufficient data allowance to stream the video feed.
By following these steps, you can easily set up remote viewing on your mobile device and access your security cameras from anywhere with an internet connection. This allows you to keep an eye on your property and ensures peace of mind even when you’re away.
Test Your Security Camera System
Once you have set up your security camera system, it is important to test it to ensure that everything is functioning correctly. Testing your system will help you identify any issues or malfunctions, allowing you to take necessary actions to address them. Follow these steps to test your security camera system:
Step 1: Check Power and Connections
Start by examining the power supply and connections of your security cameras. Ensure that all cameras are properly connected to the power source and the recording device. Check for any loose or damaged cables and make sure they are securely plugged in.
Step 2: Adjust Camera Angles
Verify that each camera is positioned at the desired angle to capture the intended area of surveillance. Pan, tilt, or rotate the cameras if necessary, ensuring that they provide adequate coverage and minimize blind spots.
Step 3: Verify Live Feed
Access the live feed of each camera on your computer or mobile device to verify the video quality and real-time streaming. Make sure the footage is clear and free from any distortions or glitches. Check if the cameras automatically switch to night vision mode when the lighting conditions change.
Step 4: Test Motion Detection
Move within the camera’s field of view to trigger the motion detection feature. Make sure the system detects your movement and begins recording. Adjust the sensitivity settings if needed to prevent false alarms or failures to detect motion.
Step 5: Review Recording Playback
Retrieve the recorded footage from the storage device and review it for quality, clarity, and accuracy. Check if the timestamps are correct and the footage captures the desired events or incidents. Test the search and playback functions to ensure ease of access and navigation through the recorded footage.
Step 6: Test Remote Monitoring
If your security camera system supports remote monitoring, try accessing the live feed and recorded footage from a remote location using your smartphone or computer. Verify that you can connect to the system and view the cameras’ feed without any issues.
By following these steps and regularly testing your security camera system, you can ensure that it is functioning optimally and providing the utmost security for your premises.
“`html
| Test Step | Description |
| Step 1 | Check Power and Connections |
| Step 2 | Adjust Camera Angles |
| Step 3 | Verify Live Feed |
| Step 4 | Test Motion Detection |
| Step 5 | Review Recording Playback |
| Step 6 | Test Remote Monitoring |
FAQ,
What is the purpose of security cameras?
The purpose of security cameras is to monitor and record activity in a specific area for security purposes.
How do I connect my security cameras to the internet?
To connect your security cameras to the internet, you need to first ensure that your cameras are IP-based. Then, you can connect them to your home or business network using Ethernet cables or Wi-Fi, and configure them to connect to the internet through your router.
What is an IP address and why is it important for security cameras?
An IP address is a unique identifier for devices on a network. For security cameras, an IP address is important because it allows the cameras to communicate with your router and connect to the internet, enabling remote access and monitoring of the cameras from anywhere.
Can I access my security cameras from my smartphone?
Yes, you can access your security cameras from your smartphone. Most security camera systems have mobile apps that allow you to view the live feed, playback recorded footage, and control camera settings from your smartphone or tablet.
What should I do if I can’t get my security cameras online?
If you are having trouble getting your security cameras online, there are a few steps you can take. First, make sure your cameras are properly connected to your network and that the cables are secure. Check your internet connection and make sure it is working properly. If the cameras still won’t connect, you may need to reset them to their factory settings and reconfigure them. If all else fails, contact the manufacturer or a professional for assistance.


