
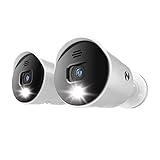
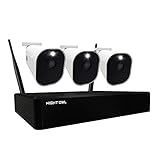
If you’re looking to enhance the security of your property, Night Owl security cameras are a fantastic choice. These cameras provide high-quality video surveillance and peace of mind. While wireless cameras are a popular option due to their convenience, hardwiring Night Owl security cameras offers several advantages.
Hardwiring your cameras ensures a reliable and secure connection. With a wired connection, you won’t have to worry about Wi-Fi interference or signal loss, which can occur with wireless cameras. Additionally, hardwiring eliminates the need to change or recharge batteries, providing a constant power source for uninterrupted surveillance.
Hardwired Night Owl security cameras also offer improved performance and picture quality. The wired connection allows for faster data transmission, resulting in clearer and smoother video footage. Whether you need to identify a person or capture license plates, the enhanced image quality provided by hardwired cameras can make all the difference.
Installing Night Owl Security Cameras
Installing Night Owl security cameras is a straightforward process that can be completed with just a few steps. Follow the instructions below to ensure a successful installation:
Gather the necessary equipment:
- Night Owl security cameras
- Mounting brackets
- Screws and anchors
- Power supply
- Coaxial cables
- Monitor or DVR
Choose the perfect locations:
Select the areas where you want to install the Night Owl security cameras. Consider the best vantage points for capturing the desired view while also ensuring the cameras are not easily accessible or obstructed.
Mount the cameras:
- Attach the mounting brackets to the chosen locations using screws and anchors.
- Secure the cameras onto the mounting brackets and adjust them to the desired angle.
- Ensure the cameras are securely mounted and cannot be easily tampered with.
Connect the cables:
- Connect one end of the coaxial cable to the camera and the other end to the DVR or monitor.
- Ensure a secure connection to prevent any signal loss.
Power up the cameras:
Connect the power supply to each camera and plug it into a power outlet. Ensure that the power supply is compatible with the cameras.
Configure the system:
Follow the instructions provided by Night Owl to configure your DVR or monitor. Set up the desired settings, such as recording options and motion detection.
Once the above steps are completed, your Night Owl security cameras will be up and running, providing you with the peace of mind knowing your property is being monitored and protected.
Tips for Hardwiring Night Owl Cameras
Hardwiring your Night Owl security cameras can provide a reliable and uninterrupted power source for your surveillance system. Here are some tips to help you successfully hardwire your cameras:
1. Plan your camera placement
Before you start the hardwiring process, carefully plan and decide on the placement of your Night Owl cameras. Consider the areas that need maximum coverage and ensure that the camera cables can reach those locations.
2. Choose the right cables
Invest in high-quality cables that are suitable for outdoor use and can withstand harsh weather conditions. Make sure the cables are long enough to reach your camera’s location and provide a secure and stable power connection.
Additionally, it is recommended to use shielded cables to minimize interference and maintain the video quality of your Night Owl cameras.
3. Use a power distribution box
To simplify the hardwiring process, consider using a power distribution box. This allows you to connect multiple cameras to a central power source, reducing the number of cables required and ensuring a more organized setup.
4. Ensure proper cable management
Proper cable management is essential for a clean and professional installation. Use cable clips or conduits to secure the cables along walls or other surfaces. This not only prevents tripping hazards but also protects the cables from damage.
5. Test the connections
Once the hardwiring is complete, test the connections to ensure that all the cameras are receiving power and transmitting video properly. Check the Night Owl camera settings and adjust accordingly if needed.

By following these tips, you can effectively hardwire your Night Owl security cameras, ensuring a reliable and efficient surveillance system for your property.
Choosing the Right Location for Your Night Owl Cameras
When installing your Night Owl security cameras, choosing the right location is crucial for optimal performance and coverage. Here are some important factors to consider when determining the placement of your cameras:
1. Area of Coverage
Determine the specific areas you want your cameras to monitor. This could include entrances, driveways, or other vulnerable spots around your property. Consider the range and angle of vision your cameras provide and ensure they are positioned to cover the desired areas effectively.
2. Mounting Height
The height at which you mount your cameras can greatly affect their performance. For outdoor cameras, it is recommended to mount them at least 9-10 feet above the ground to minimize vandalism and tampering. Indoor cameras can be mounted at a lower height depending on the area you want to monitor.
3. Lighting Conditions
Take into account the lighting conditions in the areas you plan to install your cameras. If the area is poorly lit or has frequent changes in lighting, consider cameras with built-in infrared night vision capabilities. This will ensure clear visibility even in low-light conditions.

Additionally, avoid placing cameras directly facing bright light sources to prevent lens glare and washed-out images. Test the cameras’ quality of image in different lighting conditions to determine the best placement.
4. Power Source and Wiring Accessibility
Ensure that the chosen location has easy access to a power source. Night Owl cameras are typically hardwired, so plan the installation accordingly. The wiring should be concealed or protected from tampering and weather conditions. If possible, choose a location where the wiring can be hidden or run through walls to maintain a neat and professional appearance.
Remember to also check if there are any local regulations or restrictions regarding the installation of outdoor security cameras and follow them accordingly.
Conclusion:
Choosing the right location for your Night Owl security cameras involves careful consideration of the areas of coverage, mounting height, lighting conditions, power source accessibility, and wiring concealment. By strategically placing your cameras, you can ensure optimal performance and maximum security for your property.

Preparing the Necessary Tools for Hardwiring
Before you begin the process of hardwiring your Night Owl security cameras, it’s important to gather all the necessary tools to ensure a smooth installation. Below is a table of the essential tools you will need:
| Tool | Description |
|---|---|
| Screwdriver | A screwdriver will be needed to remove any screws or panels that are securing the wires. |
| Wire Cutters | Wire cutters are necessary to trim and strip the wires during the installation process. |
| Drill | A drill will be required to create holes for mounting the camera brackets or running wires through walls. |
| Fish Tape | A fish tape will help guide and pull the wires through tight spaces or conduits. |
| Voltage Tester | A voltage tester is essential to ensure that the power supply is turned off and the circuit is not live while working with electrical components. |
| Cable Staples | Cable staples are used to secure the wires to the walls or ceiling, providing a neat and organized installation. |
| Power Drill | A power drill will be necessary to mount the camera brackets securely to the desired locations. |
| Tape Measure | A tape measure will help ensure accurate measurements for drilling holes and positioning the cameras. |
| Level | A level will assist in ensuring that the camera brackets are installed straight and properly aligned. |
| Wire Connectors | Wire connectors are essential for connecting and securing the wires together, ensuring a reliable connection. |
Having these tools readily available before you begin the hardwiring process will make the installation much easier and more efficient. Make sure all the tools are in good working condition and that you have a clear understanding of how to use them safely.
Running Wires and Cables for Night Owl Cameras
When it comes to setting up your Night Owl security cameras, one of the most important steps is running the necessary wires and cables. This ensures a reliable and secure connection for accessing your camera footage.
Planning Your Cable Routes
Before you start running any cables, it’s essential to plan your cable routes. Take into consideration the distance between your cameras and the DVR, as well as any obstacles or potential interference that may affect the quality of your signal. It is recommended to use the shortest cable route possible to minimize signal degradation.
Ensure that you have all the equipment you need before beginning, including video cables, power cables, and any necessary connectors or adapters.

Running the Cables
Once you have planned your cable routes, you can begin running the cables. Start by attaching the power and video cables to each camera, ensuring a secure connection. Then, carefully run the cables through your chosen routes, securing them along the way using cable clips or staples to prevent them from sagging or tangling.
If you need to run cables outdoors, it is important to use weatherproof cable housings or conduits to protect them from the elements. This will help prevent damage and ensure long-lasting performance.
When running cables through walls or ceilings, it may be necessary to drill holes or use wire fishing tools to navigate through tight spaces. Be cautious to avoid damaging any existing wiring or pipes during the process.
Note: If you are unsure about running wires and cables through your home or property, it is recommended to consult with a professional installer to ensure a safe and effective installation.
Once all the cables are in place, double-check the connections to ensure everything is secure. Finally, connect the other ends of the cables to the DVR, following the manufacturer’s instructions.

By following these steps, you can successfully run wires and cables for your Night Owl security cameras, ensuring a reliable and efficient surveillance system.
Connecting the Camera to the Power Source
Once you have positioned your Night Owl security camera in the desired location, it’s time to connect it to a power source. Follow these steps to ensure a successful connection:
- Prepare the power adapter: Locate the power adapter that came with your Night Owl security camera. Plug one end into the designated port on the camera.
- Find a power outlet: Locate a nearby power outlet that is easily accessible. Ensure that the outlet is working properly by plugging in another device.
- Plug in the power adapter: Connect the other end of the power adapter into the power outlet. Make sure the connection is secure.
- Check the camera’s power status: After the camera is connected to the power source, check the power indicator on the camera to ensure it is receiving power. The indicator should light up.
- Test the camera: To confirm that the camera is functioning correctly, access the camera’s video feed on your device or monitor. If the camera is not working as expected, double-check the power connection and troubleshoot any issues.
Note: It is recommended to use a surge protector or a dedicated power supply to protect your Night Owl security camera from power surges or electrical damage.
Connecting the Camera to the Recorder
Once you have determined the optimal location for your Night Owl security camera, it’s time to connect it to the recorder. This is an important step that ensures proper functioning of the camera system. Follow these instructions to connect the camera to the recorder:
Step 1: Locate the BNC (Bayonet Neill-Concelman) video output connection on the back of the camera. It is a round, threaded connector that is commonly used in video surveillance systems.
Step 2: Insert one end of the BNC video cable into the video output connector on the camera. Make sure it is securely attached and tightened.
Step 3: Locate the BNC video input connection on the back of the recorder. It is similar in appearance to the BNC video output connector on the camera.
Step 4: Insert the other end of the BNC video cable into the video input connector on the recorder. Again, make sure it is securely attached and tightened.
Step 5: If your camera has audio capabilities, locate the RCA audio connectors on both the camera and the recorder. These connectors are typically colored red and white.
Step 6: Insert one end of the RCA audio cable into the audio output connector on the camera and the other end into the audio input connector on the recorder.
Step 7: Once all the cables are connected, power on both the camera and the recorder. You should see the camera’s video feed on the recorder’s monitor.
Note: Some Night Owl security camera systems may require additional steps, such as configuring network settings or connecting to a power source. Refer to the camera’s user manual for detailed instructions specific to your model.
By following these simple steps, you will successfully connect your Night Owl security camera to the recorder, allowing you to monitor and record the surveillance footage with ease.
Testing and Adjusting the Camera Position
Once the Night Owl security camera is hardwired and properly installed, it’s important to test and adjust its position to ensure optimal functionality and coverage. Follow these steps to test and adjust the camera position:
- Access the camera’s live video feed through the Night Owl app or monitoring software.
- Check the camera’s field of view and verify that it captures the desired area.
- Look for any blind spots or areas that are not adequately covered by the camera.
- Adjust the camera’s angle and direction as needed to eliminate any blind spots and ensure full coverage.
- Monitor the camera’s live feed for a period of time to confirm that it captures all intended activity within its field of view.
- If necessary, make additional adjustments to the camera’s position to improve coverage.
- Consider testing the camera’s night vision capabilities in low light or dark conditions to ensure clear and detailed footage.
By thoroughly testing and adjusting the camera’s position, you can maximize its effectiveness and ensure that it provides reliable surveillance for your property.
Securing the Camera and Hiding Wires
When installing your Night Owl security camera, it is important to ensure that it is properly secured and that the wires are hidden to prevent any tampering or vandalism. Here are some tips to help you secure the camera and hide the wires effectively:
1. Choose a strategic location
Select a location for your camera that provides a clear view of the area you want to monitor, while also being discreetly placed. Look for spots that are high enough to prevent easy access but still capture a wide field of view. Avoid placing the camera in obvious locations where it can be easily spotted or damaged.
2. Mount the camera securely
Use the appropriate mounting equipment provided with your Night Owl security camera to ensure it is securely installed. Make sure the mount is sturdy and can withstand any harsh weather conditions. If possible, consider using tamperproof screws to prevent unauthorized removal of the camera.
3. Conceal the wires
To hide the wires and make the installation more aesthetically pleasing, there are several options to consider:
- Run the wires along existing structures: Utilize existing structures such as walls, fences, or gutters to conceal the wires. Use clips or cable management systems to securely fasten the wires along these surfaces.
- Use PVC conduit or tubing: Install PVC conduit or tubing to encase the wires and protect them from the elements. This can be painted to match the color of the wall or surface it is mounted on, making it less noticeable.
- Utilize wall cavities or crawl spaces: If possible, run the wires through existing wall cavities or crawl spaces. This can be a more discreet option, as the wires will be hidden from view.
Remember to follow the manufacturer’s instructions and local building codes when concealing the wires. Avoid running the wires along electrical lines or near any sources of interference.
4. Secure the cables
To prevent accidental disconnection or vandalism, you can secure the cables using cable ties or clips. Ensure that the cables are tightly secured and tucked away, out of reach from potential tampering.
By properly securing your Night Owl security camera and hiding the wires, you can enhance the overall effectiveness of your surveillance system while maintaining a neat and professional installation.
Setting Up Remote Access and Monitoring
Once you have successfully hardwired your Night Owl security cameras, you can set up remote access and monitoring to view the live feed from your cameras from anywhere, using your smartphone, tablet, or computer. Follow these steps to ensure a smooth setup process:
- Connect your Night Owl security system to your home network using an Ethernet cable plugged into the DVR/NVR and your router.
- Power on your DVR/NVR and wait for it to fully boot up.
- On your computer or mobile device, download the Night Owl Connect app from the App Store or Google Play Store.
- Open the Night Owl Connect app and create an account or log in if you already have one.
- Once logged in, click on the “Add Device” button and select your Night Owl security system model.
- Follow the on-screen instructions to scan the QR code located on your DVR/NVR or manually enter the device information.
- Once your Night Owl security system is added, you can access the live feed, recordings, and other settings from the app.
- To remotely access your Night Owl security system on a computer, visit the Night Owl Connect website and log in using your account credentials.
With remote access and monitoring set up, you can now have peace of mind knowing that you can keep an eye on your property at all times, no matter where you are.
Maintaining and Troubleshooting Night Owl Cameras
Once you have successfully hardwired your Night Owl security cameras, it is important to regularly maintain and troubleshoot them to ensure optimal performance. Regular maintenance will prolong the lifespan of the cameras and help prevent any potential issues from arising.
Here are some tips for maintaining and troubleshooting your Night Owl cameras:
| Issue | Solution |
|---|---|
| No Video Signal | Check the camera connections to ensure they are securely plugged in. Inspect the cables for any damage or loose connections. If needed, replace the cables or connectors. |
| Blurry or Distorted Image | Wipe the camera lens gently with a soft, lint-free cloth to remove any dust or dirt. Ensure that the lens is not obstructed by any objects. Adjust the camera focus if necessary. |
| Camera Not Recording | Check the camera settings and ensure that the recording feature is enabled. Verify that the storage device, such as an SD card or a DVR, has enough free space to store the recordings. Restart the camera or the recording device if needed. |
| Poor Night Vision | Make sure that the camera’s infrared lights are not obstructed by any objects. Adjust the camera’s night vision settings to optimize the image quality in low-light conditions. If the issue persists, consider installing additional lighting in the area. |
| Camera Offline | Check the network connections of the camera to ensure it is properly connected to your network. Restart the camera and the router if necessary. Verify the camera’s IP address and ensure it is within the correct range. If using a wireless connection, check the signal strength and consider relocating the camera or adding a Wi-Fi extender. |
By following these maintenance and troubleshooting tips, you can keep your Night Owl security cameras functioning smoothly and address any issues that may arise effectively. Remember to consult the camera’s user manual for manufacturer-specific troubleshooting instructions if needed.
FAQ,
Can I use a battery pack to hardwire night owl security cameras?
No, you cannot directly hardwire night owl security cameras using a battery pack. These cameras typically require a constant power source to operate. However, you can use rechargeable batteries as a backup power source in case of power outages or as a temporary solution during installation. Make sure to check the camera’s specifications and consult the manufacturer’s instructions for compatible battery packs, if available. Keep in mind that battery-powered operation may have limitations in terms of continuous recording and longevity compared to a wired power source.


