
Setting up a wireless security camera can seem like a daunting task, but with the Annke 1080p Wireless Security Camera, the process is simpler than you might think. Whether you’re looking to secure your home or keep an eye on your business, this camera offers high-definition video quality and easy installation.
Step 1: Choose the Perfect Spot for Your Camera
Before you begin, you need to decide where you want to install your Annke 1080p Wireless Security Camera. Consider areas that need surveillance the most, such as entrances, backyards, or driveways. This camera is designed for both indoor and outdoor use, so you have flexibility in choosing the location.
Step 2: Power Up Your Camera
Once you’ve chosen the ideal spot, plug in the power adapter and connect it to your camera. This will ensure a continuous power supply so that your camera can operate without interruption. Make sure the camera is turned on and ready to connect.

Step 3: Connect Your Camera to Wi-Fi
Next, download the Annke Vision app on your smartphone or tablet. Open the app and create an account if you don’t have one already. Follow the on-screen instructions to connect your camera to your Wi-Fi network. This will enable you to access the camera’s live video feed remotely.
Step 4: Adjust Camera Settings
Once your camera is connected to Wi-Fi, you can customize its settings through the Annke Vision app. Set up motion detection alerts, adjust video quality, and configure recording schedules according to your preferences. This will ensure that the camera meets your specific security needs.
Step 5: Enjoy Peace of Mind

With your Annke 1080p Wireless Security Camera properly set up, you can now enjoy the peace of mind that comes with knowing your property is protected. Monitor your camera’s live feed from anywhere, receive instant alerts on your device, and capture important footage when you need it most.
Remember, proper installation and placement of your security camera are crucial for optimal performance. By following these steps, you can easily hook up your Annke 1080p Wireless Security Camera and enhance your home or business security.
How to Connect Annke 1080p Wireless Security Camera
Installing and setting up your Annke 1080p wireless security camera is a relatively simple process. By following a few steps, you can have your camera up and running quickly to enhance the security of your home or office. Here’s how to connect your Annke 1080p wireless security camera:
Step 1: Prepare Your Camera
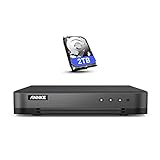
Before getting started, make sure you have all the necessary equipment. This includes the Annke 1080p wireless security camera, a compatible power adapter, an Ethernet cable, and a smartphone or computer with internet access. Once you have everything ready, proceed to the next step.
Step 2: Power Up the Camera
Connect the power adapter to the camera, and plug it into a nearby power outlet. Wait for the camera to power on and initialize. You will see indicator lights on the camera, indicating that it is successfully receiving power.

Step 3: Connect the Camera to the Internet
Using the Ethernet cable, connect the camera to your router or modem. Make sure the camera is connected to the same network as your smartphone or computer. This allows the camera to communicate with your device and access the internet for remote viewing and control.
Step 4: Download the Annke Vision App
To control and view your Annke 1080p wireless security camera, download the Annke Vision app on your smartphone or computer. The app is available for both iOS and Android devices. Search for “Annke Vision” in the App Store or Google Play Store, and install the app onto your device.
Step 5: Add the Camera to the App
Launch the Annke Vision app and create an account if necessary. Once you’re logged in, tap the “+” icon to add a new device. Select “Add Device Manually” and choose “Camera” from the options. Follow the on-screen instructions to connect your camera to the app. This may involve scanning a QR code or entering the camera’s serial number.
Step 6: Configure Camera Settings
Once the camera is successfully added to the app, you can customize its settings. This includes adjusting the camera’s viewing angle, enabling motion detection, and configuring notifications. Take some time to explore the app and familiarize yourself with its features.
Step 7: Enjoy Your Wireless Security Camera
With your Annke 1080p wireless security camera successfully connected and configured, you can now enjoy the benefits of increased security and peace of mind. Use the app to remotely view live footage, playback recorded videos, and receive alerts for any detected motion.

| Troubleshooting: |
|---|
| If you encounter any issues during the setup process, refer to the user manual provided by Annke or visit their official website for troubleshooting guides and support. |
Step 1: Check Camera Compatibility
Before beginning the setup process for your Annke 1080p wireless security camera, it is important to ensure that your camera is compatible with your current setup. This will help to avoid any compatibility issues and ensure a smooth installation process.
To check the compatibility of your Annke camera, follow these steps:
- Refer to the product manual or packaging to verify the camera’s specifications and compatibility requirements. Pay close attention to the camera’s supported operating systems and network compatibility.
- Check your current device, such as a smartphone, tablet, or computer, to ensure it meets the camera’s compatibility requirements. This may include specific software versions, network protocols, or hardware capabilities.
- If necessary, update your current devices to meet the compatibility requirements. This may involve updating your device’s operating system, installing specific apps or software, or configuring network settings.
- Ensure that your Wi-Fi network meets the camera’s requirements. This includes verifying the network’s frequency (2.4GHz or 5GHz) and signal strength in the area where the camera will be installed. If needed, consider upgrading your network equipment or adjusting your network settings.
By thoroughly checking the compatibility of your Annke wireless security camera, you can ensure a successful setup process and optimal performance. It is recommended to complete this step before proceeding with the camera installation.
Step 2: Gather Necessary Equipment
Before setting up your Annke 1080p wireless security camera, it’s important to gather all the necessary equipment. This will ensure a smooth and efficient installation process. Here are the items you will need:
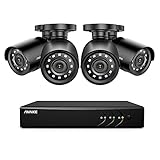
1. Annke 1080p Wireless Security Camera
Purchase an Annke 1080p wireless security camera if you haven’t already. Make sure you have the correct model that matches your needs. The camera should come with a power adapter and mounting bracket.
2. Wi-Fi Network and Password
Make sure you have a stable Wi-Fi network available and its password. The Annke security camera will need to connect to your Wi-Fi network for remote viewing and access.
3. Mobile Device or Computer
You will need a mobile device or computer to set up and configure the Annke security camera. Ensure that your device is fully charged or connected to a power source. The device should also have the necessary apps or software installed for the camera setup.
4. Ethernet Cable (optional)
If your Wi-Fi network is not stable or you prefer a wired connection, you may need an Ethernet cable. This can be used to directly connect the camera to your router for a more reliable connection during the setup process.
Once you have gathered all the necessary equipment, you are ready to proceed to the next step of the installation process.
Step 3: Power on the Camera
Before proceeding with the camera setup, ensure that you have properly connected the power adapter to the camera and plugged it into a power source.

|
Note:
|
Once you have connected the camera to the power source, the LED indicator on the camera should illuminate, indicating that it is receiving power.
If the LED indicator does not light up, try the following troubleshooting steps:
|
1. Check the power connection:
|
|
2. Verify the power adapter:
|
|
3. Replace the power adapter:
|
Once you have ensured that the camera is receiving power, you can proceed to the next step of the setup process.
Step 4: Connect Camera to Wi-Fi Network
After successfully configuring the camera, you can now connect it to your Wi-Fi network for seamless monitoring and accessibility. To do this, follow the steps below:
|
Step 1: |
Locate the Wi-Fi settings on your camera. |
|
Step 2: |
Access the Wi-Fi settings menu on your camera by navigating through the settings options. |
|
Step 3: |
Scan for available Wi-Fi networks and select your desired network from the list. |
|
Step 4: |
Enter your Wi-Fi network password when prompted. Make sure to input it correctly. |
|
Step 5: |
Wait for the camera to connect to the Wi-Fi network. This may take a few seconds. |
|
Step 6: |
Once connected, you will receive a notification or indicator on the camera confirming the successful connection to the Wi-Fi network. |
|
Step 7: |
Test the camera’s connectivity by accessing the live feed on your smartphone, tablet, or computer. If the feed is accessible, then the camera is successfully connected to the Wi-Fi network. |
Now that your camera is connected to the Wi-Fi network, you can enjoy remote monitoring, easy access to video recordings, and other convenient features offered by your Annke 1080p wireless security camera.
Step 5: Download and Install the App
Once your camera is successfully connected to your Wi-Fi network, the next step is to download and install the app on your smartphone or tablet. The app is available for both iOS and Android devices, making it convenient for everyone.
To download the app, open the App Store on your iOS device or the Google Play Store on your Android device. Search for the “Annke Vision” app, which is specifically designed for Annke security cameras.
Once you have found the app, tap on the “Download” or “Install” button to begin the installation process. Wait for the app to be downloaded and installed on your device.
After the installation is complete, open the app and create a new account. Follow the app’s instructions to set up your account and log in.
Once you have logged in, the app will guide you through the process of adding your camera to the app. Make sure your camera is powered on and within range of your Wi-Fi network. Follow the on-screen instructions to establish a connection between your camera and the app.
Once the connection is established, you will be able to access your camera’s live feed, adjust settings, and view recorded footage directly from the app.
It is important to keep the app updated to ensure you have the latest features and improvements. Check for updates regularly in the App Store or Google Play Store and install them as they become available.
| Important Note: | For optimal performance and to ensure that the app functions correctly, make sure you have a stable and reliable internet connection. Slow or unstable internet may result in connectivity issues and a poor user experience. |
Step 6: Create an Account
Creating an account is an essential step in setting up your Annke 1080p wireless security camera. By creating an account, you will be able to access and control your camera from anywhere using your smartphone or computer.
To create an account, follow these steps:
1. Download the Annke Vision App
First, you need to download the Annke Vision app on your smartphone or tablet. The app is available for both iOS and Android devices and can be downloaded from the App Store or Google Play Store.
2. Open the App and Sign Up
Once you have downloaded the app, open it and click on the “Sign Up” button to create a new account. Fill in the required information, such as your email address and a secure password. Make sure to choose a strong password to protect your account.
Note: It is recommended to use a unique password that includes a combination of letters, numbers, and special characters.
3. Confirm Your Email
After entering your information, you will receive a confirmation email. Open the email and click on the confirmation link to verify your email address. This step is necessary to activate your account.
Tip: Check your spam or junk folder if you do not see the confirmation email in your inbox.
4. Sign In to Your Account
Once you have confirmed your email, open the Annke Vision app and sign in using your email address and password. You will then have full access to your account and will be able to connect and control your Annke 1080p wireless security camera.
That’s it! You have successfully created an account for your Annke 1080p wireless security camera. Now you can proceed to the next step to connect your camera to your Wi-Fi network.
Step 7: Add the Camera to Your Account
Once the camera is connected to the power source and the Wi-Fi network, you need to add it to your Annke account to access its live feed and recordings remotely. Here’s how you can do it:
- Open the Annke Vision app on your smartphone or tablet.
- Log in to your Annke account. If you don’t have an account, create one by tapping on “Sign Up” and following the on-screen instructions.
- Tap on the plus (+) button or the “Add Device” option to start the camera setup process.
- Select “Wireless Camera” from the list of device types.
- Follow the on-screen instructions to put your camera in pairing mode. This usually involves pressing a button on the camera or scanning a QR code.
- Once your camera is in pairing mode, the app will detect it and display its name and model number. Verify that the information matches your camera, and then tap on “Next” to continue.
- Enter the Wi-Fi network SSID (name) and password for the camera to connect to your home network. Make sure the details are correct and tap on “Next”.
- Wait for the app to connect your camera to the Wi-Fi network. This may take a few moments.
- Once the camera is successfully connected, you will see a confirmation message. Tap on “Done” to complete the setup process.
- Now you can access your Annke camera’s live feed and recordings from anywhere using the Annke Vision app on your smartphone or tablet.
Congratulations! You have successfully added your Annke 1080p wireless security camera to your account. Enjoy the peace of mind that comes with 24/7 monitoring of your home or office.
Step 8: Configure Camera Settings
Once your Annke 1080p wireless security camera is connected, it’s time to configure its settings to customize its functionality to your needs. Follow these steps to set up your camera settings:
1. Launch the Annke Vision app:
Open the Annke Vision app on your smartphone or tablet. If you haven’t installed the app yet, download it from the App Store or Google Play Store.
2. Add your camera:
Tap on the “+” icon or the “Add Device” button within the Annke Vision app to add your camera.
3. Connect to the camera:
Select your Annke 1080p wireless security camera from the list of available devices and connect to it. Make sure your smartphone or tablet is connected to the same Wi-Fi network as the camera.
4. Configure camera settings:
Once connected, you can start configuring various settings for your camera. These settings include:
a. Wi-Fi setup: If you want to change the Wi-Fi network that your camera is connected to, go to the Wi-Fi settings and follow the prompts to connect it to a different network.
b. Motion detection: Enable or disable motion detection for your camera. You can also adjust the sensitivity level to suit your preferences.
c. Alert notifications: Choose whether you want to receive push notifications on your smartphone or tablet whenever motion is detected by your camera.
d. Recording options: Set up recording options such as continuous recording, scheduled recording, or motion-triggered recording. You can also choose the storage location for the recorded footage.
e. Camera display settings: Adjust camera settings such as brightness, contrast, and image quality to enhance the visual output of your camera.
5. Save the settings:
After configuring all the desired settings, save the changes by clicking on the “Save” or “Apply” button within the app. The camera will then apply the new settings and be ready to use.
Following these steps will ensure that your Annke 1080p wireless security camera is properly configured and optimized for your security needs. Experiment with the settings to find the perfect setup for your specific requirements.
Step 9: Start Monitoring Your Property
Once you have successfully set up your Annke 1080p wireless security camera and configured it to connect to your Wi-Fi network, you are ready to start monitoring your property.
Using the Annke mobile app or a web browser, you can access the live feed from your security camera and view real-time video footage of your property. This allows you to keep an eye on your home or business wherever you are, providing you with peace of mind and added security.
Make sure to adjust the camera’s position and angle to cover the areas you want to monitor. You can also customize the camera settings, such as motion detection sensitivity, to suit your specific needs.
Additionally, the Annke mobile app or web interface allows you to save and review recorded video footage. This is useful for reviewing any suspicious activity or incidents that may have occurred while you were away.
Remember to regularly check and maintain your security camera to ensure it continues to function properly. Clean the lens, check for any physical damage, and make sure the Wi-Fi signal strength remains strong.
With your Annke 1080p wireless security camera in place, you can have peace of mind knowing that you have a reliable and effective surveillance system to protect your property.
FAQ,
What is an Annke 1080p wireless security camera?
An Annke 1080p wireless security camera is a surveillance camera that can be used to monitor and record activities in and around your property. It is a wireless camera that can be connected to your home’s Wi-Fi network, allowing you to view the footage remotely on your smartphone or computer.


