
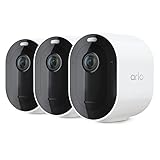
Arlo wireless security cameras offer a convenient and effective way to monitor your home or business. With their simple installation process, you can have peace of mind knowing that your property is being protected.
If you’re not the most tech-savvy person, don’t worry! Installing Arlo wireless security cameras is a straightforward process that anyone can do. In this guide, we will walk you through the steps to ensure a successful installation.
First, gather all the necessary equipment for installing your Arlo wireless security cameras. This includes the cameras themselves, mounting brackets, screws, a drill, and a ladder if needed. Make sure you have everything before you begin to avoid any delays during the installation process.
Next, choose the best location for your Arlo wireless security cameras. Look for areas with a good vantage point and clear visibility. It’s also important to consider factors such as Wi-Fi signal strength and power supply availability. Once you’ve determined the ideal placement, use the mounting brackets and screws to securely install the cameras.
Step-by-step guide for installing arlo wireless security cameras
Installing arlo wireless security cameras is a simple process that can be completed in just a few steps. Follow the guide below to ensure a successful installation:

Step 1: Choose the perfect location
Select the ideal location for your arlo wireless security cameras. Make sure the area is free from obstructions, has a good Wi-Fi signal, and provides a wide range of view for maximum coverage.
Step 2: Set up the base station
Connect the arlo base station to your router using an Ethernet cable. Plug in the power adapter and turn on the base station. Wait for the Internet LED to light green.
Step 3: Sync the cameras

Press the sync button on the top of the base station and wait for the power LED to blink green. Press the sync button on the camera and wait for the camera LED to blink blue. The sync process is complete when the camera LED turns solid green.
Step 4: Mount the cameras
Using the provided mounting hardware, attach the arlo wireless security cameras to the desired location. Make sure the cameras are secure and properly aligned for optimal performance.
Step 5: Install the batteries
If your arlo wireless security cameras are battery-powered, insert the batteries into each camera following the correct polarity. Ensure the battery compartment is properly sealed.

Step 6: Adjust camera settings
Download the arlo app on your smartphone or tablet and follow the on-screen instructions to connect the cameras to your account. Customize the camera settings, including motion detection sensitivity and recording preferences.
Step 7: Test the cameras
Check the live video feed on your smartphone or tablet to ensure the arlo wireless security cameras are functioning correctly. Adjust the camera angles if necessary to capture the desired areas.
With these easy-to-follow steps, you can quickly install arlo wireless security cameras and enjoy the peace of mind that comes with knowing your property is protected.

Check the compatibility
Before installing Arlo wireless security cameras, it’s essential to check their compatibility with your devices and network. Arlo cameras are designed to work with various platforms, including smartphones, tablets, and computers.
Make sure your device meets the minimum system requirements for Arlo cameras. Check if it supports the Arlo app, which is necessary for setting up and managing your cameras. The Arlo app is available for both Android and iOS devices.
Verify that your network supports the required Wi-Fi standards to connect the Arlo cameras. Ensure you have a stable internet connection with sufficient bandwidth to support the cameras’ live streaming and other features.
Additionally, check if your home router has available Ethernet ports if you plan to connect the Arlo cameras directly to the router using Ethernet cables for a more reliable connection.
By ensuring the compatibility of your devices and network, you can proceed with confidence to install and set up your Arlo wireless security cameras.

Determine the camera placement
Determining the optimal placement for your Arlo wireless security cameras is crucial for ensuring effective surveillance and maximum coverage. Here are a few factors to consider when deciding where to position your cameras:
1. Entry points: Start by identifying the main entry points to your property, such as doors, windows, or gates. These areas are typically the most vulnerable and should be prioritized when determining camera placement.
2. Line of sight: Ensure that the cameras have a clear line of sight to the areas you wish to monitor. Avoid placing them behind obstacles or in areas where their view might be obstructed.
3. High traffic areas: Install cameras in areas with high foot traffic or where valuable items are located. This can include living rooms, hallways, or areas with expensive equipment.
4. Outdoor cameras: If you are installing cameras outdoors, consider weatherproof models and position them in areas that provide a wide field of view while minimizing the risk of vandalism or damage.

5. Height: Mount the cameras at an appropriate height to capture clear images and avoid tampering. Generally, it is recommended to position cameras at eye level or slightly above.
6. Wi-Fi signal: Ensure that the cameras are within range of your Wi-Fi network to maintain a stable connection. Test the signal strength before finalizing the camera placement.
By carefully considering these factors, you can strategically position your Arlo wireless security cameras to enhance the security of your home or property.
Install the mounting bracket
To install your Arlo wireless security camera, you will need to begin by securing the mounting bracket in your desired location. The mounting bracket is an essential component that allows you to attach your camera securely to a wall or ceiling.
Here are the steps to install the mounting bracket:
Step 1: Choose the right location
First, determine the optimal location for mounting your Arlo camera. Consider factors such as the area you want to monitor and the camera’s field of view. Make sure the location provides a clear line of sight without any obstructions.
Once you have chosen the location, ensure that it is within the Wi-Fi range of your Arlo base station for seamless connectivity.
Step 2: Mark the holes
Using a pencil or a marker, mark the holes on the wall or ceiling where you will be mounting the bracket. Make sure the marks are aligned and level.
If you are mounting the bracket on a wall, consider using one of the provided templates to help you precisely mark the holes.
Step 3: Secure the bracket
Using screws appropriate for your wall or ceiling material, align the mounting bracket with the marked holes and secure it in place. Make sure the bracket is firmly attached to provide stability for your Arlo camera.
Double-check to ensure that the bracket is level to avoid tilted camera angles.
Now that you have successfully installed the mounting bracket, you are ready to proceed with the next steps for setting up your Arlo wireless security camera.
Connect the base station
Before you can start using your Arlo wireless security cameras, you’ll need to connect the base station. Here’s how:
- Find a suitable location for your base station. It should be near your Wi-Fi router and within range of all your cameras.
- Plug in the power adapter for the base station and connect it to an electrical outlet.
- Use an Ethernet cable to connect the base station to your Wi-Fi router. Make sure the cable is securely plugged in to both the base station and the router.
- Wait for the power and internet LEDs on the base station to turn green. This indicates that the base station has successfully connected to your network.
- If necessary, adjust the position of the base station or router to improve the signal strength.
Once the base station is connected and the LEDs are green, you can proceed with the next steps to set up your Arlo wireless security cameras.
Sync the camera with the base station
After you have successfully set up your Arlo base station, the next step is to sync your Arlo camera with the base station. Follow these steps to ensure a seamless sync process:
- Make sure the Arlo camera is powered on and within range of the base station.
- Press the sync button on the base station. The sync button is located on the top part of the base station and has an Arlo logo on it.
- Wait for the sync status LED on the base station to start blinking amber.
- Press the sync button on the camera. The sync button is usually located on the top or at the back of the camera.
- Wait for the camera’s LED to blink blue, indicating that the sync process is in progress.
- Once the sync process is complete, the camera’s LED will turn solid green, indicating that it is successfully synced with the base station.
It is important to note that each camera has a unique sync button, so make sure to sync one camera at a time. Repeat the syncing process for each additional camera you have.
Syncing your Arlo camera with the base station ensures that it can communicate and transmit data to the base station effectively. This is crucial for ensuring proper functionality and reliable security surveillance.
Set up the mobile app
After installing your Arlo wireless security cameras, the next step is to set up the mobile app. The mobile app allows you to easily monitor and control your Arlo cameras from your smartphone or tablet.
To set up the mobile app:
| 1. | Open the app store on your mobile device. |
| 2. | Search for the Arlo app and click on the download button. |
| 3. | Once the app is downloaded, open it and click on the “Sign Up” button. |
| 4. | Create a new Arlo account by entering your email address and choosing a password. |
| 5. | Follow the on-screen instructions to complete the account setup process. |
| 6. | Once your account is set up, log in to the Arlo app using your email and password. |
Now that you have successfully set up the mobile app, you can start using it to view live video feeds from your Arlo cameras, customize your camera settings, receive notifications, and much more. The app provides a user-friendly interface that makes it easy to manage your Arlo cameras remotely.
Test the camera and customize settings
After installing your Arlo wireless security camera, it’s important to test and customize its settings to ensure optimum performance. Follow these steps to get started:
1. Power on the camera: Connect the camera to a power source and make sure it’s turned on. Wait for the camera to initialize and connect to your home Wi-Fi network.
2. Check the camera position: Verify that the camera is positioned correctly and capturing the desired area. Make any necessary adjustments to the camera’s angle or height.
3. Adjust motion detection settings: Arlo cameras offer customizable motion detection settings. Access the camera’s settings through the Arlo app or web portal to adjust the sensitivity, activity zones, and notifications according to your preferences.
4. Test camera placement: Walk around the area that the camera is monitoring to test its motion detection capabilities. Pay attention to how the camera responds to your movement and make additional adjustments if needed.
5. Check camera video quality: Use the Arlo app or web portal to view live video footage from the camera. Ensure that the video quality is clear and there are no issues with image distortion or lag. Adjust camera positioning or Wi-Fi signal strength if necessary.
6. Customize camera modes: Arlo cameras offer different modes, such as “armed,” “disarmed,” or “schedule.” Customize these modes based on your specific needs and preferences. For example, you may want the camera to be armed during the night but disarmed during the day.
7. Test recording and storage: Trigger the camera’s motion detection or manually start recording to ensure that the camera captures and stores video footage properly. Check the camera’s storage capacity and consider adding additional storage if needed.
8. Set up additional features: Depending on the specific model of your Arlo camera, there may be additional features available, such as two-way audio, night vision, or integration with other smart home devices. Explore these features and customize them according to your preferences.
By following these steps and thoroughly testing your Arlo wireless security camera, you can ensure that it is properly installed and customized for your specific needs. This will help you maximize its effectiveness in monitoring your home or property.
FAQ,
What are the benefits of installing Arlo wireless security cameras?
Installing Arlo wireless security cameras provides several benefits. Firstly, they are easy to install and do not require any complex wiring. This means that you can place them anywhere around your property, both indoors and outdoors. Secondly, Arlo cameras are wireless, which eliminates the need for power cords and allows for more flexible placement options. Additionally, Arlo cameras offer advanced features such as motion detection, night vision, and two-way audio, giving you peace of mind and enhanced security.
How do I install Arlo wireless security cameras?
Installing Arlo wireless security cameras is a relatively simple process. First, choose the optimal location for your camera. Ensure that it has a clear view of the area you want to monitor. Then, mount the camera using the included magnetic mount or mounting screws. Next, insert the batteries (if applicable) and sync the camera with your Arlo base station or smartphone app. Finally, adjust the camera angle and settings to meet your preferences. Arlo provides detailed installation instructions that can be followed for a successful setup.


