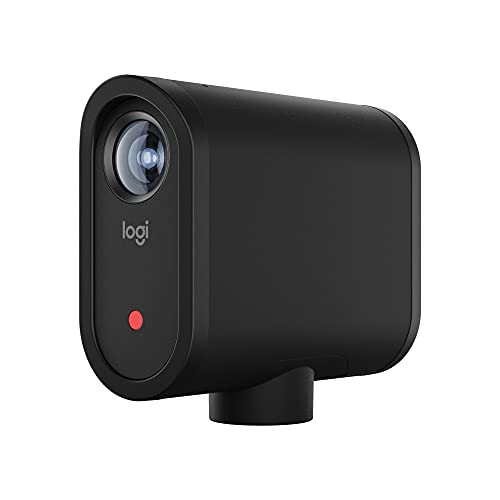
Installing a security camera system can be an effective way to secure your home or business. Comcast offers a range of security camera options that are easy to install and provide you with peace of mind. Whether you are looking to deter potential thieves or monitor activity around your property, follow these simple steps to install your Comcast security camera system.
First, determine the best location for your security camera. Consider areas that are vulnerable to break-ins or where you want to monitor activity. It is important to choose a location that provides optimal coverage and visibility. Once you have identified the location, ensure that it is within reach of a power source.
Next, securely mount the camera according to the manufacturer’s instructions. This may involve drilling holes and using screws or adhesive mounts. Make sure the camera is installed at the correct angle and height to capture the desired area. By following the mounting instructions, you can ensure proper installation and maximize the effectiveness of your security camera.
After mounting the camera, connect it to your Wi-Fi network. Most Comcast security cameras require a stable internet connection to function properly. Use the included instructions to connect the camera to your Wi-Fi network. Once connected, you may need to download a mobile app or software to access and control your camera remotely.
In conclusion, installing a Comcast security camera is a straightforward process. By choosing the right location, securely mounting the camera, and connecting it to your Wi-Fi network, you can enhance the security of your property. Take the necessary steps to protect what matters most to you and enjoy the added peace of mind that comes with a reliable security camera system.

Step-by-Step Guide: How to Install Comcast Security Camera
Step 1: Determine the Placement
Before starting the installation, decide where you want to place your Comcast security camera. It is essential to choose a location that provides the best coverage and visibility of the area you want to monitor. Consider factors such as line of sight, lighting conditions, and accessibility.
Step 2: Gather the Installation Equipment
Make sure you have all the necessary equipment before beginning the installation. Most Comcast security camera packages come with everything you need, including the camera, mounting bracket, screws, and cables. Additionally, you may need tools like a drill, screwdriver, and ladder to complete the installation.
Step 3: Mount the Camera

Start by attaching the mounting bracket to the desired location using the provided screws. Make sure the bracket is secure and level. Then, carefully mount the camera onto the bracket and adjust its position as needed. Ensure that the camera is securely in place before proceeding to the next step.
Step 4: Connect the Cables
Next, connect the camera cables to the corresponding ports on the back of the camera. These cables typically include a power cable and an Ethernet cable for network connectivity. Ensure that the connections are secure to guarantee proper functioning of the camera.
Step 5: Configure the Camera
After physically installing the camera, you need to configure it to work with your Comcast security camera system. This step usually involves connecting the camera to your Wi-Fi network or Ethernet connection and following the instructions provided by the manufacturer. Be sure to set up any desired settings, such as motion detection or video recording, during this process.

Step 6: Test and Troubleshoot
Once the camera is set up, it’s essential to test its functionality. Check the live video feed to ensure that the camera is capturing the desired area successfully. If you encounter any issues, refer to the user manual or contact customer support for troubleshooting assistance.
Step 7: Monitor and Maintain
With your Comcast security camera successfully installed, make sure to regularly monitor the camera’s performance. Check the system for any alerts, such as motion detection notifications, and review the recorded footage if necessary. Additionally, perform periodic maintenance, such as cleaning the lens and adjusting the camera’s position, to ensure optimal performance.
Installing a Comcast security camera can provide you with peace of mind and an increased sense of security for your home or business. By following this step-by-step guide, you can easily install and set up your Comcast security camera system.

Choosing the Perfect Location
When installing your Comcast security camera, it is crucial to choose the perfect location to ensure the best results. Here are a few factors to consider when selecting the ideal spot:
1. Coverage: Assess the areas you want your security camera to cover. Look for blind spots or areas where intruders might hide. It is important to select a location that allows for maximum coverage of your property.
2. Height: Mount the camera at an optimal height to capture the clearest images. Placing it too low could result in limited visibility, while placing it too high might make it difficult to identify individuals. Generally, a height of 8 to 10 feet is recommended.
3. Accessibility: Ensure that the camera is easily accessible for maintenance and adjustments. It should be placed in a position where you can reach it without any difficulty.
4. Protection from the Elements: Choose a location that provides protection from harsh weather conditions, such as rain or direct sunlight. This will help prolong the life of your camera and ensure uninterrupted surveillance.
![Hiseeu [16CH Expandable, 5MP] 2.4G/5G Wireless Pro Security Camera System, 10.1" LCD 8MP Monitor, 4Pcs 5MP Outdoor Indoor Cameras, One-Way Audio, Plug & Play, Waterproof, Motion Detection, 1TB HDD](https://m.media-amazon.com/images/I/51ycxHa-N0L._SL160_.jpg)
5. Power Source: Consider the availability of a power source near the desired location. Ensure that there is an electrical outlet nearby to connect the camera to a power supply.
By carefully considering these factors, you can select the perfect location for your Comcast security camera and enhance the security of your property.
Gathering the Necessary Equipment
Before starting the installation process for your Comcast security camera, it is important to gather all the necessary equipment. This will ensure a smooth and hassle-free installation. Here are the key items you will need:
1. Comcast Security Camera System
The first and most important item you’ll need is the Comcast security camera system itself. This typically includes one or more cameras and a central hub or NVR (Network Video Recorder). Be sure to check the package contents and make sure you have all the necessary components.
2. Internet Router
Your Comcast security camera system will require an internet connection to function. Make sure you have a working internet router that is compatible with your camera system. If necessary, consult the manufacturer’s specifications or contact Comcast for recommendations.
![[3TB Storage] Hiseeu Security Cameras Wireless Outdoor System with 15" LCD Monitor 10CH NVR,5MP PTZ Dome Security Cameras System,Explosion-Proof Auto Tracking 4pcs WiFi Camera](https://m.media-amazon.com/images/I/51xeJabAHDL._SL160_.jpg)
3. Ethernet Cables
Ethernet cables are used to connect the cameras to the central hub or NVR. Make sure you have enough ethernet cables of sufficient length to reach the desired camera locations. It’s always a good idea to have extra cables on hand in case you need to make any changes or extensions.
4. Power Outlets
Each camera will require a power source to operate. Check the package instructions to see if your cameras require a direct power connection or if they can be powered over ethernet (PoE). Ensure that you have enough power outlets available near the camera locations.
5. Drill and Mounting Hardware
If you plan to mount the cameras on walls or ceilings, you will need a drill and the necessary mounting hardware. This may include screws, wall anchors, and brackets. Be sure to select appropriate mounting locations and ensure that the mounting surface is stable and capable of supporting the weight of the cameras.
6. Mobile Device or Computer
You will need a mobile device or computer to access and control your Comcast security camera system. Check the system requirements and make sure your device is compatible with the necessary apps or software. This will allow you to view the camera footage, adjust settings, and receive alerts.
Once you have gathered all the necessary equipment, you are ready to proceed with the installation process for your Comcast security camera system.
![[2-Way Audio+121°Wide Angle] Hiseeu 4K 8MP PoE Security Camera System,8Pcs 5MP IP Wired Security Cameras Indoor Outdoor,PoE NVR 16CH Expandable,Human/Vehicle Detect,Playback,3TB HDD,24/7 Record](https://m.media-amazon.com/images/I/41R1tEx6TYL._SL160_.jpg)
Mounting the Camera
Before you begin mounting your Comcast security camera, make sure you have the necessary tools and equipment. You will need a power drill, screws, brackets, and a ladder or step stool if necessary.
Step 1: Choose the Mounting Location
Select a suitable location for your camera that provides optimal coverage of the area you want to monitor. Ensure that the camera is positioned at the right height and angle for clear visibility.
Step 2: Attach the Mounting Bracket
Use the screws and brackets provided with your Comcast security camera to attach the mounting bracket to the chosen location. Make sure the bracket is securely fastened to the wall or ceiling.
Step 3: Connect the Camera
Once the mounting bracket is securely in place, connect the camera to the bracket by aligning the holes and twisting it into position. Ensure that the camera is properly seated and locked into place.
Step 4: Adjust and Test
After mounting the camera, adjust the angle and direction to ensure the desired coverage. Use a ladder or step stool if necessary. Once you are satisfied with the positioning, test the camera to ensure it is functioning correctly.
Following these steps will help you successfully install and mount your Comcast security camera. Remember to refer to the manufacturer’s instructions for any additional guidance specific to your camera model.
Connecting the Camera to Power
Before installing the Comcast security camera, it is important to connect it to a power source. Follow these steps:
Step 1: Choose a Power Outlet
Locate a power outlet near the area where you want to install the camera. Ideally, this outlet should be within reach of the camera’s power cord.
Step 2: Plug in the Camera
Take the power cord provided with the Comcast security camera and plug it into the camera’s power port. Make sure the connection is secure.
Then, plug the other end of the power cord into the power outlet you selected in step 1. Ensure the connection is snug and secure.
Note: If the power cord is not long enough to reach the desired outlet, you may need to use an extension cord or rearrange your installation plan.
Once the camera is connected to power, it will start to receive the necessary power supply to operate. This is a crucial step in the installation process before moving on to the next steps.
Setting Up the Camera on Your Comcast Account
Before you can start using your Comcast security camera, you’ll need to set it up on your Comcast account. Follow the steps below to get started:
Step 1: Log In to Your Comcast Account
Open a web browser on your computer or smartphone and go to the Comcast website. Click on the “Sign In” button located at the top right corner of the page. Enter your Comcast username and password, then click “Sign In” again to access your account.
Step 2: Navigate to the Camera Settings
Once you’re logged in to your Comcast account, find the navigation menu located on the left side of the page. Look for the “Security” or “Camera” option and click on it. This will take you to the camera settings page.
Step 3: Add a New Camera
On the camera settings page, locate the option to add a new camera. This option may be named “Add Camera,” “Set up New Camera,” or something similar. Click on it to proceed.
Step 4: Follow the On-Screen Instructions
Comcast will guide you through the process of setting up your camera. Typically, this involves entering the camera’s unique identifier (such as the serial number or MAC address) and connecting it to your home network. Follow the on-screen instructions carefully to ensure a successful setup.
Step 5: Verify the Camera Connection
After completing the setup process, Comcast will check the connection between your camera and your account. This may take a few moments. Once the connection is established, you’ll receive a confirmation message on your screen.
| Note: | Make sure the camera is properly powered on and connected to your home network before starting the setup process. |
|---|
Congratulations! You have successfully set up the camera on your Comcast account. Now you can access and control your camera remotely through the Comcast website or mobile app.
Configuring the Camera Settings
After successfully installing your Comcast security camera, it is important to configure the camera settings to ensure optimal performance and functionality. Follow the steps below to configure your camera settings:
1. Access the camera’s web interface:
Open your preferred web browser and enter the IP address of the camera in the address bar. Press Enter to load the camera’s web interface.
2. Log in to the camera:
Enter the username and password provided with the camera or set during the installation process. Click the “Login” button to access the camera’s settings.
3. Adjust the camera’s video settings:
Within the camera’s web interface, navigate to the video settings section. Adjust the resolution, frame rate, and compression settings according to your preferences and needs. It is recommended to choose a higher resolution for clearer images but keep in mind that it may result in larger file sizes.
4. Customize the camera’s motion detection settings:
If your Comcast security camera supports motion detection, navigate to the motion detection settings section in the web interface. Adjust the sensitivity, detection area, and notification settings to meet your requirements. Enable notifications if you want to receive alerts when motion is detected.
5. Set up remote access:
To access your Comcast security camera remotely, configure the remote access settings. Set up port forwarding on your router and create a unique username and password for remote access. Ensure that your network has a stable internet connection for seamless remote viewing.
6. Save and apply the settings:
Once you have made all the desired changes, click the “Save” or “Apply” button within the camera’s web interface to save the configured settings. The camera will apply the new settings, and you can start using your Comcast security camera with the updated configurations.
By following these steps and configuring the camera settings accurately, you can maximize the effectiveness of your Comcast security camera and enhance your home or office security.
Testing the Camera
Once you have successfully installed your Comcast security camera, it is important to test it to ensure that it is functioning properly. Follow these steps to test the camera:
- Ensure that the camera is connected to a power source and that it has a stable internet connection.
- Open the Comcast mobile app or web portal on your smartphone or computer.
- Locate the camera in the app or web portal and click on it to access the live feed.
- Check if the camera’s live feed is displaying correctly. Make sure the image is clear and there are no distortions.
- Test the camera’s other features, such as the motion detection or night vision, if applicable.
- Adjust the camera angle or position if necessary to ensure optimal coverage.
- Verify that you are receiving notifications and alerts from the camera, if enabled.
- Test the camera’s recording functionality by capturing a short video or taking a snapshot.
- Review the recorded footage or snapshots to ensure that they are of good quality and properly saved.
If at any point during the testing process you encounter any issues or errors, consult the manufacturer’s troubleshooting guide or contact Comcast customer support for assistance.
Troubleshooting Common Issues
Installing a Comcast security camera may encounter some common issues that can be easily resolved. Here are a few troubleshooting tips to help you overcome them:
No video feed: If you are unable to see the video feed from your Comcast security camera, ensure that the camera is properly connected to the power source. Check all the cables and connections to make sure they are secure. It is also recommended to restart both the camera and the viewing device to see if that resolves the issue.
Poor video quality: If you are experiencing poor video quality with your Comcast security camera, first, check the camera’s location and make sure it is not obstructed by any objects. Adjust the camera’s angle and position for a better view. Additionally, ensure that your internet connection is stable, as a weak connection can result in degraded video quality.
Wi-Fi connectivity issues: If your Comcast security camera is unable to connect to the Wi-Fi network, verify that your router is functioning properly. Restarting the router can often resolve connectivity issues. Make sure that the camera and the router are within the recommended range, as distance can affect the signal strength. If needed, reconfigure the camera’s Wi-Fi settings according to the manufacturer’s instructions.
Login problems: If you are having trouble logging into your Comcast security camera’s account or app, ensure that you are using the correct username and password. Double-check for any typos or case sensitivity issues. If you have forgotten your login credentials, follow the password recovery process provided by Comcast. If the issue persists, contact Comcast customer support for further assistance.
Inconsistent motion detection: If you are experiencing inconsistent motion detection with your Comcast security camera, adjust the sensitivity settings in the camera’s app or configuration interface. Lowering the sensitivity may help reduce false notifications caused by minor movements, while increasing it can ensure better coverage for detecting relevant motion.
By following these troubleshooting tips, you should be able to resolve common issues encountered during the installation and setup of your Comcast security camera.
Securing Your Camera Network
When it comes to installing a Comcast security camera system, it’s important to prioritize the security of your network. Here are some steps you can take to ensure that your camera network is secure:
- Change default usernames and passwords: One of the first things you should do after installing your Comcast security cameras is to change the default usernames and passwords. By using strong and unique credentials, you can prevent unauthorized access to your camera network.
- Enable encryption: Encryption is a vital component of securing your camera network. Make sure that your camera system supports encryption protocols such as WPA2, which can help protect your network against unauthorized access and data breaches.
- Update firmware regularly: Keeping your camera system up to date with the latest firmware is crucial for maintaining security. Regularly check for firmware updates provided by Comcast and install them as soon as they become available. These updates often include security patches that can address vulnerabilities and improve the overall security of your camera network.
- Use a dedicated network: Consider setting up a separate network specifically for your camera system. This can help isolate your cameras from other devices on your main network and provide an additional layer of security. If possible, use VLANs (Virtual Local Area Networks) to segregate your camera network from your regular network.
- Disable remote access when not needed: If you don’t require remote access to your camera network, consider disabling this feature. By disabling remote access, you reduce the potential attack surface and minimize the risk of unauthorized access.
- Regularly monitor and review logs: Monitoring the logs of your camera system can help you identify any suspicious activities or potential security breaches. Regularly review these logs and take necessary actions to mitigate any security risks.
- Implement physical security measures: In addition to securing your camera network digitally, it’s also essential to implement physical security measures. This may include placing your cameras in secure locations, using tamper-proof enclosures, and ensuring that the cables connecting your cameras are well-protected.
By following these steps, you can significantly enhance the security of your Comcast security camera network and protect your surveillance system from potential threats or unauthorized access.
Monitoring Your Comcast Security Camera
Once you have successfully installed your Comcast security camera, it is important to understand how to properly monitor your camera to ensure the safety and security of your property. Here are some steps to help you effectively monitor your Comcast security camera:
1. Access the Camera feed
To access the live feed of your Comcast security camera, you need to open the Xfinity Home app on your smartphone or tablet. Make sure you have a stable internet connection before opening the app. Once the app is open, log in to your Xfinity Home account and select the camera you want to view. You will then be able to access the live feed from your camera.
2. Adjust Camera Settings
It is important to adjust the settings of your Comcast security camera to suit your specific needs. You can customize options such as motion detection, recording schedules, and video quality. By adjusting these settings, you can optimize the camera’s performance and ensure that it captures any suspicious activity effectively.
3. Set Up Motion Alerts
To receive instant notifications of any motion detected by your Comcast security camera, you can set up motion alerts. Motion alerts will send a notification to your smartphone whenever the camera detects movement within its field of view. This feature is especially useful if you want to be alerted of any potential security threats immediately.
However, it is important to note that excessive motion alerts can become overwhelming, so it is advisable to fine-tune the motion detection sensitivity to avoid receiving false alarms.
4. Regularly Check the Camera Feed
It is vital to regularly check the live feed from your Comcast security camera to ensure that everything is functioning properly. By regularly monitoring the camera feed, you can identify any technical issues or tampering attempts and address them promptly.
Additionally, regularly checking the camera feed allows you to stay updated on any unusual activity or potential security risks around your property. This enables you to take appropriate action if necessary.
Following these steps will help you effectively monitor your Comcast security camera and ensure the safety and security of your property.
FAQ,
Can I install a Comcast security camera on my own?
Yes, you can install a Comcast security camera on your own. The installation process is designed to be simple and user-friendly. The cameras come with detailed instructions, and the Comcast security camera app provides step-by-step guidance. If you encounter any issues during the installation, Comcast’s customer support is available to assist you.
Do I need any special tools to install a Comcast security camera?
You do not need any special tools to install a Comcast security camera. The camera system comes with all the necessary cables and power adapters. To connect the cameras to your router, you will need an Ethernet cable, which is commonly available. Other than that, basic household tools like a screwdriver may be required if you need to mount the cameras.
How long does it take to install a Comcast security camera?
The time it takes to install a Comcast security camera can vary depending on various factors such as the number of cameras you are installing, the complexity of the installation, and your familiarity with the process. On average, it may take anywhere from 30 minutes to a few hours to complete the installation and set up the system.