
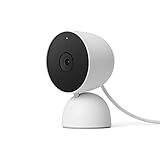
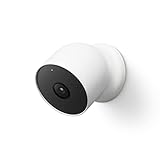
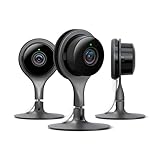
Installing a security camera in your home is a great way to ensure the safety of your loved ones and protect your property. However, drilling holes in walls can be a hassle and may not be an option for everyone. Fortunately, there are alternative methods to install a Nest security camera without drilling.
1. Use Adhesive Mounts:
If you want to avoid drilling holes in your walls, adhesive mounts are a simple and effective solution. These mounts come with strong adhesive backing that allows you to securely attach your Nest camera to any smooth surface, such as walls or ceilings. Make sure to follow the manufacturer’s instructions for cleaning the surface before applying the adhesive mount.
2. Utilize Adjustable Mounts:
Another option is to use adjustable mounts for your Nest security camera. These mounts typically have a flexible arm that can be easily adjusted to the desired angle and height. You can attach the mount to a shelf, furniture, or any other stable surface. This method gives you the flexibility to move and reposition your camera as needed.
3. Try Magnetic Mounts:
If you have a metal surface available, magnetic mounts can be a convenient solution for installing your Nest security camera. These mounts come with a magnetic base that securely attaches to any metallic surface. You can place the camera on the magnetic mount and adjust it to the desired position. Just make sure that the surface is clean and free of any dust or debris that could interfere with the magnetic connection.
By following these alternative installation methods, you can enjoy the benefits of a Nest security camera without the need for drilling holes in your walls. Remember to consider the layout of your home and choose the method that best suits your needs.
Disclaimer: Before installing a security camera, always check your local regulations and consult with a professional if needed.
Nest Security Camera Installation: Step-by-Step Guide
Installing a Nest security camera can provide you with peace of mind and added security to your home or office. Whether you want to monitor your front door, backyard, or any other area, Nest security cameras are a great choice. In this step-by-step guide, we will walk you through the installation process for the Nest security camera without drilling.
Before You Begin
Before you start the installation process, make sure you have the following items:
- Nest security camera
- Mounting magnet
- Power cable and adapter
- Smartphone or tablet with the Nest app installed
- Wi-Fi network and password
Installation Steps
Follow these steps to install your Nest security camera:
- Choose the location for your Nest camera. Make sure it is within the Wi-Fi range and has a power outlet nearby.
- Attach the mounting magnet to the back of the camera. The magnet will allow you to easily position and adjust the camera angle.
- Plug in the power cable to the camera and connect it to the adapter. Make sure the camera is powered on.
- Launch the Nest app on your smartphone or tablet.
- Follow the on-screen instructions to connect the camera to your Wi-Fi network. Make sure to enter the correct Wi-Fi password.
- Select the location where you installed the camera in the Nest app.
- Adjust the camera angle using the mounting magnet until you have the desired view.
- Test the camera by accessing the live video feed in the Nest app.
- If everything is working properly, you have successfully installed your Nest security camera without drilling.
Troubleshooting Tips
If you encounter any issues during the installation process, try the following troubleshooting tips:
| Issue | Solution |
|---|---|
| No Wi-Fi connection | Make sure your Wi-Fi network is working properly and within range. |
| Poor video quality | Try repositioning the camera or adjusting its angle for better coverage. |
| Camera not powering on | Check the power cable and adapter connections. Make sure they are securely plugged in. |
| Cannot access live video feed | Ensure that you have a stable internet connection and the latest version of the Nest app installed on your device. |
By following this step-by-step guide, you can easily install your Nest security camera without drilling and enjoy the added security it provides to your home or office.
Preparing for Installation: Tools and Equipment You’ll Need
Before you begin installing your Nest security camera without drilling, it’s important to gather all the necessary tools and equipment. Here is a list of items you’ll need:

- Nest security camera
- Mounting bracket
- Power adapter
- Micro USB cable
- Extension cord (if needed)
- WiFi network and password
- Smartphone or tablet with the Nest app installed
- Stud finder or electronic wall scanner
- Screwdriver (flathead or Phillips, depending on the camera model)
- Masking tape or pencil for marking the position
- Bubble level or spirit level
- Cable clips or adhesive hooks for cable management
- Microfiber cloth for cleaning the camera lens
Make sure to have all these tools and equipment ready before you start the installation process. Having everything prepared will help make the installation smoother and more efficient, ensuring that your Nest security camera is properly set up without the need for drilling.
Choosing the Right Spot: Finding the Ideal Location
When installing your Nest security camera without drilling, it is essential to select the perfect spot for optimal performance and coverage. Here are some factors to consider when determining the ideal location for your camera:
1. Field of view
The camera’s field of view is crucial in capturing everything that happens. Ensure that the chosen location provides a wide-angle view, covering the desired area without any obstructions.
2. Wireless connectivity
Make sure the camera is within range of your Wi-Fi network to ensure a stable and reliable connection. Avoid placing the camera too far from the router or in areas with weak Wi-Fi signal.
3. Power source
Choose a spot near a power outlet, as the camera needs a power source to function. Consider using extension cords or power outlets with USB ports if necessary.

4. Height and angle
Maintain an optimal height and angle for the camera, usually around eye level or higher. This helps to capture clear images and minimize blind spots.
5. Environmental factors
Take into account environmental factors such as weather conditions, direct sunlight, and potential obstructions like trees or buildings. Direct sunlight may affect the camera’s image quality, while obstructions can block the camera’s view.
By considering these factors when choosing the right spot, you can ensure that your Nest security camera will provide effective surveillance without the need for drilling.
Mounting Options: Alternatives to Drilling
If you are hesitant to drill holes in your walls or have limitations that prevent you from doing so, there are alternative mounting options available for installing your Nest security camera. These options allow you to securely mount your camera without damaging your walls or requiring extensive installation:
1. Adhesive Strips
One popular alternative to drilling is using adhesive strips. These strips are designed to be strong and durable, providing a secure hold for your camera. Simply attach the adhesive strip to the back of your camera and press it firmly onto the desired surface. Make sure to follow the instructions provided by the strip manufacturer for maximum effectiveness and to avoid damaging your camera or wall.

2. Magnetic Mounts
If you have a metal surface available, magnetic mounts can be a convenient option for installing your Nest security camera. These mounts use strong magnets to securely hold your camera in place. Simply attach the magnetic mount to your camera and position it on the metal surface. This option allows for easy repositioning and removal of the camera when needed.
Keep in mind that the strength of the adhesive strips and magnets may vary depending on the weight and size of your camera. It’s important to choose mounting options suitable for the specific model of your Nest security camera. Additionally, make sure to clean the mounting surface thoroughly before applying adhesive strips or magnetic mounts to ensure a strong hold.
By exploring these alternative mounting options, you can install your Nest security camera without the need for drilling and still enjoy the benefits of a secure and well-positioned camera.
Setting Up the Camera: Connecting and Configuring
Once you have received your Nest security camera, follow these steps to set it up without drilling:
Step 1: Identify the Best Location
Choose a suitable location for your Nest security camera. Look for a spot that provides a good view of the area you want to monitor but does not require any drilling. Ideally, find a flat surface near a power outlet and within the Wi-Fi range.
Step 2: Connect the Camera to Power
Plug the power cord of the Nest security camera into a nearby power outlet. Make sure the outlet is functional and turned on. Wait for the camera to power on and indicate that it is ready to be set up.
Step 3: Connect to Wi-Fi
Download and install the Nest app on your smartphone or tablet. Open the app and follow the instructions to create a new account or log in to your existing account. Select “Add Product” from the app’s home screen and choose the Nest security camera from the list of available devices. The app will guide you through the process of connecting the camera to your Wi-Fi network.
Step 4: Configure Camera Settings
Once your Nest security camera is successfully connected to your Wi-Fi network, you can configure its settings through the Nest app. Set up features such as motion detection, alerts, and video quality according to your preferences. You can also create customized zones for the camera to monitor or adjust the camera’s field of view.
Step 5: Mount and Position the Camera
Using the included wall mounting plate or adhesive tape, attach the Nest security camera to the chosen location. Ensure it is securely mounted and positioned to capture the desired area. Use the Nest app to view the camera’s live feed and adjust its position if necessary.
Step 6: Test and Monitor
Finally, test your Nest security camera by triggering an event, such as walking in front of it, to ensure it detects motion and sends you alerts if configured to do so. Make any necessary adjustments to the camera’s settings or positioning if needed. Enjoy peace of mind as you monitor your home or property without the need for drilling!

| Requirements | Additional Tips |
|---|---|
|
|
Troubleshooting Tips: Common Issues and Solutions
If you are experiencing any issues while installing your Nest security camera without drilling, here are some common problems you may encounter along with their solutions:
No Power Connection
If your security camera is not receiving power, ensure that it is properly connected to a power source. Check if the power cable is securely plugged into both the camera and the outlet. Additionally, make sure that the outlet itself is providing power by plugging in another device.
Weak Wi-Fi Signal
If your camera is not connecting to your Wi-Fi network or experiencing a weak signal, try moving it closer to your Wi-Fi router. Obstacles such as walls, furniture, and electronic devices can interfere with the Wi-Fi signal strength. If possible, try using a Wi-Fi extender or relocating your router for better coverage.
Camera Offline
If your camera is showing as offline on the Nest app, check if your internet connection is working properly. Restart your router and ensure that your camera is within range of your Wi-Fi network. If the issue persists, try resetting your camera by pressing and holding the reset button for 10 seconds.
Inaccurate Notifications
If you are receiving inaccurate or excessive notifications from your camera, adjust the motion settings in the Nest app. You can customize the sensitivity, activity zone, and notification preferences to reduce false alerts. Additionally, make sure that your camera’s view is not obstructed by any object or vegetation that might trigger unnecessary motion detections.
If you have tried these troubleshooting steps and are still experiencing issues, consult the Nest support website or contact their customer support for further assistance.
FAQ,
Is it possible to install a Nest security camera without drilling?
Yes, it is possible to install a Nest security camera without drilling. There are several options available, such as using adhesive strips, magnetic mounts, or stands to hold the camera in place.
How do I install a Nest security camera without drilling?
There are a few different ways to install a Nest security camera without drilling. One option is to use adhesive strips, which can stick to most surfaces and hold the camera securely in place. Another option is to use a magnetic mount, which can be attached to metal surfaces without the need for drilling. Additionally, you can use a stand to place the camera on a flat surface, such as a shelf or table.
What are the advantages of installing a Nest security camera without drilling?
There are several advantages to installing a Nest security camera without drilling. Firstly, it saves time and effort, as you don’t need to find a drill or create holes in your walls. Additionally, it allows for more flexibility in camera placement, as you can easily move the camera to different locations without leaving behind any damage or marks. Lastly, it is a great option for renters or those who don’t want to permanently alter their living space.
Can I move a Nest security camera that has been installed without drilling?
Yes, one of the benefits of installing a Nest security camera without drilling is that it allows for easy relocation. Since the camera is not permanently attached to the wall, you can simply remove it from its current position and place it elsewhere without any hassle. Just make sure to properly reattach the camera using adhesive strips or the appropriate mounting option in the new location.


