
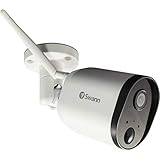
Installing a Swann Wi-Fi security camera is a smart and effective way to enhance the security of your property. Whether you want to protect your home or monitor your business premises, Swann cameras offer advanced features and reliable performance. In this article, we will guide you through the process of installing a Swann Wi-Fi security camera, ensuring that you can set up your surveillance system with ease and confidence.
Step 1: Prepare Your Camera and Accessories
Before you begin the installation process, it is important to make sure you have all the necessary components and accessories. Your Swann Wi-Fi security camera package should include the camera itself, a mount or stand, screws and wall plugs, a power adapter, and an Ethernet cable. It is also helpful to have a ladder or step stool, a power drill, and a screwdriver.
Step 2: Determine Camera Placement
The next step is to decide on the optimal location for your Swann Wi-Fi security camera. Consider the areas you want to monitor and ensure that the camera has a clear line of sight. Choose a position that provides a wide viewing angle and covers the desired area effectively. It is important to ensure that the camera is mounted securely and protected from tampering.

Step 3: Mount the Camera
Using the mounting bracket or stand provided with your Swann Wi-Fi security camera, carefully attach the camera to the chosen location. Ensure that the camera is level and securely fixed in place. Use the screws and wall plugs provided to ensure a stable and reliable installation. If you are unsure about the mounting process, refer to the camera’s user manual for detailed instructions.
Step 4: Connect the Camera to Power and Wi-Fi
Once the camera is securely mounted, connect it to a power source using the power adapter provided. Make sure the power source is easily accessible and convenient. Then, use the Ethernet cable to connect the camera to your modem or router. This will enable the camera to connect to your Wi-Fi network, allowing you to remotely access and control the camera through your smartphone or computer.
Step 5: Test and Configure

After successfully connecting the camera to power and Wi-Fi, it is important to test the camera’s functionality. Use the Swann companion app or software to ensure that the camera is working properly and streaming video. Adjust the camera settings, such as motion detection and recording preferences, according to your specific needs and preferences.
By following these steps, you can easily install a Swann Wi-Fi security camera and enjoy the benefits of enhanced security and surveillance. Remember to regularly maintain and update your surveillance system to ensure optimal performance and peace of mind.
Preparations for Swann WiFi Security Camera Installation
Before installing your Swann WiFi security camera, it is important to take the necessary preparations to ensure a smooth installation process. Here are some key steps to follow:
1. Determine the best location: Identify the areas around your property that require surveillance. Look for strategic positions that provide optimal coverage and visibility.
2. Check WiFi signal strength: Ensure that the WiFi signal is strong enough in the chosen location. This will help maintain a stable connection between the camera and your network.

3. Install the Swann app: Download and install the Swann security camera app on your smartphone or tablet. This app will serve as the main interface for managing and accessing your camera.
4. Create a Swann account: Follow the instructions provided by the app to create a Swann account. This account will be used to log in and access your camera remotely.
5. Gather necessary tools: Collect the tools and equipment required for installation, such as a ladder, drill, and screwdriver. Having these tools ready in advance will save you time during the actual installation.
6. Ensure power source availability: Check if there is a power outlet available near the chosen installation location. If not, consider using an extension cord or hiring an electrician to install an outlet.
7. Clear the area: Remove any obstacles or debris that may obstruct the camera’s view. This includes trimming nearby branches or plants that might block the camera’s field of vision.

8. Check camera compatibility: Verify that your Swann WiFi security camera is compatible with your existing WiFi network. Refer to the camera’s user manual or the manufacturer’s website for compatibility requirements.
9. Review the camera’s features: Familiarize yourself with the camera’s features and settings. Understanding the available options will allow you to optimize the camera’s performance and customize it to meet your specific needs.
10. Plan camera mounting: Decide on the type of mounting method you will use for your camera. Whether it’s wall-mounted, ceiling-mounted, or placed on a stand, plan the installation based on your preferences and the camera’s capabilities.
By completing these preparations, you will ensure a successful installation of your Swann WiFi security camera. Follow the manufacturer’s instructions and use the provided guidelines to proceed with the installation process.
Choosing the right location for your Swann WiFi Security Camera
When it comes to installing your Swann WiFi security camera, choosing the right location is crucial for ensuring optimal performance and coverage. Here are some key factors to consider when selecting the ideal spot for your camera:
Determine the Purpose
Before finalizing the camera location, consider the purpose of your surveillance system. Do you want to monitor the front door, backyard, or any other specific area? Identifying the purpose will help you determine the most strategic location.
Coverage and Range
Assess the coverage area and range of your Swann WiFi security camera. Determine which areas you want to capture and make sure the camera’s field of view can adequately cover those areas. Consider how far the camera’s WiFi signal can reach as well.
Proximity to Power and WiFi
Ensure that the chosen location is within reach of a power outlet. This will prevent you from having to use long extension cords or dealing with any potential tripping hazards. Additionally, make sure the camera is within range of your WiFi network to maintain a stable connection.
Obstructions and Lighting

Take note of any potential obstructions that may obstruct the camera’s view, such as trees, plants, or walls. Remove or trim any obstacles to ensure clear visibility. Consider the lighting conditions in the chosen location as well – make sure there is sufficient lighting for the camera’s night vision capabilities.
Mounting Options
Consider whether you’ll be mounting the camera on a wall or ceiling. Take into account the camera’s mounting requirements and ensure that the location you choose can accommodate the recommended positioning.
By taking these factors into consideration, you can select the most suitable location for your Swann WiFi security camera, enabling you to achieve the best surveillance coverage and peace of mind.
Gathering the necessary tools and equipment
Before you begin installing your Swann Wifi security camera, it is important to gather all the necessary tools and equipment. Having everything on hand will make the installation process much smoother. Here are the tools and equipment you will need:
- Swann Wifi security camera
- Power adapter
- Ethernet cable (if needed)
- Drill and drill bits
- Screwdriver
- Mounting bracket
- Wall anchors and screws
- Network cable (if needed)
- Smartphone or computer
- Wifi network with internet connection
Make sure you have all these items before you begin the installation process. It is also a good idea to read through the instruction manual that comes with your Swann Wifi security camera to familiarize yourself with any additional tools or equipment that may be required.

Connecting your Swann WiFi Security Camera to the network
Once you have successfully installed your Swann WiFi security camera, the next step is to connect it to your network. Follow these steps to ensure a secure and stable connection.
- Power on the camera and wait for the indicator lights to turn on.
- Locate the ethernet cable (included with your camera) and connect one end to the camera’s ethernet port. Connect the other end to your router or modem.
- Open the Swann Camera app on your smartphone or tablet.
- Tap on the “Connect Camera” button in the app.
- Follow the on-screen instructions to select your WiFi network and enter the password.
- Wait for the camera to connect to your WiFi network. This may take a few moments.
- Once the connection is established, your camera is now successfully connected to the network.
- Place the camera in the desired location and adjust the angle as needed. Ensure that it has a clear view and is positioned securely.
- You can now monitor the camera’s live video feed using the Swann Camera app on your mobile device or access it remotely via the web interface.
Remember to periodically check the camera’s connection status and ensure that it is connected to your network. This will ensure that you receive real-time notifications and can access the camera’s footage whenever needed.
Setting up the Swann WiFi Security Camera
Installing the Swann WiFi Security Camera is a straightforward process that can be completed in just a few easy steps. Follow the instructions below to get your camera up and running in no time:
Step 1: Unboxing the camera
Begin by opening the package and taking out the Swann WiFi Security Camera along with all the accompanying accessories, such as the power adapter, Ethernet cable, and mounting screws.
Step 2: Choosing the camera location
Determine the best location for your camera, keeping in mind that it should provide a clear view of the area you want to monitor. Consider factors like the WiFi signal strength and power outlet availability.
Step 3: Mounting the camera
Use the provided mounting screws to securely attach the camera to the chosen location, such as a wall or ceiling. Ensure that it is placed at the desired angle and position.
Step 4: Connecting the camera to power
Plug in the power adapter to a nearby power outlet and connect it to the camera. Make sure that the power source is stable and reliable to ensure uninterrupted operation.
Step 5: Connecting to WiFi
On your mobile device or computer, go to the WiFi settings and connect to the network named “Swann”. Once connected, launch your preferred web browser.
Step 6: Camera setup
Open the Swann camera setup interface by entering “www.swann.com/setup” in the address bar of your web browser. Follow the on-screen instructions to create a new account and set up your camera.
Step 7: Positioning the camera
Adjust the position and angle of the camera using the live view provided in the setup interface. Aim the camera to capture the desired area and make any necessary adjustments.
Step 8: Completing the setup
Once you are satisfied with the camera’s position, click on the “Finish” or “Complete” button in the setup interface to finalize the installation process. Your Swann WiFi Security Camera is now ready to use!
Note: It is recommended to read the user manual for further instructions and troubleshooting tips.
Testing and Troubleshooting your Swann WiFi Security Camera
After installing your Swann WiFi Security Camera, it is important to test and troubleshoot it to ensure that it is functioning properly. Here are some steps you can follow:
1. Power on the Camera: Make sure that the camera is properly connected to a power source and turned on. Check if the power indicator light is illuminated.
2. Check the WiFi Connection: Ensure that your WiFi network is working properly and that the camera is connected to it. You can do this by checking the network settings on your camera or using the Swann mobile app.
3. Test the Live View: Use the Swann mobile app or the web browser interface to access the live view feature of the camera. Check if the video feed is clear and if there are any delays or interruptions.
4. Adjust Camera Position: If the video feed is not showing the desired view or if there are any blind spots, adjust the camera position or angle. Make sure that the camera is pointing at the intended area.
5. Check the Recording: Test the recording feature of the camera by reviewing the saved footage. Make sure that the camera is capturing and storing video properly.
6. Verify Motion Detection: Test the motion detection feature of the camera by walking in front of it. Check if the camera detects the motion and starts recording or sending notifications.
7. Troubleshoot Connectivity Issues: If you are experiencing connectivity issues with the camera, try restarting your router, moving the camera closer to the router, or changing the WiFi channel. You can also consult the Swann support website for further assistance.
8. Update Firmware: Check if there are any firmware updates available for your camera and install them if necessary. This can help improve the camera’s performance and fix any known issues.
Note: If you encounter any technical issues or difficulties during the testing process, it is recommended to refer to the user manual or contact Swann customer support for assistance.
Finalizing the installation of your Swann WiFi Security Camera
Now that you have successfully connected your Swann WiFi security camera to your home network, it’s time to finalize the installation process.
1. Position the camera: Choose an optimal location for your camera where it can capture the desired area without any obstructions. Make sure it is mounted securely and at the right angle.
2. Adjust the camera settings: Using the Swann Security app or the camera’s web interface, you can customize various settings such as motion detection sensitivity, recording schedule, and alarm notifications. Take time to adjust these settings to suit your needs.
3. Test the camera: After adjusting the settings, perform a quick test to ensure that your camera is working properly. Walk around the monitored area and observe if the camera captures the movements correctly.
4. Set up remote access: To access the camera’s live feed and recordings remotely, you need to set up remote access. Follow the instructions provided by Swann to create an account and enable remote viewing on your smartphone, tablet, or computer.
5. Secure your camera: It’s essential to secure your camera and prevent unauthorized access. Change the default password and use a strong, unique password for your camera’s login. Regularly update the firmware to ensure that your camera has the latest security patches.
6. Maintain your camera: Regularly clean the camera lens to maintain optimum image quality. Keep an eye on the camera’s performance and address any issues promptly. Also, make sure the camera’s software and mobile app are up to date.
By following these steps, you can finalize the installation of your Swann WiFi security camera and enjoy the added peace of mind and security it provides.
FAQ,
Can I install multiple Swann WiFi security cameras in my home?
Yes, you can install multiple Swann WiFi security cameras in your home. The Swann Security app allows you to add and manage multiple cameras within a single account. Each camera can be given a unique name for easy identification. You can view and control all the cameras from the app, monitor multiple feeds simultaneously, and receive push notifications for any detected motion or events. It is recommended to strategically position the cameras in different areas of your home to maximize coverage and security.


