
Installing a security camera on a drop ceiling can be a great option for businesses or homes looking to keep a vigilant eye on their surroundings. The drop ceiling provides an ideal hiding place for the camera, keeping it discreet while still capturing important footage. However, mounting a security camera on a drop ceiling requires some careful planning and execution. In this article, we will guide you through the process of effectively mounting a security camera on a drop ceiling, ensuring optimal security and functionality.
Firstly, before mounting the camera, it is essential to plan the positioning and placement. Assess the area you want to monitor and identify the most strategic vantage point. Consider the camera’s field of view, ensuring it can capture the necessary angles and areas of interest. Additionally, make sure the drop ceiling can support the weight of the camera and any additional mounting equipment.
Once you have determined the optimal position, you can proceed with installing the camera. Start by removing a ceiling tile to access the area above the drop ceiling. Carefully thread the camera’s cables through the opening and position the camera securely in place. Use screws or other appropriate mounting hardware to attach the camera to the ceiling support beams. Make sure the camera is level and stable before proceeding.
After securely mounting the camera, ensure the cables are properly connected and routed through the ceiling space. Conceal the cables as much as possible to maintain a clean and professional appearance. Consider using cable management solutions such as adhesive clips or conduit to keep the cables organized and hidden.
In conclusion, mounting a security camera on a drop ceiling requires careful planning and execution. Ensure proper positioning, support, and cable management for optimal functionality and appearance. By following these guidelines, you can effectively mount a security camera on a drop ceiling and enhance the surveillance capabilities of your space.

Choosing the Right Location
When it comes to mounting a security camera in a drop ceiling, selecting the right location is crucial for optimal surveillance coverage. Consider the following factors when choosing where to install your camera:
1. Coverage Area: Determine the area you want the camera to cover. Think about the entry points, high-traffic areas, and vulnerable spots that require monitoring. This will help you decide where to position the camera.
2. Line of Sight: Ensure there is a clear line of sight between the camera and the area you want to monitor. Avoid obstacles like beams or pillars that could block the camera’s view.
3. Lighting Conditions: Take into account the lighting conditions of the area. If the location is poorly lit or experiences frequent changes in lighting, consider installing a camera with features like night vision or adjustable exposure to ensure clear footage at all times.
4. Accessibility: Consider the accessibility of the camera for installation, maintenance, and retrieval of footage if required. It should be easily accessible without disrupting the ceiling tiles or causing any damage.
5. Concealment: If you want to keep the camera discreet, select a spot where it will be well-concealed within the drop ceiling, minimizing its visibility to potential intruders.
6. Network Connectivity: Ensure that your chosen location provides easy access to network cables or Wi-Fi signals for seamless connectivity between the camera and your surveillance system.
By considering these factors, you can select the right location for your security camera in a drop ceiling, enhancing the effectiveness and efficiency of your surveillance system.
Consider the Area Coverage
When mounting a security camera in a drop ceiling, it’s important to consider the area coverage that the camera will provide. This will determine the number of cameras needed to adequately monitor the space.
Before installing the cameras, assess the area and identify the high-risk zones that require extra surveillance. These could include entry points, cash registers, or any other areas where valuable assets are stored.

Take into account the field of view (FOV) of the camera, as well as its resolution and zoom capabilities. Cameras with a wider FOV can cover a larger area, while those with a narrower FOV can capture more detail in a specific area.
Consider the height and angle at which the camera will be mounted. Mounting the camera at a higher position can provide a wider coverage, but may sacrifice detail. Conversely, mounting the camera at a lower position can capture more detail, but may have a narrower coverage.
Additionally, consider any blind spots or obstacles that may affect camera placement. Make sure the camera’s view is not obstructed by pillars, beams, or any other objects that could limit its effectiveness.
By carefully considering the area coverage, you can ensure that your drop ceiling security cameras provide comprehensive surveillance and enhance the overall security of your space.
Evaluate the Lighting Conditions
Before mounting a security camera on a drop ceiling, it is important to evaluate the lighting conditions in the specific area where the camera will be installed. Lighting conditions can have a significant impact on the clarity and quality of the camera footage. Consider the following factors:

| Factor | Considerations |
|---|---|
| 1. Natural Light | Assess the amount of natural light in the area. Natural light can create glare or wash out details in the footage, especially if the camera is facing a window or a source of direct sunlight. Adjust the camera position or use window shades to minimize these effects. |
| 2. Artificial Lighting | Take into account any artificial lighting present in the area, such as fluorescent or LED lights. These types of lighting can cause flickering or color distortion in the footage. Test the camera in various lighting conditions to determine if any adjustments need to be made. |
| 3. Low Light Conditions | If the area where the camera will be installed has low light conditions, consider using a camera specifically designed for low light environments. These cameras are equipped with infrared capabilities or low light sensors to capture clear images in dark settings. |
| 4. Shadows and Obstructions | Identify areas with potential shadows or obstructions that may affect the camera’s view. These can include columns, walls, or hanging objects. Adjust the camera position to minimize any potential obstructions or create a more comprehensive surveillance coverage. |
By carefully evaluating the lighting conditions, you can ensure optimal camera placement and maximize the effectiveness of your security camera system.
Preparing the Drop Ceiling
Before mounting a security camera on a drop ceiling, it is important to ensure that the ceiling is capable of supporting the weight of the camera and any additional equipment that may be required. Here are some steps to prepare the drop ceiling:
1. Assess the ceiling structure
First, examine the drop ceiling to determine the type of structure it has. Drop ceilings typically consist of a series of interlocking tiles that are suspended from a grid system. The grid system is supported by wires or rods, which are attached to the main ceiling or structural beams.
It is important to determine whether the ceiling tiles and grid system are strong enough to support the weight of the security camera and any additional equipment. Some drop ceilings may have weight limitations, so it is crucial to check the manufacturer’s specifications or consult a professional if necessary.
2. Locate a suitable mounting location
Next, identify a suitable location for mounting the security camera. Consider factors such as the camera’s field of view, the desired angle of view, and any potential obstructions that may impact the camera’s effectiveness.
It is important to ensure that the chosen location provides an unobstructed view of the area you want to monitor. Additionally, consider whether the location allows for easy access to the camera for installation, maintenance, and adjustments.
Once a suitable location is identified, mark it with a pencil or tape to facilitate the installation process.
By following these steps, you can adequately prepare a drop ceiling for mounting a security camera. Taking the time to assess the ceiling structure and select a suitable location will help ensure a secure and effective camera installation.
Measure and Mark the Installation Spot
Before installing a security camera on a drop ceiling, it is important to measure and mark the precise spot where it will be mounted. This will ensure that the camera is positioned correctly and maximizes its surveillance capabilities. Follow these steps to measure and mark the installation spot:
- Locate the optimal position: Determine the area that requires surveillance and identify the best spot to install the camera. Consider factors such as the angle of view, coverage area, and potential obstacles.
- Use a measuring tape: Measure the distance from the walls or any reference point to accurately determine the position of the camera. Record these measurements for reference.
- Mark the spot: With the help of a pencil or a marker, mark the exact position of the camera on the drop ceiling. Make sure the marking is visible and centered within the desired area.
- Double-check the position: Stand back and double-check the marking to ensure that it aligns with your surveillance requirements. Adjust if necessary.
By measuring and marking the installation spot before mounting the security camera, you can ensure that it is positioned correctly for your specific surveillance needs. This will help optimize its effectiveness and provide you with reliable and accurate monitoring.
Prepare the Cable Pathways
Before mounting the security camera to a drop ceiling, it is essential to prepare the cable pathways to ensure a clean and organized installation. Follow these steps to prepare the cable pathways:
| Step | Description |
|---|---|
| 1 | Identify the best path for the cables to run from the camera location to the desired connection point. Consider the aesthetics and functionality when choosing the pathway. |
| 2 | Measure the length of the cable pathway to determine the amount of cable needed. Add a few extra feet to account for any curves or bends. |
| 3 | Prepare the pathway by removing any obstructions or debris that may hinder the cable installation. Clean the area to ensure a secure and proper fit. |
| 4 | If necessary, use cable clips or adhesive mounts to secure the cables along the pathway. This will help prevent any dangling or loose cables. |
| 5 | Consider using cable management solutions such as cable raceways or conduit to further organize and protect the cables. This will also help maintain a professional appearance. |
| 6 | Label each cable before installation to ensure easy identification and troubleshooting in the future. Use clear and concise labels to avoid confusion. |
By properly preparing the cable pathways, you can create a clean and efficient installation for your security camera on a drop ceiling.
Mounting the Security Camera
Mounting your security camera on a drop ceiling is a simple and effective way to keep your property secure. Follow these steps to properly mount your security camera:
1. Determine the Location
Before mounting the camera, decide on the ideal location for maximum coverage. Consider areas such as entrances, hallways, and high-value merchandise sections. The location should provide a clear view of the area you wish to monitor.
2. Measure and Mark the Mounting Holes
Using a measuring tape, measure and mark the positions for the mounting holes on the drop ceiling. Take into account the camera’s mounting bracket and ensure it is centered and level.

3. Drill Pilot Holes
Using an appropriate-sized drill bit, carefully drill pilot holes where you marked the mounting holes. Be cautious not to damage any electrical wiring or structural components.
4. Attach Mounting Bracket
Secure the mounting bracket to the drop ceiling by inserting screws through the pilot holes and tightening them with a screwdriver. Ensure that the bracket is firmly attached for stability.
5. Mount the Camera
Attach the camera to the mounting bracket using the provided screws or mounting hardware. Ensure that the camera is securely fastened and facing the desired direction.
6. Connect the Cables
Connect the necessary cables to the camera, such as power and Ethernet cables, following the manufacturer’s instructions. Conceal the cables within the drop ceiling for a clean and professional appearance.
7. Test the Camera
Power on the camera and test its functionality. Ensure that the camera provides a clear and stable video feed before finalizing the installation.
8. Adjust and Fine-tune
Make any necessary adjustments to the camera’s position or focus to optimize the monitoring capabilities. Fine-tune the camera settings according to your desired surveillance needs.
By following these steps, you can successfully mount your security camera on a drop ceiling and enhance the security of your property.
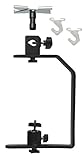
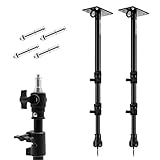
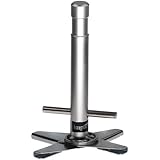
Attach the Mounting Bracket
Once you have determined the ideal location for your security camera on the drop ceiling, you will need to attach the mounting bracket. The mounting bracket is a crucial component as it provides stability and support for the camera.
Step 1: Prepare the Ceiling Tile
Begin by selecting a ceiling tile that is located directly above the desired camera location. If necessary, remove the ceiling tile from its position, being mindful not to damage it in the process.
Step 2: Mark the Mounting Points
Hold the mounting bracket against the ceiling tile and use a pen or marker to mark the mounting points on the tile. These points should align with the holes or slots on the bracket. Ensure that the bracket is level and centered before marking the points.
Step 3: Drill the Holes
Using a drill with a suitable drill bit, carefully drill holes at the marked points on the ceiling tile. Take caution not to drill through any support beams or electrical wiring that may be present above the drop ceiling.
Step 4: Attach the Mounting Bracket
Align the mounting bracket holes with the drilled holes on the ceiling tile. Insert screws or bolts through the bracket holes and into the drilled holes. Use a screwdriver or a wrench to tighten the screws and secure the mounting bracket to the ceiling tile. Ensure that the bracket is firmly attached and does not wobble.
With the mounting bracket successfully attached, you are now ready to proceed with mounting the security camera onto the bracket. Refer to the camera’s installation instructions for further guidance on how to complete this step.
FAQ,
What materials do I need to mount a security camera on a drop ceiling?
To mount a security camera on a drop ceiling, you will need a security camera bracket or mount, screws or bolts, a power drill, a drop ceiling support wire, and a Ethernet cable (if applicable).
Can I mount a security camera directly onto a drop ceiling tile?
No, it is not recommended to mount a security camera directly onto a drop ceiling tile. Drop ceiling tiles are not designed to support the weight of a security camera. You should use a camera bracket or mount to securely attach the camera to the ceiling.
How do I run the Ethernet cable for a security camera on a drop ceiling?
To run the Ethernet cable for a security camera on a drop ceiling, you can use cable clips or cable raceways to secure the cable along the ceiling tiles or support wires. Make sure to keep the cable hidden and neat for a clean installation.


