Securing your home or office is a top priority in today’s world, and a Raspberry Pi security camera can be an excellent addition to your security system. However, one of the most critical aspects of setting up your security camera is ensuring that it has a reliable power source. Without a stable power supply, your camera may not function properly, and you could be left with a vulnerable spot in your security setup.
When it comes to powering your Raspberry Pi security camera, you have a few options. One popular choice is to use a dedicated power supply, such as a USB power adapter or a power over Ethernet (PoE) switch. These options provide a steady flow of power to your camera, ensuring it stays operational around the clock. Additionally, using a proper power supply can help prevent issues like overheating and voltage drops, which can negatively impact your camera’s performance.
Another option for powering your Raspberry Pi security camera is to use a battery pack or a portable power bank. This can be especially useful if you need to set up a camera in a location where access to a power outlet is limited or unavailable. However, it’s important to note that using a battery pack or power bank may require additional hardware and setup to ensure compatibility and a stable power source.
Whatever method you choose, it’s crucial to ensure that your Raspberry Pi security camera has a reliable and uninterrupted power supply. By taking the time to set up a proper power source, you can ensure that your camera operates efficiently, allowing you to keep an eye on your surroundings and enhance your overall security.
Setting up Raspberry Pi
Before setting up your Raspberry Pi for use as a security camera, you’ll need to ensure you have the necessary equipment and software. Here’s what you’ll need:
Hardware
- Raspberry Pi board (at least version 2 or higher is recommended)
- Micro SD card (at least 8GB or higher is recommended)
- Power supply
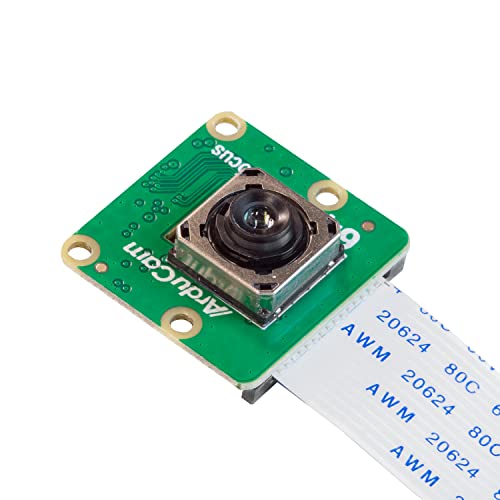
- Camera module (compatible with Raspberry Pi)
- Ethernet cable (optional, if you want to connect your Pi to the internet via wired connection)
- Wi-Fi dongle (optional, if you want to connect your Pi to the internet via wireless connection)
Software
- Raspberry Pi operating system (such as Raspbian)
- Camera software (such as motion or fswebcam)
Once you have all the necessary hardware and software, follow these steps to set up your Raspberry Pi:
- Download the latest version of the Raspberry Pi operating system from the official website.
- Format your micro SD card and insert it into your computer.
- Use a disk imaging tool, like Etcher, to write the Raspberry Pi operating system image onto the micro SD card.
- Eject the micro SD card from your computer and insert it into the Raspberry Pi.
- Connect the Raspberry Pi to a monitor or TV using an HDMI cable.
- Connect a keyboard and mouse to the Raspberry Pi.
- Connect the power supply to the Raspberry Pi to boot it up.
- Follow the on-screen instructions to complete the initial setup of the Raspberry Pi operating system.
- Once the setup is complete, open a terminal window and update the system by running the command
sudo apt-get update. - Install the camera software by running the command
sudo apt-get install motionorsudo apt-get install fswebcam, depending on the software you choose. - Configure the camera software according to your preferences.
- Restart the Raspberry Pi to apply the changes.
After following these steps, your Raspberry Pi will be set up and ready to use as a security camera. You can now start capturing and monitoring footage using the camera module and software you installed.
Installing Raspbian Operating System
The first step in setting up your Raspberry Pi security camera is to install the Raspbian operating system. Raspbian is a free, Debian-based Linux operating system optimized for the Raspberry Pi.
To install Raspbian, you will need to download the Raspbian image from the official Raspberry Pi website. Make sure to choose the Raspbian Buster with desktop and recommended software version.
Once the image has finished downloading, you will need to use a program like Etcher to write the image to an SD card. Insert the SD card into your computer and open Etcher. Select the Raspbian image, choose the SD card as the target, and click “Flash” to write the image.

After the image has been written to the SD card, remove it from your computer and insert it into the Raspberry Pi. Connect the Raspberry Pi to a power source and a display using an HDMI cable.
When the Raspberry Pi boots up, you will be prompted to set up the Raspbian operating system. Follow the on-screen instructions to select your language, configure your Wi-Fi network, and set your preferred options.
Once the setup process is complete, you will be taken to the Raspbian desktop. From here, you can install any additional software or packages that you may need for your security camera project.
Now that Raspbian is installed, you are ready to move on to the next step of setting up your Raspberry Pi security camera.
Configuring Wi-Fi Connection
One of the key steps in setting up a Raspberry Pi security camera is configuring the Wi-Fi connection. This allows the camera to connect to your home network and access the internet for remote monitoring and notifications.

Step 1: Accessing the Terminal
To configure the Wi-Fi connection on your Raspberry Pi, you’ll need to access the terminal. You can do this by connecting a keyboard and monitor directly to the Pi, or by using SSH to connect to it remotely from another device.
If you’re using a monitor, simply boot up your Raspberry Pi and log in using your username and password. If you’re using SSH, open a terminal on your computer and use the SSH command followed by your Pi’s IP address.
Step 2: Editing the Network Configuration File
Once you have access to the Pi’s terminal, you’ll need to edit the network configuration file to set up the Wi-Fi connection. The file you need to edit is located at /etc/wpa_supplicant/wpa_supplicant.conf.
Open the file using a text editor, such as Nano, by typing the command:
sudo nano /etc/wpa_supplicant/wpa_supplicant.conf

Within the file, you’ll see a section labeled “network={“. Below this line, you’ll need to add the following lines to specify your Wi-Fi network details:
ssid="Your Network Name"
psk="Your Network Password"
Replace “Your Network Name” with the name (SSID) of your Wi-Fi network, and “Your Network Password” with your Wi-Fi password.
Save the changes and exit the text editor.

Step 3: Restarting the Network Service
To apply the changes and connect to your Wi-Fi network, you’ll need to restart the network service. Type the following command in the terminal:
sudo systemctl restart dhcpcd
This will restart the DHCP service and establish a connection to your Wi-Fi network.
Once the process is complete, your Raspberry Pi security camera should be connected to your Wi-Fi network. You can verify the connection by opening a web browser on the Pi or accessing it remotely via SSH.
Enabling Camera Module
If you are using a Raspberry Pi that has a camera module, you will need to enable it before you can start using the security camera software. Enabling the camera module is a simple process that can be done through the Raspberry Pi configuration settings.

Step 1: Open Raspberry Pi Configuration
To open the Raspberry Pi configuration settings, you can either click on the Raspberry Pi logo at the top left corner of the screen and select “Preferences” > “Raspberry Pi Configuration”, or you can open a terminal window and type the following command:
sudo raspi-config
Step 2: Enable Camera Module
Once the Raspberry Pi configuration tool opens, navigate to the “Interfacing Options” tab using the arrow keys, and press Enter to select it. Scroll down to “Camera” using the arrow keys, and press Enter to enable it. You will see a prompt asking if you want to enable the camera module, select “Yes” and press Enter.
Note: Enabling the camera module requires a reboot, so make sure to save any open documents or files before proceeding.
Step 3: Reboot Raspberry Pi
After enabling the camera module, you will be prompted to reboot the Raspberry Pi. Select “OK” and press Enter to proceed with the reboot. Once the Raspberry Pi has restarted, the camera module will be enabled and ready to use.

Now that the camera module is enabled, you can proceed with installing the security camera software and configuring it to meet your specific needs. Remember to take any necessary precautions to protect your Raspberry Pi and ensure the security of your camera feed.
Installing Security Software
One of the crucial steps in setting up a Raspberry Pi security camera is installing the necessary security software. This software is responsible for capturing video, detecting motion, and storing footage. Here’s a step-by-step guide on how to install the security software on your Raspberry Pi:
Step 1: Update and Upgrade Your Raspberry Pi System
Before installing any software, it’s important to ensure that your Raspberry Pi system is up to date. Open the terminal and run the following commands:
- sudo apt-get update
- sudo apt-get upgrade
This will update the list of available packages and upgrade all installed packages on your system.
Step 2: Install Motion
The Motion software is a popular open-source program that allows you to turn your Raspberry Pi into a security camera. To install Motion, run the following command in the terminal:
sudo apt-get install motion
This command will download and install the Motion software along with its dependencies.
Step 3: Configure Motion
Once Motion is installed, you need to configure it to suit your specific requirements. This includes setting up video quality, adjusting motion detection settings, specifying output directories, and more. To configure Motion, open the configuration file using the following command:
sudo nano /etc/motion/motion.conf
Make the necessary changes to the configuration file and save the changes.
Step 4: Start the Motion Service
After configuring Motion, you can start the Motion service using the following command:
sudo systemctl start motion
This will start the Motion service and begin capturing video from your Raspberry Pi camera.
Congratulations! You have successfully installed the security software on your Raspberry Pi. You can now access the live video stream or view recorded footage using a web browser on any device connected to the same network as your Raspberry Pi.
Choosing and Installing Surveillance Software
When it comes to setting up a security camera using Raspberry Pi, choosing the right surveillance software is crucial. There are several options available, each with its own set of features and capabilities. Here are some factors to consider when making your selection:
1. User-Friendly Interface
Look for surveillance software that provides an intuitive and user-friendly interface. This will make it easier for you to navigate through the different settings and customize your camera’s configuration without any technical expertise.
2. Motion Detection
Motion detection is an essential feature for a security camera. Look for software that can detect motion and trigger recording or alerts. This will ensure that you capture any suspicious activity and receive notifications whenever movement is detected.
3. Remote Access
Having the ability to access your security camera remotely is a great advantage. Look for software that allows you to view the camera feed and control its settings from your smartphone, tablet, or computer. This will enable you to monitor your property even when you’re away.
4. Storage Options
Consider the storage options offered by the surveillance software. Some software supports local storage on an SD card or USB drive, while others offer cloud storage options. Assess your needs and choose software that provides adequate storage capacity for your recording needs.
Installing Surveillance Software
Once you have chosen the surveillance software that meets your requirements, the installation process usually involves the following steps:
Step 1: Download the surveillance software onto your Raspberry Pi by following the instructions provided by the software developer.
Step 2: Install any necessary dependencies or libraries required by the software to ensure proper functionality.
Step 3: Configure the surveillance software by setting up your camera’s parameters, such as resolution, frame rate, motion detection sensitivity, and storage preferences.
Step 4: Test the software by accessing the camera feed and checking if the motion detection and recording features are functioning correctly.
Step 5: Adjust the settings as needed and make any additional configurations to customize the software to your specific requirements.
By carefully selecting and installing surveillance software on your Raspberry Pi, you can create a powerful and reliable security camera system to protect your property and belongings.
FAQ,
What materials do I need to power a Raspberry Pi security camera?
To power a Raspberry Pi security camera, you will need a Raspberry Pi board, a camera module, a microSD card, a power supply, and a compatible case or enclosure to hold all the components.
Can I power a Raspberry Pi security camera using batteries?
Yes, you can power a Raspberry Pi security camera using batteries. However, it is important to choose the appropriate battery capacity and type based on the power requirements of the Raspberry Pi and the camera module. Additionally, you may need to consider a battery charger or power management system to ensure continuous operation.
What are the advantages of using a solar power source for a Raspberry Pi security camera?
Using a solar power source for a Raspberry Pi security camera has several advantages. Firstly, it provides a sustainable and environmentally friendly power solution. Secondly, it allows for remote installation in areas without access to mains power. Lastly, it ensures continuous operation even during power outages or disruptions.


