
If you are looking to enhance the security of your home or business, installing security cameras can be a great option. However, setting up multiple cameras can be a bit challenging if you don’t have the right equipment and knowledge.
In this article, we will guide you on how to put two security cameras on a single cat6 cable, allowing you to efficiently monitor different areas using a single cable.
Step 1: Gather the necessary materials
Before you start the installation process, make sure you have all the necessary materials. You will need two security cameras, a cat6 cable, a network switch with PoE (Power over Ethernet) capability, and an Ethernet cable. Additionally, prepare any tools required for the installation, such as a drill, screws, and a stud finder.
Step 2: Plan the camera placement

Take some time to plan where you want to position your security cameras. Consider the areas you want to monitor and ensure that the cameras have a clear view. Measure the distance between the cameras and the location of the network switch to determine how much cat6 cable you’ll need.
Step 3: Run the cat6 cable
Using a drill and screws, mount the first security camera in the desired location. Then, carefully run the cat6 cable from the camera to the network switch. If needed, make use of a stud finder to locate the studs in the walls, ensuring a secure installation. Repeat this process for the second camera.
Step 4: Connect the cameras to the network switch
Once the cat6 cables are installed, connect one end of each cable to the network switch. Take note of the numbered ports on the switch and connect the cables accordingly. The network switch should provide power to the cameras through PoE, so there’s no need for separate power sources.
Step 5: Test the installation
After the connections are made, verify that the cameras are working properly. Connect the Ethernet cable from the network switch to your computer or monitor, and access the camera’s interface to see the live feed. If everything is functional, congratulations! You have successfully put two security cameras on a single cat6 cable.
In conclusion, with the right equipment and a proper installation process, it is possible to connect two security cameras to a single cat6 cable. By following the steps outlined in this article, you can ensure an effective and efficient surveillance system for your home or business.
Choosing the Right Cat6 Cable
When it comes to setting up a surveillance system with two security cameras on a single Cat6 cable, it’s important to choose the right cable to ensure optimal performance. The Cat6 cable is a popular choice for networking and surveillance applications due to its high bandwidth capacity and reliable data transmission.
Here are a few factors to consider when selecting a Cat6 cable for your security cameras:

Cable Length:
Before purchasing a Cat6 cable, calculate the required length for your installation. Ensure that the cable is long enough to reach both security cameras and the network switch or recorder. It’s advisable to add a little extra length to accommodate any unexpected changes or adjustments during the installation process.
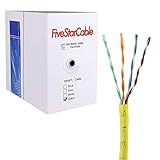
Cable Type:
Cat6 cables come in different types, such as solid or stranded. Solid cables are ideal for permanent installations as they provide better performance over longer distances. On the other hand, stranded cables are more flexible and suitable for situations where the cable may need to be moved or adjusted frequently.
Shielding:

Consider whether you need a shielded or unshielded Cat6 cable. Shielded cables have additional protection against electromagnetic interference, making them ideal for environments with high electrical noise or interference. Unshielded cables, also known as UTP (Unshielded Twisted Pair) cables, are more common and cost-effective for most surveillance installations.
Bandwidth Requirements:
Depending on the resolution and frame rate of your security cameras, you may need to consider the bandwidth requirements of the Cat6 cable. Higher resolution cameras and cameras that require a higher frame rate will require a cable with greater bandwidth capacity to ensure smooth and reliable video transmission. Check the specifications of your cameras to determine the appropriate Cat6 cable bandwidth.
Manufacturer and Certification:
Choose a reputable manufacturer that offers Cat6 cables that are designed and tested to meet industry standards. Look for cables that are UL-listed (Underwriters Laboratories), ETL-verified (Intertek), or compliant with TIA/EIA standards to ensure the cable’s quality and reliability.

By considering these factors and choosing the right Cat6 cable, you can ensure a successful installation of your surveillance system with two security cameras on a single cable. Always consult with a professional if you’re unsure about the cable specifications or installation process to ensure optimal performance and security.
What to Consider When Selecting a Cat6 Cable
When it comes to setting up security cameras, selecting the right Cat6 cable is crucial for ensuring a reliable and efficient connection. Here are some key factors to consider when choosing a Cat6 cable:
Cable Length
The first thing to consider is the length of the cable you need. Measure the distance between your security cameras and the DVR or network switch to determine the appropriate length. It’s always best to choose a cable length that gives you a bit of extra slack to account for any unforeseen obstacles.
Cable Quality
The quality of the Cat6 cable is essential for optimal performance. Look for cables that are certified by reputable organizations like the Telecommunications Industry Association (TIA) or the International Organization for Standardization (ISO). These certifications ensure that the cable meets industry standards and will provide a reliable and high-speed connection.
Additionally, consider the thickness of the cable. Thicker cables tend to have better insulation and are less prone to electromagnetic interference, which can degrade the signal quality.
Shielding
Shielding is another crucial factor to consider when selecting a Cat6 cable. Shielded cables provide extra protection against external interference, such as electrical noise or cross-talk from nearby cables. If you are planning to install the security cameras in a high-interference area, like near power lines or heavy machinery, using shielded cables is highly recommended.
However, if you’re installing the cameras in a low-interference environment, such as an office building, unshielded cables can be sufficient and more cost-effective. Evaluate the surroundings and select the appropriate shielding type accordingly.
Ultimately, selecting the right Cat6 cable for your security camera setup can make a significant difference in performance and reliability. By considering cable length, quality, and shielding, you can ensure a seamless and secure connection for your surveillance system.
Remember, investing in high-quality cables can help future-proof your security camera setup and minimize the risk of signal loss or degradation.
Installing the Cat6 Cable
Installing a Cat6 cable for your security cameras is an important step to ensure a reliable and efficient surveillance system. Here are the steps to follow:
1. Plan the cable route: Before you start installing the cable, carefully plan the route it will take. Consider the distance between the cameras, any obstacles such as walls or ceilings, and the location of your recording device. This will help you determine the length of cable needed.
2. Measure and cut the Cat6 cable: Using a measuring tape, carefully measure the length of cable required for each camera and cut accordingly. Be sure to leave some extra length for maneuverability and any future adjustments.
3. Prepare the cable: Strip about an inch of the outer jacket from each end of the Cat6 cable, using a cable stripper tool. Inside the cable, you will find four pairs of twisted wires. Untwist each pair and separate them.
4. Terminate the cable: Use a punch-down tool to terminate each pair of wires into the appropriate slots of a RJ45 connector. Make sure to follow the T568B wiring standard, which is commonly used for Ethernet connections. Repeat this step for both ends of the cable.
5. Connect the cameras: Once the cables are terminated, connect each camera to one end of the Cat6 cable using a female RJ45 connector. Ensure that the connectors are securely attached.
| Camera | Camera End |
|---|---|
| Camera 1 | Connect to Cat6 cable end 1 |
| Camera 2 | Connect to Cat6 cable end 2 |
6. Test the connection: Once the cameras are connected, test the connection by powering them on and checking if the footage is being transmitted to your recording device. Ensure that the images are clear and the signal is stable.
7. Secure the cables: To ensure a neat and organized installation, secure the Cat6 cables using cable clips or cable ties. This will help protect the cables from damage and maintain a professional appearance.
8. Finalize the setup: Once everything is in place and working correctly, finalize the setup by connecting the other end of the Cat6 cable to your recording device, such as a DVR or NVR. Make sure all connections are secure and test the cameras once again to ensure everything is functioning properly.
Following these steps will help you install a Cat6 cable for your security cameras, ensuring a reliable and efficient surveillance system.
Step-by-Step Guide to Installing a Cat6 Cable
Step 1: Planning and Preparation
Before you begin the installation process, make sure to plan where you want to install the Cat6 cable and locate the areas where you want to connect your security cameras. Measure the distances between the devices to determine the length of cable you’ll need.
Step 2: Gathering the Tools and Materials
Make sure you have all the necessary tools and materials for the installation. You will need a roll of Cat6 cable, RJ45 connectors, a crimping tool, a network tester, and cable clips or adhesive hooks to secure the cable.
Step 3: Preparing the Cat6 Cable
Cut the Cat6 cable to the desired length using a wire cutter, making sure to leave some extra length for ease of installation. Strip about 2 inches of the outer insulation using a cable stripper, exposing the 8 inner wires. Untwist and straighten the wires for termination.
Step 4: Terminating the Cat6 Cable
Next, you’ll need to terminate the Cat6 cable with RJ45 connectors. Arrange the wires according to the T568B wiring scheme, making sure they are in the correct order. Trim any excess wire, leaving about half an inch, and insert the wires into the RJ45 connector. Use a crimping tool to secure the wires in place.
Step 5: Testing the Cable
After terminating the cable, use a network tester to ensure proper connectivity. Connect one end of the cable to the tester and the other end to a known working device. The tester will indicate if there are any wiring issues or connection problems.
Step 6: Cable Installation
Once you’ve tested the cable, it’s time to install it. Use cable clips or adhesive hooks to secure the cable along the desired route. Make sure to run the cable away from any potential sources of interference, such as electrical wires or appliances.
Note: If you’re not comfortable with running the cable yourself, you may want to consider hiring a professional to do it for you.
Step 7: Connecting the Security Cameras
Finally, connect the Cat6 cable to your security cameras. Strip the cable at the desired locations and terminate the wires using the same process as in step 4. Connect the RJ45 connectors to the cameras, making sure the wiring is correct. Test the cameras to ensure they are functioning properly.
Step 8: Cable Management
After connecting the cameras, organize and secure any excess cable using cable management techniques. This will help keep the installation clean and minimize the risk of damage to the cable.
Step 9: Testing the Security Cameras
Once everything is installed and organized, test the security cameras to ensure they are recording and capturing footage correctly. Make any necessary adjustments to improve the camera angles or focus, if needed.
Step 10: Monitoring and Maintenance
Regularly monitor the security cameras to ensure they continue to function properly. Perform any necessary maintenance, such as cleaning the lenses or adjusting the positioning. Maintain a backup of the recorded footage for future reference if necessary.
Connecting the Security Cameras
Once you have your two security cameras and a Cat6 cable ready, you can proceed to connect them. Follow these simple steps to ensure a successful connection:
1. Determine the Camera Placement
Decide where you want to position your security cameras for optimal coverage. Consider the areas you want to monitor and mount the cameras accordingly.
2. Run the Cat6 Cable
Measure and cut the Cat6 cable according to the distance between your cameras and the recording device. Make sure to leave some extra cable for flexibility.
Run the Cat6 cable from the first camera to the location where you plan to mount the second camera. Avoid obstacles and sharp edges that could potentially damage the cable.
3. Strip the Cable Ends
Using a cable stripper or a sharp knife, carefully strip about an inch of the outer insulation from both ends of the Cat6 cable.
Inside the cable, you will find four pairs of twisted wires. Untwist the pairs and separate them.
4. Attach the Connectors
Take an RJ45 connector and insert each pair of wires into the appropriate slots. Ensure that the wires are fully inserted and making good contact with the connector.
Repeat this process for the other end of the Cat6 cable.
5. Connect the Cameras
Connect one end of the Cat6 cable to the first camera, ensuring a secure connection. You may need to use a crimping tool or a specialized camera connector to secure the cable.
Finally, connect the other end of the Cat6 cable to the second camera in the same manner.
Note: Some security cameras may require additional power to function. If this is the case, make sure to connect the power cables to each camera as per the manufacturer’s instructions.
6. Test the Connection
Once all the connections are in place, test the cameras to ensure they are working properly. Use the security camera software or app to view the live feeds and make any necessary adjustments.
Remember to follow the specific instructions provided by the manufacturer of your security cameras for optimal performance and reliability.
How to Connect the Cameras to the Cat6 Cable
Connecting security cameras to a Cat6 cable is a straightforward process that requires a few simple steps. By following these instructions, you will be able to effectively connect two security cameras to a single Cat6 cable.
Step 1: Prepare the Materials
Before you begin, make sure you have the necessary materials at hand:
| 1. | Two security cameras |
| 2. | One Cat6 cable |
| 3. | BNC connectors |
| 4. | RJ45 connectors |
| 5. | Crimping tool |
| 6. | Wire stripper |
Step 2: Prepare the Cat6 Cable
Start by stripping the outer jacket of the Cat6 cable, exposing the four pairs of twisted wires inside. Use a wire stripper to carefully remove the jacket, making sure not to damage the inner wires.
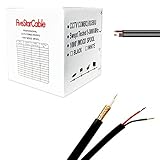
Step 3: Connect the BNC Connectors
Take each pair of twisted wires and attach them to the BNC connectors. Ensure that each wire is securely connected, and use the crimping tool to crimp the connectors onto the wires.
Step 4: Connect the RJ45 Connectors
Attach the RJ45 connectors to the opposite ends of the Cat6 cable, making sure to match the appropriate wires from the BNC connectors to the corresponding pins on the RJ45 connectors. Once again, use the crimping tool to crimp the connectors onto the wires.
Step 5: Testing and Installation
With the connectors in place, it’s time to test the connection. Plug the RJ45 connectors into the cameras, and ensure that the video feed is being transmitted properly. If everything is working correctly, you can then install the cameras at their desired locations.
By following these steps, you can easily connect two security cameras to a single Cat6 cable. This allows for a convenient and organized setup while ensuring a reliable and high-quality video surveillance system.
Testing the Connection
After connecting the security cameras to the single Cat6 cable, it is important to test the connection to ensure that everything is working properly. Follow the steps below to test the connection:
Step 1: Power On the Security Cameras
Make sure that both security cameras are properly powered on. Check the camera’s power indicators to make sure they are receiving power.
Step 2: Connect the Cat6 Cable to the Recording Device
Connect the Cat6 cable to the recording device or the network switch to which the recording device is connected. Ensure that the cable is securely plugged in.
Step 3: Log into the Recording Device
Open a web browser and enter the IP address of the recording device in the address bar. You will need to log in to the recording device using the correct credentials.
Step 4: Check the Camera Feed
Once logged in, navigate to the camera settings or live view section of the recording device’s interface. Look for the connected cameras and check if the camera feeds are being displayed correctly.
Step 5: Test Camera Functions
Check if all camera functions are working properly, such as pan, tilt, zoom, and motion detection. Make sure to test these functions for each of the connected cameras.
If any issues are encountered during the testing process, double-check all the connections and settings. Ensure that the Cat6 cable is not damaged and is properly connected to both the security cameras and the recording device. If the issue persists, refer to the user manuals of the cameras and the recording device for troubleshooting.
| Issue | Possible Solution |
|---|---|
| No camera feed displayed | Check camera power supply and connections.
Ensure correct IP address and login credentials. Verify network settings. |
| Camera feed freezing or lagging | Check network bandwidth and stability.
Reduce camera resolution or frame rate if necessary. Upgrade network equipment if needed. |
| Camera functions not working | Verify camera compatibility with the recording device.
Check camera firmware for updates. Reset camera settings to default if necessary. |
Methods to Test the Security Camera Connection
Ensuring a reliable and secure connection for your security cameras is crucial for maintaining the effectiveness of your surveillance system. Here are a few methods to test the connection of your security cameras:
1. Ping Test
The ping test is a simple method to check if your security cameras are connected to the network. It involves sending a small packet of data to the camera’s IP address and waiting for a response. To perform a ping test, open the command prompt on your computer and type:
ping [camera IP address]
If you receive replies with low latency and no packet loss, it indicates a successful connection.
2. Camera Viewing Software
Many security camera systems come with viewing software that allows you to monitor your cameras. Open the software and check if the cameras are connected and streaming video. A stable and clear video feed indicates a good connection.
Additionally, ensure that the software is updated to the latest version to avoid any compatibility issues.
3. Network Monitoring Tools
You can utilize network monitoring tools to provide more detailed insights into the connection status of your security cameras. These tools can monitor the bandwidth, packet loss, and latency of your camera’s connection. By analyzing the data provided by these tools, you can identify any abnormalities or potential issues.
Examples of network monitoring tools include PRTG Network Monitor, SolarWinds Network Performance Monitor, and Nagios XI.
It is recommended to regularly test the connection of your security cameras to ensure optimal performance and 24/7 surveillance coverage. By using these methods, you can identify and resolve any connection issues promptly, thus maintaining the security and reliability of your surveillance system.
FAQ,
Can I connect two security cameras to a single cat6 cable?
Yes, it is possible to connect two security cameras to a single cat6 cable. You will need to use a PoE (Power over Ethernet) switch or injector to provide power and data transmission to both cameras through the cat6 cable.
What is a PoE switch?
A PoE (Power over Ethernet) switch is a networking device that allows you to connect and power multiple devices, such as security cameras, over a single Ethernet cable. It eliminates the need for separate power cables for each device, simplifying the installation process.
What is the maximum distance for connecting two security cameras to a single cat6 cable?
The maximum recommended distance for connecting two security cameras to a single cat6 cable is around 330 feet (100 meters). Beyond this distance, the signal strength may degrade, and you may experience issues with data transmission and power delivery.


