
As home security becomes increasingly important, many homeowners are exploring ways to upgrade their traditional doorbell systems to enhance the safety of their property. One popular option is to replace the existing doorbell button with a security camera, which allows you to see and communicate with anyone at your front door, whether you’re home or not.
Replacing a doorbell button with a security camera may sound like a complex task, but with the right tools and a little patience, it can be a straightforward DIY project. In this article, we’ll guide you through the step-by-step process to help you successfully install a security camera in place of your doorbell button.
Step 1: Gather the necessary materials and tools.
Before you get started, make sure you have all the materials and tools you’ll need for the installation. This typically includes a wireless security camera that is compatible with your existing doorbell system, a screwdriver, wire strippers, electrical tape, and a power drill.
Keep in mind that the specific tools and materials required may vary depending on the make and model of your security camera, so it’s always best to consult the manufacturer’s instructions before proceeding.
Step 2: Turn off the power.
Prior to working with any electrical components, it is essential to turn off the power to the doorbell circuit. Locate the circuit breaker panel in your home and identify the correct circuit breaker. Flip the switch to the “Off” position to ensure that no power is flowing to the doorbell.
Note: It is crucial to follow proper safety precautions when working with electrical systems. If you are unsure about any part of the process, it is advisable to consult a professional electrician.
Step 3: Remove the existing doorbell button.
Using a screwdriver, carefully remove the screws holding the existing doorbell button in place. Once you have removed the screws, gently pull the doorbell button away from the wall to expose the wiring behind it. Take note of how the wires are connected to the button.

Step-by-Step Guide: Replacing a Doorbell Button with a Security Camera
Step 1: Plan the Installation
Before you begin, carefully plan where you want to install the security camera as a replacement for the doorbell button. Consider factors such as the camera’s field of view, connectivity requirements, and power source.
Step 2: Remove the Existing Doorbell Button
Using a screwdriver, gently remove the screws securing the existing doorbell button to the wall. Carefully disconnect the wires connected to the button and remove it from the wall.
Step 3: Mount the Security Camera
Follow the camera manufacturer’s instructions to mount the security camera in the desired location. Use screws or adhesive to secure the camera to the wall or door frame, ensuring it is level and stable.
Step 4: Connect the Camera to Power
Depending on the camera model, connect it to a power source. This could involve plugging it into an electrical outlet or connecting it to a power adapter. Ensure the camera is receiving power and functioning correctly.
Step 5: Connect the Camera to the Wi-Fi Network
Follow the camera manufacturer’s instructions to connect the camera to your Wi-Fi network. This may involve using a mobile app or a web interface to enter your network credentials and establish a connection.

Step 6: Test the Camera
Once the camera is connected to power and Wi-Fi, test its functionality. Make sure it is capturing clear and crisp video, and that you can access the live feed from your smartphone or computer.
Step 7: Set Up Doorbell Notifications
Configure the camera to send notifications or alerts when someone presses the virtual doorbell button. This will help ensure you don’t miss any visitors or deliveries.
Step 8: Securely Attach the Camera’s Faceplate

Many security cameras come with detachable faceplates that can be used to cover the camera’s internal components. Attach the faceplate to make the camera blend in with its surroundings and help protect it from weather or tampering.
Step 9: Monitor and Maintain the Camera
Regularly check the camera’s functionality and ensure it is properly maintained. Keep the lens clean from dust and debris, regularly update the camera’s firmware, and make any necessary adjustments to optimize its performance.
By following these step-by-step instructions, you can easily replace a doorbell button with a security camera and enhance the security and convenience of your home.
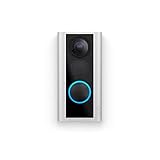
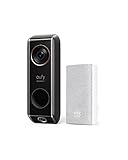
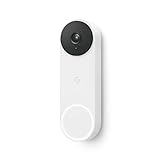
Choosing the Right Security Camera for Your Needs
When it comes to replacing a doorbell button with a security camera, choosing the right one is crucial. There are various factors to consider to ensure you select a camera that fits your needs and provides reliable surveillance. Here are some important considerations to keep in mind:
1. Indoor or Outdoor?
The first step is to determine whether you need an indoor or outdoor security camera. If you want to monitor the area outside your front door, an outdoor camera is necessary to withstand extreme weather conditions. Conversely, an indoor camera might be more suitable for monitoring the inside of your home.
2. Wired or Wireless?
You also need to decide whether you prefer a wired or wireless security camera. Wired cameras are connected directly to a power source and provide a stable connection, but may require professional installation. Wireless cameras, on the other hand, are easier to install and can be placed anywhere within range of your Wi-Fi network, but may experience signal interference.
It’s important to note that wireless cameras still require a power source, so keep this in mind when planning camera placement.
3. Resolution and Field of View
The resolution and field of view (FOV) are important factors to consider. Higher resolution cameras will provide clearer and more detailed footage, but may also require more storage space. Additionally, a wider FOV allows for a larger area to be covered by the camera.
Consider the specific areas you want to monitor and choose a camera with an appropriate resolution and FOV to ensure optimal coverage and image quality.
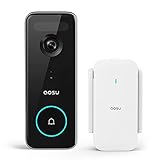
Overall, selecting the right security camera for your needs requires careful consideration of factors such as location, connectivity, and specifications. By understanding your requirements and doing thorough research, you can find a camera that provides the desired surveillance and peace of mind.
Gathering the Necessary Tools and Equipment
Before you begin replacing your doorbell button with a security camera, you’ll need to gather the necessary tools and equipment. Here are the items you’ll need:
- A security camera with a doorbell function
- A screwdriver (usually a Phillips head)
- An electrical tester
- Wire nuts
- A power drill (if necessary)
- A ladder (if necessary)
Make sure you have these tools and equipment on hand before you start the installation process. It’s important to have the right tools to ensure a smooth and successful replacement of your doorbell button with a security camera. Remember, safety should always be a priority, so if you need a ladder to access your doorbell, make sure it is stable and secure before you climb up.
Removing the Old Doorbell Button
Before you can install the new security camera doorbell, you will need to remove the old doorbell button. Follow these steps to safely remove the old button:
| Step | Description |
| 1 | Locate the doorbell button on the exterior of your home. It is typically found near the entrance. |
| 2 | Use a screwdriver to remove the screws holding the button plate in place. Be careful not to damage the surrounding area. |
| 3 | Once the screws are removed, gently pull the button plate away from the wall, exposing the wires behind it. |
| 4 | Take note of the wires’ configuration. There will typically be two wires connected to the button plate. |
| 5 | Using a pair of pliers, carefully disconnect the wires from the back of the button plate. |
| 6 | After the wires are disconnected, remove the old button plate from the wall. |
Now that the old doorbell button has been safely removed, you are ready to proceed with the installation of the new security camera doorbell. Refer to the manufacturer’s instructions for the specific installation steps.
Installing the Security Camera to Replace the Button
Replacing a doorbell button with a security camera is a great way to add an extra layer of security to your home. Here are the steps to install the security camera:
1. Choose the Right Camera
Before you begin the installation process, it’s important to choose a security camera that is specifically designed for doorbell replacement. Look for a camera that has a wide-angle lens, motion detection, night vision, and two-way audio capabilities.
2. Turn off the Power
Before starting any electrical work, make sure to turn off the power to the doorbell circuit at the breaker box. This will prevent any accidents or damage to the security camera during the installation process.
3. Remove the Old Doorbell Button
Once the power is turned off, carefully remove the old doorbell button from the wall. You may need to unscrew the button or gently pry it off with a flathead screwdriver. Be careful not to damage the wiring behind the button.
4. Disconnect the Wires
After removing the old button, disconnect the attached wires. Take note of which wire is connected to the positive terminal and which one is connected to the negative terminal. This will be important when connecting the wires to the security camera.
5. Mount the Security Camera
Now it’s time to mount the security camera in the same location as the old doorbell button. Use the included screws and any necessary brackets to securely attach the camera to the wall or door frame. Make sure the camera is level and facing the desired direction.
6. Connect the Wires to the Camera
With the camera securely mounted, connect the wires to the corresponding terminals on the camera. The positive wire should be connected to the positive terminal, and the negative wire should be connected to the negative terminal. Follow the manufacturer’s instructions for proper wiring.
7. Test the Camera
After the camera is properly wired, turn the power back on at the breaker box and test the camera. Make sure the camera is functioning correctly and that you can access the live video feed from your smartphone or computer.
With the security camera successfully installed, you now have a doorbell button replacement that offers not only the convenience of answering the door remotely but also the added security of monitoring and recording any activity at your front door.
Wiring and Connecting the Security Camera
Once you have chosen and purchased a suitable security camera to replace your doorbell button, it’s time to proceed with the wiring and connection process. Follow these steps to successfully install your new security camera:
1. Turn off the power: Before starting any electrical work, make sure to turn off the power to the doorbell circuit from the main electrical panel to avoid any potential risks.
2. Remove the existing doorbell button: Carefully unscrew the existing doorbell button from the wall using a screwdriver. Disconnect the wires attached to the button and remove it entirely.
3. Prepare the security camera: Depending on the model you have chosen, the security camera may need to be prepared by connecting it to a power source and configuring its settings. Consult the camera’s manual for specific instructions.
4. Identify the wires: Locate the two wires that were connected to the doorbell button. Typically, these wires are color-coded, with one being neutral (usually white or black) and the other being the positive wire (usually red or blue).
5. Connect the wires: Connect the positive wire from the security camera to the positive wire from the doorbell button, and connect the neutral wire from the camera to the neutral wire from the button. Ensure that the connections are secure and insulated using electrical tape.
6. Mount the security camera: Choose a suitable location near your front door to mount the security camera. Use screws and a drill to secure the camera in place, making sure that it is positioned correctly for optimal coverage.
7. Adjust the camera’s angle: Once the camera is mounted, adjust its angle to ensure it captures the desired area. Most security cameras allow for adjustments in multiple directions, so take the time to find the perfect angle.
8. Test the camera: Before wrapping up the installation, test the camera to ensure it is functioning correctly. Use a smartphone or computer to view the live feed from the camera and verify that the video and audio are clear.
9. Restore power: Once you are satisfied with the camera’s performance, restore power to the doorbell circuit by flipping the corresponding switch in the main electrical panel.
10. Enjoy your new security camera: With the camera successfully wired and connected, you can now enjoy the added security and convenience it brings to your home.
Setting Up and Configuring the Camera’s Features
Once you have replaced the doorbell button with the security camera, it is important to properly set up and configure its features to ensure optimal performance and functionality. Follow these steps to get started:
1. Power On and Connect to Wi-Fi
First, power on the camera using the supplied power adapter or by connecting it to an existing doorbell power source. Wait for the camera to boot up and then connect it to your Wi-Fi network. Refer to the camera’s user manual for detailed instructions on how to connect to Wi-Fi.
2. Install the Manufacturer’s App
Next, install the manufacturer’s app on your smartphone or tablet. You can find the app in the app store or by scanning the QR code provided in the camera’s user manual. Once installed, open the app and create an account or log in if you already have one.
3. Add the Camera to the App
After logging in to the app, follow the on-screen instructions to add the camera to your account. This usually involves scanning a QR code on the camera or manually entering the camera’s serial number. Make sure to grant the necessary permissions for the app to access the camera’s features.
4. Configure Camera Settings
Once the camera is successfully added to the app, you can start configuring its settings. This includes adjusting the camera’s resolution, enabling motion detection, setting up notifications, and configuring any advanced features such as night vision or two-way audio. Take your time to explore the app’s settings and customize them according to your needs.
5. Test the Camera
After configuring the camera settings, it is important to test its functionality. Check if the camera captures clear and high-quality video, if the motion detection is working properly, and if you receive notifications when someone approaches your door. Make any necessary adjustments to the settings to achieve the desired performance.
| Tip: | Consider adjusting the camera’s field of view and angle to ensure it covers the desired area effectively. |
|---|
By following these steps, you can successfully set up and configure the features of your newly installed security camera. Enjoy the added peace of mind and security that comes with monitoring your doorstep remotely.
Final Steps: Testing and Troubleshooting
After installing the security camera to replace the doorbell button, it’s important to test and troubleshoot to ensure everything is functioning properly. Follow the steps below for a successful setup:
1. Power On the Camera
Make sure the camera is properly powered on by plugging it in or inserting the batteries. Check for any indicator lights or sounds that confirm it is receiving power.
2. Connect to the App
Download and install the manufacturer’s app on your smartphone or tablet. Open the app and follow the instructions to connect the camera to your home Wi-Fi network.
3. Check the Live Feed
Once the camera is connected to the app, access the live feed to verify that the camera is capturing and streaming video properly. Ensure that the camera’s field of view covers the desired area.
4. Test the Doorbell Function
Press the virtual doorbell button in the app or use the physical doorbell button if it’s still accessible. Check if you receive a notification or a doorbell sound on your smartphone or tablet. Also, verify that the camera records a video clip every time the doorbell is pressed.
5. Adjust Settings
Explore the app’s settings to customize alerts, adjust motion detection sensitivity, and enable/disable any additional features or functions. Ensure that all settings are configured according to your preferences.
6. Troubleshoot Issues
If you encounter any issues during testing, consult the camera’s user manual or visit the manufacturer’s website for troubleshooting guidance. Common problems may include connectivity issues, poor video quality, or audio problems.
By following these final steps, you will be able to ensure that your doorbell button replacement with a security camera is successfully implemented, providing you with an enhanced security solution for your home.
FAQ,
Can I replace my doorbell button with a security camera?
Yes, it is possible to replace a doorbell button with a security camera. By doing so, you can have a doorbell system that not only alerts you when someone is at your door but also allows you to see and communicate with the person through your smartphone or computer.
What are the benefits of replacing a doorbell button with a security camera?
There are several benefits to replacing a doorbell button with a security camera. Firstly, you can have a visual of who is at your door, which can enhance your home security. Secondly, you can communicate with the person at your door even when you are not at home, which can be convenient if you have deliveries or visitors. Lastly, you can have a record of the people who have come to your door, which can be helpful in case of any incidents or suspicious activities.
Are there any drawbacks to replacing a doorbell button with a security camera?
While replacing a doorbell button with a security camera can have numerous benefits, there are a few drawbacks to consider. Firstly, the initial cost can be higher compared to simply replacing a doorbell button. Secondly, you will need a stable internet connection for the camera to work effectively, so if your internet goes down, you may not be able to access the camera’s features. Lastly, some security cameras may have limited recording capabilities or may require a subscription for cloud storage, which can add to the overall cost.


