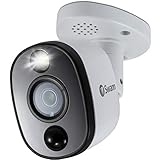
Swann security cameras are a popular choice for those looking to enhance the security of their homes or businesses. With their high-quality video and easy-to-use features, it’s no wonder why so many people trust Swann cameras to keep their properties safe.
One of the most common questions users have is how to save files from Swann security cameras. Whether you want to keep a record of an important event or simply want to review footage at a later time, saving files from your Swann camera is a straightforward process.
To save a file from your Swann security camera, you’ll need to follow a few simple steps. First, locate the file you want to save. This could be a recording of an event or a snapshot taken by your camera. Once you’ve found the file, select it and choose the option to save it. Depending on the model of your Swann camera, you may have the option to save the file locally on your device or to a cloud storage service.
If you choose to save the file locally, make sure you have enough storage space on your device. Swann security camera files can be quite large, especially if you’re recording high-resolution video. It’s also a good idea to name the file something descriptive, so you can easily find it later.
If you prefer to save the file to a cloud storage service, make sure you have an account set up with the provider of your choice. Most Swann cameras are compatible with popular cloud storage services such as Dropbox or Google Drive. Simply select the option to save the file to the cloud and follow the prompts to log in to your account and choose the destination folder.

Once you’ve saved the file from your Swann security camera, you can access it at any time for future reference. Whether you’re reviewing footage for security purposes or simply want to relive a special moment, having easy access to your saved files is a key benefit of using Swann security cameras.
By following these simple steps, you can easily save files from your Swann security cameras and ensure that you have a record of important events. Whether you choose to save the files locally on your device or in the cloud, the process is quick and straightforward, allowing you to focus on what matters most – keeping your property safe.
Choosing the Right Swann Security Camera
Swann security cameras are an excellent choice for protecting your home or business. With their range of high-quality, reliable cameras, you can find the perfect option to suit your specific security needs. Here are some factors to consider when choosing the right Swann security camera:
Type of Camera: Swann offers a variety of camera types, including bullet, dome, and PTZ (pan-tilt-zoom) cameras. Bullet cameras are best for outdoor use, dome cameras are discreet and versatile, and PTZ cameras are ideal for large areas.
Resolution: The resolution of your camera determines the quality of the image. Swann cameras come in various resolutions, with higher resolutions providing clearer and more detailed images.
Field of View: Consider the field of view you need for your surveillance needs. Some Swann cameras have a wide-angle lens, allowing them to cover a larger area, while others have a narrower field of view for more focused monitoring.
Night Vision: If you need surveillance during nighttime hours, choose a Swann camera with excellent night vision capabilities. Look for cameras with infrared LEDs, as they provide clear images even in complete darkness.
Indoor or Outdoor: Determine whether you need a camera for indoor or outdoor use. Swann offers weatherproof cameras designed to withstand harsh weather conditions, ensuring reliable performance even in challenging environments.
Connectivity: Consider your connectivity options. Swann cameras can be wired or wireless, so choose the one that suits your needs and provides a stable connection for your security system.
Storage: Swann cameras use various storage options, including DVR (Digital Video Recorder) or NVR (Network Video Recorder) systems. Consider your recording and storage needs to choose the right Swann camera and storage solution.

Additional Features: Finally, consider any additional features you may need, such as motion detection, two-way audio, or remote access. Swann cameras offer a range of advanced features to enhance your security system.
By considering these factors, you can choose the right Swann security camera that meets your specific requirements, providing reliable and effective surveillance for your home or business.
Understanding the File Saving Process
When it comes to saving files from Swann security cameras, it’s important to understand the process to ensure that you can access and utilize the footage effectively. The file saving process involves a few key steps that we will outline below:
| Step | Description |
|---|---|
| 1 | Locating the footage |
| 2 | Selecting the desired files |
| 3 | Choosing a save location |
| 4 | Confirming the save |
Step 1: Locating the footage
The first step in saving a file from your Swann security camera is to locate the specific footage that you want to save. This can usually be done through the camera’s user interface or software provided by Swann. Once you have accessed the footage, you can proceed to the next step.

Step 2: Selecting the desired files
After locating the footage, you will need to select the specific files that you want to save. This could include individual video clips or a range of footage. Most Swann cameras offer a selection tool or option to choose the desired files for saving.
Step 3: Choosing a save location
Once you have selected the files, the next step is to choose a save location for the footage. This could be a specific folder on your computer, an external storage device, or a cloud storage service. Make sure that you have enough storage space available for the selected files.
Step 4: Confirming the save

Before finalizing the saving process, it’s important to confirm the selected files and save location. Double-check that you have chosen the correct files and that the save location is accessible and secure. Once you are certain, proceed with the save option provided by the Swann camera software or interface.
By following these steps, you can successfully save files from your Swann security cameras and have easy access to the footage whenever you need it. Remember to regularly back up your saved files to prevent any data loss and to ensure the safety of your surveillance footage.
Setting up the Swann Security System
Installing and setting up the Swann Security System is a straightforward process that can be completed in a few easy steps. By following the instructions below, you’ll have your system up and running in no time.
Step 1: Unboxing and Placement
Begin by unboxing your Swann Security System and checking that all the necessary components are included. This typically includes the DVR/NVR unit, cameras, power supply, cables, and mounting hardware.
Next, choose the optimal locations for your cameras. Consider areas that provide a wide field of view and cover points of interest, such as entrances and high-traffic areas. The cameras should be placed within reach of power outlets and have a clear line of sight to the DVR/NVR unit.

Step 2: Connecting the Cameras
Connect each camera to the DVR/NVR unit using the provided cables. Typically, this involves connecting the BNC connectors on each end of the cable–one to the camera and the other to the DVR/NVR. Power on the cameras using the included power supply.
Ensure that the cables are securely connected and that the cameras are receiving power. You may need to adjust the camera positions and angles for optimal coverage. Consult the user manual for specific instructions on camera setup.
Step 3: Connecting to a Monitor
Next, connect the DVR/NVR unit to a monitor or TV using an HDMI or VGA cable. This will enable you to access the system’s interface and configure settings. Power on the monitor and select the appropriate input source.
If prompted, follow the on-screen instructions to complete the initial setup and configure basic settings such as date and time.
Step 4: Network Setup
If you wish to access your Swann Security System remotely or receive alerts on your mobile device, it’s essential to connect the DVR/NVR unit to your local network. Connect an Ethernet cable from the unit to your router or modem.

Access the system’s interface using the monitor and navigate to the network settings. Configure the network settings according to your network’s requirements, including assigning an IP address and port forwarding if necessary. Consult the user manual for detailed instructions on network setup.
Step 5: Configuring Recording Settings
Access the system’s interface and navigate to the recording settings. Here, you can configure parameters such as recording mode (continuous, motion detection, or scheduled), recording quality, and storage allocation.
Additionally, you can set up email alerts, push notifications, and mobile access if desired. It’s recommended to create a dedicated storage location for the recorded footage, such as an external hard drive or a network-attached storage (NAS) device.
Note: It’s crucial to regularly check and update the system’s firmware to ensure optimal performance and security.
With these steps completed, your Swann Security System should be set up and ready to go. Remember to test the system’s functionality by reviewing recorded footage and adjusting settings if needed. Enjoy the peace of mind that comes with having a reliable and robust security system in place.
Connecting the Swann Security Camera to a Device
Connecting your Swann security camera to a device, such as a computer or smartphone, is an essential step to saving the footage. By following these simple steps, you can easily connect your camera and start saving the files.
Step 1: Powering the Camera
Before you can connect the camera to a device, ensure that it is properly powered. Use the included power adapter to connect the camera to a power source.
Step 2: Connecting to Wi-Fi
Most Swann security cameras support Wi-Fi connectivity, allowing you to remotely access and save footage. To connect to Wi-Fi, follow the instructions provided with your camera or refer to the user manual.
Step 3: Downloading the Swann App
To access the camera’s footage on your device, download the Swann app from the App Store or Google Play Store, depending on your device’s operating system. Install the app and create an account if necessary.
Step 4: Adding the Camera to the App
Launch the Swann app on your device and log in to your account. Follow the on-screen instructions to add the camera to the app. This may involve scanning a QR code or entering the camera’s unique identification number.
Step 5: Accessing the Camera
Once the camera is added to the app, you can now access the live feed and saved footage. Use the app’s interface to navigate through the camera’s settings, view the live feed, and save any important footage to your device.
By following these steps, you can easily connect your Swann security camera to a device and start saving the footage for future reference.
Accessing the Swann Security Camera’s Interface
Accessing the interface of your Swann security camera is a straightforward and easy process. To get started, make sure that your camera is properly connected to the power source and to your network.
Step 1: Establishing a Connection
Ensure that your computer or mobile device is connected to the same network as the Swann security camera. This can be done by connecting to the Wi-Fi network provided by the camera or by making sure both devices are connected to the same router.
Step 2: Launching the Web Interface
Open your preferred web browser on your computer or mobile device and enter the IP address of the Swann security camera. The IP address can usually be found on the camera or in the documentation provided with it.
Step 3: Logging In
Once you have entered the IP address, you will be directed to the login page of the camera’s interface. Enter the default username and password provided by Swann or any custom username and password you have set up. If you can’t remember the login credentials, refer to the camera’s documentation or contact Swann support for assistance.
Step 4: Navigating the Interface
After logging in, you will have access to the Swann security camera’s interface. From here, you can view live video feeds, adjust camera settings, access recorded footage, and perform various other tasks depending on the features of your specific camera model. The interface is designed to be user-friendly and intuitive, so you should have no trouble finding the desired options.
It is important to note that the specific steps may vary slightly depending on the model and firmware version of your Swann security camera. Always refer to the camera’s documentation or contact Swann support if you encounter any issues or need further guidance.
Configuring the File Saving Settings
After setting up your Swann security cameras, you’ll want to configure the file saving settings to ensure that your footage is properly stored and accessible. The file saving settings allow you to specify where the video files should be saved and what format they should be in.
1. Access the Camera Settings
To configure the file saving settings, start by accessing the camera settings. This can usually be done through the camera’s web interface or a dedicated software provided by Swann.
2. Navigate to the File Saving Settings
Once you’re in the camera settings, navigate to the file saving settings section. This section might be named differently depending on the camera model and software version, but it should be easily distinguishable.
3. Specify the File Saving Location
In the file saving settings, you’ll have the option to specify the location where the video files should be saved. Choose a folder on your computer or network storage device where you want to store the footage. Make sure that the selected location has enough space to accommodate the video files.
4. Choose the File Format
Next, you’ll need to choose the file format for the saved video files. Swann security cameras typically support various file formats, such as AVI or MP4. Consider the compatibility of the file format with the media players or video editing software you plan to use.
5. Set the File Saving Schedule
If you want to save storage space or only record footage during specific hours, set the file saving schedule. Most Swann security cameras allow you to configure a schedule for when the cameras should start and stop recording. This can be useful if you only need to capture video during certain time periods, such as when you’re away from home.
6. Save the Settings
After configuring the file saving settings, make sure to save the changes. The camera settings interface should provide a “Save” or “Apply” button that allows you to save the updated settings.
By properly configuring the file saving settings, you can ensure that your Swann security cameras effectively store the recorded footage in the desired location and format. This makes it easier for you to access and review the footage whenever necessary, providing you with peace of mind and added security.
Starting and Stopping the File Saving
To save a file from a Swann security camera, you need to start and stop the file saving process. Here are the steps to follow:
1. Access the Swann camera’s settings by logging in to your camera’s web interface or using the mobile app.
2. Navigate to the “Recording” or “Storage” section in the camera’s settings menu.
3. Look for the option to enable or start recording. This might be labeled as “Enable Recording” or “Start Recording”. Toggle the switch or checkbox to turn on the file saving feature.
4. Specify the location where you want the files to be saved. This can be a local storage device, such as an internal or external hard drive, or a cloud storage service if supported by your camera.
5. Set the duration or schedule for the recording. You can choose to record continuously or set up specific time frames during which the camera should capture footage.
6. Save the changes and exit the settings menu. The camera will now start saving the video files based on your settings.
To stop the file saving process:
1. Access the camera’s settings again.
2. Navigate to the “Recording” or “Storage” section.
3. Find the option that controls the file saving and disable or stop the recording. This could be labeled as “Disable Recording” or “Stop Recording”. Toggle the switch or checkbox to turn off the file saving feature.
4. Save the changes and exit the settings menu. The camera will then stop saving any new video files.
| Start Saving | Stop Saving |
|---|---|
| 1. Access camera settings. | 1. Access camera settings. |
| 2. Go to “Recording” or “Storage” section. | 2. Go to “Recording” or “Storage” section. |
| 3. Enable or start recording. | 3. Disable or stop recording. |
| 4. Specify save location. | 4. Save changes. |
| 5. Set recording duration or schedule. | 5. Save changes. |
| 6. Save changes and exit settings. | 6. Stop saving new files. |
By following these steps, you can easily start and stop the file saving process on your Swann security camera to capture and store the footage as needed.
Reviewing and Managing Saved Files
Once you have successfully saved the files from your Swann security cameras, you may want to review and manage them to ensure maximum security and effectiveness. Here are some steps to help you in this process:
1. Organize the Saved Files:
It’s essential to organize and categorize the saved files for easy access and retrieval. Create folders or directories based on factors such as date, time, camera location, or specific events.
2. Review the Files:
Regularly reviewing the saved files can help you identify any suspicious activities or security breaches. Use a media player compatible with the file format to review the footage and ensure it’s clear and of good quality.
| File Format | Recommended Media Player |
|---|---|
| AVI | VLC Media Player |
| MP4 | Windows Media Player, QuickTime Player |
3. Backup the Files:
To prevent data loss, it’s crucial to regularly backup the saved files. You can use external hard drives, cloud storage services, or network-attached storage (NAS) to create backups. Make sure to follow a consistent backup schedule to keep your files secure.
4. Delete Unnecessary Files:
To free up storage space and maintain optimal system performance, delete any unnecessary files or footage that are no longer required. Be cautious when deleting files, as they may be evidence or important for future reference.
By following these steps and implementing a well-organized file management system, you can effectively review and manage the saved files from your Swann security cameras, ensuring the safety and security of your property and loved ones.
Transferring Files from the Swann Security Camera
If you have a Swann security camera system and want to save the recorded video footage or pictures, you can easily transfer the files to your computer or other storage devices. Below are the steps to do so:
- Make sure your Swann security camera system is connected to a power source and properly set up.
- Access the camera system’s user interface by opening the Swann software or logging into the web portal.
- Select the camera from which you want to transfer files. This will usually be displayed as a thumbnail or a list of camera names.
- In the camera’s interface, navigate to the files section or the storage settings. This may vary depending on the Swann camera model and software version.
- Select the files you want to transfer. You can typically choose specific files, a range of files, or select all files for transfer.
- Choose the destination where you want to save the files. You can select a folder on your computer, an external hard drive, or any other connected storage device.
- Click on the “Transfer” or “Download” button to start the file transfer process. The duration of the transfer will depend on the size and number of files being transferred.
- Once the transfer is complete, verify that the files have been successfully saved to the chosen destination.
By following these steps, you can easily transfer files from your Swann security camera to your preferred storage device. This allows you to keep a backup of the recorded footage or pictures for future reference or evidence, if needed.
Troubleshooting Common File Saving Issues
In order to save files from your Swann security cameras, you may encounter a few common issues. Here are some troubleshooting steps to overcome these problems:
1. Insufficient Storage Space
If you are unable to save files from your Swann security cameras, one possible reason could be that your storage space is full. Check the available storage on your device and delete any unwanted files or free up space to make room for new recordings.
2. Incorrect File Path
Make sure that you are saving the files to the correct file path or directory. Double-check the file path settings in your Swann security camera software and ensure that it matches the desired location where you want to save the files.
3. File Permissions
Check if you have the necessary file permissions to save files to the specified location. Make sure that you have the appropriate write permissions for the directory where you want to save the files. If necessary, adjust the file permissions to allow saving files.
4. System Compatibility
Ensure that your system is compatible with the file format and specifications of your Swann security camera’s file output. Check the user manual or contact Swann support to verify the compatibility requirements and make any necessary adjustments to your system.
5. Software Updates
Keep your Swann security camera software up to date. Regularly check for software updates or firmware upgrades provided by Swann and install them if available. The latest updates may include bug fixes and improvements that can help resolve any file saving issues.
| Issue | Troubleshooting Steps |
|---|---|
| Insufficient Storage Space | Check available storage and free up space if needed |
| Incorrect File Path | Verify and set the correct file path |
| File Permissions | Check and adjust file permissions if necessary |
| System Compatibility | Ensure system compatibility with file format and specifications |
| Software Updates | Keep software up to date with the latest updates |
By following these troubleshooting steps, you should be able to resolve most file saving issues with your Swann security cameras. If you continue to experience problems, it is recommended to reach out to Swann support for further assistance.
FAQ,
How can I save the footage from my Swann security camera?
To save the footage from your Swann security camera, you can follow these steps:
Is it possible to save the video files directly from the Swann security camera to a USB drive?
Yes, it is possible to save the video files directly from the Swann security camera to a USB drive. You can connect the USB drive to the USB port on the camera and then configure the camera settings to save the files to the USB drive.
What format are the video files saved in on the Swann security cameras?
The video files on Swann security cameras are typically saved in the AVI format. This is a common video format that can be easily played on most media players.
Can I save the video files from my Swann security camera to a computer?
Yes, you can save the video files from your Swann security camera to a computer. To do this, you will need to connect the camera to the computer using a USB cable or by accessing the camera’s network settings. Once the camera is connected, you can transfer the video files to the computer’s hard drive.
Is there a way to save the video files from my Swann security camera to the cloud?
Yes, you can save the video files from your Swann security camera to the cloud. Swann offers cloud storage options for their security cameras, allowing you to upload and store your video files securely online. You will need to subscribe to the cloud storage service and configure your camera to upload the files to the cloud.