
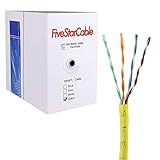
If you are considering installing a security camera system in your home or office, it is important to understand the basics of cable management. One of the key components of any security camera system is the cable that connects the cameras to the recording device or monitor. In many cases, Cat5e cable is used for this purpose due to its reliability and cost-effectiveness.
However, it is often necessary to split the Cat5e cable in order to connect multiple cameras to a single recording device or monitor. This process requires careful planning and execution to ensure that each camera receives a stable and strong signal.
The first step in splitting a Cat5e cable for security camera use is to determine the number of cameras you wish to connect. This will help you determine the amount of cable you will need as well as the necessary equipment, such as connectors and couplers.
Once you have gathered all the necessary materials, you can begin the process of splitting the Cat5e cable. This typically involves carefully cutting the cable into two or more sections, depending on the number of cameras you are connecting. It is important to use a sharp blade and make clean, precise cuts to avoid damaging the internal wires of the cable.
Preparing for cable splitting
Before you start splitting a Cat5e cable for a security camera, it’s essential to gather all the necessary tools and materials. This will ensure a smooth process and prevent any complications or damage to the cable.

1. Cat5e cable: Make sure you have a suitable Cat5e cable. This type of cable is commonly used for Ethernet networks and is also suitable for security cameras.
2. Cable cutter: Use a cable cutter specifically designed for cutting through Cat5e cables. This tool will provide clean and precise cuts without damaging the internal wires.
3. Wire stripper: A wire stripper will help you remove the outer insulation without cutting into the inner wires. Choose a wire stripper that is suitable for Cat5e cables.
4. Cable tester: It’s important to have a cable tester to ensure that the split cable connections are working correctly. This tool will help you identify and fix any connectivity issues.
5. Crimping tool and connectors: If you plan to terminate the split cable ends, you will need a crimping tool and connectors. This will allow you to securely attach the connectors to the split wires.
6. Heat shrink tubing (optional): Heat shrink tubing can be used to provide extra protection and strain relief to the split cable connections.
7. Screwdriver: You may need a screwdriver to open the security camera housing or make any adjustments during the installation process.
By gathering these tools and materials beforehand, you will be well-prepared to safely and effectively split a Cat5e cable for your security camera.
Gathering the necessary tools
Before you can begin splitting a Cat5e cable for your security camera, there are a few tools that you will need to gather. These tools include:
1. Utility knife:
A utility knife will be used to carefully cut through the outer insulation of the Cat5e cable. Make sure that the blade is sharp and be cautious while using it.

2. Wire strippers:
Wire strippers are essential for removing the outer insulation from the individual wires inside the cable. They allow you to expose the copper wires without damaging them.
3. Crimping tool:
A crimping tool is necessary for attaching connectors to the cut ends of the Cat5e cable. It helps secure the wires in place and ensures a proper connection.
4. Connectors:
You will need connectors that are compatible with Cat5e cables. These connectors will be attached to the cut ends of the cable and allow you to connect it to your security camera.
Once you have gathered all the necessary tools, you will be ready to move on to the next step of splitting the Cat5e cable for your security camera.
Understanding the Purpose of Cable Splitting
Cable splitting is a common method used in security camera installations to maximize the use of a single cable for multiple camera connections. It involves splitting a Cat5e cable into separate wires to connect multiple cameras to a central location or recording device.

Why Splitting a Cable is Necessary
Splitting a cable allows for the efficient use of resources by minimizing the number of cables needed for a security camera system. This can be especially beneficial in situations where multiple cameras need to be installed in various locations, but running individual cables from each camera to the central location is impractical or costly.
By splitting a cable, power and data can be transmitted to multiple cameras using just one cable. This reduces both the cost of materials and the complexity of the installation process. It also helps to maintain a cleaner and more organized setup by minimizing the number of exposed cables.
How Cable Splitting Works
Splitting a Cat5e cable involves separating the four twisted pairs of wires within the cable and assigning them different functions. Typically, two pairs are used for data transmission, allowing for the connection of two cameras, while the remaining two pairs are used for power delivery.
To split the cable, a specialized splitter or injector is used. The splitter divides the cable into separate wires, allowing for multiple camera connections. The injector combines power and data back into a single cable for transmission to the central location or recording device.
It’s important to note that cable splitting should be done carefully and with proper knowledge of the hardware being used. Incorrect splitting or improper connections can result in poor camera performance or even damage to the equipment.

In conclusion, cable splitting is a useful technique that allows for the efficient installation of security camera systems by reducing the number of cables needed. It provides a cost-effective solution and helps maintain a neat and organized setup. However, it is essential to follow proper guidelines and use appropriate equipment to ensure optimal performance.
Identifying the necessary cable
If you are planning to split a cat5e cable for a security camera installation, it is important to first identify the correct cable. Cat5e cables typically consist of four pairs of twisted wires, each contained within an outer jacket. To determine which cable to split, you will need to locate the cable that is already connected to your security camera system.
Here are the steps to identify the necessary cable:
- Locate the central hub or network switch where all of the cables from your security cameras are connected.
- Examine the cables and look for the one that is labeled or identified as the cable connected to the security camera.
- If the cables are not labeled, you can visually inspect them for any signs of wear or damage, as the cable connected to the security camera may have been connected for a longer period of time than the other cables.
- Once you have identified the cable connected to the security camera, follow it along its length to determine where it is connected to the central hub or network switch.
- Once you have located the other end of the cable, you can now proceed to split it in order to connect your new security camera.
By correctly identifying the necessary cable, you can ensure a successful and efficient installation of your security camera system.
Differentiating between cat5e and other cables
When it comes to networking and security camera installations, it is important to be able to differentiate between different types of cables to ensure proper connectivity and performance. One commonly used cable is Cat5e, but how can you easily identify it among other cables?
Colour coding
One distinguishing feature of Cat5e cables is their colour coding. Cat5e cables typically have a blue jacket, although other colours such as gray, yellow, and white are also common. However, it is important to note that the jacket color is not the only way to identify a Cat5e cable, as other types of cables can have similar colours.
Cable markings
Another way to differentiate Cat5e cables is by checking for specific markings. Cat5e cables should be labelled with “Cat5e”, “Category 5e”, or “Enhanced” on the jacket. These markings indicate that the cable has been designed to meet the Category 5e standard and can support data rates of up to 1000 Mbps.
Additionally, Cat5e cables may also have other markings such as the manufacturer’s name or logo, the cable length, and sometimes even performance ratings.
It is important to be cautious when identifying cables based on markings, as counterfeit cables may lack proper labeling or have misleading markings. In such cases, it is best to consult with a professional or trusted supplier to ensure you are purchasing genuine Cat5e cables.
Conclusion: While colour coding and cable markings can be helpful in identifying Cat5e cables, it is always recommended to double-check the specifications and consult with a professional if there is any confusion. Properly identifying cables is essential for ensuring the correct installation and optimal performance of security camera systems.
Checking cable condition and length
Before splitting a Cat5e cable for a security camera installation, it is important to first check the condition and length of the cable. This ensures that the cable is suitable for the intended purpose and will provide reliable performance.
1. Inspect the cable
Examine the outer jacket of the Cat5e cable for any signs of damage or wear. Look for cuts, kinks, or frayed sections that may compromise the integrity of the cable. If such damage is detected, it is advisable to replace the cable with a new one to avoid any future issues.
Additionally, carefully inspect the connectors on each end of the cable. Make sure that they are securely attached and have no visible signs of damage or corrosion. Loose or damaged connectors may result in poor connectivity and signal loss.
2. Measure the cable length
Determining the length of the Cat5e cable is essential for planning the security camera installation. Measure the cable from one end to the other using a measuring tape or a cable length measuring device. Record the length accurately for later reference.
It is important to have an idea of the cable length in order to choose the appropriate positions for the camera and the network equipment. This ensures that the cable is long enough to reach the desired locations without any tension or strain.
Note: When measuring the cable length, take into account any additional length required for routing the cable through walls, conduits, or other spaces. This extra length will ensure that the cable reaches the intended destination without being stretched or damaged.
By thoroughly inspecting the cable for any signs of damage and accurately measuring its length, you can ensure that it is in optimal condition and suitable for splitting for a security camera installation.
Marking and cutting the cable
Before cutting the cat5e cable, it is important to mark the locations where it needs to be split. This will ensure that the cables are cut at the right lengths and in the right places.
Start by identifying the area where the cable needs to be split. Measure the distance from the starting point to the point where the split needs to occur. Use a marker or a piece of tape to mark this spot on the cable.
Once you have marked the location, carefully cut the cable using a suitable tool such as wire cutters or a utility knife. Make sure to cut straight and cleanly through the cable to avoid any damage to the wires inside.
After cutting the cable, you should have two separate pieces. Inspect the ends of the cables to ensure that they are clean and undamaged. If necessary, trim any excess cable or untwisted wires.
Repeat this process for any additional splits that are needed along the length of the cable. Remember to mark each location before cutting to ensure accuracy.
When the splitting process is complete, you can proceed with the installation of the security cameras using the split cables. Make sure to secure the cable ends properly to avoid any accidental disconnection or damage.
By marking and cutting the cat5e cable carefully, you can ensure that the installation of your security cameras is done accurately and efficiently.
Determining the split point on the cable
Before splitting a Cat5e cable for a security camera installation, it is important to determine the ideal split point. This will ensure that both ends of the cable are properly connected and functioning.
To determine the split point, follow these steps:
- Start by locating the end of the Cat5e cable where the camera will be installed. This end should be near the desired camera location.
- Measure and mark the desired length of cable needed for the camera. Take into consideration any obstacles or areas where the cable may need to be routed.
- Then, locate the other end of the Cat5e cable, which will be connected to the recording device or monitor.
- Measure and mark the length of cable needed to reach this end. Again, consider any obstacles or areas where the cable may need to be routed.
- Once the desired lengths are marked, add a few extra inches to each end to allow for flexibility and future adjustments.
- Now, connect one end of the Cat5e cable to the camera, and route the cable along the desired path.
- At the split point, use a cable cutter or knife to carefully cut the outer jacket of the cable, exposing the individual wires inside.
- Separate and organize the wires into their respective pairs.
- Use a wire stripper to strip a small portion of the insulation from each wire, exposing the copper conductors.
- Finally, terminate the wires using the appropriate connectors or terminals at both ends of the split cable.
Determining the split point on the Cat5e cable is crucial to ensure a successful installation and proper functionality of your security camera system. Take your time and follow these steps carefully to achieve the best results.
Using the appropriate cutting tool
When it comes to splitting a Cat5e cable for a security camera, it’s essential to use the right cutting tool to ensure accurate results and minimize the risk of damaging the cable or the wires within. Here are some tips for using the appropriate cutting tool:
1. Cable cutter:
Invest in a good quality cable cutter that is specifically designed for cutting Cat5e cables. A cable cutter with sharp, precision blades will help you make clean and smooth cuts without fraying or damaging the wires inside the cable.
2. Cable stripping tool:
A cable stripping tool is necessary to remove the outer insulation of the Cat5e cable carefully. This tool ensures that you strip just the right amount of insulation without cutting into the wires. Many cable stripping tools have adjustable blades, allowing you to set the depth based on the thickness of the cable’s outer insulation.
Before using any cutting tool, make sure to disconnect the power source and any other connections from the cable. This precautionary step will prevent any electricity from flowing through the cable during the cutting process, protecting you and the equipment from potential harm.
Always follow the manufacturer’s instructions for using the cutting tools correctly. Improper use of these tools can result in damage to the cable or injury to yourself. Take your time and work carefully to ensure clean cuts and maintain the integrity of the wires inside the Cat5e cable.
Remember, using the appropriate cutting tool is vital when splitting a Cat5e cable for a security camera installation. It will help you achieve clean and precise cuts, ensuring optimal performance and longevity of your security camera system.
Splitting the Cable
Splitting a Cat5e cable for a security camera installation requires careful planning and precision. By properly splitting the cable, you can effectively supply both power and data to your security camera without any loss in performance. Here are the steps to split a Cat5e cable:
-
Determine the length: Measure the distance between your security camera and your network switch or recording device to determine the length of cable required.
-
Prepare the cable: Use a cable stripper to remove approximately 2-3 inches of the outer sheath from the Cat5e cable, exposing the four twisted pairs of wires.
-
Identify the wires: Using a cable tester or a wiring diagram, identify which wires correspond to the power and data connections. Typically, the blue and brown pairs are used for data transmission, while the orange and green pairs are used for power.
-
Split the wires: Carefully separate the orange and green pairs from the blue and brown pairs. Maintain the twist in each pair to minimize signal interference.
-
Create termination points: Use wire strippers to remove a small portion of insulation from each wire, and then attach termination connectors to the exposed wires. Attach RJ45 connectors to the blue and brown pairs for data transmission, and attach power connectors (e.g., BNC or DC connectors) to the orange and green pairs for power supply.
-
Test the connections: Use a cable tester to ensure that both the data and power connections are properly terminated. Verify that there is no signal loss or interference.
-
Secure the connections: Once the connections are tested and verified, use electrical tape or cable ties to secure the termination points and ensure that the wires are properly organized and protected.
By following these steps, you can successfully split a Cat5e cable for your security camera installation. Remember to take necessary precautions and consult the manufacturer’s documentation for specific instructions related to your security camera and equipment.
Separating the outer jacket
When installing security cameras, it may be necessary to split a Cat5e cable in order to connect the camera to a power source and a network device. To begin this process, you will need to separate the outer jacket of the cable to expose the individual twisted pairs inside.
Gather the necessary tools
Before starting, gather the following tools:
| Wire strippers | – to strip the outer jacket |
| Snips or scissors | – to cut the jacket |
| Marker or tape | – to label the pairs |
Steps to separate the outer jacket
Follow these steps to separate the outer jacket of the Cat5e cable:
- Begin by using the wire strippers to cut off a small portion of the outer jacket at one end of the cable.
- Hold the cable just below the cut portion and gently pull the jacket away from the twisted pairs. Be careful not to cut or damage the inner wires.
- Continue pulling and unwinding the jacket until it is completely separated from the twisted pairs.
- Once the jacket is separated, use the snips or scissors to cut off the excess jacket, leaving only the exposed twisted pairs.
- Finally, use a marker or tape to label each of the twisted pairs to distinguish them for future reference.
Congratulations! You have successfully separated the outer jacket of the Cat5e cable, exposing the twisted pairs inside. Now you can proceed to terminate the individual pairs and connect them to the necessary devices for your security camera installation.
FAQ,
How do I split a cat5e cable for a security camera?
To split a cat5e cable for a security camera, you will need a networking switch. Connect one end of the cat5e cable to the camera and the other end to the switch. Then, connect your router or DVR to the switch using another cat5e cable. This will allow you to split the connection and have multiple cameras connected to a single network device.
Can I split a cat5e cable without using a networking switch?
No, you cannot split a cat5e cable without using a networking switch. The purpose of the switch is to provide the necessary connections for splitting the cable and allowing multiple devices to be connected to a single network device.
Are there any alternatives to using a cat5e cable for a security camera?
Yes, there are alternatives to using a cat5e cable for a security camera. One alternative is using a wireless security camera system that connects to your home Wi-Fi network. Another alternative is using a powerline adapter, which allows you to transmit video and data over your home’s electrical wiring. However, these alternatives may have limitations and may not be suitable for all situations.
What are the benefits of splitting a cat5e cable for security cameras?
Splitting a cat5e cable for security cameras allows you to connect multiple cameras to a single network device, such as a router or DVR. This can help simplify the installation process and reduce the amount of cables needed. Additionally, it allows for easier management and monitoring of the cameras, as they can all be connected to the same network.


