Ensuring the safety and security of your home is a top priority for many homeowners. One effective way to enhance the security of your property is by installing security cameras. These cameras provide you with a constant, vigilant eye on your surroundings, deterring potential criminals and capturing crucial footage if any incidents occur. However, before you can start reaping the benefits of security cameras, you need to wire your home to connect them properly.
Wiring your home for security cameras may seem like a daunting task, but with the right guidance and a little bit of knowledge, you can easily accomplish it. The first step is to determine the best locations for your cameras. Common areas include entry points, such as doors and windows, as well as high-traffic areas and blind spots. By strategically placing your cameras, you can maximize their effectiveness and coverage.
Once you have identified the ideal positions for your security cameras, it’s time to start the wiring process. It is recommended to use a combination of wired and wireless cameras for optimal coverage and flexibility. For wired cameras, you will need to run cables from each camera to a centralized location where you will connect them to a recording device or a network video recorder (NVR).
Remember to use high-quality cables that are suitable for outdoor use and have the necessary length to reach your cameras. It’s also crucial to label each cable properly to avoid any confusion during the installation process. Additionally, make sure to follow the manufacturer’s instructions when connecting the cables to your cameras and recording device.
By following these steps and investing some time and effort, you can successfully wire your home for security cameras. Once the wiring is complete, you’ll have peace of mind knowing that your property is well-protected and monitored, enhancing your overall home security.

The Importance of Home Security Cameras
Home security cameras play a crucial role in protecting your property and ensuring the safety of your loved ones. Installing security cameras not only helps you deter potential intruders, but also provides valuable evidence in case of any incidents.
Here are some reasons why home security cameras are important:
- Crime deterrent: The presence of security cameras can discourage burglars and other criminals from targeting your home. Knowing that their actions are being recorded increases the risk of getting caught, making your property a less appealing target.
- Remote monitoring: With modern security cameras, you can keep an eye on your property from anywhere using your smartphone or computer. This allows you to check in on your home, monitor your children or pets, and receive alerts in case of any suspicious activity.
- Evidence collection: In the unfortunate event of a break-in or any other crime, security camera footage can provide valuable evidence to law enforcement agencies. High-quality video footage can help identify criminals, enhance investigations, and increase the chances of recovering stolen items.
- Peace of mind: Having security cameras at home can give you peace of mind knowing that your property is being monitored. Whether you’re away on vacation or simply at work, you can have the assurance that you can keep an eye on what matters most to you.
When installing security cameras in your home, it’s essential to strategically place them in areas that provide optimal coverage. Common locations include the front entrance, backyards, garages, and any other vulnerable areas.
In conclusion, home security cameras are essential for protecting your property, deterring crime, and ensuring the safety of your loved ones. By investing in a reliable security camera system, you can have peace of mind knowing that you have taken proactive steps to safeguard your home.
Choosing the Right Security Cameras
When it comes to securing your home, choosing the right security cameras is essential. With so many options available on the market, it can be overwhelming to know where to start. Here are some key factors to consider when selecting security cameras for your home:
1. Resolution:
High-resolution cameras provide clear and detailed images, making it easier to identify individuals or objects. Consider cameras with at least 1080p resolution for optimal clarity.
2. Camera Type:
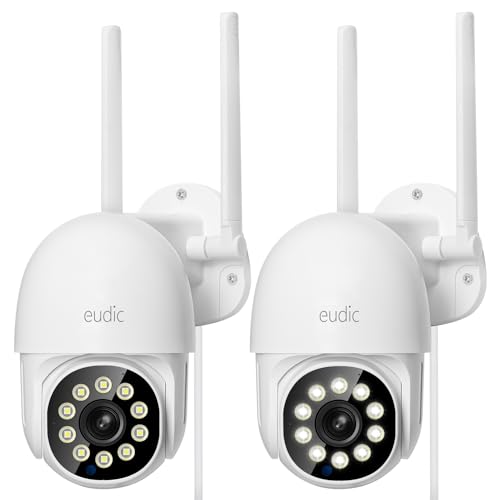
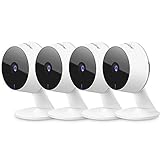
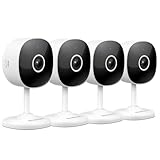
Determine whether you need indoor cameras, outdoor cameras or both. Outdoor cameras should be weatherproof and have features such as night vision and vandal-resistant casing.
3. Field of View:
Consider the field of view you need in order to cover the desired areas. Wide-angle lenses provide a broader view, while zoom lenses allow for detailed close-ups.
4. Connectivity:
Decide whether you prefer wired or wireless cameras. Wired cameras provide a more reliable connection, while wireless cameras offer easier installation and flexibility in terms of placement.
5. Recording Options:
Determine if you want cameras that record continuously or only when motion is detected. Some cameras offer cloud storage or built-in memory, while others require a separate DVR or NVR.

By considering these factors and understanding your specific needs, you can select the right security cameras to keep your home and loved ones safe.
Assessing Your Home’s Security Needs
Before you start wiring your home for security cameras, it’s important to assess your home’s security needs. Taking the time to evaluate your property will help you determine the number and placement of cameras, as well as any additional security measures that may be necessary.
Here are some steps to follow when assessing your home’s security needs:
1. Identify Vulnerable Areas
Walk around your property and identify any areas that could potentially be vulnerable to break-ins or other security threats. This may include windows at ground level, entry doors, or secluded areas of your property.
Take note of these areas as they will be the primary locations for your security cameras.

2. Determine Camera Types
Once you have identified the vulnerable areas, consider the type of security cameras that would best suit your needs. For example, dome cameras are ideal for monitoring large areas, while bullet cameras are more suited for long-distance viewing.
3. Decide on Camera Placement
Decide where each camera should be placed to provide optimal coverage. Consider factors such as camera angles, lighting conditions, and potential obstructions. It’s important to place cameras at strategic locations to maximize their effectiveness.
4. Consider Additional Security Measures
While security cameras are an important part of any home security system, they are not the only measure you should consider. Assess whether additional security measures such as motion sensor lights, alarms, or security signs may be necessary to enhance your home’s overall security.
By carefully assessing your home’s security needs, you will be able to plan and wire your security camera system effectively. This will provide you with peace of mind knowing that your home and loved ones are protected.
Planning Camera Placement and Coverage
When it comes to installing security cameras in your home, effective placement is key to maximizing coverage and ensuring the safety of your property. Here are some important factors to consider when planning the placement of your security cameras:

- Identify high-risk areas: Begin by identifying the high-risk areas of your property, such as entrances, windows, and blind spots. These areas are typically prime targets for potential intruders.
- Map out camera coverage: Once you’ve identified the high-risk areas, map out the camera coverage needed to monitor these areas effectively. This will help you determine the number of cameras required and their optimal placement.
- Consider camera types: Different camera types, such as bullet cameras and dome cameras, offer different fields of view and mounting options. Take into account the specific needs of each area when selecting camera types.
- Position cameras strategically: Position the cameras at strategic vantage points that provide a clear view of the high-risk areas. Aim to cover all entry points and ensure the cameras have an unobstructed view.
- Account for lighting conditions: Consider the lighting conditions in the areas where you plan to install cameras. Some cameras may require additional lighting or infrared capabilities for better visibility in low-light conditions.
- Plan for weather resistance: If you plan on installing cameras outdoors, choose weather-resistant models that can withstand harsh conditions. Ensure the cameras are properly protected from rain, snow, and extreme temperatures.
- Consider privacy concerns: Take privacy concerns into consideration when positioning the cameras. Avoid capturing areas where privacy is expected, such as bedrooms and bathrooms, to respect the privacy of your household members.
- Test camera angles and coverage: Before finalizing the installation, test the camera angles and coverage to ensure they provide the desired visibility. Make necessary adjustments to optimize the camera placement.
By carefully planning the camera placement and coverage in your home, you can enhance the security level and gain peace of mind knowing that your property is effectively monitored.
Understanding Wiring Requirements
When installing security cameras in your home, it is important to understand the wiring requirements to ensure proper functionality and safety. Here are some key points to consider:
Power Source: Security cameras require a power source to operate. You can choose either a wired or wireless power source depending on your preference and the camera’s specifications. If you opt for a wired power source, ensure that there are electrical outlets nearby or consider hiring a professional electrician to install them.
Network Connection: To connect your security cameras to a recording device or monitor, you will need to establish a network connection. This can be done through Ethernet cables, Wi-Fi, or a combination of both. Make sure you have the necessary cables and a stable internet connection, if applicable, for seamless connectivity.
Cable Types: Different types of cables are used for wiring security cameras. Coaxial cables are commonly used for analog cameras, while CAT5 or CAT6 cables are used for IP cameras. It is important to choose the appropriate cable type that is compatible with your camera system for efficient transmission of video signals.

Camera Placement: Consider the placement of your security cameras before wiring them. Ensure that the cables are long enough to reach the desired location and are concealed to prevent tampering. Plan the wiring route carefully to avoid any obstructions or hazards, such as electrical wires or sharp objects.
Weatherproofing: If you are installing security cameras outdoors, make sure to use weatherproof cables and connectors to protect them from moisture, dust, and extreme temperatures. This will ensure the longevity and durability of your camera system.
Professional Help: If you are unsure about the wiring requirements or feel overwhelmed by the installation process, it is recommended to seek professional help. A licensed electrician, security technician, or an experienced installer can assist you in properly wiring your home for security cameras.
By understanding the wiring requirements and following proper installation guidelines, you can ensure that your security cameras are set up correctly for enhanced home surveillance and peace of mind.
Gathering the Necessary Tools and Equipment
Before you start wiring your home for security cameras, it’s important to gather all the necessary tools and equipment. Having the right tools will make the process much easier and ensure that the installation is done correctly.
Here are some essential tools and equipment you will need:
1. Power drill: This is necessary for drilling holes in walls and mounting the cameras.
2. Screwdrivers: You will need both flathead and Phillips screwdrivers for attaching camera brackets and securing wires.
3. Fish tape: This is used to guide cables through walls and ceilings, making it easier to hide the wires.
4. Wire strippers: These tools are used to strip the insulation off the ends of the wires, allowing for proper connections.
5. Ethernet cables: These cables are used to connect the cameras to a network video recorder (NVR) or a power-over-Ethernet (PoE) switch.
6. Camera mounts: Depending on the location of your cameras, you may need mounts or brackets to securely attach them to walls or ceilings.
7. Security camera extension cables: These cables help extend the reach of your cameras, allowing you to place them in different areas of your home.
8. Cable clips and ties: These are used to neatly secure the cables to walls and prevent them from dangling or becoming tangled.
9. Power supply: If your cameras are not powered by the NVR or PoE switch, you will need a power supply for each camera.
Make sure to gather all these tools and equipment before you begin the wiring process. It’s also a good idea to have a ladder or step stool on hand for reaching high places. With the right tools, you’ll be well-prepared to wire your home for security cameras.
Installing the Camera System
Once you have chosen the locations for your security cameras, it’s time to start the installation process. Follow these steps to ensure a successful installation:
1. Begin by mounting the cameras in the selected locations. Use the mounting brackets and screws provided with the cameras to securely attach them to the walls or ceilings. Make sure the cameras have a clear line of sight and are positioned at the desired angle.
2. Next, run the necessary cables from each camera to a central location where the video recorder will be located. Use a combination of cable clips and cable management solutions to keep the cables neat and organized.
3. Connect the cables from each camera to the video recorder. Most cameras use BNC connectors, so make sure to use the corresponding BNC cables to make the connections. Follow the manufacturer’s instructions for properly connecting the cables.
4. Once the cameras are mounted and the cables are connected, plug in the video recorder and turn it on. Make sure the recorder is properly connected to a power source and a monitor or screen for viewing the camera feeds.
5. Test the camera system to ensure everything is working correctly. Use the recorder’s interface to view the camera feeds and make any necessary adjustments to the camera angles or settings.
6. Finally, secure the cables and ensure they are hidden from view as much as possible. Use cable covers or run the cables through walls or conduits to prevent them from being easily accessible or visible.
By following these steps, you can successfully install a camera system in your home and enhance its security. Remember to consult the user manuals for your specific cameras and video recorder for detailed instructions and troubleshooting if needed.
Testing and Configuring the Cameras
Once the security cameras are installed and wired properly, it is crucial to test and configure them to ensure their functionality and optimize their performance. Here are the steps to test and configure your security cameras:
1. Power up the cameras
Start by connecting the power supply to each camera and ensure that they are receiving power. Check the camera’s indicator lights to verify that they are working properly.
2. Check the video feed
Next, connect each camera to a monitor or a recording device to check the video feed. Make sure that the footage is clear and that there are no issues with the image quality or distortion.
3. Adjust camera angles and positions
If necessary, adjust the camera angles and positions to capture the desired areas. Test the visibility range of each camera to ensure that it covers the intended surveillance area effectively.
4. Configure camera settings
Access the camera’s settings menu through its interface or software and configure important settings such as resolution, frame rate, motion detection sensitivity, and recording preferences. Set up any desired alerts or notifications for specific events or movements.
5. Test the recording and playback
Initiate test recordings and playback to ensure that the cameras are recording properly and that the footage can be easily accessed and reviewed. Test the playback both on the camera itself and on any connected recording devices or monitors.
6. Network configuration
If you plan to access the cameras remotely or integrate them into a network, configure the network settings accordingly. Assign unique IP addresses to each camera and ensure that they are connected to the network properly.
By following these steps and thoroughly testing and configuring your security cameras, you can ensure that they are functioning correctly and providing the desired surveillance coverage for your home.
Connecting to a Monitoring System
Once you have wired your home for security cameras, the next step is to connect them to a monitoring system. This will allow you to view the camera feeds and keep an eye on your property from anywhere.
1. Choose a monitoring system
There are many monitoring systems available on the market, and it’s important to choose one that suits your needs. Look for a system that offers remote viewing, motion detection, and alerts. Consider whether you want a wired or wireless system, as well as any additional features you may need.
2. Install the monitoring software or app
Most monitoring systems come with software or an app that you need to install on your computer or mobile device. Follow the manufacturer’s instructions to download and install the software or app.
3. Connect the cameras to the monitoring system
Depending on the type of monitoring system you have chosen, there are a few different ways to connect the cameras. Wired systems typically require you to connect the cameras to a central recording device using Ethernet cables. Wireless systems may require you to sync the cameras with a base station or connect them directly to your Wi-Fi network.
4. Configure the monitoring system
Once the cameras are connected, you will need to configure the monitoring system. This includes setting up the cameras, creating user accounts, and adjusting the settings to suit your preferences. Refer to the user manual or online documentation for instructions on how to configure your particular monitoring system.
5. Test the connection and camera feeds
Before relying on your monitoring system for security purposes, it’s important to test the connection and camera feeds. Make sure you can access the camera feeds remotely and that the motion detection and alert features are working correctly. Perform a thorough test to ensure that everything is functioning as expected.
By following these steps, you can successfully connect your security cameras to a monitoring system and keep your home safe and secure.
Maintaining Your Security Cameras
Once you have installed your security cameras, it is important to regularly maintain them to ensure they are functioning properly and continue to provide you with the necessary surveillance. Here are some tips for maintaining your security cameras:
1. Clean the lenses regularly:
Dust, dirt, and smudges can accumulate on the lenses of your security cameras over time, which can affect the quality of the footage. Use a soft microfiber cloth to gently clean the lenses and keep them clear for optimal performance.
2. Check for loose connections:
Periodically check the connections of your security cameras to ensure they are secure. Loose or damaged connections can result in poor video quality or even a complete loss of signal. If you notice any loose connections, tighten them or replace the cables as needed.
3. Test the cameras regularly:
Regularly test your security cameras to make sure they are capturing footage as expected. Check the angles and adjust them if necessary, ensuring that the cameras are capturing the desired areas. Additionally, review the footage to ensure clarity and make any necessary adjustments to the camera settings.
4. Keep the area around the cameras clear:
It is important to keep the area surrounding your security cameras clear of obstructions such as tree branches, leaves, or cobwebs. These obstructions can interfere with the camera’s field of view and affect the quality of the footage.
5. Protect the cameras from the elements:
If your security cameras are installed outdoors, it is important to protect them from the elements. Choose cameras that are specifically designed for outdoor use or install weatherproof housing to shield them from rain, snow, and extreme temperatures.
By following these maintenance tips, you can ensure that your security cameras are always in optimal condition, providing you with the peace of mind and the surveillance you need to keep your home safe and secure.
Continuously Improving Your Home Security
Ensuring the security of your home is an ongoing process. With advancements in technology and changing security threats, it is important to continuously improve your home security measures. Here are some tips to help you enhance your home security:
1. Regularly assess your security needs
Security needs vary from home to home and can change over time. Regularly assess your security needs to identify any vulnerabilities or areas that need improvement. Consider factors such as the layout of your home, the location, and the potential risks in your area.
2. Install and maintain security cameras
Security cameras are an essential part of any comprehensive home security system. Install cameras in strategic locations both indoors and outdoors to provide surveillance coverage. Regularly check and maintain your cameras to ensure they are working properly.
3. Upgrade your alarm system
If you have an alarm system, consider upgrading it to include modern features such as remote access, smartphone notifications, and integration with other smart home devices. A robust alarm system can act as a deterrent and provide quick response in case of a security breach.
4. Secure windows and doors
Windows and doors are common points of entry for intruders. Reinforce them with high-quality locks, security bars, or additional layers of protection such as window films or shatterproof glass. Regularly check and maintain these security measures.
5. Implement secure access control
Implement secure access control measures such as smart locks, keyless entry systems, or biometric authentication for added security. This can help prevent unauthorized access to your home and provide you with better control over who can enter.
By continuously improving your home security, you can enhance the safety and peace of mind for yourself and your family. Stay updated with the latest security technologies and best practices to ensure your home remains protected.
FAQ,
What are the basic components needed to wire a home for security cameras?
The basic components needed to wire a home for security cameras include the cameras themselves, a digital video recorder (DVR) or network video recorder (NVR), power cables, Ethernet cables, and a monitor or smartphone for viewing the footage.
How many security cameras do I need to wire my entire home?
The number of security cameras needed to wire an entire home depends on the size and layout of the property. As a general rule, it is recommended to have cameras covering all entrances, such as front and back doors, as well as any other vulnerable areas such as windows or blind spots. Additional cameras can be installed for more comprehensive coverage.