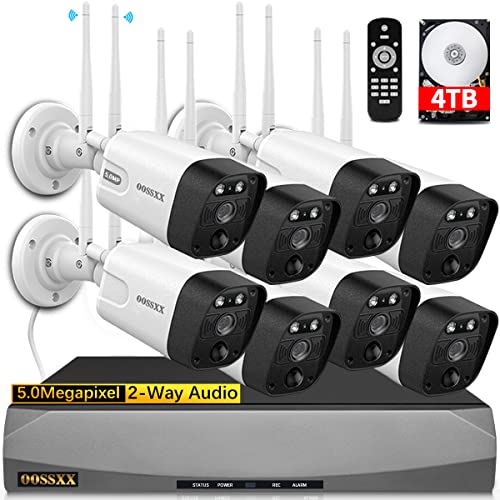
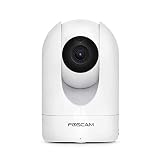
If you are looking to enhance the security of your premises, adding security cameras can be a great solution. Foscam is a well-known brand for its reliable and high-quality security cameras. On the other hand, D-Link offers a wide range of networking equipment, including routers, switches, and cameras. If you already have a D-Link setup and considering adding a Foscam security camera, you might be wondering if it is possible.
The good news is that it is generally possible to add a Foscam security camera to a D-Link network. Both Foscam and D-Link cameras work based on standard networking protocols, such as IP (Internet Protocol). This means that they can communicate with each other over a network, allowing you to integrate them seamlessly.
However, the exact process of adding a Foscam camera to a D-Link network can vary depending on the models of the devices and the specific setup you have. It is recommended to consult the user manuals or documentation of both the Foscam camera and your D-Link equipment for detailed instructions on how to proceed.
Keep in mind that proper configuration and network settings are crucial to ensure the smooth operation of the Foscam camera within your D-Link network. If you are not familiar with networking concepts or unsure about the process, it is advisable to seek assistance from a professional or contact the customer support of both Foscam and D-Link for guidance.
Connecting a Foscam Security Camera to a D-Link: Step-by-Step Guide
If you have a Foscam security camera and a D-Link router, you may be wondering if it’s possible to connect the camera to the router. Luckily, it is! Follow the step-by-step guide below to get your Foscam security camera up and running with your D-Link router.

Step 1: Make sure your Foscam security camera is properly set up and connected to your local network. This typically involves connecting the camera to a power source and configuring it using the Foscam mobile app or web interface.
Step 2: Locate the IP address of your Foscam security camera. This information is essential for connecting the camera to your D-Link router.
Step 3: Open a web browser on your computer and enter the IP address of your D-Link router in the address bar. This will typically be something like “192.168.0.1” or “192.168.1.1”. Press Enter to access the router’s web interface.
Step 4: Enter your router’s login credentials to access the settings. If you haven’t changed them, the default username and password are usually “admin”. Consult your router’s documentation if you’re unsure.
Step 5: Navigate to the “Port Forwarding” or “Virtual Server” section of the router’s settings. This is where you will configure the necessary port forwarding rules to allow your Foscam security camera to communicate with the outside world.
Step 6: Create a new port forwarding rule by clicking on the “Add” or “Create” button. Fill in the required fields, such as the IP address of your Foscam camera and the port number it uses (usually port 80 or 8080 for HTTP access).
Step 7: Save the changes and exit the router’s settings. Your D-Link router should now be configured to allow incoming connections to your Foscam security camera.
Step 8: Test the connection by accessing your Foscam camera from a computer or mobile device outside of your local network. Open a web browser and enter your external IP address followed by the port number assigned to your camera (e.g., “http://yourExternalIP:portNumber”). If everything is set up correctly, you should be able to view your camera’s live feed.
Congratulations! You have successfully connected your Foscam security camera to your D-Link router. Remember to keep your router’s firmware and camera’s firmware up to date to ensure optimal performance and security.
| Note: | Configuration steps may vary slightly depending on the specific model of your D-Link router. Consult your router’s documentation or online resources for more detailed instructions. |
|---|
Compatibility: Foscam and D-Link Security Systems
If you are wondering whether it is possible to add a Foscam security camera to a D-Link system, the short answer is no. Foscam and D-Link security systems are not directly compatible with each other.

Foscam and D-Link are two different brands that have their own unique protocols and technologies. As a result, their cameras and software are designed to work specifically within their own ecosystems. This means that a Foscam camera cannot be integrated and controlled directly through a D-Link security system.
Alternatives for Integrating Foscam Cameras
While you cannot directly add a Foscam camera to a D-Link security system, there are alternative options to consider if you want to incorporate Foscam cameras into your overall security setup:
- Connect Foscam and D-Link Cameras to a Network Video Recorder (NVR): If your D-Link system supports NVR functionality, you can connect both Foscam and D-Link cameras to a compatible NVR. This allows you to access and manage video feeds from multiple camera brands through a single interface.
- Use Third-Party Software or Apps: There are third-party software and apps available that offer compatibility with multiple camera brands, including Foscam and D-Link. These software and apps typically provide a unified platform for viewing and managing video feeds from various cameras.
- Consider a Hybrid Security System: If you are willing to invest in a new security system, there are hybrid options available that support multiple camera brands. These systems are designed to integrate cameras from different manufacturers, allowing you to mix and match brands based on your specific needs.
While these alternatives provide options for incorporating Foscam cameras into your security setup, it is important to note that compatibility may still vary depending on the specific models and features of the cameras and systems you are working with. It is always recommended to consult the product manuals and specifications or reach out to the manufacturers for detailed compatibility information.
Preparing Your Foscam Security Camera for Connection
Before you can add your Foscam security camera to your D-Link system, you need to make sure that the camera is properly set up and configured. Follow these steps to prepare your Foscam security camera for connection:
1. Power on the Camera
Connect the power adapter to the Foscam camera and plug it into a power outlet. Ensure that the camera has a stable power supply.

2. Connect the Camera to Your Network
Using an Ethernet cable, connect the Foscam camera to your router or network switch. Make sure the connection is secure and properly seated on both ends.
3. Configure the Camera’s Network Settings
Access the camera’s configuration interface by typing its IP address into a web browser. Login using the camera’s default username and password, which can usually be found in the user manual or on the camera itself.
Once logged in, navigate to the network settings and configure the camera to obtain an IP address automatically using DHCP. This will allow the camera to be assigned an IP address by your network router.
Note: For more detailed instructions on accessing and configuring your Foscam camera settings, refer to the camera’s user manual or the manufacturer’s website.
4. Set Up Port Forwarding (if required)
If you plan to access the camera remotely or from outside your local network, you may need to set up port forwarding on your router. This allows external devices to connect to the camera using the assigned IP address and port number. Refer to your router’s user manual or contact your Internet Service Provider (ISP) for guidance on setting up port forwarding.
5. Test the Camera’s Connection
Once the camera’s network settings are configured and port forwarding is set up (if necessary), test the camera’s connection by accessing its live feed through a web browser or the manufacturer’s mobile app. Ensure that you can view the camera’s video feed and control its features without any issues.
By following these steps, you can ensure that your Foscam security camera is properly prepared and ready to be added to your D-Link system.
Configuring the D-Link Network for Foscam Camera Integration
If you are looking to integrate your Foscam security camera with your D-Link network, you will need to configure the network settings to ensure seamless connectivity and functionality. The following steps will guide you through the process:
| Step 1: | Connect the Foscam camera to your D-Link network by plugging it into a power source and connecting it to your router using an Ethernet cable. |
| Step 2: | Open a web browser on your computer and enter the IP address of the D-Link router. This will allow you to access the router’s administration panel. |
| Step 3: | Log in to the router’s administration panel using the username and password associated with your D-Link network. |
| Step 4: | Navigate to the network settings section of the router’s administration panel. |
| Step 5: | Assign a static IP address to the Foscam camera by entering its MAC address and an IP address within the same subnet as your D-Link network. This will ensure that the camera always has the same IP address and is easily accessible. |
| Step 6: | Enable port forwarding on the D-Link router to allow external access to the Foscam camera. This will enable you to view the camera feed remotely. |
| Step 7: | Create a new user account on the D-Link router with the necessary privileges for accessing the camera feed and making any necessary changes to the network settings. |
| Step 8: | Save the changes made to the network settings on the D-Link router and restart the router to apply the new configuration. |
| Step 9: | Access the Foscam camera settings interface using its IP address, and configure the necessary network settings to ensure compatibility with the D-Link network. |
| Step 10: | Test the connectivity and functionality of the Foscam camera by accessing its live feed from a computer or mobile device connected to the D-Link network, as well as remotely. |
By following these steps, you will be able to successfully integrate your Foscam security camera with your D-Link network, allowing for convenient and efficient surveillance of your property.
Connecting the Foscam Camera to the D-Link Network
If you have a Foscam security camera and want to connect it to your D-Link network, you can follow these instructions to ensure a successful setup.

Step 1: Connect the Foscam Camera
Start by connecting the power adapter to the Foscam camera and plugging it into an electrical outlet. Then, use an Ethernet cable to connect the camera to your D-Link router or switch. Make sure the Ethernet cable is securely connected to both the camera and the router.
Step 2: Determine the Camera’s IP Address
To connect the Foscam camera to the D-Link network, you need to determine its IP address. There are a few different methods you can use:
– If the camera has its own built-in display, you can navigate through the settings menu to find the IP address.
– If you have access to your D-Link router’s network settings, you can check the list of connected devices to find the camera’s IP address.
– You can also use software tools like Foscam IP Camera Tool or network scanning apps to discover the camera’s IP address.

Step 3: Access the Camera’s Web Interface
Once you have the camera’s IP address, open a web browser on your computer and enter the IP address in the address bar. Press Enter to access the camera’s web interface.
Step 4: Configure Camera Settings
In the camera’s web interface, you will need to configure its settings to connect it to the D-Link network. Look for the network settings or wireless settings section, and enter the SSID (network name) and password for your D-Link network. Save the settings once you have entered the information.
Step 5: Test the Connection
After saving the network settings, the Foscam camera should attempt to connect to your D-Link network. Wait for a few moments and then try accessing the camera’s web interface using the IP address again. If successful, you should be able to view the camera’s live feed and control its settings.
By following these steps, you can easily connect your Foscam security camera to your D-Link network for seamless monitoring and surveillance. Remember to keep the camera’s firmware updated and change the default login credentials for added security.
Troubleshooting: Common Issues and Solutions
When adding a Foscam security camera to a D-Link system, there may be some common issues that you encounter. Here are some troubleshooting steps and solutions:
1. Network Connectivity Issues
If you’re having trouble connecting your Foscam camera to your D-Link system, check the following:
- Ensure that your camera and D-Link system are both properly connected to the same network.
- Check the network settings on your camera to make sure they match the settings on your D-Link system. This includes the IP address, subnet mask, gateway, and DNS settings.
- Reset the network settings on both the camera and D-Link system and try the setup process again.
2. Compatibility Issues
In some cases, Foscam cameras may not be compatible with certain D-Link systems. To troubleshoot compatibility issues:
- Check the compatibility list provided by both Foscam and D-Link to ensure that your camera and system are compatible.
- Update the firmware on your camera and D-Link system to the latest versions, as newer firmware releases often fix compatibility issues.
- Contact the technical support teams of both Foscam and D-Link for further assistance.
3. Camera Configuration Issues
If your Foscam camera is connected to your D-Link system but not functioning correctly, consider the following:
- Verify that the camera is properly configured within the D-Link system. Check the settings related to video streaming, motion detection, and recording.
- Make sure that the camera is positioned correctly and not obstructed by any objects that may interfere with its functionality.
- Perform a factory reset on both the camera and D-Link system and reconfigure them from scratch.
By following these troubleshooting steps and solutions, you should be able to resolve common issues when adding a Foscam security camera to a D-Link system.
Enhancing Security: Additional Steps for Foscam-D-Link Integration
Integrating your Foscam security camera with your D-Link system can provide multiple layers of protection for your home or business. However, to further enhance your security, there are additional steps you can take:
| Step | Description |
|---|---|
| 1 | Change Default Passwords |
| 2 | Enable Two-Factor Authentication |
| 3 | Regularly Update Firmware |
| 4 | Secure Network with Encryption |
| 5 | Limit Camera Access |
| 6 | Enable Motion Detection |
| 7 | Monitor Remote Access |
By following these additional security steps, you can ensure the utmost protection for your property and personal privacy. Remember to consult the Foscam and D-Link user manuals for detailed instructions on how to carry out each step.
Remote Access: Viewing Your Foscam Camera on D-Link Devices
If you have a Foscam security camera and a D-Link device, you may be wondering if you can connect and view your Foscam camera on your D-Link device. Luckily, with a few simple steps, you can easily set up remote access and view your Foscam camera from the comfort of your D-Link device. Here’s how:
Step 1: Connect Your Foscam Camera to Your Network
First, you’ll need to connect your Foscam camera to your local network. To do this, follow the instructions provided with your Foscam camera to connect it to your home Wi-Fi network. Ensure that your camera is connected and accessible on your local network before proceeding to the next step.
Step 2: Set Up Port Forwarding on Your D-Link Device
Next, you’ll need to set up port forwarding on your D-Link device to allow remote access to your Foscam camera. Access your D-Link device’s administration interface by entering its IP address into a web browser. Once logged in, locate the port forwarding settings and create a new rule to forward traffic from the external port (e.g., 8080) to the internal IP address of your Foscam camera on the internal port (e.g., 80).
Note: The exact steps may vary depending on the model of your D-Link device. Refer to the user manual or online documentation for detailed instructions.
Step 3: Configure Dynamic DNS (DDNS)
In order to access your Foscam camera remotely, you’ll need to configure Dynamic DNS (DDNS) on your D-Link device. DDNS allows you to access your camera using a domain name instead of an IP address, which can change periodically.
Create a DDNS account with a service provider of your choice, such as No-IP or DynDNS. Once you have an account, navigate to the DDNS settings on your D-Link device and enter your account information. Make sure to enable the DDNS service and associate it with your external IP address. Save the settings to apply the changes.
Step 4: Access Your Foscam Camera on Your D-Link Device
With port forwarding and DDNS configured, you can now access your Foscam camera on your D-Link device. Open a web browser and enter your DDNS domain name (e.g., yourcamera.ddnsprovider.com) followed by the port number you specified in the port forwarding settings (e.g., :8080). Press Enter, and you should see the login page for your Foscam camera.
Enter your Foscam camera’s username and password to log in and view the live video feed. You should now be able to remotely access and monitor your Foscam camera from your D-Link device.
Note: It’s important to ensure that your Foscam camera’s firmware is up to date for optimal performance and security. Check the Foscam website regularly for any firmware updates and apply them as needed.
In conclusion, by following these steps, you can easily set up remote access and view your Foscam security camera on your D-Link device. This allows you to monitor your camera from anywhere and at any time, providing peace of mind and enhanced security for your home or business.
FAQ
Can I add a Foscam security camera to my D-Link network?
Yes, you can add a Foscam security camera to your D-Link network. Foscam cameras are compatible with D-Link routers and can be easily integrated into the network. You will need to follow the specific instructions provided by Foscam for setting up the camera on your D-Link network.
Is it difficult to add a Foscam security camera to a D-Link network?
No, it is not difficult to add a Foscam security camera to a D-Link network. The process usually involves connecting the camera to the router and following the setup instructions provided by Foscam. However, the exact steps may vary depending on the specific model of the camera and the D-Link router. It is recommended to consult the user manual and online resources for both the camera and the router for detailed instructions on how to add the camera to the network.