When it comes to securing your home, one of the most effective ways is to install security cameras. These cameras not only act as a deterrent for potential intruders, but they also provide valuable evidence in case of a break-in or other security incident.
One important factor to consider when installing security cameras is the location. The optimal placement of cameras can significantly enhance their effectiveness. One popular location to mount security cameras is on the eaves of the house. The eaves, or the overhanging edges of the roof, provide an elevated position that allows for a better view of the surroundings.
Mounting security cameras on the eaves offers several advantages. Firstly, it provides a wider field of view compared to mounting cameras at ground level. This allows for better coverage of the area, minimizing blind spots and increasing the chances of capturing important details. Additionally, the elevated position makes it more difficult for potential intruders to tamper with or disable the cameras, as they are out of reach.
Another benefit of mounting cameras on the eaves is that it provides a less obtrusive appearance. The cameras can be discreetly installed, blending in with the overall architecture of the house. This is especially important for homeowners who want to maintain the aesthetic appeal of their property while ensuring its security.
Understanding the importance of mounting security cameras on the eaves
In today’s world, ensuring the safety and security of our homes is of utmost importance. One way to achieve this is by installing security cameras. However, it is crucial to understand the significance of mounting these cameras on the eaves of our houses.

Mounting security cameras on the eaves provides several advantages. Firstly, it offers a strategic vantage point to capture a wider field of view. By placing the cameras at an elevated position, they can cover a larger area, reducing blind spots and effectively monitoring the surroundings. This enables homeowners to have a comprehensive view of their property, ensuring that no suspicious activity goes unnoticed.
Moreover, mounting security cameras on the eaves also helps protect the cameras from vandalism or theft. The elevated position makes it difficult for intruders to tamper with or disable the cameras. Additionally, the eaves provide some natural cover, shielding the cameras from harsh weather conditions, such as rain or direct sunlight. This not only ensures the durability of the cameras but also enhances their performance for extended periods.
Factors to consider when choosing the best location for security cameras on eaves
When it comes to securing your home, choosing the right location for security cameras is crucial. Mounting cameras on the eaves of your house can provide an optimal vantage point for monitoring the exterior of your property. However, there are several factors to consider when selecting the best location for your security cameras.
1. Coverage area: One of the key factors to consider is the coverage area of the camera. You want to ensure that the camera can capture a wide field of view, covering important areas such as the front entrance, driveway, and backyard. Assess the layout of your property and determine the areas that require monitoring the most.
2. Height and angle: The height and angle at which the camera is mounted on the eaves can greatly impact its effectiveness. Mounting the camera too high may result in a narrow field of view, while mounting it too low can make it vulnerable to tampering. Consider the optimal height and angle that provides a clear view of the intended coverage area.

- 3. Protection from weather: Weather conditions can affect the performance and durability of security cameras. Ensure that the selected location on the eaves provides adequate protection from rain, snow, and strong winds. This can help prolong the lifespan of the camera and ensure uninterrupted surveillance.
- 4. Accessibility for maintenance: It is important to choose a location that is easily accessible for maintenance and adjustments. Cameras may require periodic cleaning and realignment, so selecting a location that allows for easy reach can save time and effort in the long run.
- 5. Deterrence factor: The visibility of security cameras can act as a deterrent to potential intruders. Consider mounting the cameras in a location that is visible from the street or other entry points, as this can discourage criminal activity and provide a sense of security for you and your neighbors.
By considering these factors, you can choose the best location for your security cameras on the eaves of your house, ensuring optimal surveillance and protection for your property.
Mounting security cameras on the front eaves: Pros and cons
As a homeowner looking to enhance the security of my property, I have considered mounting security cameras on the front eaves of my house. This location offers several advantages, but it also has some drawbacks that need to be taken into account.
Pros:
- Improved visibility: Placing security cameras on the front eaves gives them a clear line of sight, allowing for better visibility of the surrounding area. This can help capture crucial details such as faces, license plates, and suspicious activities.
- Deterrence factor: Visible security cameras act as a deterrent to potential intruders. When mounted on the front eaves, they send a clear message that the property is being monitored and increases the likelihood of deterring criminal activity.
- Easy installation: Mounting cameras on the front eaves is relatively straightforward and requires minimal drilling or wiring. This makes it a convenient option for homeowners who want to install security cameras themselves.
Cons:
- Restricted field of view: While the front eaves provide a good vantage point, they may have limitations when it comes to the camera’s field of view. Depending on the architecture of the house and the angle of the eaves, there may be blind spots or areas that are not fully covered by the camera.
- Vulnerability to tampering: Mounting the cameras on the front eaves makes them more accessible to potential tampering or vandalism. Intruders or malicious individuals may try to disable or damage the cameras, compromising their effectiveness.
- Exposure to weather conditions: The front eaves are exposed to the elements, which can pose a challenge for the longevity and performance of the cameras. Extreme temperatures, rain, and direct sunlight can affect the camera’s functionality and durability over time.
In conclusion, mounting security cameras on the front eaves of a house has its advantages and disadvantages. It offers improved visibility and acts as a deterrent, while also being relatively easy to install. However, there may be limitations in the camera’s field of view, increased vulnerability to tampering, and exposure to weather conditions that need to be considered before making a decision.

Mounting security cameras on the side eaves: Advantages and disadvantages
When it comes to securing your home, mounting security cameras on the side eaves can be a popular choice. This location offers several advantages that can enhance the effectiveness of your surveillance system. However, there are also some disadvantages to consider.
Advantages:
- Wide coverage: Mounting cameras on the side eaves allows for a wide field of view, covering a larger area of your property. This can help capture more details and provide better overall surveillance.
- Higher vantage point: By placing the cameras on the eaves, they are elevated and can capture a broader perspective. This can be beneficial in monitoring entrances, driveways, and other areas that are not easily visible from ground level.
- Deterrent effect: Visible security cameras on the eaves can act as a deterrent to potential intruders. The presence of cameras can make them think twice before attempting to break into your home.
- Protection from tampering: Mounting the cameras on the side eaves can make it more difficult for intruders to tamper with or disable them. The elevated position can discourage attempts to interfere with the cameras.
Disadvantages:
- Limited coverage angles: While mounting cameras on the side eaves provides a wide coverage area, there may be blind spots or areas that are not captured effectively. Careful positioning and additional cameras may be required to address this limitation.
- Weather exposure: Cameras mounted on the eaves are more exposed to harsh weather conditions such as rain, wind, and extreme temperatures. This can affect their durability and performance over time, requiring regular maintenance and weatherproofing.
- Installation challenges: Mounting cameras on the side eaves can be more challenging than other locations, especially if your house has a high roof or difficult access points. Professional installation may be necessary to ensure proper placement and secure mounting.
Overall, mounting security cameras on the side eaves of your house can offer significant advantages in terms of coverage, perspective, and deterrence. However, it’s important to consider the limitations and potential challenges associated with this location to ensure the effectiveness and longevity of your surveillance system.
Mounting security cameras on the back eaves: Benefits and drawbacks
When it comes to securing our homes, installing security cameras is an effective way to monitor and deter potential intruders. One popular location for mounting security cameras is on the back eaves of the house. This strategic placement offers several benefits, but it also has a few drawbacks that should be considered.

Benefits:
- Heightened surveillance: Mounting cameras on the back eaves provides an elevated view of the surrounding area, allowing for better surveillance of the backyard, patio, or any other outdoor space at the back of the house. This can help capture any suspicious activity and provide valuable evidence in case of a security breach.
- Discreet placement: The back eaves offer a relatively hidden location for security cameras, making it less likely for intruders to notice them. This can be advantageous in maintaining the element of surprise and preventing potential criminals from tampering or disabling the cameras.
- Protection from the elements: By mounting cameras on the back eaves, they are sheltered from direct exposure to harsh weather conditions, such as heavy rain or extreme sunlight. This helps to extend the lifespan of the cameras and ensures their functionality even in challenging weather conditions.
Drawbacks:
- Limited coverage: While the elevated position of the back eaves provides a wider field of view, it may also have limitations in terms of coverage. Depending on the layout of the property, blind spots or areas not fully captured by the cameras may exist. It is important to carefully plan the positioning of the cameras to maximize coverage.
- Vulnerable to vandalism: Although the discreet placement of security cameras on the back eaves can be an advantage, it also makes them vulnerable to vandalism. Intruders who notice the cameras may attempt to disable or damage them to avoid detection. Regular maintenance and monitoring are necessary to ensure the cameras remain functional.
- Difficult installation: Mounting security cameras on the back eaves can be challenging due to the height and accessibility of the location. It may require the use of ladders or professional installation services, which can add to the overall cost and effort involved in the setup.
In conclusion, mounting security cameras on the back eaves of a house offers benefits such as heightened surveillance, discreet placement, and protection from the elements. However, it also has drawbacks including limited coverage, vulnerability to vandalism, and difficulties in installation. Careful consideration of these factors is essential to make an informed decision on the placement of security cameras for optimal home security.
Tips for achieving optimal camera angles when mounting on eaves
When it comes to mounting security cameras on the eaves of your house, achieving optimal camera angles is crucial for effective surveillance. Here are some tips that can help you get the best possible angles:
- Positioning: Choose strategic locations on the eaves where the cameras can capture a wide field of view without obstructions. Avoid placing them too close to walls or other structures that may obstruct the view.
- Height: Mount the cameras at a height that provides a clear view of the area you want to monitor. Ideally, the cameras should be mounted high enough to prevent tampering or vandalism, but not so high that they lose detail or become difficult to access for maintenance.
- Angle: Adjust the angle of the cameras to ensure they are capturing the desired area. Tilt the cameras downwards slightly to cover more ground and minimize blind spots. Avoid pointing them directly at the ground or too high up, as this may limit their effectiveness.
- Test the view: Before finalizing the mounting positions, test the camera views to ensure they provide the desired coverage. Use a monitor or smartphone app to view the camera feeds and make any necessary adjustments to the angles or positions.
- Consider lighting: Take into account the lighting conditions in the areas you want to monitor. Position the cameras to avoid direct sunlight or extreme shadows, as these can affect the quality of the footage. If necessary, use cameras with built-in infrared capabilities for better visibility in low-light conditions.
By following these tips, you can ensure that your security cameras mounted on the eaves of your house have optimal angles, providing you with the best surveillance coverage possible.
How to ensure proper stability and protection for eave-mounted security cameras
When it comes to mounting security cameras on the eaves of your house, it is important to ensure proper stability and protection. Here are a few tips to help you achieve this:
1. Choose a sturdy mounting bracket: Invest in a high-quality mounting bracket that is specifically designed for eave installation. This will provide the necessary stability and support for your security camera.

2. Securely fasten the bracket: Make sure to securely fasten the mounting bracket to the eave of your house. Use appropriate screws or bolts that are suitable for the material of your eave, such as wood or concrete.
- For wooden eaves: Use wood screws that are long enough to penetrate the eave and provide a secure attachment.
- For concrete eaves: Use concrete anchors or expansion bolts to ensure a strong and stable connection.
3. Protect the camera from the elements: Consider purchasing a weatherproof housing or enclosure for your security camera. This will protect it from rain, snow, and other harsh weather conditions that could potentially damage the camera.
4. Position the camera strategically: Ensure that the camera is positioned in a way that provides optimal coverage of the area you want to monitor. Avoid obstructions such as tree branches or other structures that could block the camera’s view.
5. Regularly check and maintain the camera: Take the time to regularly inspect and clean your eave-mounted security camera. Remove any dirt, debris, or spider webs that may accumulate over time, as these can affect the camera’s performance.
By following these tips, you can ensure that your eave-mounted security cameras are properly stable and protected, allowing you to effectively monitor your property and enhance its security.

Common Mistakes to Avoid When Mounting Security Cameras on Eaves
Mounting security cameras on the eaves of your house can be an effective way to monitor your property and enhance the security of your home. However, there are some common mistakes that people make when installing these cameras that can compromise their effectiveness. By avoiding these mistakes, you can ensure that your security cameras are properly positioned and functioning optimally.
1. Poor positioning: One of the most common mistakes is placing the cameras in the wrong position. It’s important to choose a location that provides a clear and unobstructed view of the area you want to monitor. Avoid placing the cameras too high or too low, as this can result in distorted or limited views. Take the time to carefully consider the best vantage points for your cameras.
2. Incorrect angle: Another mistake is mounting the cameras at the wrong angle. The angle at which the camera is positioned can greatly affect its field of view and the quality of the footage it captures. Ensure that the camera is angled downwards slightly to capture the full view of the area, while also considering any potential blind spots that may be created.
3. Inadequate lighting: Insufficient lighting can greatly impact the effectiveness of your security cameras. Avoid mounting the cameras in areas with poor lighting conditions, as this can result in blurry or indistinguishable footage. Consider installing additional lighting or choosing cameras with built-in night vision capabilities to ensure clear visibility in low light situations.
4. Ignoring weather conditions: Failing to consider the impact of weather conditions on your cameras can lead to premature damage or malfunction. Ensure that the cameras you choose are weatherproof and suitable for the specific climate in your area. Additionally, regularly inspect and clean the cameras to remove any debris or moisture that may accumulate and affect their performance.
![[3TB + True HD] SANSCO 2K 8CH Home Security Camera System with 3000GB HDD, (8) 2MP CCTV Outdoor Waterproof Cameras, 8 Channel DVR for 24/7 Recording, Instant App Push Alert/Email, PC Remote Access](https://m.media-amazon.com/images/I/51ACSopL0aL._SL160_.jpg)
5. Neglecting cable management: Proper cable management is often overlooked but is crucial for maintaining the functionality and aesthetics of your security camera system. Avoid leaving cables exposed or loosely hanging, as this can not only pose a safety hazard but also make your cameras more vulnerable to tampering or damage. Use cable clips or conduits to neatly secure and protect the cables.
By avoiding these common mistakes, you can ensure that your security cameras are installed correctly and provide the desired level of protection for your home. Take the time to carefully plan and execute the installation process, and consider seeking professional assistance if needed. With proper positioning, angle, lighting, weatherproofing, and cable management, your security cameras can effectively monitor your property and enhance your home’s security.
Best location to mount security cameras on eaves of house

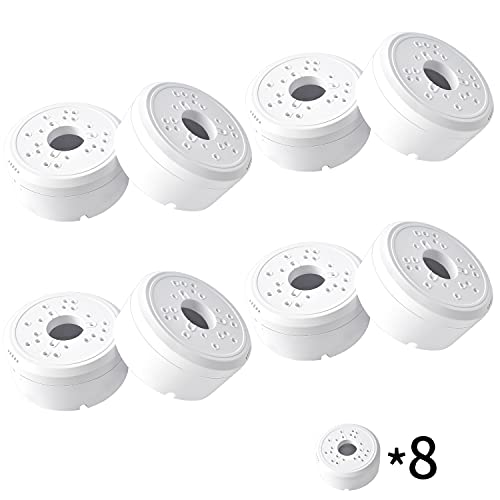
Universal Junction Box for Bullet Security Camera, Plastic Waterproof Junction Box Mount Bracket, Indoor/Outdoor Wall Ceiling Mount Hide Cable Junction Base Boxes for Arlo and Reolink Solar Panel
Features
| Part Number | US-D-05 |
| Size | 8pcs |


Didn't find the right price? Set price alert below


4G LTE Cellular Security Cameras Wireless Outdoor With SIM Card No WiFi 2K 360° View Solar Battery Powered Cameras for Home Security Outside Color Night Vision Motion Detection IP65 SD/Cloud Storage
Features
| Model | S70 |
| Color | 4G Camera (White) |


| Price history for 4G LTE Cellular Security Cameras Wireless Outdoor With SIM Card No WiFi 2K 360° View Solar Battery Powered Cameras for Home Security Outside Color Night Vision Motion Detection IP65 SD/Cloud Storage | |
|---|---|
|
Latest updates:
|
|
Didn't find the right price? Set price alert below

SV3C 2 Pack PTZ Security Camera Outdoor, 1080P Pan Tilt WiFi IP Camera, Auto Tracking 360 Camera, ONVIF, Color Night Vision, 2-Way Audio, Human Motion Detection, Waterproof, 24/7 Recording, Camhipro
Features
| Part Number | C13-2 |
| Model | C13-2 |
| Color | C13-2 |
| Size | 2 Count (Pack of 1) |


Didn't find the right price? Set price alert below

Starlink Mount Long Wall Mount, Starlink Wall-Mounted Mount, Starlink Mounting Kit for Starlink Internet Kit Satellite, Mount Compatible with Starlink for Wall Eave Fascia Installation
Features
| Part Number | DF-5002 |
| Model | DF-5002 |
| Warranty | no |


Didn't find the right price? Set price alert below

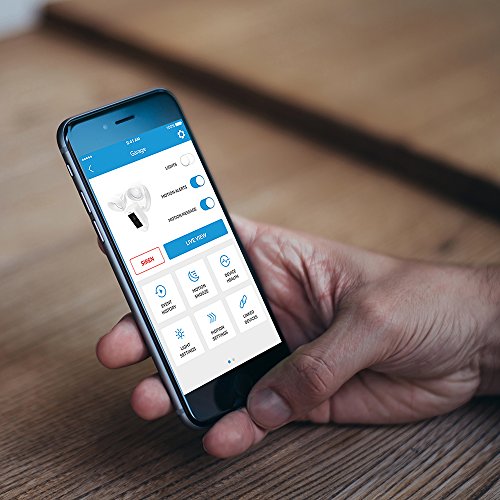
Wasserstein 3-in-1 Floodlight, Charger & Mount for Google Nest Cam Outdoor/Indoor, Battery (Camera NOT Included)
Features
| Part Number | 4895230317310 |
| Model | 4895230317310 |


Didn't find the right price? Set price alert below

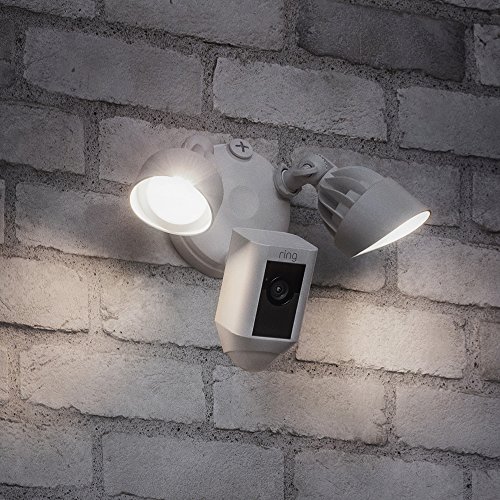
Certified Refurbished Ring Floodlight Camera Motion-Activated HD Security Cam Two-Way Talk and Siren Alarm, White, Works with Alexa
Features
| Part Number | 842861104608 |
| Model | 842861104608 |
| Color | White |
| Is Adult Product | |
| Release Date | 2019-06-17T00:00:01Z |


Didn't find the right price? Set price alert below
![[3TB + True HD] SANSCO 2K 8CH Home Security Camera System with 3000GB HDD, (8) 2MP CCTV Outdoor Waterproof Cameras, 8 Channel DVR for 24/7 Recording, Instant App Push Alert/Email, PC Remote Access](https://m.media-amazon.com/images/I/51ACSopL0aL._SS520_.jpg)
[3TB + True HD] SANSCO 2K 8CH Home Security Camera System with 3000GB HDD, (8) 2MP CCTV Outdoor Waterproof Cameras, 8 Channel DVR for 24/7 Recording, Instant App Push Alert/Email, PC Remote Access
Features
| Model | 8508+8x8699+3TB-SP |
| Warranty | Manufacturer warranty for 365 days from date of purchase |
| Color | 8 Cameras | 3TB |
![[3TB + True HD] SANSCO 2K 8CH Home Security Camera System with 3000GB HDD, (8) 2MP CCTV Outdoor Waterproof Cameras, 8 Channel DVR for 24/7 Recording, Instant App Push Alert/Email, PC Remote Access](https://m.media-amazon.com/images/I/41lwIBwqBbL._SL500_.jpg)
![[3TB + True HD] SANSCO 2K 8CH Home Security Camera System with 3000GB HDD, (8) 2MP CCTV Outdoor Waterproof Cameras, 8 Channel DVR for 24/7 Recording, Instant App Push Alert/Email, PC Remote Access](https://m.media-amazon.com/images/I/51kTH7XbgnL._SL500_.jpg)
![[3TB + True HD] SANSCO 2K 8CH Home Security Camera System with 3000GB HDD, (8) 2MP CCTV Outdoor Waterproof Cameras, 8 Channel DVR for 24/7 Recording, Instant App Push Alert/Email, PC Remote Access](https://m.media-amazon.com/images/I/5166l-KyuBL._SL500_.jpg)
![[3TB + True HD] SANSCO 2K 8CH Home Security Camera System with 3000GB HDD, (8) 2MP CCTV Outdoor Waterproof Cameras, 8 Channel DVR for 24/7 Recording, Instant App Push Alert/Email, PC Remote Access](https://m.media-amazon.com/images/I/51aK3Za1n0L._SL500_.jpg)
![[3TB + True HD] SANSCO 2K 8CH Home Security Camera System with 3000GB HDD, (8) 2MP CCTV Outdoor Waterproof Cameras, 8 Channel DVR for 24/7 Recording, Instant App Push Alert/Email, PC Remote Access](https://m.media-amazon.com/images/I/51wKkOLXrJL._SL500_.jpg)
![[3TB + True HD] SANSCO 2K 8CH Home Security Camera System with 3000GB HDD, (8) 2MP CCTV Outdoor Waterproof Cameras, 8 Channel DVR for 24/7 Recording, Instant App Push Alert/Email, PC Remote Access](https://m.media-amazon.com/images/I/41ufn6dj1TL._SL500_.jpg)
![[3TB + True HD] SANSCO 2K 8CH Home Security Camera System with 3000GB HDD, (8) 2MP CCTV Outdoor Waterproof Cameras, 8 Channel DVR for 24/7 Recording, Instant App Push Alert/Email, PC Remote Access](https://m.media-amazon.com/images/I/4153s2hB5hL._SL500_.jpg)
![[3TB + True HD] SANSCO 2K 8CH Home Security Camera System with 3000GB HDD, (8) 2MP CCTV Outdoor Waterproof Cameras, 8 Channel DVR for 24/7 Recording, Instant App Push Alert/Email, PC Remote Access](https://m.media-amazon.com/images/I/41EPqe6RhdL._SL500_.jpg)
Didn't find the right price? Set price alert below

3 Pack - Solar Panel for Ring Camera, Compatible with Ring Spotlight Cam Plus/Pro(Battery) & Ring Stick Up Cam/Pro Battery & Ring Spotlight Cam Battery with 10FT/3M Long Cable
Features
| Warranty | 2 Years Warranty |
| Size | 3 Pack |
| Energy Efficiency Class | High Efficiency |


Didn't find the right price? Set price alert below

6V 4.5W Solar Panel for Google Nest Cam Outdoor or Indoor, IP65 Waterproof Google Nest Camera Solar Panel with 10Ft Cable Continuous Power to The Camera - 3 Pack
Features
| Warranty | 2 Years Warranty |
| Size | 3 Pack |
| Energy Efficiency Class | High Efficiency |


Didn't find the right price? Set price alert below

Wireless Bridge with 2 Bracket Mounts, 3KM 5.8G Point to Point Outdoor CPE, Adalov CPE660 Long Range Wifi Bridges for PtP/PtMP with 14DBi High Gain Antenna, PoE Adapter, 2 RJ45 Ethernet Port, 2 Pack
Features
| Part Number | CPE660 |
| Model | CPE660 |
| Warranty | 1 Year |
| Color | White |
| Language | Italian |


| Price history for Wireless Bridge with 2 Bracket Mounts, 3KM 5.8G Point to Point Outdoor CPE, Adalov CPE660 Long Range Wifi Bridges for PtP/PtMP with 14DBi High Gain Antenna, PoE Adapter, 2 RJ45 Ethernet Port, 2 Pack | |
|---|---|
|
Latest updates:
|
|
Didn't find the right price? Set price alert below
Questions and answers:
Where is the best location to mount security cameras on the eaves of a house?
The best location to mount security cameras on the eaves of a house is at the corners of the eaves, facing downwards towards the entrance points of the property. This allows for maximum coverage and ensures that any potential intruders are captured on camera.
Should security cameras be mounted on the front or back eaves of a house?
It is recommended to mount security cameras on both the front and back eaves of a house. This provides comprehensive coverage of the entire property, capturing any potential intruders from any direction. It is important to ensure that the cameras are strategically positioned to cover all entrances and vulnerable areas.


