Arduino is a popular open-source hardware and software platform that allows anyone to create interactive projects. One of the common applications of Arduino is interfacing sensors to capture and process data. When it comes to digital camera sensors, the question arises: can any digital camera sensor be connected to Arduino?
Well, the answer is not a simple yes or no. While Arduino boards are capable of interacting with a wide range of sensors, connecting a digital camera sensor to Arduino may require some additional considerations.
Digital camera sensors are complex devices that require specific hardware and interfaces to operate. They usually come with a dedicated circuitry and interface protocols like Serial Peripheral Interface (SPI) or Inter-Integrated Circuit (I2C). Therefore, it is not as simple as connecting the sensor directly to the Arduino’s GPIO pins.
Advantages of Connecting Any Digital Camera Sensor to Arduino
Connecting a digital camera sensor to an Arduino microcontroller can bring several advantages and open up new possibilities for projects and applications. Here are some of the main benefits:
1. Enhanced Image Processing: By connecting a camera sensor to Arduino, you can access and utilize the sensor’s capabilities for image processing. This can include features such as capturing images, recording videos, image analysis, and more. Arduino’s computational capabilities can be leveraged to perform real-time image processing tasks, making it suitable for applications such as surveillance, object tracking, and computer vision.

2. Flexible and Customizable Projects: Arduino provides a platform for developing customized applications. By connecting a digital camera sensor, you can integrate image capturing and processing into your projects, adding a visual element to your creations. Whether you’re building a robotic project, a home automation system, or an interactive art installation, the combination of Arduino and a camera sensor allows for limitless possibilities.
3. Cost-Effective Solution: Digital camera sensors can be obtained at affordable prices, making it a cost-effective option for obtaining visual data for your Arduino projects. Instead of purchasing complex and expensive imaging systems, you can utilize a compatible digital camera sensor and interface it with Arduino to achieve similar functionalities at a fraction of the cost.
4. Modularity and Expandability: Arduino’s modular and expandable nature allows for easy integration of camera sensors. There are various camera modules available that can be easily connected to Arduino through standard interfaces such as SPI or I2C. This makes it easier to upgrade or change camera modules based on specific project requirements, enabling flexibility and scalability.
5. Wide Range of Application Possibilities: The combination of an Arduino microcontroller and a digital camera sensor opens up a wide range of application possibilities. Some potential applications include: object detection and recognition, facial recognition, motion sensing, QR code scanning, barcode scanning, augmented reality, and more. The versatility of Arduino allows developers to explore different applications and create innovative solutions.
By connecting any digital camera sensor to Arduino, you can leverage the power of image capture and processing in your projects, enhancing their functionality and creating unique applications.

Endless Possibilities for Creative Projects
Connecting a digital camera sensor to an Arduino opens up a world of possibilities for creative projects. Whether you’re an amateur tinkerer or a seasoned electronics enthusiast, this combination offers endless opportunities to explore and create.
Expanded Photography Capabilities
By connecting a digital camera sensor to an Arduino, you can enhance and expand the capabilities of your photography. You can create custom camera controls, automate your shooting process, and even experiment with alternative image capture methods.
For example, with the right combination of sensors and programming, you can trigger your camera based on specific events, such as motion or light changes. You can also create time-lapse sequences, high-speed photography setups, or even create your own DIY camera stabilization system.
Interactive Art Installations
Arduino-powered digital camera sensors can also be used to create interactive art installations. By capturing images and analyzing their data, you can develop installations that respond to the presence or movements of viewers.
For instance, you could create a photo booth that captures and processes images differently based on the emotions expressed by the subjects. You could also create installations that use facial recognition technology to trigger specific responses or interactions.

With the Arduino’s ability to connect to other devices and sensors, you can also incorporate sound, light, and other interactive elements to create multi-sensory experiences.
This combination of digital camera sensors and Arduino is not limited to photography and art installations. With some imagination and technical know-how, you could create robotic systems that use image recognition to navigate or interact with their environments. You could also develop scientific or environmental monitoring devices that use image data to gather valuable information.
The possibilities are truly endless, limited only by your creativity and technical skills. So, grab your Arduino and start exploring the exciting world of digital camera sensor projects!
Enhanced Image Quality and Resolution
Connecting a digital camera sensor to an Arduino opens up the possibility of enhanced image quality and resolution. By interfacing the sensor with the Arduino, you can capture images with greater clarity and detail.
One way to achieve enhanced image quality is by using a sensor with a higher resolution. Many digital camera sensors available in the market come with different resolutions, ranging from a few megapixels to tens of megapixels. By choosing a sensor with a higher resolution, you can capture images with more pixels, resulting in greater detail and sharpness.
![Arduino Portenta Vision Shield - LoRa® [ASX00026]](https://m.media-amazon.com/images/I/41G6v0Mwr-L._SL160_.jpg)
In addition to resolution, the quality of the sensor itself plays a crucial role in image quality. Higher-quality sensors are often designed to capture images with less noise and better dynamic range. This means that the resulting images will have cleaner and more accurate colors, as well as better contrast between different parts of the image.
When connecting a digital camera sensor to an Arduino, it is also possible to apply various image processing techniques to further enhance the image quality. This can include noise reduction, image sharpening, and color correction. By utilizing the processing power of the Arduino, you can improve the final image output and make it more visually appealing.
Moreover, the Arduino can be used to control other parameters of the sensor, such as exposure time and focus. This allows for more precise control over the image capturing process, resulting in better overall image quality.
In conclusion, connecting a digital camera sensor to an Arduino offers the opportunity to achieve enhanced image quality and resolution. By selecting a sensor with higher resolution and taking advantage of image processing techniques, you can capture images with greater clarity, detail, and visual appeal.
Access to Advanced Camera Features
While it is possible to connect various digital camera sensors to an Arduino board, accessing advanced camera features may not always be straightforward. Most digital camera sensors have a wide range of functionalities and settings that require proper integration and communication protocols.
Before attempting to connect a digital camera sensor to an Arduino, it is important to determine the specific features and functionalities you need to access. This will help you choose the right camera sensor and ensure compatibility with the Arduino board.
Some advanced camera features that may be desirable include:
1. High-resolution imaging:
A high-resolution camera sensor allows capturing detailed images with a higher pixel count. This can be useful for applications such as image processing, computer vision, or photography.
2. Autofocus and lens control:
Some camera sensors have built-in autofocus capabilities, allowing the camera to automatically focus on the subject. Additionally, certain sensors support lens control, enabling the manipulation of focus, zoom, and aperture settings.
Once you have identified the camera sensor with the desired advanced features, proper integration with the Arduino board is necessary. This may involve using specific libraries or communication protocols, such as SPI or I2C.

An important consideration is the processing power and memory capabilities of the Arduino board. Some camera sensors require significant computational resources to process and store images. Ensure that the Arduino board you are using can handle the data output and perform the required processing.
Furthermore, the Arduino board should have the necessary connectivity options, such as GPIO pins or serial interfaces, to connect and control the camera sensor.
A reliable way to establish communication between the Arduino and the camera sensor is to consult the datasheets and technical documentation of both devices. These resources often provide pinouts, communication protocols, and example code snippets for setting up the connection.
Lastly, it is important to consider power requirements. Advanced camera features may require additional power supply or voltage levels. Ensure that the Arduino board can provide the necessary power and voltage levels, either directly or through external power sources.
| Camera Feature | Considerations |
|---|---|
| High-resolution imaging | – Requires a compatible camera sensor – Adequate processing power and memory on Arduino board |
| Autofocus and lens control | – Supported by specific camera sensors – Requires proper integration and control mechanisms |
| Communication protocols | – SPI, I2C, or other compatible protocols – Consult datasheets and technical documentation for information |
| Power requirements | – Verify voltage levels and power supply needs – Ensure compatibility with Arduino board |
Expansion of Arduino’s Functionality
The Arduino platform provides a versatile and flexible environment for creating a wide range of projects. While it originally started as a simple microcontroller board, it has evolved over time to support various expansions that enhance its functionality. One such expansion is the ability to connect digital camera sensors to Arduino.

Connecting a digital camera sensor to Arduino opens up a whole new world of possibilities for capturing and processing images. With this expansion, Arduino can be used for tasks such as image recognition, object tracking, and even creating your own DIY camera.
Connecting a Digital Camera Sensor
Connecting a digital camera sensor to Arduino requires an understanding of both the sensor and Arduino’s capabilities. Most digital camera sensors use either Serial Peripheral Interface (SPI) or Inter-Integrated Circuit (I2C) communication protocols to send and receive data.
To interface with the camera sensor, you would typically need to use additional components, such as level shifters, to ensure compatibility between the sensor’s voltage levels and Arduino’s voltage levels. Additionally, you may need to write or use existing libraries that handle the specific protocols and data formats used by the camera sensor.
Potential Applications
The ability to connect a digital camera sensor to Arduino opens up a world of applications. Here are a few examples:
1. Image Recognition: By combining Arduino’s processing power with a camera sensor, you can build projects that can recognize and analyze images in real-time. This could be used for applications such as detecting objects, recognizing faces, or even reading barcodes.
2. Object Tracking: Arduino, with a camera sensor, can also be used to track the movement of objects. This could be useful in applications such as robotics, where the Arduino can control motors based on the movement of an object captured by the camera sensor. This can enable applications such as autonomous robot navigation or object-following robots.
3. DIY Camera: With a camera sensor connected, Arduino can be transformed into a DIY camera. You can program Arduino to capture images, store them on an SD card, and even add additional features such as time-lapse photography or motion detection.
In conclusion, connecting a digital camera sensor to Arduino expands its functionality significantly, allowing for the creation of projects involving image recognition, object tracking, and DIY cameras. With the appropriate components and libraries, Arduino becomes a powerful platform for image processing and computer vision tasks.
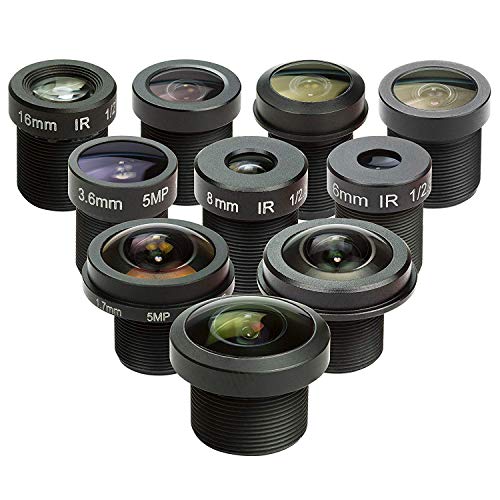
Compatibility with Existing Camera Lenses
When considering connecting a digital camera sensor to an Arduino, one important factor to consider is the compatibility with existing camera lenses. While it is possible to connect various types of camera sensors to an Arduino, not all sensors will be compatible with all lenses.
The first thing to consider is the lens mount. Different camera manufacturers have various lens mount systems, such as Canon EF, Nikon F, Sony E, and so on. Each lens mount has a specific mechanical and electrical interface that allows the lens to be connected to the camera body. Therefore, before connecting a camera sensor to an Arduino, it is crucial to ensure that the lens mount of the camera sensor is compatible with the lens mount of the desired lens.
Another important consideration is the electronic communication between the lens and the camera sensor. Many modern lenses have electronic contacts that allow for autofocus, aperture control, and other features. However, not all camera sensors may support these electronic communication protocols. Therefore, it is essential to check whether the selected camera sensor is capable of communicating with the desired lens electronically.
Additionally, the size of the camera sensor can also affect lens compatibility. Different camera sensors have varying sizes, such as full-frame, APS-C, Micro Four Thirds, and so on. Each sensor size corresponds to a specific crop factor, which affects the field of view and focal length multiplier. It is important to consider the sensor size and its compatibility with the lens’s image circle to ensure proper image capture.
In summary, while it is possible to connect a digital camera sensor to an Arduino, it is crucial to consider the compatibility of the camera sensor with existing camera lenses. Factors such as lens mount, electronic communication, and sensor size can all affect the compatibility and functionality of the system. By considering these factors, one can ensure a successful integration of a camera sensor with an Arduino.
Streamlined Data Acquisition Process
When connecting a digital camera sensor to an Arduino board, it is important to establish a streamlined data acquisition process. This ensures that the sensor data is efficiently collected and processed by the Arduino for further analysis or control.
1. Sensor Integration
The first step is to integrate the digital camera sensor with the Arduino board. This can be done by connecting the necessary pins of the sensor to the appropriate pins on the Arduino. It is essential to consult the datasheet or technical documentation of the sensor to determine the pin mapping.
Additionally, it may be required to install any required libraries or firmware on the Arduino to ensure compatibility with the camera sensor. These libraries provide the necessary functions and communication protocols to communicate with and control the sensor.
2. Data Collection
Once the sensor is successfully integrated, the next step is to collect data from the camera sensor. This involves initializing the sensor and configuring it to capture images or videos as required. The collected data can then be stored in a buffer or transmitted for further processing.
The Arduino can utilize its digital input/output pins or other communication interfaces such as I2C or SPI to interact with the sensor and retrieve the data. The collected data can be stored in variables or arrays in the Arduino’s memory for subsequent analysis or transmission.
3. Data Processing
After the data is collected, it needs to be processed according to the desired application. The Arduino can perform various processing tasks such as image recognition, data filtering, or feature extraction, depending on the complexity of the application.
This processing may involve using additional libraries or algorithms implemented on the Arduino. The processed data can then be used for decision making, control actions, or further analysis.
4. Data Transmission or Storage
Finally, the processed data can be transmitted or stored for further use. This can be accomplished by utilizing the Arduino’s communication interfaces such as serial communication, Ethernet, Wi-Fi, or Bluetooth. The data can be sent to a computer or other devices for real-time analysis or storage.
| Pros | Cons |
|---|---|
| Ease of data acquisition | Limitations of Arduino’s processing power |
| Flexibility in application development | Limited memory for storing large amounts of data |
| Cost-effective solution | Dependence on compatible camera sensors |
Overall, a streamlined data acquisition process for connecting a digital camera sensor to an Arduino board involves integrating the sensor, collecting the data, processing it, and transmitting or storing it for further use. By carefully following this process, developers can make efficient use of the camera sensor data and facilitate various applications and projects.
Integration with Other Arduino Sensors
Arduino offers a wide range of sensors that can be easily integrated with a digital camera sensor. These sensors provide additional functionality and allow you to build more advanced projects.
Some of the popular Arduino sensors that can be integrated with a digital camera sensor include:
- Ultrasonic Sensor: This sensor can be used to measure distances or detect motion. By combining it with a digital camera sensor, you can automate processes that require both distance measurements and image capture.
- Temperature and Humidity Sensor: By incorporating this sensor with a digital camera, you can capture images based on specific temperature or humidity conditions. This can be useful for applications such as monitoring environmental conditions in a greenhouse or controlling a thermostat based on room temperature.
- Gas Sensor: With a gas sensor, you can detect the presence of various gases and trigger the digital camera sensor to capture images or videos accordingly. This can be helpful in monitoring air quality or detecting gas leaks.
- Light Sensor: By integrating a light sensor with a digital camera sensor, you can capture images or videos based on the level of ambient light. This can be used for applications such as automatic photography in low-light conditions or controlling lighting systems based on the amount of natural light available.
- Accelerometer: An accelerometer can measure acceleration, tilt, and orientation. Combining it with a digital camera sensor can enable the creation of projects that require motion-based image capture or stabilization.
These are just a few examples of the many sensors available for Arduino. With the right combination of sensors and a digital camera sensor, you can create innovative projects that integrate measurements, images, and videos seamlessly.
Cost-Effective Alternative to Professional Camera Equipment
Professional camera equipment can often come with a hefty price tag, making it inaccessible to many photographers and artists. However, with the development of digital camera sensors and the versatility of Arduino, there is now a cost-effective alternative available.
1. Benefits of Arduino
- Arduino is an open-source electronics platform that allows users to create a wide range of projects.
- It is cost-effective and can be easily integrated with different components.
- Arduino boards have a small form factor, making them portable and easy to work with.
- There is a large community of Arduino enthusiasts who are constantly developing and sharing new projects and libraries.
- Arduino can interface with various digital camera sensors, allowing for customization and experimentation.
2. Connecting a Digital Camera Sensor to Arduino
Most digital camera sensors come with a standardized interface, such as SPI or I2C, which can be easily connected to Arduino. By following the sensor’s datasheet and using appropriate libraries, you can establish communication between the sensor and Arduino.
Once connected, you can capture images, adjust settings, and even perform image processing using Arduino. This opens up endless possibilities for creative photography projects, time-lapse photography, motion detection, and more.
3. Limitations and Considerations
While Arduino provides a cost-effective alternative to professional camera equipment, it’s important to note that there are some limitations to consider:
- Arduino’s processing power and memory limitations may restrict the resolution and speed of image capture.
- Compatibility issues may arise when interfacing with certain camera sensors, so it’s essential to choose sensors that are well-documented and supported by Arduino libraries.
- Image quality may not match that of professional cameras, as the sensor’s specifications and built-in image processing capabilities vary.
- Camera control functionality may be limited compared to dedicated camera equipment, such as auto-focus, advanced exposure control, and stability.
Despite these limitations, Arduino provides a cost-effective option for hobbyists, students, and artists who want to explore photography and experiment with digital camera sensors. With a little creativity, Arduino can be a powerful tool for capturing unique and inspiring images.
Potential for Real-time Image Processing and Analysis
Connecting a digital camera sensor to an Arduino opens up the potential for real-time image processing and analysis. By using the Arduino’s processing power and various libraries and software tools, it is possible to perform a wide range of image processing tasks directly on the captured data.
1. Object Detection and Tracking
One potential application is object detection and tracking. By analyzing the image data, it is possible to identify and track specific objects or patterns of interest. This can be useful in various fields, such as surveillance, robotics, and automation.
2. Image Filtering and Enhancement
Another possibility is to apply various image filtering and enhancement algorithms to improve the quality or extract specific features from the captured images. This can include techniques such as noise reduction, contrast adjustment, edge detection, and image sharpening.
These image processing techniques can be used, for example, in computer vision systems, medical imaging, or quality control applications, allowing for real-time analysis and decision making based on the captured images.
3. Pattern Recognition
Using machine learning algorithms and pattern recognition techniques, it is also possible to train the Arduino to recognize specific patterns or objects in real-time. This can be useful in applications such as gesture recognition, facial recognition, or object identification.
4. Augmented Reality
By combining the Arduino’s capability to process image data with additional sensors, such as accelerometers or gyroscopes, it is possible to create augmented reality experiences. The Arduino can analyze the captured images in real-time and overlay virtual objects or information onto the real-world environment.
Overall, connecting a digital camera sensor to an Arduino opens up a wide range of possibilities for real-time image processing and analysis. With the right software tools and algorithms, the Arduino can become a powerful platform for various applications in computer vision, robotics, automation, and more.
Question-answer:
Can I connect any digital camera sensor to arduino?
Yes, it is possible to connect most digital camera sensors to an Arduino board with the right interface and connections.
What kind of interface do I need to connect a digital camera sensor to arduino?
The specific interface required to connect a digital camera sensor to an Arduino board depends on the sensor itself. Some common interface options include SPI (Serial Peripheral Interface), I2C (Inter-Integrated Circuit), and UART (Universal Asynchronous Receiver-Transmitter).
Are there any limitations on the type of digital camera sensor that can be connected to arduino?
Yes, there are some limitations. The Arduino board has limited resources in terms of processing power, memory, and I/O pins. Therefore, it may not be able to support high-resolution or high-speed sensors. Additionally, some sensors may require specialized drivers or libraries that may not be compatible with Arduino.
What are the benefits of connecting a digital camera sensor to arduino?
Connecting a digital camera sensor to an Arduino board allows you to capture and process images directly using the Arduino platform. This opens up possibilities for various applications such as image recognition, computer vision, surveillance systems, and more. It also provides an opportunity to learn about sensor interfacing and image processing using a popular microcontroller platform.
Can I use an Arduino board to control the functions of a digital camera sensor?
In most cases, an Arduino board alone may not have enough processing power or resources to fully control all the functions of a digital camera sensor. However, you can use an Arduino board as a controller to send commands and receive data from the sensor, enabling you to perform basic operations such as capturing images or adjusting sensor settings.


