
With the increasing concern for security, many individuals are looking for ways to enhance the safety of their homes and businesses. If you own a MacBook Pro, you might be wondering if it can be utilized as a security camera. The good news is that yes, you can indeed turn your MacBook Pro into a reliable surveillance system.
One of the main advantages of using your MacBook Pro as a security camera is its built-in webcam. These webcams are typically of high quality and allow you to capture clear and detailed footage. Additionally, the MacBook Pro is equipped with the necessary software to support video recording, making it a convenient choice for monitoring your surroundings.
There are various software applications available that allow you to turn your MacBook Pro into a security camera. These applications provide features like motion detection, remote access, and cloud storage, making it easier for you to monitor your property from anywhere in the world. Furthermore, using your MacBook Pro as a security camera eliminates the need to purchase additional equipment, saving you both time and money.
However, it is important to keep in mind that your MacBook Pro will need to be constantly connected to power when used as a security camera. Continuous video recording can drain the battery quickly, so ensure that you have a reliable power source nearby. Additionally, consider the storage capacity of your MacBook Pro, as video files can occupy a significant amount of space.
In conclusion, if you own a MacBook Pro and are looking to enhance your security measures, utilizing it as a security camera is a viable option. With its high-quality built-in webcam and various software applications available, the MacBook Pro can provide you with the necessary surveillance capabilities without the need for additional equipment. By turning your MacBook Pro into a security camera, you can have peace of mind knowing that your property is being monitored effectively.

How to Use MacBook Pro as a Security Camera
If you own a MacBook Pro and want to increase the security of your home or office, you can repurpose your laptop as a security camera. Using the built-in camera and some software, you can easily set up a DIY security system without having to invest in expensive cameras.
Here are the steps to use your MacBook Pro as a security camera:
| Step | Description |
|---|---|
| Step 1 | Make sure your MacBook Pro is connected to a power source and is positioned in a suitable location to cover the desired area. |
| Step 2 | Open the “Photo Booth” application on your MacBook Pro. |
| Step 3 | In the “Photo Booth” application, click on the “Effects” button and select the “Security Camera” effect. |
| Step 4 | Adjust the camera angle and position to capture the desired area. |
| Step 5 | Click on the red button in the “Photo Booth” application to start recording. |
| Step 6 | Leave the “Photo Booth” application running in the background while you’re away. |
| Step 7 | To access the recorded videos, open the “Photo Booth” application again and click on the “Browse” button. |
By following these steps, you can easily turn your MacBook Pro into a security camera and keep an eye on your home or office even when you’re not there. It’s a cost-effective solution that can provide peace of mind and added security.
Note: Make sure to check the laws and regulations regarding the use of security cameras in your area before implementing this setup. Privacy and legal issues may vary depending on your location.
Setting Up Your MacBook Pro
Setting up your MacBook Pro as a security camera is a convenient and effective way to enhance the security of your home or office. You can utilize the built-in camera and the powerful software available on your MacBook Pro to set up a surveillance system that meets your needs. To get started, follow these steps:

- Open the Camera app: To access your MacBook Pro’s camera, open the Camera app from your Applications folder or launch it from the Launchpad.
- Adjust camera settings: Once the Camera app is open, you may want to adjust the camera settings such as video resolution, frame rate, and video quality. These settings will vary depending on the macOS version.
- Position your MacBook Pro: Decide on the best location to position your MacBook Pro for monitoring the area you want to secure. You can use a laptop stand or any other accessory to prop up your MacBook Pro for optimal viewing angle and coverage.
- Enable recording and notifications: If you want to record footage or receive notifications whenever there is motion detected, you can use third-party software like iSpy or SecuritySpy. Install and set up the software according to the instructions provided.
- Test the setup: After completing the setup, test your MacBook Pro’s functionality as a security camera by moving around the monitored area to ensure proper recording, motion detection, and notifications.
Remember, using your MacBook Pro as a security camera may require keeping it powered on and connected to a power source for extended periods. It’s also important to regularly check for software updates and keep your MacBook Pro up to date to ensure optimal performance and security.
By following these steps and utilizing the features available on your MacBook Pro, you can turn it into a reliable and effective security camera solution to monitor and protect your premises.
Choosing the Right Security Camera Software
When it comes to using your MacBook Pro as a security camera, one crucial aspect to consider is the software you will use. The right security camera software can provide you with the necessary features and functionality to monitor and protect your premises effectively.
Compatibility: Before choosing any security camera software, it is important to ensure that it is compatible with your MacBook Pro. Look for software that supports the macOS operating system to ensure smooth functioning and optimal performance.
Video Management: A good security camera software should offer comprehensive video management features. The ability to view, record, and playback video footage is essential. Look for software that allows you to easily access and manage video recordings in a user-friendly interface.

Alerts and Notifications: Opt for software that provides real-time alerts and notifications. These alerts can be vital in notifying you of any suspicious activity or breaches in security. Look for a software solution that allows you to customize the types of alerts you receive to ensure they match your specific needs.
Remote Access: The ability to access your security camera feed remotely is a crucial feature for modern security camera software. Look for software that offers remote access capabilities, allowing you to monitor your premises from anywhere using your MacBook Pro or any other device with an internet connection.
Integration with Other Systems: If you plan to integrate your security camera system with other systems or devices, make sure that the software you choose supports these integrations. This could include alarms, access control systems, or other security measures that you may have in place.
User-Friendly Interface: Lastly, consider the usability of the security camera software. Look for software that offers an intuitive and easy-to-use interface, allowing you to access and manage your security camera system without difficulty or extensive training.
By carefully considering these factors, you can choose the right security camera software that suits your needs and maximizes the effectiveness of your MacBook Pro as a security camera.
Configuring Your MacBook Pro
Configuring your MacBook Pro as a security camera involves a few steps that you need to follow. Here is a step-by-step guide on how to set it up:
Step 1: Open the App Store on your MacBook Pro and search for a security camera app. There are several options available, so choose one that suits your needs and requirements.
Step 2: Download and install the security camera app on your MacBook Pro. Make sure to read the app’s instructions and requirements before proceeding with the installation.
Step 3: Once the app is installed, open it and follow the on-screen instructions to set up the camera. You may need to create an account or sign in with an existing account to access all the features of the app.
Step 4: Position your MacBook Pro in the desired location where you want to monitor and record. Make sure it has a clear view of the area you want to monitor.

Step 5: Adjust the settings of the app according to your preferences. You can customize features such as motion detection, recording schedules, and notifications.
Step 6: Test the camera by accessing the live stream or recording a short video. Make sure everything is functioning properly before relying on it for security purposes.
Step 7: Connect your MacBook Pro to a power source to ensure it remains operational at all times. You may also consider enabling power-saving settings to conserve battery life.
Note: It is recommended to set a password or passcode for your MacBook Pro to prevent unauthorized access and protect your surveillance footage.
By following these steps, you can effectively configure your MacBook Pro as a security camera and enhance the security of your surroundings.

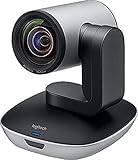
Connecting Your MacBook Pro to a Surveillance Camera
If you are looking to enhance the security of your property or keep an eye on your surroundings, you can repurpose your MacBook Pro as a surveillance camera. By connecting a compatible camera to your MacBook Pro, you can easily monitor your premises directly from your laptop.
Choosing the Right Camera
Before getting started, you need to choose a surveillance camera that is compatible with your MacBook Pro. Look for a camera that supports macOS and offers the features you need, such as motion detection, night vision, and high-resolution video recording.
There are various types of surveillance cameras available, including wired, wireless, IP, and USB cameras. Consider the specific requirements of your surveillance setup and select the camera that best fits your needs.
Connecting the Camera
Once you have chosen the camera, you can proceed with connecting it to your MacBook Pro. Depending on the camera type, the connection process may vary:
Wired cameras: For wired cameras, you will need to connect the camera to your MacBook Pro using an appropriate cable, such as an Ethernet cable or a USB cable. Follow the instructions provided by the camera manufacturer for the specific connection process.
Wireless cameras: Wireless cameras connect to your MacBook Pro using your local Wi-Fi network. Ensure that your MacBook Pro is connected to the same network as the camera, and follow the setup instructions provided by the camera manufacturer.
IP cameras: IP cameras are a popular choice for surveillance systems. To connect an IP camera to your MacBook Pro, you will need to configure the camera’s network settings and connect it to your local network. Once connected, you can access the camera’s video stream through a web browser or compatible surveillance software.
Using Surveillance Software
After successfully connecting the camera to your MacBook Pro, you can now start using surveillance software to monitor the camera feed. There are several applications available for macOS that allow you to view and manage your surveillance cameras.
Some popular surveillance software options for macOS include:
- SecuritySpy
- Blue Iris
- SSCCTV
These applications provide a user-friendly interface where you can view live video, access recorded footage, and configure additional settings for your surveillance system.
Note: It is recommended to secure your MacBook Pro and the camera feed by setting up strong passwords and enabling encryption to prevent unauthorized access.
By repurposing your MacBook Pro as a surveillance camera, you can take advantage of its powerful hardware and versatility to create a cost-effective security solution for your home or business.
Managing Camera Feeds on Your MacBook Pro
Using your MacBook Pro as a security camera can provide you with added peace of mind and security. However, to effectively manage and utilize your MacBook Pro as a security camera, you need to have the right tools and techniques in place.
1. Choose the Right Camera Software:
There are several camera software options available for your MacBook Pro, such as iSpy, SecuritySpy, and Manything. These applications allow you to manage and monitor your camera feeds, set up motion detection, and even receive notifications on your MacBook when any suspicious activity is detected.
2. Set Up Multiple Camera Feeds:
If you want to monitor different areas of your property, you can set up multiple camera feeds on your MacBook Pro. This can be done by connecting multiple IP cameras or using software that supports multiple camera streams. By setting up multiple camera feeds, you can keep an eye on different locations simultaneously.
3. Customize Camera Settings:
Adjusting the camera settings according to your specific needs is crucial for successful surveillance. You can control parameters such as camera resolution, frame rate, and image quality to ensure that you capture the required details accurately. Additionally, enabling features like night vision and audio monitoring can enhance the effectiveness of your security camera system.
4. Optimize Storage and Recording:
As video recordings consume a significant amount of storage space, it is essential to optimize your storage and recording settings. Set your MacBook Pro to automatically delete old video footage and save disk space. Alternatively, consider using cloud storage options for long-term storage and easy accessibility.
5. Remote Monitoring:
With the right camera software, you can access your camera feeds remotely from your MacBook Pro. This allows you to monitor your property even when you are away, providing real-time security updates. Ensure that your camera software supports remote access and consider using a secure VPN connection for added security.
By following these steps and utilizing the capabilities of your MacBook Pro, you can effectively manage camera feeds and enhance the security of your property.
Accessing Your Security Camera Remotely
Using your MacBook Pro as a security camera allows you to monitor your surroundings from wherever you are. By accessing your security camera remotely, you can keep an eye on your home, office, or any other location even when you are not physically present.
To access your security camera remotely, follow these steps:
- Ensure that your MacBook Pro is connected to the internet.
- Install a reliable security camera software or app on your MacBook Pro.
- Configure the security camera software or app with your camera’s IP address and other necessary settings.
- Set up port forwarding on your router to allow remote access to your security camera.
- Create a secure login for accessing your security camera remotely.
- Launch the security camera software or app on your MacBook Pro.
- Enter your login credentials and connect to your security camera.
- Once connected, you will be able to view a live stream of your security camera remotely.
- Depending on the software or app you are using, you may also be able to control certain camera settings or access recorded footage.
It is important to note that accessing your security camera remotely may require you to set up dynamic DNS (DDNS) services if you have a dynamic IP address. This will allow you to access your camera even if your IP address changes.
Additionally, ensure that your MacBook Pro is securely positioned and connected to a power source while functioning as a security camera for extended periods. You may also consider enabling motion detection or configuring alerts to be notified of any unusual activity.
With proper setup and configuration, your MacBook Pro can serve as a reliable and convenient remote security camera, providing you with peace of mind and enhanced security.
Configuring Alerts and Notifications
With your MacBook Pro acting as a security camera, it’s essential to configure alerts and notifications to stay informed about any suspicious activities. By setting up alerts, you can receive real-time notifications whenever motion is detected or certain events occur.
Motion Detection Alerts
To enable motion detection alerts, you’ll need to use security camera software or applications such as iSpy, SecuritySpy, or OBS Studio. These programs can recognize movements within the camera’s field of view and send you an alert whenever this happens.
Once you’ve installed the chosen software, open the settings or preferences panel and navigate to the “Notifications” or “Alerts” section. Here, you can customize various parameters such as sensitivity levels, the areas to monitor for motion, and the actions to take when motion is detected.
Ensure that you’ve configured the notifications to be sent to your desired method, such as email or through a dedicated app. This way, you’ll receive an immediate alert whenever your MacBook Pro’s camera detects any motion.
Event-Based Alerts
In addition to motion detection alerts, you can also configure event-based alerts for specific actions or occurrences. For example, you may want to receive a notification when someone opens a particular door or enters a restricted area.
To set up event-based alerts, you’ll need to use advanced security camera software with specific features, such as object recognition or facial detection. These programs can determine when a predefined event occurs, allowing you to receive alerts for these events in real-time.
Similar to configuring motion detection alerts, open the settings or preferences panel of your security camera software and navigate to the “Events” or “Rules” section. Here, you can define the conditions and actions for each event. Specify the events you want to receive alerts for, such as a person’s face being detected or an object being moved, and choose how you want to be notified.
Note: Ensure that your MacBook Pro remains powered on and connected to the internet to receive these alerts and notifications.
By configuring alerts and notifications, you can transform your MacBook Pro into a reliable security camera and stay updated about any potential security breaches or suspicious activities in your home or office. Always test the alerts to ensure they’re working correctly and adjust the settings as needed for optimal functionality.
Enhancing Security Camera Performance on MacBook Pro
Using your MacBook Pro as a security camera can provide you with an additional layer of protection for your home or office. However, there are a few steps you can take to enhance the performance of your security camera and ensure maximum efficiency.
1. Positioning and Placement
The placement of your MacBook Pro is crucial in maximizing the performance of your security camera. It is recommended to position the MacBook Pro in a strategic location that provides a clear and unobstructed view of the area you want to monitor. Avoid placing it near windows or bright light sources to minimize glare or overexposure.
2. Camera Settings and Software
Adjusting the camera settings and utilizing the right software can significantly improve the performance of your security camera. Install a reliable security camera software, such as iSpy or SecuritySpy, that offer advanced features and customization options. Fine-tune settings such as resolution, motion detection sensitivity, and recording duration to optimize the camera’s performance.
3. Wi-Fi Network Optimization
A stable and secure Wi-Fi connection is crucial for seamless live streaming and recording. Make sure your MacBook Pro is connected to a fast and reliable Wi-Fi network. Consider upgrading your router or using a Wi-Fi extender to strengthen the signal in the area where the MacBook Pro is located. Regularly check and update your router’s firmware to ensure optimal performance.
4. Storage and Backups
Having adequate storage space and regular backups are essential for uninterrupted security camera operation. Make sure your MacBook Pro has sufficient storage capacity to store recorded footage. Consider using an external hard drive or cloud storage for additional storage options. Set up automatic backups to ensure that your footage is securely saved and easily accessible.
By following these tips, you can enhance the performance of your security camera and effectively monitor your surroundings using your MacBook Pro. Remember to regularly check the camera functionality and update any necessary software or firmware for optimal performance.
Maximizing Storage Efficiency on Your MacBook Pro
If you own a MacBook Pro, you know that storage space can quickly become an issue. With the amount of photos, videos, documents, and applications we use on a daily basis, it’s easy to run out of space. However, there are several steps you can take to maximize the storage efficiency on your MacBook Pro and make the most out of the available space.
| Delete Unnecessary Files: | Start by deleting any unnecessary files or applications that you no longer use. This will immediately free up a significant amount of storage space on your MacBook Pro. Take a look at your downloads folder, old documents, and any unused applications and remove them from your device. |
| Use Cloud Storage: | Utilize cloud storage services such as iCloud, Google Drive, or Dropbox to store your files. Cloud storage allows you to access your files from any device with an internet connection, freeing up space on your MacBook Pro. |
| Optimize Photos and Videos: | Photos and videos can take up a significant amount of storage space on your MacBook Pro. Consider using photo and video editing software to optimize and compress your files without losing too much quality. This will help you save valuable space without compromising the visual integrity of your media. |
| Empty the Trash Regularly: | Remember to regularly empty your trash bin. When you delete files, they are moved to the trash bin, and this still takes up space on your hard drive. To completely free up the storage space, make sure to empty your trash on a regular basis. |
| Manage Application Storage: | Keep an eye on the storage usage of your applications. Some applications may store large amounts of data, such as cache files or temporary files. Check the settings of each application and clear any unnecessary data to free up storage space. |
| Consider External Storage: | If you still find yourself running out of storage space on your MacBook Pro, consider investing in external storage options such as an external hard drive or solid-state drive (SSD). These devices can be used to store files that you don’t need immediate access to, freeing up space on your MacBook Pro’s internal storage. |
By following these steps, you can maximize the storage efficiency on your MacBook Pro and ensure that you have enough space for all your important files and applications.
Best Practices for Using Your MacBook Pro as a Security Camera
Using your MacBook Pro as a security camera is a cost-effective and efficient way to monitor your home or office. However, to ensure that you get the best results, there are a few best practices that you should follow.
1. Positioning
The placement of your MacBook Pro is crucial for effective surveillance. Place it in a position where it can capture the entire area you want to monitor. Avoid obstructions that may hinder the camera’s view, such as furniture or walls.
2. Lighting
Proper lighting is essential for clear and detailed footage. Ensure that the area you want to monitor is well-lit, either naturally or through artificial lighting. Avoid pointing the camera directly at a light source, as it may result in glare or overexposure.
Tip: Consider investing in additional lighting equipment, such as LED lights, to optimize the visibility of the footage.
3. Privacy
Respect the privacy of individuals in the area you are monitoring. Avoid placing your MacBook Pro in spaces where privacy is expected, such as bedrooms or bathrooms. Keep in mind any legal requirements regarding surveillance and privacy in your region.
4. Security
Ensure that your MacBook Pro is protected from theft or tampering. You can use security features such as a Kensington lock or set up password protection on your device. Additionally, consider using encryption software to protect your footage from unauthorized access.
Tip: Regularly update your MacBook Pro’s security software to mitigate any potential vulnerabilities.
5. Storage
Choose a storage option that suits your needs. You can store the footage locally on your MacBook Pro, but keep in mind that large amounts of video data can quickly consume storage space. Consider using an external hard drive or cloud storage for long-term storage.
By following these best practices, you can maximize the effectiveness of your MacBook Pro as a security camera. Remember to regularly check the camera’s functionality and adjust the settings to meet your specific requirements.
FAQ
Can I use my MacBook Pro as a security camera?
Yes, you can use your MacBook Pro as a security camera. There are various software and apps available that can turn your MacBook Pro’s built-in camera into a surveillance camera. You can monitor the live feed from another device and even receive alerts when motion is detected. It’s a cost-effective solution if you already have a MacBook Pro and don’t want to invest in a separate security camera.
What software can I use to turn my MacBook Pro into a security camera?
There are several software options available that can turn your MacBook Pro into a security camera. Some popular choices include iSpy, SecuritySpy, and EvoCam. These applications allow you to record video, detect motion, and even access the live feed remotely from another device. It’s recommended to research and try out different software to find the one that best suits your needs and preferences.


