If you have a security camera and want to view the footage on a larger screen, you may be wondering if it is possible to rewire the camera to an HDMI cord. While it may seem like a simple solution, it is important to understand the underlying technology and compatibility issues that may arise.
Firstly, it is important to note that most security cameras do not have an HDMI output. They are designed to transmit video signals using different technology, such as analog or digital signals. Therefore, simply rewiring the camera to an HDMI cord may not be feasible without additional hardware or converters.
Secondly, even if you manage to find a way to connect the camera to an HDMI cord, it does not guarantee compatibility with HDMI-enabled devices. HDMI signals and protocols are different from those used by security cameras. It is possible that the device you are connecting the camera to may not recognize the video signal or display it properly.
In conclusion, while it may be technically possible to rewire a security camera to an HDMI cord with the right equipment and conversions, it is not a straightforward process and may not yield the desired results. It is recommended to consult with a professional or do thorough research before attempting to rewire a security camera to an HDMI cord.
How to Convert a Security Camera to HDMI
If you have a security camera that uses a different type of cable and you want to view its footage on a device with an HDMI input, you can convert the camera output to HDMI with the help of some additional equipment.

Here are the steps to convert a security camera to HDMI:
- Identify the type of video output your security camera uses. Common types include RCA, BNC, or VGA.
- Purchase a video converter that supports the video output of your camera and has an HDMI output. Make sure to check the specifications of the converter to ensure compatibility.
- Connect the video output of your security camera to the input of the video converter using the appropriate cable.
- Connect the HDMI output of the video converter to the HDMI input of your desired device, such as a TV or monitor, using an HDMI cable.
- Power on the security camera and the device with the HDMI input. Select the correct HDMI input on the device.
- You should now be able to view the footage from your security camera on the device connected with HDMI.
It’s important to note that this method may vary depending on the specific model of your security camera and video converter. Always refer to the user manuals for the camera and converter for detailed instructions.
In conclusion, converting a security camera to HDMI involves using a video converter that supports the camera’s video output and has an HDMI output. By following the steps outlined above, you can successfully connect your security camera to a device with an HDMI input and view its footage.
Step-by-Step Guide for Rewiring Your Security Camera
Upgrading your security camera system to connect it to an HDMI cord can provide you with better video quality and easier integration with your existing devices. If you’re looking to rewire your security camera, follow these step-by-step instructions to ensure a smooth installation process.
Step 1: Gather the Necessary Tools and Equipment
Before you begin rewiring your security camera, gather all the necessary tools and equipment. You’ll typically need a screwdriver, wire strippers, pliers, electrical tape, an HDMI cord, and any additional connectors or adapters required for your specific camera model.

Step 2: Turn Off the Power
Prior to starting any electrical work, it’s crucial to turn off the power supply to your security camera system. Locate the power source, which is often a circuit breaker or power switch, and switch it off to prevent any accidents or electrical shocks during the rewiring process.
Step 3: Remove the Old Wiring
Once the power is turned off, carefully remove the old wiring from your security camera. Unscrew any connectors or terminals and detach the wires from their respective ports. Take note of the wire colors and their corresponding connections for easier reinstallation later.
Step 4: Prepare the HDMI Cord
Next, prepare the HDMI cord by removing any excess casing or insulation. Use the wire strippers to strip a small portion of the HDMI cord’s wires to expose the inner copper conductors. Be careful not to damage the wires during this process.
Step 5: Connect the HDMI Cord
Connect the HDMI cord to your security camera by matching the appropriate wires with their respective connections. Use the pliers to secure the connections and ensure a tight fit. Double-check that each wire is properly connected to its corresponding port.
Step 6: Insulate the Connections
After the HDMI cord is connected, use electrical tape to insulate and protect the connections. Wrap the tape around each individual wire connection and the entire section of connected wires to provide insulation and prevent any potential short circuits.

Step 7: Test the Connection
Before completing the rewiring process, it’s crucial to test the connection. Turn the power back on and verify that your security camera system is receiving a video feed through the HDMI cord. Make any necessary adjustments or reconnections if the video signal is not transmitting properly.
Step 8: Secure the Wiring
Once you’ve confirmed that the rewiring is successful, secure the wiring in place using screws or clips. This will prevent any accidental disconnections or damage to the newly installed HDMI cord. Ensure that all the wires are neatly organized and free from any potential obstructions or hazards.
By following these step-by-step instructions, you can easily rewire your security camera system to an HDMI cord. Remember to exercise caution and consult the user manual or seek professional assistance if needed. Enjoy the improved video quality and enhanced connectivity that comes with your rewired security camera system!
Materials You Will Need for the Conversion
Before you begin rewiring your security camera to an HDMI cord, make sure you have the following materials:
- A security camera with video output
- An HDMI cord (length will depend on your setup)
- HDMI to AV converter
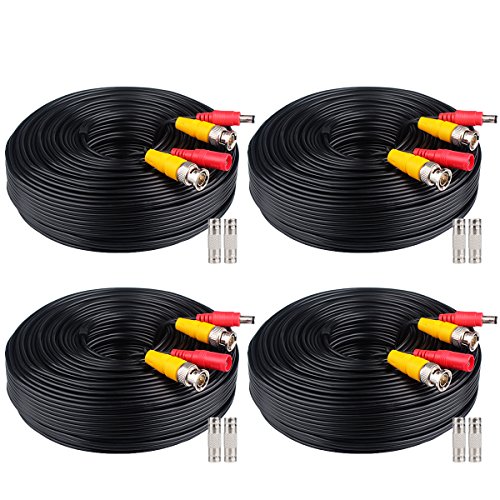
- AV cable (typically red, yellow, and white connectors)
- Power supply for the security camera
- Power adapter for the HDMI to AV converter
- Television or display with HDMI input
- Power outlet or extension cord
- Mounting brackets (if needed for camera installation)
- Screwdriver or drill (if needed for camera installation)
- Cable ties or clips for cable management
- Tape measure or ruler
Having these materials ready will ensure that you have everything you need to successfully convert your security camera to an HDMI cord.

Understanding the Wiring and Connections of Your Security Camera
When it comes to setting up a security camera system, understanding the wiring and connections is crucial. Proper installation and wiring ensure that your security camera functions effectively. Here is a breakdown of the main components and connections involved in a typical security camera setup:
1. Power Supply
Every security camera requires power to function. Most often, this power is supplied through a power adapter that connects to a standard electrical outlet. It is essential to ensure that your camera’s power supply is reliable and stable.
2. Camera
The camera itself is the core component of your security system. It captures video footage that is then transmitted to a recording device or monitor. Most cameras come with standard BNC connectors, which are used to connect coaxial cables.
3. Coaxial Cable
Coaxial cables are used to transmit the video signal from the camera to the recording device or monitor. These cables are often pre-made with BNC connectors and can transmit both video and power signals.
4. DVR/NVR
The Digital Video Recorder (DVR) or Network Video Recorder (NVR) is the device that records and stores the video footage. It connects to the cameras using coaxial cables and provides an interface for accessing and managing the recorded footage.

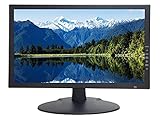
5. Monitor
A monitor allows you to view the live camera feed or recorded footage. It connects to the DVR/NVR using an HDMI or VGA cable. Make sure to check the compatibility of your monitor with the DVR/NVR’s available ports.
6. Ethernet Cable
If you are using IP cameras instead of analog cameras, an Ethernet cable is required for both power and video transmission. It connects the camera to the NVR and provides a stable network connection.
7. Network Router
If you have multiple IP cameras or want to access your camera remotely, a network router is necessary. It allows you to connect your security system to the internet and provides access for remote viewing and management.
Understanding the wiring and connections of your security camera system helps ensure a smooth installation process. Remember to follow the manufacturer’s instructions and consider seeking professional assistance if needed. With the right setup, you can have peace of mind knowing that your property is secure and protected.
Connecting the HDMI Cable to Your Security Camera
Connecting your security camera to an HDMI cable can be a convenient way to view your camera feed on a larger screen, such as a TV or monitor. However, it’s important to note that not all security cameras have an HDMI output, so before attempting to connect the cable, make sure your camera supports HDMI connectivity.

To connect the HDMI cable to your security camera, follow these steps:
- Check the camera specifications: Look for the HDMI output port on your camera. It is usually labeled as “HDMI”.
- Connect the HDMI cable: Take one end of the HDMI cable and insert it into the HDMI output port on your security camera.
- Connect the other end of the HDMI cable: Plug the other end of the HDMI cable into the HDMI input port on your TV or monitor.
- Switch on the devices: Power on both your security camera and the TV or monitor that you have connected the HDMI cable to.
- Select the HDMI input: Use the remote control for your TV or monitor to select the HDMI input that you have connected the camera to.
- View the camera feed: Once you have selected the correct HDMI input, you should see your security camera feed displayed on the TV or monitor screen.
It’s important to mention that not all cameras output a live feed via HDMI. Some cameras may only support HDMI for playback or configuration purposes. Therefore, refer to your camera’s user manual or contact the manufacturer to confirm if HDMI connectivity is available for live viewing.
By connecting your security camera to an HDMI cable, you can enjoy a larger and more detailed view of your camera feed on a TV or monitor. This can be particularly helpful if you want to closely monitor areas such as entrances, driveways, or commercial spaces. Remember to consult your camera’s documentation or seek professional assistance if you encounter any difficulties during the connection process.
Testing and Troubleshooting Your HDMI Conversion
After rewiring your security camera to an HDMI cord, it’s important to test the connection to ensure it is functioning properly. Here are some steps you can take to troubleshoot any potential issues:
| Issue | Possible Cause | Solution |
|---|---|---|
| No Signal on HDMI | Incorrect wiring or incompatible devices | Double-check the wiring connections between the security camera and HDMI cord. Verify that both devices support HDMI output and input. Adjust the settings on your security camera to enable HDMI output, if necessary. |
| Poor Picture Quality | Inadequate resolution or interference | Confirm that the HDMI cord supports the desired resolution of the security camera. Ensure that there is no interference from other electronic devices or cables. Try using a shorter HDMI cord or a different port on your recording device. |
| No Audio | Audio settings or faulty HDMI cable | Check the audio settings on both the security camera and the device receiving the HDMI signal. Ensure that audio output is enabled and the volume is not muted. Try using a different HDMI cable to rule out any cable defects. |
| Compatibility Issues | Incompatible resolutions, frame rates, or HDCP issues | Verify that the resolutions and frame rates of both the security camera and the receiving device are compatible. Check for HDMI handshake errors or HDCP (High-Bandwidth Digital Content Protection) compatibility issues. Update the firmware of the devices if necessary. |
| No Power | Unused power source or faulty power supply | Ensure that your security camera is receiving power from a compatible power source. Verify that the power supply is functioning correctly by testing it with another device. Consider using a different power source if needed. |
| HDMI Port Issues | Malfunctioning HDMI port on either device | Try using a different HDMI port on your recording device or the display device. Test the security camera with another HDMI device or test the HDMI cord with another compatible device to isolate the fault. |
By following these troubleshooting steps, you should be able to identify and resolve any issues with your rewired security camera connected to an HDMI cord.

Benefits of Using an HDMI Cord for Your Security Camera
When it comes to setting up a security camera system, one of the important considerations is the type of connection used to transmit video footage. While there are various options available, using an HDMI cord can offer several benefits that make it a popular choice among users.
1. High-quality video transmission: HDMI cords are capable of transmitting high-definition video signals, which means you can expect sharp and clear images from your security camera. This is especially important when you need to capture details such as facial features or license plate numbers.
2. Easy installation: HDMI cords are widely available and easy to install. You simply need to connect one end of the cord to your security camera and the other end to your viewing device, such as a monitor or TV. This makes it a hassle-free solution for both professionals and DIY enthusiasts.
3. Versatility: HDMI cords can be used with a wide range of devices, such as TVs, monitors, and projectors. This means that you can easily connect your security camera to different display options depending on your needs. Whether you want to monitor the footage on a large screen or a small monitor, HDMI cords offer flexibility in choosing your viewing device.
4. Audio support: Most HDMI cords also support audio transmission, allowing you to hear the surveillance footage along with the video. This can be beneficial in situations where audio monitoring is required, providing a more comprehensive security solution.
5. Long-distance transmission: HDMI cords can transmit video signals over longer distances without any loss in quality. This makes them suitable for larger properties or installations that require cameras to be located far away from the viewing device. With HDMI cords, you can have peace of mind knowing that your video footage will be transmitted reliably.
| Benefits |
|---|
| High-quality video transmission |
| Easy installation |
| Versatility |
| Audio support |
| Long-distance transmission |
FAQ
Can I connect a security camera to an HDMI cord?
Yes, it is possible to connect a security camera to an HDMI cord. However, it depends on the specific camera model and its compatibility with HDMI. Some security cameras have an HDMI output, which allows you to connect them directly to a monitor or TV using an HDMI cable. However, not all cameras have this feature, so it’s important to check the specifications of your camera before attempting to connect it to an HDMI cord.
How can I rewire a security camera to an HDMI cord?
Unfortunately, it is not generally possible to rewire a security camera to an HDMI cord. Security cameras are designed to output video signals in specific formats, such as composite video or digital video signals. HDMI, on the other hand, uses a different format and requires a different set of wiring. Rewiring a security camera to an HDMI cord would require significant technical knowledge and equipment modifications, which is beyond the capabilities of most users. It is recommended to use the appropriate cables and connectors that are compatible with your security camera’s native output.


