Lightning is a powerful force of nature that has fascinated humans for centuries. Its unpredictable and awe-inspiring nature makes it a challenging subject to capture with any camera, let alone a DSLR. However, with the right equipment, settings, and a little bit of luck, it is indeed possible to capture lightning strikes using a DSLR camera.
A DSLR camera, with its ability to adjust shutter speed, aperture, and ISO, provides the necessary flexibility and control required to capture lightning. The key to capturing lightning is to set the camera to a long exposure, allowing it to capture the lightning bolt as it arcs across the sky. A tripod is a must, as it helps keep the camera steady during the long exposure.
When attempting to capture lightning, it’s important to find a good vantage point away from city lights and other sources of light pollution. This will help ensure that the only light being captured by the camera is from the lightning itself. Additionally, using a wide-angle lens can help capture more of the sky, increasing the chances of capturing a lightning strike.
Patience and timing are crucial when trying to capture lightning. It often requires multiple attempts and some trial and error to get the perfect shot. One technique that can be effective is using the “Bulb” mode on the camera, which allows the shutter to stay open for as long as the photographer holds down the shutter button. This way, the photographer can anticipate the lightning strike and release the button at the perfect moment to capture it.
In conclusion, while capturing lightning with a DSLR camera may be a challenging endeavor, it is certainly possible with the right equipment, settings, and a bit of practice. So, if you’re up for the challenge, grab your camera, find a safe location, and get ready to capture the mesmerizing beauty of lightning with your DSLR!

Capturing Lightning with a DSLR Camera: A Beginner’s Guide
Are you interested in photographing lightning storms? Capturing lightning can be challenging but with the right equipment and technique, you can achieve stunning results. In this beginner’s guide, we will walk you through the steps of capturing lightning with a DSLR camera.
Equipment You Will Need
To effectively capture lightning, you will need the following equipment:
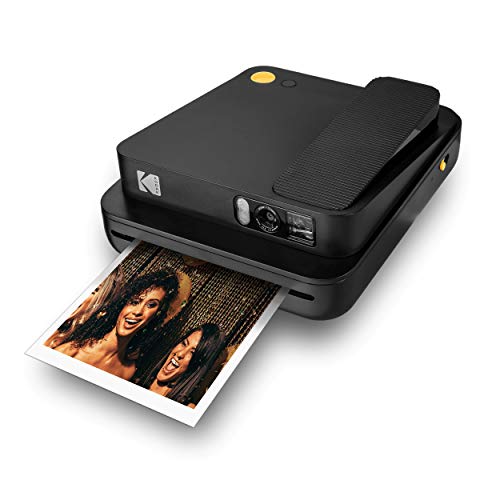
- A DSLR camera with manual mode
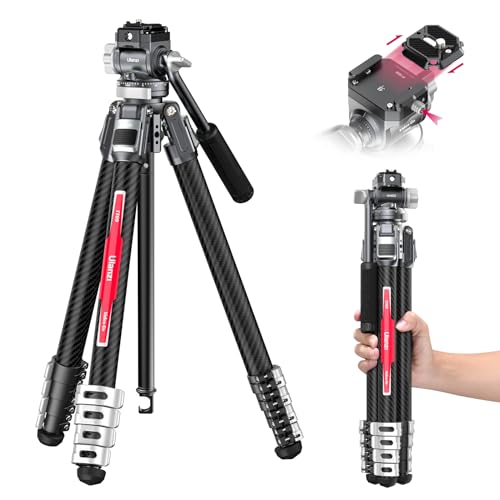
- A sturdy tripod
- A wide-angle lens
- A remote shutter release or intervalometer
- A lightning trigger
Tips for Setting up Your Gear
Here are some tips for setting up your gear:

- Find a safe and open location with a clear view of the sky
- Set up your tripod on a stable surface
- Attach your wide-angle lens to the camera
- Connect the remote shutter release or intervalometer to the camera
- Attach the lightning trigger to the camera’s hot shoe
Camera Settings
Next, let’s talk about the camera settings:
- Set your camera to manual mode
- Choose a low ISO setting (around ISO 100)
- Select a small aperture (around f/8)
- Set your shutter speed to bulb mode
Techniques for Capturing Lightning
When it comes to capturing lightning, there are a few techniques you can try:
- Pre-focus your lens to infinity
- Keep your shutter open for several seconds or until you capture a lightning strike
- Use your remote shutter release or intervalometer to control the timing
Staying Safe
It’s important to stay safe while capturing lightning:
- Avoid open areas or high ground
- Do not touch your camera during a lightning storm
- Seek shelter immediately if there is a risk of lightning striking nearby
Post-Processing
Once you have captured your lightning photos, you can enhance them using post-processing software. Adjust the exposure, contrast, and saturation to make your photos stand out.
With these tips and techniques, you are now ready to capture stunning lightning photos with your DSLR camera. Practice and experiment to refine your skills and don’t forget to stay safe!

Understanding the Basics of DSLR Cameras
A DSLR camera, which stands for Digital Single-Lens Reflex camera, is a popular choice among photographers due to its advanced features and versatility. Unlike a regular point-and-shoot camera, a DSLR camera allows you to have more control over the settings and produce high-quality images.
One of the key components of a DSLR camera is the presence of a mirror and a reflex mirror mount. The mirror reflects the light coming through the lens onto the focal plane shutter, which is located behind the mirror. When you press the shutter button, the mirror flips up, exposing the image sensor to light, and captures a photograph.
DSLR cameras also come with interchangeable lenses, which means you can use different lenses to achieve various photographic effects. Common types of lenses include wide-angle, telephoto, and macro lenses.
Another important feature of a DSLR camera is its ability to capture images in different formats, such as JPEG and RAW. JPEG is a compressed image format that is convenient for sharing and printing, while RAW format stores unprocessed image data, giving you greater flexibility in post-processing.
Understanding the exposure triangle is crucial for using a DSLR camera effectively. The exposure triangle consists of three elements – aperture, shutter speed, and ISO sensitivity. Aperture refers to the size of the lens opening, which controls the depth of field. Shutter speed determines the amount of time the camera’s sensor is exposed to light, while ISO sensitivity affects the camera’s ability to capture images in low light conditions.

DSLR cameras also offer different shooting modes, such as Manual, Aperture Priority, Shutter Priority, and Program modes. In Manual mode, you have complete control over the exposure settings, while the other modes provide a semi-automatic approach.
To optimize the performance of your DSLR camera, it is essential to familiarize yourself with its features and practice using different settings. Experimentation and practice will help you understand the capabilities of your camera and enable you to capture stunning photographs in various conditions.
The Science Behind Capturing Lightning
Lightning is a fascinating natural phenomenon that creates a stunning display of electrifying energy. Capturing a photograph of lightning can be challenging, but with the right techniques and equipment, it is possible to freeze this ephemeral moment in time.
When lightning occurs, it is a rapid discharge of electricity between a storm cloud and the ground, or between different storm clouds. The intense heat of the discharge creates a brief but powerful burst of light that can be captured by a DSLR camera.
To capture lightning, there are a few key factors to consider:

1. Shutter Speed:
Setting a long shutter speed on your camera is crucial. Lightning flashes happen within milliseconds, so a longer exposure time increases the chances of capturing the bolt. Start with a shutter speed of around 10-30 seconds, and adjust accordingly based on your results.
2. Tripod:
Because of the long exposure time required, using a tripod is essential to ensure a stable shot. The slightest movement during the exposure can result in a blurry image. Attach your camera securely to the tripod to keep it steady.
3. Manual Mode:

Switching your camera to manual mode allows you to have control over all the settings. Set the aperture to a medium or small size (around f/8 or f/11) and the ISO to a low value (100 or 200) to reduce noise. This combination will provide a well-exposed image without overexposing the lightning.
4. Timing:
Timing plays a crucial role in capturing lightning. It is important to anticipate when and where the lightning will strike. Keep your camera pointing towards the storm and trigger the shutter at the right moment. It may take some practice, but with time, you will improve your timing and increase your chances of getting a great shot.
Remember, capturing lightning can be dangerous, and it is important to prioritize safety at all times. Avoid open areas during storms and seek shelter indoors. Experimenting with lightning photography can be rewarding, but always prioritize your personal well-being above capturing the perfect shot.
By understanding the science behind capturing lightning and following these techniques, you’ll be well on your way to capturing some electrifying photographs.
Essential Camera Equipment for Capturing Lightning
When it comes to capturing lightning with a DSLR camera, having the right equipment is essential to ensure the best results. Here are some essential pieces of camera equipment to consider:
1. DSLR Camera: A DSLR camera is a must-have for capturing lightning. It allows for manual control of settings such as shutter speed and aperture, which are crucial for capturing lightning strikes.
2. Tripod: Since capturing lightning requires longer exposure times, a sturdy tripod is necessary to keep the camera steady during the shot. This helps to avoid camera shake and ensure sharp images.
3. Wide-Angle Lens: A wide-angle lens allows you to capture a broader view of the sky, increasing your chances of capturing lightning strikes. Look for lenses with a focal length of around 16-35mm for best results.
4. Remote Shutter Release: Using a remote shutter release helps minimize camera shake when capturing lightning. It allows you to trigger the camera without touching it, reducing the risk of blurriness in the image.
5. Lightning Trigger: Although not necessary, a lightning trigger can greatly increase your chances of capturing lightning strikes. These devices detect the electric charge in the air and automatically trigger the camera when lightning is detected.
6. ND Filter: An ND (neutral density) filter can be useful when capturing lightning during the daytime or in bright conditions. It helps to reduce the amount of light entering the camera, allowing for longer exposure times without overexposing the image.
7. Extra Batteries and Memory Cards: Lightning photography can quickly drain the camera’s batteries and fill up memory cards due to the longer exposure times involved. Always carry spare batteries and memory cards to ensure you don’t miss any lightning opportunities.
Remember, safety is paramount when capturing lightning. Always keep a safe distance from the storm, and if possible, capture lightning from a covered location or indoors.
By having the right camera equipment, you can increase your chances of capturing stunning lightning strikes with your DSLR camera.
Choosing the Right Settings for Lightning Photography
Capturing lightning with a DSLR camera can be an exhilarating and challenging experience. To ensure the best results, it is essential to choose the right settings. In this article, we will explore the key settings to consider when photographing lightning.
1. Shutter Speed
One of the most critical settings for lightning photography is the shutter speed. A long exposure time allows you to capture the movement of the lightning bolt, creating dramatic and captivating images. Start with a shutter speed of around 15-30 seconds and adjust accordingly based on the intensity of the lightning strikes.
2. Aperture
The aperture setting determines the depth of field and the amount of light entering the camera. A wider aperture, such as f/2.8 or lower, allows more light to reach the sensor, resulting in brighter and more vibrant images. However, keep in mind that this may also reduce the sharpness of other elements in the frame. Experiment with different aperture settings to achieve the desired effect.
3. ISO
The ISO setting controls the sensitivity of the camera’s sensor to light. In low light conditions, such as during a thunderstorm, increasing the ISO can help capture more detail in the lightning bolt. However, be cautious as higher ISO settings can introduce noise or grain in the image. Start with an ISO of around 400-800 and adjust accordingly to find the right balance between detail and noise.
4. Focus
Manual focus is recommended when photographing lightning, as autofocus can struggle in low light conditions. Set the focus to infinity or use the distant landscape as a reference point for achieving sharp images. Remember to check and adjust the focus as necessary throughout your shoot to ensure optimal results.
5. Tripod
Using a sturdy tripod is essential for lightning photography, as long exposure times require a stable camera setup. This prevents any unwanted camera movement or blur caused by handheld shooting. Make sure your tripod is set up on a solid surface and use a remote shutter release or the camera’s self-timer to avoid any additional vibrations.
| Setting | Recommended Range |
|---|---|
| Shutter Speed | 15-30 seconds |
| Aperture | f/2.8 or lower, experiment for desired effect |
| ISO | 400-800, adjust for balance between detail and noise |
By considering these key settings and experimenting with different variations, you can capture stunning lightning photographs with your DSLR camera. Remember to prioritize safety and stay vigilant during storms to ensure a successful and enjoyable photography experience.
Tips and Techniques for Successful Lightning Shots
Photographing lightning can be a challenging yet rewarding experience. With the right techniques and equipment, you can capture stunning images of these electrifying natural phenomena. Here are some tips to help you get started:
1. Choose the Right Location
When it comes to lightning photography, location is everything. Look for areas with open skies and minimal light pollution. This will increase your chances of capturing lightning strikes and reduce the interference from artificial lights.
It’s also important to consider your safety when selecting a location. Remember to stay away from tall objects, such as trees and metal structures, that could attract lightning and pose a risk.
2. Use a Tripod and Shutter Release
Lightning photography requires long exposure times, so a sturdy tripod is essential to keep your camera steady. This will help prevent image blur and ensure sharpness in your shots.
Using a shutter release or a remote trigger can further minimize camera shake, allowing you to capture lightning bolts with greater clarity. If you don’t have a shutter release, you can also set a self-timer to avoid touching the camera during the exposure.
3. Adjust Your Camera Settings
Start by setting your camera to manual mode. This will give you full control over the exposure settings.
For lightning shots, choose a low ISO to reduce noise and increase image quality. Set your aperture to a small f-stop (e.g., f/8 or smaller) to ensure a wide depth of field. Experiment with different exposure times, typically between 10 and 30 seconds, to capture the best lightning streaks.
Consider shooting in RAW format as it provides more flexibility during post-processing and allows you to recover details from highlights and shadows.
4. Patience is Key
Lightning is unpredictable, so be prepared to wait for the perfect moment. Set up your camera, compose your scene, and be patient. This might involve waiting for a storm to approach, or patiently observing the sky for lightning activity.
Remember, capturing the perfect lightning shot takes practice and perseverance. Don’t get discouraged if you don’t succeed on your first try. Keep experimenting, refining your techniques, and learning from each experience.
By following these tips and techniques, you’ll be on your way to capturing stunning lightning shots with your DSLR camera. Remember to always prioritize safety and enjoy the process of capturing nature’s power!
Editing and Post-Processing Lightning Photographs
Once you have successfully captured lightning with your DSLR camera, the next step is to edit and post-process your photographs to enhance their visual impact. Editing lightning photographs can help in bringing out the details and emphasizing the power and beauty of lightning strikes.
Here are some tips and techniques for editing and post-processing lightning photographs:
- Adjusting exposure: Lightning can be extremely bright, causing the surrounding areas to appear dark and underexposed. Use exposure adjustments to balance the exposure and reveal more details in both the lightning and the surroundings.
- Enhancing colors: Lightning can have various colors, ranging from vivid white to hues of purple and blue. Experiment with color adjustments to bring out the intensity and vibrancy of the lightning bolts.
- Sharpening details: Lightning strikes can have intricate details and patterns. Use sharpening tools or techniques to enhance the fine details and make the lightning bolts appear more defined and crisp.
- Reducing noise: Low light conditions during thunderstorms can result in image noise. Apply noise reduction techniques to minimize the graininess and improve the overall quality of the photograph.
- Cropping and framing: Experiment with different cropping and framing options to create a visually pleasing composition. Focus on the lightning bolts and consider removing any distracting elements from the frame.
- Adding contrast and saturation: Increase the contrast and saturation to make the lightning bolts stand out and create a more dramatic effect. However, be careful not to overdo it and maintain a natural appearance.
- Using specialized editing software: Consider using specialized editing software that is designed for handling and enhancing lightning photographs. These software options often come with presets and tools specific to lightning photography.
Remember, editing is a subjective process, and the goal is to enhance the visual impact of your lightning photographs while maintaining their authenticity. Experiment with different adjustments and techniques to find the style that best represents your vision and conveys the awe-inspiring nature of lightning.
Question-answer:
Is it possible to capture lightning with a DSLR camera?
Yes, it is possible to capture lightning with a DSLR camera. However, it requires some special equipment and techniques.
What kind of equipment do I need to capture lightning with a DSLR camera?
To capture lightning with a DSLR camera, you will need a camera with manual settings, a tripod to keep the camera steady, and a remote shutter release to minimize camera shake. Additionally, a fast lens with a wide aperture and a lightning trigger device can greatly improve your chances of capturing lightning successfully.
Are there any specific camera settings I should use to capture lightning?
Yes, there are some recommended camera settings for capturing lightning. It is best to set your camera to manual mode and select a low ISO (around 100-200) to reduce noise. Set a wide aperture (around f/8 to f/16) to capture enough light and keep a fast shutter speed (around 1/250th of a second or faster) to freeze the lightning bolt.
Are there any safety precautions I should take when trying to capture lightning with a DSLR camera?
Yes, it is important to prioritize your safety when trying to capture lightning. Always ensure that you are in a safe location away from the lightning storm, such as indoors or in a car. Do not stand near tall objects or water bodies, as they can attract lightning. It is also recommended to use a lightning trigger device, so you don’t have to keep looking through the viewfinder, which can be dangerous during a storm.