
Home security is a top priority for everyone, and there are many options available to help protect your property. One popular choice is a trail camera, which is typically used for monitoring wildlife. But can you connect a trail camera for home security? The answer is yes!
Trail cameras are designed to capture high-quality images and videos in outdoor environments, and they can be a valuable asset for home security. These cameras are often equipped with motion sensors, allowing them to detect any movement in their field of view. When motion is detected, the camera will automatically start recording, capturing any potential intruders or suspicious activity.
To connect a trail camera for home security, you will need to set up a wireless network. Most modern trail cameras come with built-in Wi-Fi capabilities, allowing you to connect them to your home network. This means you can access the camera’s feed remotely, using your smartphone or computer.
By connecting your trail camera to your home network, you can receive real-time alerts whenever motion is detected. This gives you the ability to immediately check the camera’s feed and assess the situation. In addition, many trail cameras are equipped with night vision capabilities, ensuring that you can monitor your property 24/7, even in complete darkness.
Overall, using a trail camera for home security is a smart and effective choice. It provides an additional layer of protection for your property and allows you to keep an eye on your home, even when you’re away. So, if you’re looking for an affordable and reliable home security solution, consider connecting a trail camera today!
The Benefits of Using a Trail Camera for Home Security
Home security is a top priority for many homeowners, and there are numerous options available for protecting your property. One increasingly popular choice is the use of trail cameras. Originally developed for tracking wildlife, trail cameras have proven to be effective tools for home security. Here are some of the benefits of using a trail camera for home security:
- 24/7 Surveillance: Trail cameras are equipped with motion sensors that can detect any movement in their field of view. This ensures that your property is under constant surveillance, even when you are not at home.
- Remote Monitoring: Many trail cameras are capable of connecting to your smartphone or computer, allowing you to remotely monitor your property in real-time. This is especially useful if you are away on vacation or at work.
- High-Quality Images and Videos: Trail cameras are designed to capture high-resolution images and videos, ensuring that you can easily identify any potential threats. This can be crucial in providing evidence to law enforcement in case of a break-in.
- Weather Resistant: Trail cameras are built to withstand various weather conditions, including rain, snow, and extreme temperatures. This makes them suitable for outdoor use, providing reliable surveillance year-round.
- Easy Installation: Installing a trail camera is a straightforward process, requiring minimal technical skills. They can be mounted on trees, fences, or other structures, providing flexibility in positioning.
- Cost-Effective: Compared to traditional home security systems, trail cameras are a cost-effective option. They do not require monthly monitoring fees or expensive installation charges. Once purchased, a trail camera is a one-time investment.
In conclusion, using a trail camera for home security offers numerous benefits, including 24/7 surveillance, remote monitoring, high-quality images and videos, weather resistance, easy installation, and cost-effectiveness. Investing in a trail camera can provide you with peace of mind, knowing that your home is protected around the clock.
Factors to Consider When Connecting a Trail Camera for Home Security
When setting up a trail camera for home security, there are several important factors to consider. These factors can make a significant difference in the effectiveness and functionality of your camera system. Here are some key points to keep in mind:
1. Placement
The placement of your trail camera is crucial for optimal home security. You should consider strategic locations that cover the areas you want to monitor. This could be near entry points such as doors or windows, as well as high-traffic areas around your property.
2. Power Source
Before connecting your trail camera, you need to consider the power source. Some cameras are battery-operated, while others can be connected to a power outlet or solar panel. Choose a power source that suits your needs and ensures uninterrupted operation.

3. Connectivity
Check the connectivity options of your trail camera. Most cameras allow you to connect via Wi-Fi or Bluetooth, which enables remote monitoring and access to footage. Ensure your camera is compatible with your home network or smartphone for convenient access.
4. Range and Coverage
The range and coverage of your trail camera determine its effectiveness in capturing footage. Consider the range of the camera lens and its ability to capture clear images in different lighting conditions. Additionally, check the camera’s field of view to ensure it covers the desired area effectively.
5. Image and Video Quality
The image and video quality of your trail camera is an essential factor in identifying potential threats or capturing important details. Look for cameras with high-resolution capabilities and adjustable settings to ensure clear and detailed footage.
6. Storage and Accessibility
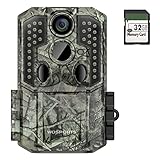
Consider the storage capacity of your trail camera and how easily you can access and manage the recorded footage. Some cameras have built-in SD card slots, while others offer cloud storage options. Choose a system that meets your storage needs and offers easy retrieval of recorded data.
By considering these factors when connecting your trail camera for home security, you can ensure the effectiveness and reliability of your surveillance system.

Choosing the Right Location for your Trail Camera for Home Security
When it comes to setting up a trail camera for home security, choosing the right location is key. Placing your camera in the right spot will ensure maximum coverage and effectiveness. Here are some important factors to consider when selecting the perfect spot for your camera:
1. Entry Points
Identify the entry points of your home, such as doors, windows, and gates. These are the areas where intruders are most likely to try to gain access to your property. By positioning your trail camera to capture activity near these entry points, you will have a clear view of any suspicious individuals or activities.
2. Line of Sight
Make sure that the camera has a clear line of sight to the area you want to monitor. Avoid placing the camera behind obstacles like trees, bushes, or fences, as they can obstruct the view and limit the camera’s effectiveness. It’s also important to position the camera at an appropriate height to capture the desired field of view.
3. Hidden Placement
While it’s important to have a clear line of sight, you also want to ensure that the camera isn’t easily visible to potential intruders. Choose a location that allows the camera to blend in with its surroundings, whether it’s mounted on a tree, placed on a pole, or hidden in shrubbery. This way, the camera can discreetly capture any suspicious activity without drawing attention.
Remember to consider the lighting conditions in the area as well. If possible, position the camera in a location where it can take advantage of natural or artificial lighting for clearer images and videos.

Conclusion:
Choosing the right location for your trail camera is essential for home security. By strategically positioning the camera at entry points, ensuring a clear line of sight, and maintaining hidden placement, you can maximize the effectiveness of your camera and increase the safety of your home.
How to Properly Install and Mount a Trail Camera for Home Security
Installing a trail camera for home security can provide you with peace of mind and an extra layer of protection for your property. Follow these steps to properly install and mount your trail camera:
1. Choose the Right Location
Before installing your trail camera, it is important to choose the right location. Look for areas where the camera will have a clear view of the desired monitoring area, such as entryways, driveways, or outdoor valuables. Consider the range and angle of the camera’s motion detection capabilities to ensure optimal coverage.
2. Mount the Camera Securely
Once you have selected the location, mount the trail camera securely. Most trail cameras come with straps or mounting brackets that make installation straightforward. Attach the camera to a tree, post, or other sturdy object using the provided equipment. Make sure the camera is level and stable to avoid unnecessary movement or vibrations.

3. Check the Camera’s Settings
After mounting the camera, check its settings and adjust them according to your security needs. Set the camera to the desired mode, whether it be photo, video, or a combination of both. Adjust the sensitivity and range of the motion detection to avoid false alarms while ensuring accurate monitoring. Additionally, set the desired duration between triggers to conserve battery power.
It is recommended to test the camera’s settings by walking in the monitored area to ensure it captures images or videos as intended.
4. Power the Camera
Ensure that your trail camera is powered properly. Most cameras run on batteries, so make sure they are fresh and fully charged. Follow the manufacturer’s instructions for inserting the batteries correctly and securely. Some cameras also have the option of using an external power source, such as solar panels or rechargeable batteries.
5. Secure the Camera Against Theft
To protect your investment, take precautions against camera theft. Consider camouflage the camera to make it less visible or use a security box designed for trail cameras. Additionally, avoid low-hanging branches or other obstructions that could make it easier for someone to tamper with or steal the camera.
By following these steps, you can properly install and mount a trail camera for home security. Regularly check and maintain the camera to ensure it functions optimally and provides reliable surveillance for your property.

Understanding the Features and Settings of a Trail Camera for Home Security
When it comes to choosing a trail camera for home security, it’s important to understand the various features and settings available to ensure maximum effectiveness. Here are some key aspects to consider:
Motion Detection:
One of the most crucial features of a trail camera for home security is its motion detection capability. Look for a camera that offers advanced motion sensors with adjustable sensitivity levels. This will help minimize false alerts caused by small animals or tree movements while capturing any significant activity that occurs on your property.
Resolution:
The resolution of the camera determines the clarity of the images and videos it captures. For home security purposes, opt for a camera with a high-resolution capability, preferably at least 1080p. This will ensure that you can easily identify any intruders or suspicious activity with clear visuals.

Night Vision:
Since security breaches can occur at any time, it’s essential to choose a trail camera with reliable night vision capabilities. Look for a camera that offers infrared night vision technology, allowing you to capture high-quality images and videos even in complete darkness.
Storage:
Consider the storage options available with the trail camera. Some cameras have built-in memory, while others require external SD cards for storage. Additionally, check if the camera supports cloud storage or allows for easy transfer of files to your computer or mobile device.
Power Source:
Trail cameras for home security usually operate on batteries, so consider the battery life and power options available. Some cameras offer long battery life, while others can be powered through solar panels or external power sources. Choose accordingly based on your requirements and the accessibility of power sources in your desired camera location.
Wireless Connectivity:
Having wireless connectivity features in a trail camera simplifies the process of monitoring and accessing the footage. Look for cameras that support Wi-Fi or Bluetooth connectivity, allowing you to conveniently view live feeds or receive alerts on your smartphone or computer.
Weatherproof Design:
Ensure that the trail camera you choose is designed to withstand outdoor conditions. Look for cameras with weatherproof or waterproof ratings, ensuring that it can function optimally despite rain, snow, or extreme temperatures.
By understanding and considering these features and settings, you’ll be able to select the most suitable trail camera for home security. Remember to assess your specific needs and preferences before making a final decision.
Monitoring and Recording Options for your Trail Camera for Home Security
When it comes to using a trail camera for home security, it’s important to have the right monitoring and recording options in place. With the right setup, you can ensure that your camera is capturing any suspicious activity and providing you with the evidence you need for peace of mind and potential legal purposes.
- Wi-Fi Connectivity: One of the most convenient options is to choose a trail camera that offers Wi-Fi connectivity. This allows you to easily connect the camera to your home network and access the recorded footage from anywhere using your smartphone or computer.
- Cloud Storage: Another useful feature is cloud storage, which allows you to securely store and access the recorded footage online. This eliminates the need for physical storage devices and ensures that your footage is safe even if the camera is damaged or stolen.
- Mobile App: Look for a trail camera that has a dedicated mobile app. This will provide you with a user-friendly interface to control and monitor your camera, view live footage, and access recorded videos and photos.
- Alerts and Notifications: To stay updated with any suspicious activity, consider a trail camera that offers alerts and notifications. This can be in the form of push notifications to your smartphone or emails, allowing you to take immediate action if necessary.
- Time-Lapse Function: A time-lapse function can be incredibly useful for monitoring and recording long periods of time, such as capturing activity during the night or tracking the progress of construction projects. This feature allows you to compress hours or days of footage into a shorter video clip.
By considering these monitoring and recording options, you can make the most of your trail camera for home security. Remember to choose a camera that suits your specific needs and provides the functionality you require to effectively monitor and protect your property.
Maintaining and Troubleshooting Your Trail Camera for Home Security
Trail cameras can be a great addition to your home security system, providing an extra layer of protection for your property. However, like any electronic device, they require regular maintenance and may occasionally experience technical issues. In this guide, we will cover some important tips for maintaining and troubleshooting your trail camera.
1. Regularly clean and inspect your trail camera
Regular maintenance is essential to keep your trail camera in optimal condition. Start by cleaning the lens and sensors with a soft, lint-free cloth to remove any dirt or debris. Inspect the camera housing for any signs of damage, cracks, or water leakage. If you notice any issues, contact the manufacturer for repairs or replacement.
2. Check the battery life
One common issue with trail cameras is a low battery life. Ensure that the batteries are fully charged or replace them with new ones if needed. It is recommended to use high-quality batteries to ensure a longer lifespan.
3. Adjust the camera settings
If you are experiencing problems with image quality or capturing, check the camera settings. Make sure the resolution, exposure, and detection range are set correctly. Refer to the camera’s manual for instructions on how to adjust these settings.
4. Position the camera properly
The placement of your trail camera plays a crucial role in its effectiveness. Ensure that it is positioned at the right angle and height to capture the desired area. Avoid placing the camera directly facing the sun or areas with excessive movement, as it can result in false triggers.
5. Test the camera regularly
To ensure your trail camera is functioning properly, perform regular tests. Set it up in different locations around your property and review the captured images or videos. This will help you identify any potential issues and make any necessary adjustments.
6. Contact the manufacturer for technical support
If you have tried the above troubleshooting steps and are still experiencing problems with your trail camera, contact the manufacturer’s technical support. They can provide specific guidance and assistance regarding your camera model.
By following these maintenance tips and troubleshooting steps, you can ensure that your trail camera for home security is always in good working condition and provides the surveillance you need to protect your property.
Integrating Your Trail Camera with Existing Home Security Systems
Adding a trail camera to your existing home security system can provide an extra layer of protection and surveillance for your property. By integrating your trail camera with your existing setup, you can enhance the security measures already in place and increase your peace of mind.
1. Compatibility and Connectivity
Before connecting your trail camera to your home security system, ensure that they are compatible and can connect seamlessly. Check if your trail camera supports the necessary connectivity options, such as Wi-Fi, Bluetooth, or cellular networks. Additionally, ensure that your home security system can receive the camera’s feed and integrate it into its monitoring capabilities.
Tip: Some trail cameras come with their own apps or software, which makes it easier to connect and integrate them with your existing home security system.
2. Strategic Placement
The placement of your trail camera is crucial for effective home security integration. Consider key areas where the camera’s footage will be most useful, such as entry points, driveways, or vulnerable areas. Ensure that the camera has a clear line of sight and is positioned at an optimal height and angle to capture important details.
Tip: Mounting the camera higher up can provide a wider field of view and reduce the risk of tampering.
Note: The placement of your trail camera may be influenced by local laws and regulations regarding surveillance. Be sure to comply with any legal requirements in your area.
3. Integration with Monitoring System
Once the trail camera is connected and strategically placed, integrate it with your existing home security monitoring system. This may involve configuring the camera’s settings and connecting it to the monitoring hub or control panel. Ensure that you follow the instructions provided by the camera manufacturer and the home security system provider.
4. Testing and Maintenance
After integration, thoroughly test the connection between your trail camera and the home security system. Check if the camera’s feed is being received accurately and if the footage is being stored and monitored properly. Regularly inspect and maintain the camera to ensure its functionality and reliability.
Tip: Periodically review the camera’s footage to identify any suspicious activity or events that may require further investigation.
In conclusion, integrating your trail camera with your existing home security system can significantly enhance your property’s security. However, it is important to ensure compatibility, strategically position the camera, integrate it with the monitoring system, and regularly test and maintain the setup. With a well-integrated setup, you can have peace of mind knowing that your property is being monitored effectively.
Tips for Optimizing the Performance of Your Trail Camera for Home Security
1. Find the Right Location
Choosing the right location for your trail camera is crucial for maximizing its performance for home security. Look for areas with high foot traffic or potential entry points, such as doors and windows. Make sure the camera is positioned at a height that captures a wide range of the area without being easily accessible to intruders.
2. Adjust the Camera Settings
Take the time to adjust the camera settings to suit your specific security needs. This may include adjusting the image resolution, sensitivity, and detection range. Higher image resolution will provide clearer images, while adjusting sensitivity and detection range can help avoid false alarms.
3. Regularly Check the Battery Life
Ensure that your trail camera always has sufficient battery life to capture any suspicious activity. Check the battery level regularly and replace or recharge the batteries as needed. Some cameras also allow you to connect a solar panel for continuous power supply.
4. Test the Camera’s Trigger Speed
Test the trigger speed of your trail camera to ensure it captures fast-moving subjects. This is especially important for home security, as you want to capture any intruders as quickly as possible. Adjust the camera’s settings or position if the trigger speed is not satisfactory.
5. Secure Your Trail Camera
Take measures to secure your trail camera to prevent theft or tampering. Use a lockbox or cable lock to secure it to a sturdy object, such as a tree, post, or fence. Consider camouflage or discreet placement to make it less noticeable to potential intruders.
6. Regularly Check and Analyze Footage
Regularly review the footage captured by your trail camera to identify any suspicious activity or potential security breaches. Use the timestamp and other metadata to accurately assess the situation. Analyze patterns and adjust camera settings if necessary.
7. Maintain and Clean the Camera
Proper maintenance and cleaning can help ensure the longevity and optimal performance of your trail camera. Regularly check for dirt, dust, or condensation on the lens and other components. Use a soft, lint-free cloth to clean the camera and protect it from the elements.
8. Consider Remote Access and Monitoring
Explore options for remote access and monitoring of your trail camera. Some models offer Wi-Fi or cellular connectivity, allowing you to view and manage the camera’s settings and footage from your smartphone or computer. This can provide added convenience and peace of mind for home security.
By following these tips, you can optimize the performance of your trail camera for home security and enhance the safety of your property.
Frequently Asked Questions about Connecting a Trail Camera for Home Security
Q: Can I connect a trail camera to my home security system?
A: Yes, you can connect a trail camera to your home security system. Many trail cameras have wireless capabilities or can be connected through a wired connection to your home network. This allows you to monitor and access the camera’s live feed through your smartphone, tablet, or computer.
Q: Do I need Wi-Fi to connect a trail camera for home security?
A: Wi-Fi is not always necessary to connect a trail camera for home security. While many trail cameras use Wi-Fi for wireless connectivity, there are also options available that use cellular networks or have their own built-in cellular capabilities. These cameras can send alerts and footage to your phone or computer even in areas where Wi-Fi is not available.
Q: Can I view the trail camera footage remotely?
A: Yes, you can view the trail camera footage remotely. As long as the camera is connected to your home network or a cellular network, you can access its live feed and recorded footage from anywhere using a smartphone, tablet, or computer. This allows you to check on the security of your home even when you are away.
Q: Can I receive alerts from the trail camera when it detects motion?
A: Yes, most trail cameras designed for home security have motion detection capabilities and can send alerts to your smartphone or email when motion is detected. This allows you to receive real-time notifications and take appropriate action if any suspicious activity is detected.
Q: How long can a trail camera record for home security?
A: The recording time of a trail camera for home security depends on several factors, including the camera’s battery life, storage capacity, and recording settings. Some cameras can record continuously for days or even weeks if they have sufficient battery power and storage space. Others may have motion-activated recording, which conserves power and storage by only recording when motion is detected.
Q: Can I use a trail camera as the primary security camera for my home?
A: While trail cameras can provide additional security for your home, they are not typically designed to be the primary security camera system. Trail cameras are often used for outdoor surveillance or monitoring specific areas, but they may not have all the features and capabilities of dedicated home security cameras. It is recommended to use a combination of trail cameras and dedicated home security cameras for comprehensive home security.
FAQ
Can I use a trail camera for home security?
Yes, you can definitely use a trail camera for home security. Trail cameras are designed to capture photos and videos of wildlife, but they can also be used to monitor your property for security purposes.
How does a trail camera work for home security?
A trail camera for home security works by using motion sensors to detect movement in its field of view. When movement is detected, the camera automatically captures photos or videos, which can then be reviewed later. Some trail cameras also have the ability to send the captured footage to a smartphone or computer through wireless connectivity.
What are the benefits of using a trail camera for home security?
There are several benefits of using a trail camera for home security. Firstly, trail cameras are usually weatherproof and can withstand outdoor conditions, making them suitable for monitoring the exterior of your home. Additionally, they are easy to install and can be placed in various locations around your property. Moreover, trail cameras often have night vision capabilities, allowing them to capture clear footage even in low-light conditions.
Can I connect a trail camera to my smartphone for home security?
Yes, many trail cameras have wireless connectivity options, such as Bluetooth or Wi-Fi, which allow you to connect them to your smartphone for home security. By doing so, you can receive notifications on your phone when movement is detected, and you can also remotely access the captured footage from anywhere.
Are trail cameras effective for home security?
Yes, trail cameras can be quite effective for home security. They serve as a deterrent to potential intruders and can provide valuable evidence in case of a break-in or any other suspicious activity. However, it is important to consider the placement of the trail camera and ensure that it covers the desired area without any blind spots.


