
DSLR cameras are known for their exceptional photography capabilities, but can they also capture high-quality video? The answer is a resounding yes. In fact, DSLR cameras have become a popular choice among videographers and filmmakers due to their versatility and advanced features.
One of the main advantages of shooting video with a DSLR camera is its ability to produce stunning cinematic footage. With their larger image sensors and interchangeable lenses, DSLRs allow you to achieve a shallow depth of field and create a beautiful bokeh effect, making your videos appear more professional and visually appealing.
Additionally, DSLRs offer manual control over various camera settings, such as aperture, shutter speed, and ISO, which gives you full creative control over your videos. You can experiment with different exposure settings to achieve the desired look and feel for your footage. Moreover, the ability to change lenses allows you to adapt to different shooting situations and capture a wide range of perspectives.
It’s important to mention that shooting video with a DSLR does come with its challenges. Unlike dedicated camcorders, DSLRs have a limited recording time due to their design. Most DSLRs can only record videos up to 30 minutes in length, after which the camera may overheat or automatically shut off. However, this limitation can be overcome by using external recording devices or breaking your footage into shorter clips and later merging them during post-production.
In conclusion, DSLR cameras are indeed capable of shooting high-quality video. They offer a wide range of creative possibilities, including stunning visual effects and full manual control. So, if you’re looking to venture into videography or simply want to enhance your filmmaking skills, consider using a DSLR camera to bring your videos to life.

Using a DSLR Camera for Shooting Videos: Tips and Tricks
DSLR cameras are widely used for photography, but they also have the capability to shoot high-quality videos. If you own a DSLR camera and want to explore its video shooting capabilities, here are some tips and tricks to help you get started.
1. Understand your camera settings
Before you begin shooting videos, take the time to familiarize yourself with your camera’s settings. Understand how to adjust the exposure, shutter speed, aperture, ISO, and white balance. These settings will have a significant impact on the quality of your videos, so it’s essential to know how to manipulate them.
2. Invest in a good lens
The lens you use can make a substantial difference in the quality of your videos. Consider investing in a lens that is suitable for videography, such as a prime lens with a wide aperture or a zoom lens with image stabilization. These lenses will give you more control over the depth of field, low light performance, and overall sharpness of your videos.
3. Use a tripod or stabilizer
While DSLR cameras are great for capturing high-quality videos, they can also be quite heavy to hold for an extended period. To avoid shaky footage, use a tripod or stabilizer to keep your camera steady. This will ensure smooth and professional-looking videos.
4. Pay attention to audio
High-quality audio is just as important as excellent video quality. Invest in a separate microphone or a shotgun microphone to capture clear and crisp audio. Avoid relying on the camera’s built-in microphone, as it may not provide the best sound quality, especially in noisy environments.

5. Take advantage of manual focus
Most DSLR cameras offer manual focus capabilities, which can be incredibly useful for video shooting. Instead of relying on autofocus, manually adjust the focus to maintain sharpness throughout your video. This allows you to have more control over what you want to emphasize in each shot.
| Pros of shooting videos with a DSLR camera: | Cons of shooting videos with a DSLR camera: |
|---|---|
| 1. High image quality | 1. Limited recording time |
| 2. Interchangeable lenses for different creative possibilities | 2. Bulkier and heavier compared to dedicated video cameras |
| 3. Ability to capture shallow depth of field | 3. Lack of continuous autofocus during video recording |
By following these tips and tricks, you can make the most out of your DSLR camera for shooting videos. Experiment with different settings, lenses, and techniques to find your own style and create compelling videos.
Understanding the Basics of DSLR Video Shooting
The popularity of DSLR cameras has grown significantly over the years, and one of the reasons for this is their ability to shoot high-quality videos. If you own a DSLR camera and want to explore the world of video shooting, it’s important to understand the basics to achieve professional-looking results.
The Importance of Settings
Before you start shooting videos with your DSLR camera, familiarize yourself with the different settings that affect the quality of your footage. Some essential settings to consider include:
- Resolution: Choose the appropriate resolution that suits your needs, such as 1080p for high-definition videos.
- Framerate: Determine the frame rate, usually expressed in frames per second (fps), which affects the smoothness of your video. Common options include 24fps for a film-like look or 30fps for a standard video.
- Shutter Speed: Adjust the shutter speed to control the amount of motion blur in your footage. A faster shutter speed is ideal for capturing fast-moving subjects, while a slower shutter speed can create a sense of motion.
- Aperture: Consider the aperture settings to control the depth of field in your videos. A wider aperture (lower f-number) creates a shallow depth of field, making your subject stand out from the background.
Composition and Lighting
A well-composed video with proper lighting can enhance the overall quality and storytelling of your footage. Here are some tips to consider:

- Rule of Thirds: Use the rule of thirds to divide your frame into nine equal parts and position your subject at the intersection points or along the lines. This technique adds visual interest and balance to your shots.
- Leading Lines: Incorporate leading lines in your composition to guide the viewer’s eye towards the subject or create depth. Examples of leading lines include roads, fences, or natural elements like tree branches.
- Lighting: Pay attention to lighting conditions when shooting videos. Natural light or well-positioned artificial lights can make a significant difference. Avoid harsh shadows or overexposure by using reflectors or diffusers to manipulate the lighting.
Stabilization Techniques
When shooting videos with a DSLR camera, maintaining stability is crucial for smooth and professional-looking footage. Here are some stabilization techniques to consider:
- Tripod: Use a tripod to keep your camera steady and avoid shaky shots.
- Gimbal: Consider using a gimbal for handheld shots, as it stabilizes the camera and compensates for any movements.
- Image Stabilization: Activate the image stabilization feature on your lens or camera for additional stabilization.
By understanding the basics of DSLR video shooting, you can unlock the full potential of your camera and capture stunning videos. Experiment with different settings, compositions, and stabilization techniques to achieve your desired results. Happy shooting!
Choosing the Right DSLR Camera for Video Recording
When it comes to shooting videos with a DSLR camera, choosing the right one is crucial. Not all DSLR cameras are designed to deliver high-quality video recordings, so it’s important to consider several factors before making a purchase. Here are some key points to keep in mind:
1. Sensor Size and Resolution
The sensor size and resolution of a DSLR camera can greatly impact the quality of the video footage. A larger sensor size generally allows more light to be captured, resulting in better low-light performance and improved dynamic range. Higher resolution also provides more detail and clarity in the video. Look for cameras with at least a 24-megapixel sensor size and 4K video recording capabilities for optimal results.
2. Autofocus and Stabilization
Smooth and stable footage is essential for professional-looking videos. Look for a DSLR camera with reliable autofocus and image stabilization features. Autofocus should be fast and accurate, allowing you to track moving subjects effortlessly. Optical image stabilization or in-body stabilization can compensate for camera movements, reducing shakiness and ensuring smoother video recordings.

3. Manual Controls and Customization Options
DSLR cameras offer more control over video settings compared to traditional camcorders. Look for a camera that provides manual control options for exposure, white balance, ISO, and aperture. Customizable buttons and dials can also enhance your shooting experience, allowing quick adjustments on the fly.
Remember: shooting videos with a DSLR camera involves more than just having the right equipment. In addition to the camera, invest in high-quality lenses, external microphones for better audio, and other accessories that can enhance your video recording experience.
In conclusion, choosing the right DSLR camera for video recording involves considering factors such as sensor size, resolution, autofocus capabilities, image stabilization, manual controls, and customization options. By carefully evaluating these features, you can find a camera that meets your specific video recording needs and allows you to capture high-quality footage.
Essential Accessories for DSLR Video Shooting
When shooting video with a DSLR camera, there are several essential accessories that can greatly enhance your footage and overall filmmaking experience. These accessories can help improve stability, audio quality, and control over your camera, allowing you to capture high-quality videos with ease.
1. Tripod
A sturdy tripod is a must-have accessory for DSLR video shooting. It provides stability and eliminates shaky footage, especially when capturing moving subjects or shooting in low light conditions. Look for a tripod with adjustable height and a fluid head for smooth panning and tilting movements.
2. External Microphone
While DSLR cameras are equipped with built-in microphones, they often lack in audio quality. An external microphone can significantly improve the sound recording, capturing clear and crisp audio. Shotgun microphones are particularly suitable for DSLR video shooting, as they can be mounted on top of the camera and point towards the subject, minimizing background noise.
| Accessory | Why It’s Essential |
|---|---|
| 3. ND Filters | Neutral Density (ND) filters are essential for controlling the amount of light entering the camera. They allow you to maintain proper exposure while shooting in bright sunlight or using wide apertures, resulting in well-exposed footage without overexposure. |
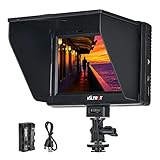
| 4. External Monitor | An external monitor provides a larger and more accurate display of your footage, allowing you to better assess exposure, focus, and composition. It is especially useful when shooting in bright outdoor conditions or when working with a camera that has a small built-in screen. |
| 5. Follow Focus System | A follow focus system enables precise and smooth focusing adjustments while shooting video. It allows you to easily track moving subjects or create cinematic focus pulls. Look for a follow focus system with adjustable gear rings that can fit a variety of lenses. |
| 6. Camera Stabilizer | A camera stabilizer, such as a gimbal or a shoulder rig, helps achieve smooth and steady shots, even when moving or walking. It reduces camera shakes and vibrations, allowing you to capture professional-looking footage. |
By investing in these essential accessories for DSLR video shooting, you can enhance the quality of your videos and take your filmmaking to the next level. Remember to choose accessories that are compatible with your specific DSLR camera model and your unique shooting style.
Mastering Manual Settings for DSLR Video Recording
Shooting videos with a DSLR camera can give you incredible results, but to get the most out of your footage, it’s important to understand and master the manual settings. While using automatic settings might be easier, switching to manual mode allows you to have more control over your videos and achieve the desired look and feel.
1. Shutter Speed
The shutter speed determines how long the camera’s sensor is exposed to light. It affects the motion blur in your video. Slower shutter speeds create more motion blur, giving a smoother and more cinematic look, while faster shutter speeds freeze motion and create a sharper image. Experiment with different shutter speeds to find the right balance for your video.
2. Aperture
The aperture, also known as the f-stop, controls the amount of light that enters the camera through the lens. It also affects the depth of field in your video. A lower f-stop (wider aperture) lets in more light and creates a shallow depth of field, with the subject in focus and the background blurred. On the other hand, a higher f-stop (narrower aperture) allows less light and results in a larger depth of field, with more objects in focus. Consider the desired effect and adjust the aperture accordingly.

3. ISO
The ISO setting determines the camera’s sensitivity to light. Lower ISO values produce better image quality with less noise, but they require more light. Higher ISO values allow shooting in low-light conditions, but they can introduce more noise into the footage. Find the right balance between image quality and light sensitivity by adjusting the ISO based on the lighting conditions of your shoot.
4. White Balance
White balance ensures that the colors in your video appear natural and accurate. Different lighting conditions, such as daylight, tungsten, or fluorescent, can cast different color temperatures. Setting the correct white balance helps to eliminate unwanted color casts and ensure accurate color reproduction. You can either use the camera’s presets or manually adjust the white balance for more precise results.
5. Focus
Manual focus allows you to have complete control over what is in focus in your video. While autofocus can be useful, it may not always accurately focus on the desired subject. Utilize the camera’s focus peaking or magnification features to ensure critical focus is achieved.
By mastering these manual settings, you can take your DSLR video recording to the next level. Practice using these settings in different shooting scenarios to understand their effects and how they can help you achieve your desired cinematic look. With time and experience, you’ll be able to produce stunning videos with your DSLR camera.
Best Practices for Focusing and Exposure in DSLR Videos
In order to shoot high quality videos with a DSLR camera, it is important to pay attention to focusing and exposure settings. These two factors can greatly affect the overall quality of your video footage. Here are some best practices to follow:

1. Manual Focus: Unlike autofocus, manually focusing allows you to have full control over the focus point. Use the focus ring on your lens to adjust the focus until your subject is sharp and clear. Avoid relying on autofocus when shooting videos, as it can often be slow or inaccurate.
2. Focus Peaking: Some DSLR cameras have a feature called focus peaking that highlights the areas of the frame that are in focus. This can be extremely helpful in ensuring accurate manual focusing. Enable focus peaking in your camera settings and adjust the sensitivity level to your preference.
3. Exposure Lock: DSLR cameras generally have automatic exposure settings, but they may not always give you the desired results. To have better control over exposure, consider using the exposure lock feature. Point your camera at an area with the desired exposure, press the AE-L or AE-Lock button to lock the exposure settings, and then reframe your shot.
4. Manual Exposure: If you have experience with exposure settings, consider using manual exposure mode for more precise control. Adjust the aperture, shutter speed, and ISO settings based on the lighting conditions and desired creative effect.
5. Use a Tripod: To maintain stability and reduce camera shake, use a tripod when shooting videos. This will help ensure that your footage is sharp and steady, especially when using manual focus and exposure settings.
6. Test and Adjust: Before shooting an important video, take some test shots to check the focus and exposure settings. Review the footage on a larger screen to ensure that your subject is properly focused and the exposure is well-balanced. Make necessary adjustments before starting your actual video recording.
7. Continuously Monitor: While shooting videos, continuously monitor the focus and exposure settings and make adjustments as needed. Lighting conditions may change, requiring you to make adjustments to maintain proper focus and exposure throughout your video.
By following these best practices for focusing and exposure in DSLR videos, you can greatly improve the overall quality of your footage. Take the time to fine-tune these settings and experiment to achieve the desired results.
Harnessing the Power of Lenses for DSLR Video Capture
When it comes to shooting high-quality video with a DSLR camera, one of the key elements that can make a significant difference is the lens that you use. DSLR cameras are known for their versatility, and by choosing the right lens, you can further enhance the visual impact of your videos.
The choice of lens greatly affects the depth of field, focal length, and overall image quality in DSLR video capture. Various lens options are available, including prime lenses, zoom lenses, and specialty lenses. Each type of lens offers unique characteristics that can be utilized to create visually stunning videos.
Prime lenses, also known as fixed focal length lenses, are highly regarded for their exceptional image quality. These lenses have a fixed focal length, which means they don’t zoom in or out. However, their optical performance often exceeds that of zoom lenses. Prime lenses typically have wider maximum apertures, allowing for greater control over depth of field and low-light shooting.
Zoom lenses, on the other hand, offer flexibility by allowing you to adjust the focal length and zoom in or out to capture a variety of perspectives. They are a popular choice for shooting video as they eliminate the need to change lenses frequently. However, zoom lenses often have narrower maximum apertures compared to prime lenses, which can affect low-light and shallow depth of field performance.
For specific video shooting requirements, specialty lenses are available, such as wide-angle lenses and telephoto lenses. Wide-angle lenses allow you to capture a wider field of view, making them ideal for landscape and architectural shots. Telephoto lenses, on the other hand, enable you to zoom in from a distance, making them suitable for wildlife and sports videography.
Regardless of the type of lens you choose for DSLR video capture, it’s essential to consider the technical specifications, such as aperture, focal length, and optical stabilization. These factors play a crucial role in achieving the desired visual effects and ensuring smooth, steady shots.
In conclusion, harnessing the power of lenses for DSLR video capture is an indispensable aspect of elevating the quality of your videos. The right lens can enhance depth of field, focal length, and overall image quality. Whether you opt for prime lenses, zoom lenses, or specialty lenses, each type has its own distinct advantages that can be leveraged to create captivating visuals.
Creative Techniques for Shooting Videos with a DSLR Camera
DSLR cameras are not just limited to capturing stunning photos. They can also be used to create high-quality videos with a professional touch. By utilizing the right techniques, you can maximize the potential of your DSLR camera and enhance your video shooting skills.
Here are some creative techniques to consider when shooting videos with a DSLR camera:
- Depth of Field: By adjusting the aperture settings on your DSLR camera, you can control the depth of field in your videos. This technique allows you to blur the background and emphasize the subject, creating a cinematic effect.
- Frame Rate: Experimenting with different frame rates can add a unique look and feel to your videos. Higher frame rates result in smoother footage, while lower frame rates create a more cinematic and dreamy effect.
- Motion: Utilize your DSLR camera’s ability to capture motion by incorporating smooth tracking shots or fast-paced action sequences. This technique adds dynamism to your videos and keeps your viewers engaged.
- Composition: Just like with photography, the rule of thirds and leading lines can be applied to video composition. These techniques help create a visually appealing frame and draw your viewers’ attention to key elements.
- Lighting: Proper lighting can drastically improve the quality of your videos. Experiment with different lighting setups, such as natural light, studio lights, or even creating interesting shadows, to add depth and drama to your shots.
- Audio: Don’t overlook the importance of good audio quality. Consider using an external microphone to capture clear and crisp sound. Additionally, explore the use of background music and sound effects to enhance the mood of your videos.
- Post-processing: After shooting your video, take advantage of video editing software to enhance the final product. Play around with color grading, adding transitions, and incorporating special effects to create a polished and professional-looking video.
By implementing these creative techniques, you can elevate your video shooting skills and capture visually stunning footage with your DSLR camera. Don’t be afraid to experiment and push the boundaries of what your camera can achieve!
Post-Production Tips for DSLR Videos: Editing and Color Grading
After shooting a video with your DSLR camera, the post-production process is crucial to enhance the final quality of your footage. Here are some tips on editing and color grading your DSLR videos to make them look professional and visually appealing:
1. Organize Your Footage
Before you start editing, it’s important to organize your footage. Create a folder structure on your computer to keep all the files organized. Sort the clips by date, event, or any other relevant criteria. This way, you can easily locate and access the clips you need during the editing process.
2. Choose the Right Editing Software
There are various editing software options available for DSLR videos, such as Adobe Premiere Pro, Final Cut Pro, or DaVinci Resolve. Choose the software that best suits your editing needs and learn the basics of how to use it effectively.
3. Trim and Arrange Clips
Start the editing process by trimming the unnecessary parts of your clips and arranging them in the desired order. This will help create a coherent and well-paced storyline. Use the software’s timeline to easily rearrange and adjust the duration of each clip.
4. Apply Transitions and Effects
Add transitions between clips to create smooth and seamless transitions. Experiment with different types of transitions, such as fades, cross dissolves, or wipes, to enhance the flow of your video. Additionally, consider applying effects like color correction, filters, or motion graphics to add creative elements to your footage.
5. Optimize Audio Quality
Don’t neglect the audio aspect of your DSLR videos. Ensure the audio levels are balanced and free from background noise. Use software tools to adjust the audio levels, add background music or voiceovers, and apply audio effects if necessary.
6. Color Grade Your Footage
Color grading is a crucial step to give your DSLR videos a professional and cohesive look. Use color grading tools in your editing software to adjust the overall color balance, saturation, contrast, and exposure of your footage. Experiment with different color grading presets or create your own unique look.
Conclusion
By following these post-production tips for DSLR videos, you can greatly enhance the visual quality of your footage. Remember to organize your footage, choose the right editing software, trim and arrange clips effectively, apply transitions and effects strategically, optimize audio quality, and color grade your footage to give it a professional finish. With practice and experimentation, you can create stunning DSLR videos that captivate your audience.
Question-answer:
Can I shoot video with a DSLR camera?
Yes, most DSLR cameras are equipped with video recording capabilities, allowing you to shoot high-quality videos. However, the video quality and features vary depending on the model and brand of the camera.
What are the advantages of shooting video with a DSLR camera?
There are several advantages of shooting video with a DSLR camera. Firstly, DSLR cameras have larger sensors than regular camcorders, resulting in better image quality and low-light performance. Secondly, DSLRs offer more flexibility in terms of lenses, allowing you to achieve different visual effects. Additionally, DSLRs often provide manual controls and customizable settings, giving you more control over your video footage.


