
Apple users are well aware of the groundbreaking technology that comes with the iPhone, especially when it comes to the camera. The advanced cameras on iPhones have revolutionized the way we capture and share our experiences. But what if you want to take it a step further and use your iPhone camera with other devices or applications?
The good news is that it is indeed possible to use your iPhone camera with other devices and applications, thanks to the concept of “ons”. Ons is a term that refers to a set of tools and technologies that allow different devices and software to communicate and work together seamlessly.
By utilizing the power of ons technology, iPhone users can connect their iPhone cameras to a wide range of devices and applications, opening up a world of possibilities. Whether you want to use your iPhone camera as a webcam for video conferences, a scanner for documents, or even a monitor for drone photography, ons can make it happen.
With the help of ons-enabled apps, you can easily integrate your iPhone camera into your workflow and enhance your creativity. Imagine being able to shoot professional-quality photos with your iPhone and instantly transfer them to your computer for editing, all with a simple tap of a button. The possibilities are endless with ons.
Using iPhone Camera with Ons: A Comprehensive Guide
Introduction

The iPhone camera is known for its excellent quality and features. If you are an Ons user, you might be wondering if you can utilize your iPhone camera with Ons to enhance your photography experience. The answer is yes! In this comprehensive guide, we will walk you through the process of using your iPhone camera with Ons and explore the various features and benefits it offers.
Step 1: Ensuring Compatibility
Firstly, it is important to ensure that your iPhone is compatible with Ons. You can check this by going to the App Store and searching for the Ons app. If it is available for download on your iPhone, then you are good to go!
Step 2: Installing Ons
Next, you will need to install the Ons app on your iPhone. To do this, simply follow these steps:

- Open the App Store on your iPhone.
- Search for “Ons” in the search bar.
- Tap on the app when you see it in the search results.
- Tap the “Install” button and wait for the app to download and install on your iPhone.
Step 3: Granting Camera Access
After installing Ons, you will need to grant it access to your iPhone’s camera. To do this:
- Go to the “Settings” app on your iPhone.
- Scroll down and tap on “Privacy”.
- Tap on “Camera”.
- Find Ons in the list of apps and make sure the toggle switch next to it is enabled.
Step 4: Launching Ons Camera
Now that you have installed Ons and granted it camera access, you are ready to start using your iPhone camera with Ons. Simply open the Ons app on your iPhone and navigate to the camera feature.
Step 5: Exploring Ons Camera Features

Ons offers a variety of camera features that can help you enhance your photography skills. Some of the key features include:
- Manual Controls: Adjust the exposure, focus, and other settings manually for more control over your photos.
- Filters and Effects: Apply various filters and effects to add an artistic touch to your photos.
- Burst Mode: Capture a series of photos in quick succession to capture fast-moving subjects or create action shots.
- Timer: Set a timer to capture selfies or group photos without the need for someone else to take the picture.
- Portrait Mode: Create stunning portrait photos with blurred backgrounds and enhanced subject focus.
Conclusion
Using your iPhone camera with Ons can greatly enhance your photography experience. With the right installation, access, and exploration of Ons camera features, you can take your photos to the next level. So, go ahead and unleash the full potential of your iPhone camera with Ons!
Compatibility and Requirements
If you want to use your iPhone camera with Ons, there are a few compatibility and requirements to keep in mind:
- Your iPhone must have a compatible operating system. Ons works with iOS 11 and above, so make sure your device is running on iOS 11 or a newer version.
- Ensure that your Ons app is up to date. Developers frequently release updates to enhance compatibility and fix any bugs, so it’s important to have the latest version installed on your device.
- Check if your iPhone model is supported. Most recent iPhone models, including iPhone X, XR, XS, 11, and newer, should be compatible with Ons. However, some older models might not have the necessary hardware capabilities.
- Make sure your iPhone camera is functioning properly. Test the camera by opening the Camera app on your iPhone and taking a few pictures or recording a short video. If the camera works without any issues, it should work fine with Ons as well.
By ensuring that your iPhone meets these compatibility and requirements, you can make the most out of using your iPhone camera with Ons.

Connecting iPhone Camera to Ons
If you want to use your iPhone camera with Ons, there are a few steps that you need to follow. Here’s a step-by-step guide:
- First, make sure that your iPhone is running on the latest version of iOS. You can check for updates by going to Settings > General > Software Update.
- Next, you’ll need to download the Ons app from the App Store. Search for “Ons” and tap on the download button to install it on your iPhone.
- Once the app is installed, open it and sign in using your Ons account. If you don’t have an account, you’ll need to create one.
- After signing in, you’ll need to grant the Ons app permission to access your iPhone camera. This can be done by going to Settings > Privacy > Camera, and then toggling the switch next to Ons to enable camera access.
- Now, you’re ready to connect your iPhone camera to Ons. Open the Camera tab in the Ons app and you should see a live view from your iPhone camera.
- To take a photo, simply tap on the capture button in the Ons app. The photo will be saved to your Ons account and you can access it from any device.
Remember to ensure that your iPhone has sufficient storage space and a stable internet connection for the best experience with Ons.
By following these steps, you can easily connect your iPhone camera to Ons and start capturing moments using your iPhone. Enjoy!
Configuring Camera Settings
Once you have successfully connected your iPhone camera with ons, you can configure various settings to enhance your photography experience. Below are some essential camera settings you can adjust on your iPhone:
1. Resolution: You can choose the resolution at which you want your photos and videos to be captured. Higher resolutions generally result in better image quality but might occupy more storage space on your device.

2. Exposure: Adjust the exposure level to control the brightness of your photos. Increase the exposure for brighter images and decrease it for darker ones.
3. Focus: Choose between auto-focus and manual focus modes. Auto-focus automatically adjusts the focus based on the subject in the frame, while manual focus allows you to manually focus on a specific area.
4. White Balance: Set the white balance to ensure accurate color representation in your photos. You can choose from various presets such as daylight, cloudy, fluorescent, etc., or use the auto white balance setting to let the camera determine the best balance.
5. HDR: HDR (High Dynamic Range) mode captures multiple exposures of a scene and combines them to create a well-balanced image with enhanced details. Enable or disable this feature depending on your shooting conditions.
6. Flash: Toggle the flash setting to control when the flash should be used. Options usually include auto, on, and off. Auto mode uses the flash when necessary, while on and off modes keep the flash always on or off, respectively.

7. Live Photos: If your iPhone supports it, you can enable or disable the Live Photos feature, which captures a few seconds of video along with your photo. This adds a fun and interactive element to your images.
8. Timer: Set a timer for your photos to give yourself enough time to pose or include yourself in a group shot.
By adjusting these camera settings, you can capture stunning photos and videos using your iPhone camera with ons. Experiment with different settings to find the perfect combination for your specific needs and artistic vision.
Capturing High-Resolution Images
One of the great features of iPhones is the high-quality camera that comes with them. With the ONS app, you can easily use your iPhone camera to capture high-resolution images and enhance your overall experience.
When taking photos using your iPhone, it’s important to ensure that you capture the highest resolution possible. This will result in sharper and more detailed images, especially when viewing them on larger screens or printing them out.
To capture high-resolution images with your iPhone camera, follow these tips:
1. Adjust the camera settings: Open the camera app on your iPhone and go to the settings. Make sure that the image quality is set to the highest option available. This will vary depending on your iPhone model, but generally, you should select the highest resolution and enable the “High Efficiency” format.
2. Use good lighting: Lighting plays a crucial role in photography, so make sure you have adequate lighting when capturing images. Natural light is preferred, but if necessary, you can use artificial lighting sources to enhance the brightness and clarity of your photos.
3. Steady your hand: It’s important to have a stable hand when capturing photos to avoid blurry images. If possible, use a tripod or stabilize your iPhone against a steady surface. This will help eliminate any unintentional movement and result in sharper images.
4. Tap to focus: To ensure that your subject is sharp and in focus, tap on the screen of your iPhone to set the focus point. This will help the camera automatically adjust the focus and exposure settings for the best possible image quality.

5. Avoid digital zoom: While it may be tempting to zoom in on your subject, avoid using the digital zoom feature on your iPhone. Instead, try to physically get closer to your subject or use the cropping feature after taking the photo. Digital zoom can result in a loss of image quality and detail.
By following these tips, you can capture high-resolution images using your iPhone camera and make the most out of the ONS app’s features for an enhanced visual experience.
Recording Videos with Your iPhone Camera
With the advancements in technology, recording videos has become easier and more accessible than ever before. One device that many people use to record videos is their iPhone. The iPhone camera is known for its high-quality and versatile features that allow you to capture stunning videos.
1. Basic Settings
Before you start recording videos with your iPhone camera, it’s important to optimize some basic settings. You can access these settings by opening the Camera app on your iPhone and swiping to the video mode.
One important setting to consider is the resolution and frame rate. The higher the resolution, the crisper and more detailed your videos will appear. However, higher resolutions can also result in larger file sizes, so you need to find a balance that suits your needs.
You should also consider the frame rate. Higher frame rates, such as 60 frames per second (fps), can make your videos look smoother, especially for fast-paced action shots. However, higher frame rates require more processing power and can result in larger file sizes.
2. Lighting and Composition
Lighting plays a crucial role in video recording, and your iPhone camera has some features to help you capture well-lit videos. With the Auto Exposure and Auto Focus features enabled, your iPhone will adjust to the lighting conditions and ensure your subjects are properly exposed. However, you can also manually adjust these settings by tapping on the screen.
Composition is another important aspect to consider when recording videos. You should think about the framing of your shots and the placement of your subjects. The iPhone camera has gridlines that can help you to align the elements in your shot using the rule of thirds.
Furthermore, using stable and steady movements while recording can significantly improve your videos’ quality. Consider using a tripod or stabilizer to minimize shaky footage and enhance the overall professional look of your videos.
In conclusion, the iPhone camera is a powerful tool for recording videos. By optimizing the basic settings, considering lighting and composition, and using stable movements, you can capture impressive videos with your iPhone camera.
Editing and Enhancing Images
Using the camera on your iPhone, you can capture high-quality images that can be edited and enhanced in a variety of ways. Whether you want to adjust the brightness, contrast, or color saturation, or apply filters and effects, there are plenty of options available to make your photos look their best.
1. Built-in Editing Tools
The iPhone comes with a powerful set of built-in editing tools that allow you to make basic adjustments to your images. You can access these tools by opening the Photos app and selecting the photo you want to edit. From there, you can crop, rotate, and straighten your image, as well as apply auto-enhancements to improve its overall appearance.
In addition to these basic editing options, you can also use the Markup feature to add text, draw, and highlight specific areas of your image. This can be useful for adding captions or annotations to your photos.
2. Third-Party Editing Apps
If you’re looking for more advanced editing options, you can explore the wide range of third-party editing apps available on the App Store. These apps offer a plethora of features and tools, such as advanced filters, selective editing, and the ability to adjust specific aspects of your image, such as exposure and white balance.
Popular editing apps like Adobe Lightroom, VSCO, and Snapseed provide professional-grade editing tools that allow you to take your photo editing skills to the next level. With these apps, you can create stunning edits and enhance the visual appeal of your images.
3. Additional Enhancements with Ons
In addition to using editing apps, you can also take advantage of the features and enhancements offered by Ons. Ons provides a variety of tools and filters that can be applied directly to your images, allowing you to enhance their look and feel. Whether you want to add vintage effects, create double exposures, or apply artistic filters, Ons can help you achieve the desired aesthetic for your photos.
By combining the editing capabilities of your iPhone camera, third-party apps, and Ons, you have the power to unleash your creativity and transform your ordinary photos into stunning works of art. So go ahead, capture that perfect shot, and start exploring the endless possibilities of image editing and enhancement.
| Benefits | Tools |
|---|---|
| Basic editing options | Cropping, rotating, straightening |
| Advanced editing features | Filters, selective editing, exposure adjustment |
| Enhancement options with Ons | Vintage effects, double exposures, artistic filters |
Sharing Your iPhone Camera Content
If you are wondering whether you can use your iPhone camera with Ons, the answer is yes! Ons offers full compatibility with your iPhone camera, allowing you to easily share your camera content with others. Whether you want to capture stunning photos or record unforgettable videos, your iPhone camera is ready to go.
How to Share Camera Content on Ons
Sharing your iPhone camera content on Ons is a breeze. Here are the steps to follow:
- Open the Ons app on your iPhone.
- Navigate to the camera section within the app.
- Tap on the camera icon to access your iPhone camera.
- Use your iPhone camera to capture the desired photos or videos.
- Once you have captured your content, tap on the share button within the Ons app.
- Select the desired sharing option, such as sharing with friends or uploading to your Ons profile.
That’s it! Your camera content will be shared seamlessly with others on Ons.
Benefits of Sharing Camera Content on Ons
Sharing your camera content on Ons can enhance your overall experience on the platform. Here are some benefits:
| Connect with Others | Easily connect with friends and other Ons users by sharing your camera content. You can create meaningful connections and engage in conversations based on your shared content. |
| Showcase Your Creativity | Display your photography and videography skills by sharing your stunning camera content. Ons provides a platform for you to showcase your creativity and receive recognition from others. |
| Discover New Content | By sharing your camera content, you can also discover new and inspiring content shared by other Ons users. Explore different perspectives and gain inspiration for your own creations. |
Start sharing your iPhone camera content on Ons today and unlock a world of creative possibilities!
Question-answer:
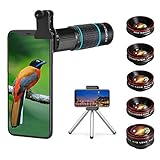
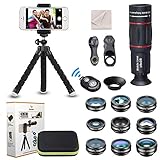
Can I use my iPhone camera with external lenses?
Yes, you can use your iPhone camera with external lenses. There are many third-party lenses available in the market that can be easily attached to your iPhone’s camera to enhance its capabilities. These lenses can help you capture wide-angle shots, zoom in on distant subjects, or achieve unique creative effects.
Are external lenses compatible with all iPhone models?
External lenses are generally compatible with most iPhone models. However, it’s always important to check the compatibility of the lens with your specific iPhone model before making a purchase. Some lenses may be designed specifically for certain iPhone models, while others may be more universally compatible.


