Home security is a top priority for any homeowner. With the rise in burglaries and home invasions, having a reliable and effective security system is crucial. One popular option that has gained popularity in recent years is do-it-yourself home security cameras.
Do-it-yourself home security cameras offer a cost-effective and convenient way to monitor your home and keep your family safe. These cameras are designed to be easily installed by the homeowner, eliminating the need for professional installation. They can be placed both inside and outside the house, providing comprehensive coverage of your property.
So, how do these do-it-yourself home security cameras work? Most of them use wireless technology to connect to your home’s Wi-Fi network. The cameras capture video footage and audio, which is then transmitted to a connected device, such as a smartphone or tablet, using an app or software. This allows you to view the live video feed in real-time or access recorded footage whenever you want.
Additionally, many do-it-yourself home security cameras come with motion sensors and night vision capabilities. The motion sensors detect any movement within their range and send an alert to your connected device, allowing you to quickly respond to any potential threat. The night vision feature ensures that you have clear visibility even in low-light or dark conditions, providing round-the-clock surveillance.
In conclusion, do-it-yourself home security cameras are an affordable and user-friendly option for securing your home. By using wireless technology, motion sensors, and night vision capabilities, these cameras provide a reliable monitoring solution that you can easily install and control on your own.

DIY Home Security Cameras: Understanding How They Work
DIY home security cameras have become increasingly popular in recent years as technology has advanced and become more affordable. These cameras offer homeowners the ability to monitor their properties remotely, keeping an eye on everything from potential break-ins to package deliveries. But how exactly do DIY home security cameras work?
Most DIY home security cameras consist of several key components. First, there is the camera itself, which is typically equipped with a lens, image sensor, and built-in microphone. This camera is responsible for capturing footage and recording audio.
The camera connects to a Wi-Fi network, allowing it to transmit the recorded footage and audio to a designated device, such as a smartphone or computer. This technology enables homeowners to view the live feed from their security cameras from anywhere with an internet connection.
Another important component of DIY home security cameras is the storage system. The footage recorded by the camera needs to be stored so that it can be reviewed later if necessary. Many DIY home security camera systems offer cloud storage options, where the recorded footage is stored on remote servers. This allows homeowners to access and download footage even if the camera itself is damaged or stolen.
In addition to cloud storage, some DIY home security cameras also offer local storage options. This means that the footage is stored on a physical device, such as a microSD card or a network-attached storage (NAS) device. Local storage provides an additional layer of security and ensures that the footage is not dependent on an internet connection.

To access the live feed and recorded footage from their DIY home security cameras, homeowners typically need to download and install a mobile app or desktop software provided by the camera manufacturer. This app or software allows users to view the cameras’ feeds, adjust settings, and receive notifications for any detected motion or sound.
Overall, DIY home security cameras work by capturing and recording footage and audio, transmitting it over a Wi-Fi network, and storing it either locally or in the cloud. This technology gives homeowners the peace of mind of being able to monitor their properties remotely and provides valuable evidence in case of any potential security incidents.
Benefits of DIY Home Security Cameras
DIY home security cameras offer several benefits for homeowners who wish to protect their property and loved ones. These cameras can be installed and set up by the homeowners themselves, without the need for professional installation. Here are some key advantages of using DIY home security cameras:
1. Cost-Effective
One of the main benefits of DIY home security cameras is that they are cost-effective. By eliminating the need to hire professional installers, homeowners can save a significant amount of money. Additionally, many DIY security camera systems are available at affordable prices, making them an ideal option for budget-conscious individuals.
2. Easy Installation
DIY home security cameras are designed to be easy to install and set up, even for those who do not have technical expertise. Most cameras come with clear instructions and user-friendly interfaces, making the installation process simple and straightforward. This means that homeowners can quickly and easily set up their security cameras without the need to wait for professional assistance.

Moreover, with DIY home security cameras, homeowners have the flexibility to place the cameras in the most strategic locations to maximize coverage. The wireless nature of these cameras eliminates the need for extensive cable installations, further simplifying the installation process.
3. Customization
Another advantage of DIY home security cameras is the flexibility they offer in terms of customization. Homeowners can choose cameras with specific features and functionalities that suit their unique needs and preferences. Whether they require indoor or outdoor cameras, night vision capabilities, or motion detection alerts, there are a variety of options available to cater to different security requirements.
Furthermore, DIY home security cameras often come with mobile apps or online platforms that allow homeowners to remotely view live feeds and control camera settings. This level of customization enables homeowners to monitor their property anytime, anywhere, providing them with peace of mind.
4. Expandability
DIY home security cameras are usually part of a larger smart home security system that can be expanded in the future. This means that homeowners can start with a basic camera setup and gradually add more cameras or security devices as needed. Whether they want to increase coverage or enhance specific areas of their property, DIY home security systems provide the flexibility to grow and adapt over time.
In conclusion, DIY home security cameras offer a cost-effective, easy-to-install, customizable, and expandable solution for homeowners looking to enhance their home security. With the advancements in technology, these cameras provide an accessible option for anyone interested in having a reliable surveillance system.
Components of a DIY Home Security Camera System
A DIY home security camera system consists of several key components that work together to provide surveillance and monitoring for your home. These components include:
1. Cameras
The primary component of a home security camera system is, of course, the cameras themselves. DIY systems offer a variety of camera options, including indoor and outdoor cameras, wired or wireless cameras, and cameras with different capabilities such as night vision or motion detection.
2. Network Video Recorder (NVR) or Digital Video Recorder (DVR)
The NVR or DVR is the device that receives and stores the video footage captured by the cameras. It acts as the central hub of the security system and allows you to view and access the recorded footage. The choice between NVR and DVR depends on the type of cameras used – IP cameras typically require an NVR, while analog cameras require a DVR.
3. Hard Drive
In order to store the recorded video footage, a DIY home security camera system requires a hard drive. The size of the hard drive will determine how much video footage can be stored and for how long. It is important to choose a hard drive with sufficient storage capacity to meet your needs.
4. Power Supply
Cameras and the NVR or DVR require power to operate. A DIY home security camera system will typically include power supplies for each camera and the central recording device. These power supplies can be plugged into a standard power outlet.

5. Cables and Connectors
For wired camera systems, cables and connectors are necessary to transmit video and power signals between the cameras and the central recording device. The specific type and length of cables and connectors will depend on the system’s requirements and the distance between the cameras and the NVR or DVR.
6. Monitor
A monitor is used to view the live video feed from the cameras and to access the recorded footage. This can be a dedicated monitor or any device with a display, such as a computer or smartphone. Some DIY home security camera systems also offer remote access capabilities, allowing you to view the footage from anywhere using an internet connection.
By understanding the components of a DIY home security camera system, you can make informed decisions when choosing and setting up your own system. Whether you opt for wired or wireless cameras, it is important to ensure that the system is properly installed and configured to effectively monitor and secure your home.
Installation and Setup of DIY Home Security Cameras
Installing and setting up DIY home security cameras can provide an added layer of protection and peace of mind for homeowners. With advancements in technology, these cameras have become more user-friendly and affordable, making it easier than ever to install them yourself.
1. Determine the camera locations
The first step in installing DIY home security cameras is to determine the optimal locations for installation. Consider areas of your property that require monitoring, such as entry points, high-value belongings, or blind spots. It’s important to choose locations that provide a wide field of view and cover the desired areas effectively.
2. Mounting the cameras
Once you have identified the camera locations, it’s time to mount the cameras. Most DIY home security cameras come with mounting brackets or adhesive backings, making installation a straightforward process. Simply follow the manufacturer’s instructions to securely attach the cameras to your desired locations.
3. Power source
Next, ensure that your cameras have a power source. DIY home security cameras can be powered using different methods, such as batteries, solar panels, or plugging them into an electrical outlet. Choose the power source that best suits your needs and follow the instructions provided by the manufacturer to connect the cameras to the power supply.
4. Connecting to a wireless network
Most DIY home security cameras operate wirelessly and can connect to your home’s Wi-Fi network. This allows you to access the camera footage remotely and receive real-time alerts on your smartphone or computer. Follow the camera’s instructions to connect it to your wireless network by entering the network name and password.
5. Camera setup and configuration
After successfully connecting your DIY home security cameras to the wireless network, you will need to set them up and configure the desired settings. This includes adjusting the camera’s angle, enabling motion detection, setting up recording schedules, and customizing other options based on your preferences. Use the camera’s accompanying mobile app or web interface to access the settings and make the necessary configurations.
By following these installation and setup steps, you can easily install and configure DIY home security cameras to enhance the security of your property. Remember to regularly check the camera’s functionality, update the firmware, and maintain a secure network to ensure optimal performance.

How DIY Home Security Cameras Work
DIY home security cameras are becoming increasingly popular as more people look for ways to protect their homes and loved ones. These cameras provide an affordable and convenient option for homeowners to monitor their property and enhance their security measures. But how do these DIY home security cameras actually work?
Camera Setup
The setup process for DIY home security cameras is relatively simple. Typically, the camera is connected to a Wi-Fi network and paired with a smartphone or computer using a dedicated app or software. This allows the homeowner to access the camera’s live feed and control its settings remotely.
Most DIY home security cameras are equipped with motion sensors and night vision capabilities. These features enable the camera to detect any movement within its field of view, even in low light conditions. When motion is detected, the camera will often send an alert to the homeowner’s smartphone, allowing them to take immediate action or review the footage.
Cloud Storage and Local Storage Options
Another important aspect of DIY home security cameras is the storage options they offer. Many cameras provide both cloud storage and local storage options, giving homeowners flexibility in storing their recorded footage.
Cloud storage allows the camera to upload the recorded footage to a remote server, accessible from anywhere with an internet connection. This ensures that the footage is safe and secure, even if the camera is damaged or stolen. Local storage, on the other hand, enables the camera to save the recorded footage directly to a memory card or a connected hard drive.
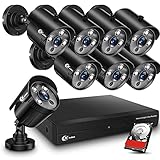
![[Expandable 10CH,2K] Hiseeu Wireless Security Camera System with 1TB Hard Drive with One-Way Audio,10 Channel NVR 4Pcs 1296P 3MP Night Vision WiFi Security Surveillance Cameras DC Power Home Outdoor](https://m.media-amazon.com/images/I/41xwoP7QcpL._SL160_.jpg)
Remote Viewing and Control
One of the key advantages of DIY home security cameras is the ability to remotely view and control the camera from a smartphone or computer. Through the dedicated app or software, homeowners can access the camera’s live feed, review recorded footage, and adjust settings such as motion detection sensitivity or notification preferences.
This remote access allows homeowners to keep an eye on their property even when they are away. Whether it’s checking in on pets, monitoring for suspicious activity, or simply ensuring that everything is as it should be, DIY home security cameras offer peace of mind and added security that can be easily managed from anywhere.
In conclusion, DIY home security cameras are a practical and effective solution for home security. With easy setup, motion detection capabilities, flexible storage options, and remote viewing and control, these cameras provide homeowners with an affordable and convenient way to protect their homes and loved ones.
Tips for Choosing the Right DIY Home Security Cameras
When it comes to choosing the right DIY home security cameras, there are several important factors to consider. These cameras are a popular choice for homeowners who want to take control of their home security systems and set up their own monitoring devices.
Determine Your Security Needs
Before purchasing a DIY home security camera system, it’s important to first assess your specific security needs. Consider factors such as the size of your property, the number of entry points, and any areas of vulnerability. This will help you determine how many cameras you need and where they should be placed.
For example, if you have a large property with multiple access points, you may need more cameras to adequately cover all areas. On the other hand, if you have a small apartment, one or two cameras may be sufficient.
Consider Camera Features
When choosing DIY home security cameras, consider the features that are important to you. Some common features to look for include:
| 1. Night vision capabilities | 5. Two-way audio |
| 2. Motion detection | 6. Cloud storage |
| 3. High-definition video quality | 7. Integration with smart home systems |
| 4. Wide-angle lens | 8. Mobile app for remote access |
Consider which features are most important to you and select a camera that meets those requirements.
Research Camera Brands and Models
There are many different brands and models of DIY home security cameras on the market, so it’s important to do your research before making a decision. Look for reputable brands that have positive customer reviews and a history of quality products. Compare the specifications and features of different camera models to find the best fit for your needs and budget.
Additionally, consider the compatibility of the cameras with other security devices or systems you may already have in place. Make sure the cameras you choose will integrate seamlessly with your existing setup.
Overall, choosing the right DIY home security cameras requires careful consideration of your specific security needs, camera features, and brand reputation. By taking the time to research and compare options, you can ensure that you’re making an informed decision and setting up a reliable home security system.
FAQ
How do do-it-yourself home security cameras work?
Do-it-yourself home security cameras work by capturing video footage of the area they are installed in. They are typically connected to an application or software that allows users to monitor the footage remotely. Some cameras also have motion detection capabilities and can send alerts or notifications to the user’s phone when motion is detected.
What is the advantage of using do-it-yourself home security cameras?
There are several advantages to using do-it-yourself home security cameras. Firstly, they are often more affordable compared to professional security systems. Additionally, they are easy to install yourself without the need for professional assistance. They also provide the flexibility to position the cameras wherever you want, giving you more control over your security monitoring. Lastly, with remote access through smartphone apps, you can monitor your home from anywhere at any time.