Setting up a security camera with IP connectivity can greatly enhance the level of surveillance and monitoring for your home or office. By connecting your camera to your network, you’ll be able to view live video feeds, record footage, and even control the camera remotely from your smartphone or computer. However, the process of setting up an IP camera can seem daunting for beginners. In this article, we will guide you through the steps to successfully set up your security camera for IP connect.
Step 1: Choose the right camera
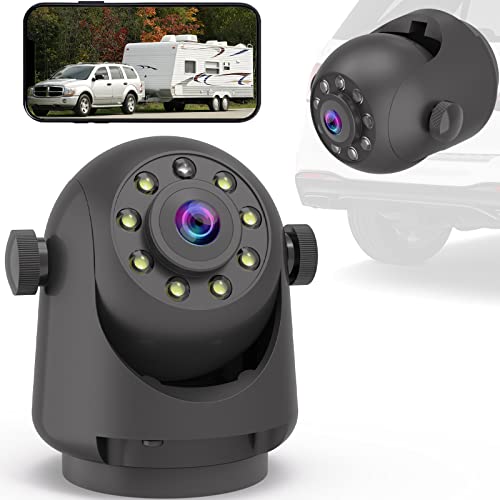
Before you start setting up your security camera, it is important to choose the right camera for your needs. There are various types of IP cameras available in the market, each with its own set of features and specifications. Consider factors such as resolution, night vision capabilities, field of view, and weatherproofing, among others. Once you have chosen the camera that best suits your requirements, you can proceed with the setup process.
Step 2: Connect the camera to your network
The next step is to connect your security camera to your network. Most IP cameras have an Ethernet port that allows you to connect them directly to your router. This can be done using an Ethernet cable. Make sure to plug one end of the cable into the camera’s Ethernet port and the other end into an available Ethernet port on your router.

Step 3: Configure the camera settings
Once your camera is connected to the network, you will need to configure its settings. This usually involves accessing the camera’s web interface through a computer or smartphone. Open your preferred web browser and enter the IP address of the camera in the address bar. You may find the IP address in the camera’s user manual or on a label attached to the camera itself. Once you have accessed the web interface, follow the instructions provided by the camera manufacturer to configure settings such as Wi-Fi connection, resolution, motion detection, and more.
Step 4: Test and fine-tune
After configuring the camera settings, it is important to test and fine-tune the setup to ensure everything is working as intended. Check the live video feed to confirm that the camera is capturing clear and high-quality footage. Adjust the camera’s position if necessary, and test features such as motion detection and remote access. Make any necessary adjustments to the camera’s settings and placement to optimize its performance.
Conclusion:

Setting up a security camera for IP connect may require some initial effort, but the benefits it provides in terms of enhanced surveillance and monitoring are well worth it. By following these steps and carefully configuring your camera’s settings, you can enjoy the convenience and peace of mind that comes with having an IP-connected security camera.
Steps to Set Up IP Connect for Your Security Camera
Setting up IP connect for your security camera is a straightforward process that can enhance the monitoring capabilities of your device. By following these steps, you’ll be able to remotely access and view your camera’s feed from anywhere using the internet.
Before you get started, make sure you have the following information:
1. Camera IP address: This is the unique network address assigned to your camera. It can usually be found in the camera’s settings or through the software provided by the manufacturer.
2. Router IP address: This is the IP address of your home network router. You can usually find it in the router’s settings or by referring to the user manual.

3. Port number: The port number is used to establish a connection between your camera and the internet. It is a unique identifier that allows data to be transmitted and received correctly.
4. Internet connection: Ensure that your camera and router are both connected to the internet before proceeding with the setup process.
Now, follow these steps to set up IP connect for your security camera:
Step 1: Open a web browser on a computer or mobile device connected to the same network as your security camera.
Step 2: Type the camera’s IP address into the address bar of the web browser and press Enter.

Step 3: If prompted, enter your camera’s username and password to log in. This information is typically provided by the manufacturer or can be found in the camera’s documentation.
Step 4: Once logged in, navigate to the camera’s settings or network configuration page.
Step 5: Find the “Network” or “IP Settings” section and locate the “IP Connect” or “Enable Remote Access” option.
Step 6: Enable the IP Connect feature and enter the router’s IP address and port number in the designated fields.
Step 7: Save the changes and exit the camera’s settings page.

Step 8: On your computer or mobile device, open a web browser and enter your router’s IP address into the address bar.
Step 9: Log in to your router’s settings using the provided username and password.
Step 10: Navigate to the “Port Forwarding” or “Virtual Server” section of the router’s settings.
Step 11: Create a new port forwarding rule for your security camera using the camera’s IP address and port number.
Step 12: Save the changes and exit the router’s settings page.

That’s it! You have successfully set up IP connect for your security camera. You should now be able to access and view your camera’s live feed remotely using the internet.
Note that the exact steps and terminology may vary slightly depending on the make and model of your security camera and router. Refer to the user manuals or manufacturer’s documentation for detailed instructions specific to your devices.
IP Connect Basics
Setting up your security camera for IP connect requires a few basic steps. Here’s what you need to know:
- Obtain the camera’s IP address: To connect your security camera to an IP network, you’ll first need to find its IP address. The IP address is a unique identifier that allows devices to communicate with each other over a network.
- Connect the camera to your network: Once you have the camera’s IP address, you’ll need to physically connect it to your network. This typically involves plugging an Ethernet cable into the camera and into your router or switch.
- Configure the camera’s network settings: After connecting the camera, you’ll need to access its settings to configure the network connection. This usually involves accessing the camera’s web interface through a web browser and entering the IP address in the address bar.
- Assign a static IP address: To ensure that your security camera always has the same IP address, you should assign it a static IP address. This will prevent the IP address from changing when the camera restarts or reconnects to the network.
- Set up port forwarding: If you want to access your security camera remotely, you’ll need to set up port forwarding on your router. This allows you to access the camera’s video feed from outside your local network.
- Configure security settings: To protect your camera from unauthorized access, it’s important to enable security features such as username and password authentication. Be sure to choose a strong password to prevent unauthorized access.
By following these basic steps, you can set up your security camera for IP connect and ensure that it is properly connected to your network and secured against unauthorized access.
Choosing the Right Security Camera
When it comes to setting up an IP-connected security camera system, one of the most important steps is choosing the right security camera for your needs. With so many options available in the market, it can be overwhelming to make a decision. However, considering a few key factors can help you select the camera that best suits your requirements.

1. Purpose of the Camera
First and foremost, determine the purpose of the camera. Are you looking to monitor a large outdoor area or a small indoor space? Do you need a camera for general surveillance or specific applications like license plate recognition or facial recognition? The intended use of the camera will guide you towards the most suitable camera type.
2. Camera Features
Consider the specific features you require in a security camera. Some key features to evaluate include:
- Resolution: Higher resolution cameras provide clearer and more detailed images.
- Field of View: The camera’s field of view determines how much area it can cover. A wider field of view is preferable for monitoring large areas.
- Low Light Performance: Cameras with good low light performance are essential for capturing clear footage in low-light environments.
- Weather Resistance: If the camera will be exposed to the elements, ensure it has the necessary weather resistance for outdoor installation.
- Two-Way Audio: Cameras with two-way audio capabilities allow for communication between the camera user and individuals on-site.
- Remote Access: Check if the camera offers remote access through a mobile app or web browser for convenient monitoring from anywhere.
By assessing these features, you can identify the camera that includes the capabilities necessary for your specific use case.
Overall, taking the time to research and consider your specific requirements will help you choose the right security camera to set up for IP connectivity. By selecting a camera that aligns with your needs, you can ensure effective surveillance and peace of mind.
Network Configuration
To set up your security camera for IP connect, you will need to configure the network settings on the camera. Follow the steps below to complete the network configuration:
- Connect the camera to your router using an Ethernet cable. Ensure that both the camera and the router are powered on.
- Access the camera’s configuration menu by typing its IP address into a web browser.
- Log in to the camera’s interface using the provided username and password.
- Navigate to the network settings section of the configuration menu.
- Select DHCP if you want the camera to obtain an IP address automatically from the router. If you want to assign a static IP address to the camera, choose the static IP option.
- If you selected DHCP, the camera should automatically obtain an IP address from the router. If you chose static IP, enter the IP address, subnet mask, gateway, and DNS settings manually.
- Save the network settings and restart the camera.
- Disconnect the Ethernet cable from the camera once it has rebooted.
Once the network configuration is complete, you should be able to access the camera remotely using its IP address. Ensure that the camera is connected to a reliable network with proper internet access for seamless and uninterrupted remote monitoring.
Setting Up Port Forwarding
Port forwarding is a crucial step in setting up your security camera for IP connectivity. It allows your camera to receive and send data over the internet without any restrictions. Follow these steps to set up port forwarding:
1. Access Your Router’s Configuration Page
First, you need to access your router’s configuration page. Open a web browser and enter your router’s IP address. This information is usually printed on the back of your router or can be found in the user manual.
2. Login to Your Router
Once you have entered the router’s IP address, a login page will appear. Enter the username and password for your router. If you have never changed these credentials, check the router’s documentation for the default username and password.
3. Locate the Port Forwarding Section
After logging in, navigate to the port forwarding section. The location of this section may vary depending on your router’s make and model. Look for terms like “nat,” “virtual server,” or “port forwarding.”
4. Add a New Port Forwarding Rule
Click on the option to add a new port forwarding rule. You will need to specify the following information:
- Protocol: Select either TCP or UDP, or both if your camera requires both protocols.
- External Port: Enter the port number that you want to open for external access. This should match the port number used by your camera.
- Internal IP Address: Enter the IP address of your security camera.
- Internal Port: Enter the port number used by your camera.
5. Save and Apply the Changes
After entering all the necessary information, save and apply the changes. Your router will then configure the port forwarding rule. It may take a few moments for the changes to take effect.
Once the port forwarding is set up correctly, you should be able to access your security camera remotely using the designated port number and your camera’s IP address. Ensure that you have a strong password and other security measures in place to protect your camera from unauthorized access.
Configuring the Camera Software
Setting up your security camera for IP connect involves configuring the camera software to properly connect to your network. Here are the steps to follow:
Step 1: Connect the Camera to your Network
First, connect the camera to your network using an Ethernet cable. Ensure that the camera is powered on and properly connected to your router or switch.
Step 2: Determine the Camera’s IP Address
To access the camera’s settings, you will need to determine its IP address. This can usually be done through the camera’s documentation or by using a network scanning tool. Once you have the IP address, open a web browser and enter it in the address bar.
Step 3: Access the Camera’s Web Interface
After entering the camera’s IP address, you should be redirected to the camera’s web interface. Here, you will be prompted to enter a username and password to log in. Refer to the camera’s documentation for default login credentials.
Step 4: Configure the Camera’s Network Settings
Once logged in, navigate to the network settings section of the camera’s web interface. Here, you will need to enter the network information such as the IP address, subnet mask, gateway, and DNS servers. It is recommended to set the camera’s IP address to a static IP for consistent connectivity.
Step 5: Enable IP Connect
Next, enable the IP connect feature on the camera. This will allow the camera to connect to your network and be accessible over the internet. Refer to the camera’s documentation for specific instructions on enabling this feature.
Step 6: Save and Apply Settings
After configuring the network settings and enabling IP connect, remember to save and apply the settings. This will ensure that the changes take effect and the camera is ready for IP connection.
By following these steps and properly configuring the camera software, you can successfully set up your security camera for IP connect and enjoy remote monitoring and access. Remember to always keep your camera’s firmware up to date for optimal performance and security.
Testing and Troubleshooting
Once you have set up your security camera for IP connect, it is important to test and troubleshoot to ensure everything is working properly. Here are some steps to follow:
1. Check the network connection
Make sure that your security camera is properly connected to your network. Check the cables and ensure that they are securely plugged in. If you are using Wi-Fi, make sure that the camera is within range of your router.
2. Verify the camera’s IP address
Check the IP address of your camera to ensure that it is properly configured. You can usually find this information in the camera’s settings or documentation. Make sure that the IP address is within the same subnet as your network.
3. Test the camera’s access from another device
Try accessing the camera’s IP address from another device on your network, such as a computer or smartphone. Open a web browser and enter the camera’s IP address. If you can successfully view the camera’s feed, it means that the IP connect is working correctly.
4. Check for any firewall or security settings
Ensure that there are no firewall or security settings that might be blocking the camera’s access to the network. Disable any firewalls temporarily to see if it resolves the issue. If necessary, consult your router’s documentation or contact the manufacturer for assistance with configuring the settings.
5. Update the camera’s firmware
If you are still experiencing issues, check if there are any firmware updates available for your camera. Updating the firmware can often resolve compatibility issues and improve the camera’s performance.
6. Contact technical support
If you have followed all the steps and are still unable to connect your security camera to your IP network, it is recommended to contact the manufacturer’s technical support. They will be able to provide further troubleshooting assistance and help resolve any issues you may be facing.
FAQ,
Is it possible to set up my security camera for IP connect without professional help?
Yes, it is possible to set up your security camera for IP connect without professional help. Many modern IP cameras come with user-friendly interfaces and detailed instructions that can guide you through the setup process. Additionally, there are numerous online resources, forums, and tutorials available that provide step-by-step guidance on how to set up IP cameras. As long as you have a basic understanding of your network settings and are comfortable following instructions, you should be able to set up your security camera for IP connect on your own. However, if you encounter any difficulties or have specific requirements, it is always recommended to seek professional assistance to ensure a successful installation.