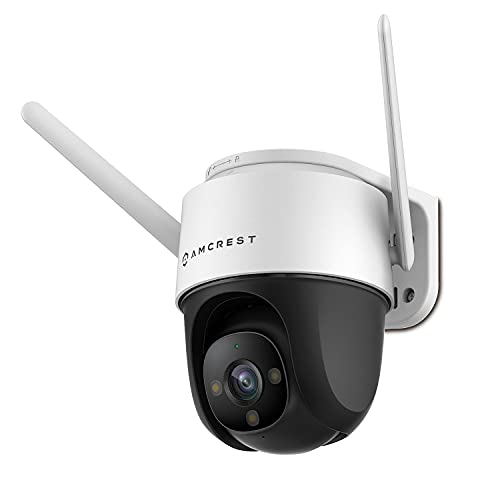
If you own an Amcrest security camera, you may be wondering how you can connect to it remotely. Whether you’re constantly on the go or just want to keep an eye on your property from a different location, remote access to your security camera can bring you peace of mind.
Connecting to your Amcrest security camera remotely is easier than you might think. The first step is to make sure that your camera is set up properly and connected to your home network. You will also need to have an internet connection at the location where your camera is installed.
Once your camera is set up and connected, you can use your smartphone, tablet, or computer to access it remotely. Most Amcrest security cameras come with a mobile app that allows you to view the live feed from your camera and control its settings. Simply download the app, sign in to your Amcrest account, and you’ll be able to access your camera from anywhere with an internet connection.
With remote access to your Amcrest security camera, you can check in on your home or business anytime, anywhere. Whether you want to keep an eye on your kids, monitor your pets, or ensure the safety of your property, remote connectivity gives you the ability to stay connected and in control, no matter where you are.
So, if you’re looking for a convenient way to connect remotely to your Amcrest security camera, follow these easy steps and enjoy the peace of mind that comes with knowing you can keep an eye on what matters most to you.
Connecting Remotely to Amcrest Security Camera: A Step-by-Step Guide
Amcrest security cameras are a popular choice for remote monitoring and surveillance. With the ability to connect to your camera remotely, you can view live footage, receive motion alerts, and control your camera settings from anywhere in the world. In this step-by-step guide, we will walk you through the process of connecting remotely to your Amcrest security camera.
Step 1: Set up your camera for remote access
The first step is to ensure that your camera is configured for remote access. You will need to connect your camera to your network and set up port forwarding on your router. Refer to the Amcrest camera’s user manual or online documentation for detailed instructions on how to perform this setup.
Step 2: Create an Amcrest Cloud account
To remotely access your Amcrest security camera, you need to create an Amcrest Cloud account. Visit the Amcrest Cloud website and sign up for an account using your email address. Once your account is created, you can log in and add your camera to the cloud account.
Step 3: Connect your camera to the Amcrest Cloud
Follow the instructions provided by Amcrest to connect your camera to the Amcrest Cloud. This usually involves entering the camera’s serial number or scanning a QR code. Once your camera is successfully connected, it will appear in the Amcrest Cloud dashboard.
Step 4: Access your camera remotely
To access your Amcrest security camera remotely, you can use either the Amcrest View app on your smartphone or the Amcrest Cloud web portal on your computer. Download the Amcrest View app from the App Store or Google Play Store and log in using your Amcrest Cloud account credentials. Alternatively, visit the Amcrest Cloud website and log in using your account credentials.

Once logged in, you will be able to view a live feed from your camera, receive motion detection alerts, and adjust camera settings such as pan, tilt, and zoom. You can also review stored footage and access other advanced features offered by the Amcrest Cloud platform.
By following these steps, you can easily connect remotely to your Amcrest security camera and enjoy the convenience of monitoring your property from anywhere in the world. Make sure to keep your camera firmware up to date and follow best practices for securing your camera and network to ensure the privacy and security of your surveillance system.
Check Network Connectivity
When trying to connect remotely to your Amcrest security camera, it is important to ensure that your network connection is working properly. Follow these steps to check your network connectivity:
- Verify that your internet connection is active and stable. Check if other devices on your network have internet access.
- Ensure that your Amcrest security camera is properly connected to your network. Check if the camera’s Ethernet cable is securely plugged into both the camera and your router. If you are using Wi-Fi, make sure that the camera is connected to your network’s Wi-Fi and has a strong signal.
- Restart your camera by unplugging the power adapter, waiting for a few seconds, and then plugging it back in. This can help resolve any temporary issues that may be affecting the camera’s connectivity.
- Check your network settings to ensure that the camera’s IP address is set correctly. You can usually access the camera’s settings through the Amcrest web interface or mobile app. Make sure that the camera’s IP address is within the same subnet as your other devices.
- If you have a firewall or security software installed on your network, ensure that it is not blocking the camera’s access to the internet. Check the settings of your firewall or security software and add an exception for the camera if necessary.
- If you are still having connectivity issues, try accessing the camera from a different device on your network. This can help determine if the issue is specific to one device or affects all devices trying to connect to the camera.
By following these steps, you can troubleshoot and ensure that your network connectivity is not causing issues with remotely connecting to your Amcrest security camera.
Configure Port Forwarding on Your Router
To connect remotely to your Amcrest security camera, you will need to configure port forwarding on your router. Port forwarding allows external devices to access your camera’s feed through your router’s network.
Step 1: Determine Your Router’s IP Address
Open a web browser and enter your router’s IP address in the address bar. If you are unsure of your router’s IP address, consult your router’s user manual or contact your internet service provider.
Step 2: Enter Your Router’s Admin Panel
Once you have your router’s IP address, enter it in your web browser’s address bar. You will be prompted to enter your router’s login credentials. If you are unsure of this information, consult your router’s user manual or contact your internet service provider.
Step 3: Locate the Port Forwarding Section
Within your router’s admin panel, navigate to the port forwarding section. The location of this section may vary depending on your router’s make and model, but it is typically found under the “Advanced” or “Security” settings.
Step 4: Create a New Port Forwarding Rule
In the port forwarding section, create a new rule by clicking on the “Add” or “Create” button. You will be prompted to enter the following information:
| Field | Description |
|---|---|
| Service Name | Enter a name for your port forwarding rule (e.g., Amcrest Camera). |
| Protocol | Select the protocol used by your security camera (e.g., TCP, UDP). |
| External Port | Enter the external port number that will be used to access your camera remotely. |
| Internal IP Address | Enter the IP address of your security camera. |
| Internal Port | Enter the internal port number used by your security camera (typically the same as the external port). |
Once you have entered this information, save the port forwarding rule.

Step 5: Test Remote Connection
After saving the port forwarding rule, you can test the remote connection to your Amcrest security camera. Open a web browser on your remote device and enter the external IP address of your router, followed by the external port number you specified in the port forwarding rule (e.g., http://external_ip:external_port).
If successful, you should be able to access your camera’s feed remotely. If you encounter any issues, double-check your port forwarding settings and consult your router’s user manual or contact your internet service provider for further assistance.
Set Up Dynamic DNS
If you want to connect remotely to your Amcrest security camera, one important step is to set up Dynamic DNS (DDNS). Dynamic DNS is a service that allows you to access your camera using a domain name even if your internet service provider (ISP) assigns you a dynamic IP address.
Here are the steps to set up Dynamic DNS:
Step 1: Sign up for a Dynamic DNS service. There are several providers available, such as No-IP, Dyn, and Duck DNS. Choose a provider and create an account.

Step 2: Once you have created an account, log in to the Dynamic DNS provider’s website and find the configuration settings for your account. Look for an option to create a new hostname or domain name. Enter a name for your camera, such as “mycam” or “securitycam.”
Step 3: Configure your Amcrest security camera to use the Dynamic DNS service. Open the camera’s web interface by entering its IP address in a web browser. Go to the settings or network configuration page and look for the option to enable Dynamic DNS and enter the hostname or domain name you created in Step 2.
Step 4: Save the settings and wait for the camera to update its configuration. This may take a few minutes. Once the update is complete, your Amcrest security camera will be accessible remotely using the domain name provided by the Dynamic DNS service.
Note: Some Dynamic DNS services require you to periodically confirm your IP address to ensure it stays up to date. Check the provider’s documentation for instructions on how to configure this feature.
By setting up Dynamic DNS, you can easily access your Amcrest security camera from anywhere with an internet connection. This allows you to monitor your surveillance footage and keep an eye on your property remotely.
Install Amcrest View App on Your Mobile Device
To remotely connect to your Amcrest security camera, you can use the Amcrest View app on your mobile device. Follow the steps below to install the app:
| Step 1: | Open the App Store or Google Play Store on your mobile device. |
| Step 2: | Search for “Amcrest View” in the search bar. |
| Step 3: | Tap on the “Install” button next to the Amcrest View app. |
| Step 4: | Wait for the app to download and install on your device. |
| Step 5: | Once the installation is complete, open the Amcrest View app. |
| Step 6: | Follow the instructions on the screen to log in or create a new account. |
| Step 7: | Once you’re logged in, you can add and connect to your Amcrest security camera using the app. |
By installing the Amcrest View app on your mobile device, you’ll have easy access to your security camera from anywhere in the world. You can view live video feeds, playback recorded footage, and manage your camera settings conveniently from your smartphone or tablet.
Accessing Your Amcrest Security Camera Using a Web Browser
To remotely access your Amcrest security camera using a web browser, follow the steps below:
| Step | Description |
|---|---|
| 1 | Make sure your Amcrest security camera is connected to the internet and powered on. |
| 2 | Open your preferred web browser on a computer or mobile device connected to the same network as your Amcrest security camera. |
| 3 | Enter the IP address of your camera into the address bar of your web browser. The IP address can usually be found in the documentation or settings of your camera. |
| 4 | Press Enter or click on the Go button to access the web interface of your Amcrest security camera. |
| 5 | You will be prompted to enter your login credentials. By default, the username is usually admin and the password is either admin or left blank. Enter the required information and click on the Login or Sign In button. |
| 6 | Once logged in, you will have access to the live view of your Amcrest security camera. From here, you can view and manage your camera’s settings, including recording footage, adjusting motion detection settings, and more. |
By following these steps, you will be able to remotely access your Amcrest security camera using a web browser and monitor your property from anywhere with an internet connection.
Troubleshooting Remote Connection Issues
If you’re experiencing issues connecting remotely to your Amcrest security camera, there are a few troubleshooting steps you can try to resolve the problem.

1. Check your internet connection:
Make sure you have a stable internet connection with sufficient bandwidth. Slow or intermittent internet connectivity can cause issues with remote access to your security camera.
2. Verify camera settings:
Ensure that the camera’s network settings are correctly configured. Check that the network IP address, subnet mask, gateway IP, and DNS server settings are accurate.
3. Configure port forwarding:
Port forwarding allows you to access your security camera from outside your local network. Ensure that the necessary ports (default 37777 for TCP and 37778 for UDP) are properly forwarded on your router.
4. Disable firewall or antivirus software:
Firewall or antivirus software on your computer can sometimes block access to your security camera. Try temporarily disabling these programs and see if you can establish a remote connection.
5. Use the correct remote access method:
There are different ways to remotely connect to your Amcrest security camera, such as using the Amcrest View app, Amcrest Cloud, or a web browser. Make sure you are using the correct method for your specific camera model.
6. Update camera firmware:
Check if there are any firmware updates available for your camera. Updating the firmware can often fix bugs or compatibility issues that may be causing problems with remote access.
7. Contact Amcrest support:
If you’ve tried all the troubleshooting steps and still can’t connect remotely to your security camera, reach out to the Amcrest support team for further assistance. They will be able to provide you with specific troubleshooting steps for your camera model.
By following these troubleshooting steps, you should be able to resolve most remote connection issues with your Amcrest security camera. Remember to double-check your settings and seek support if needed.


