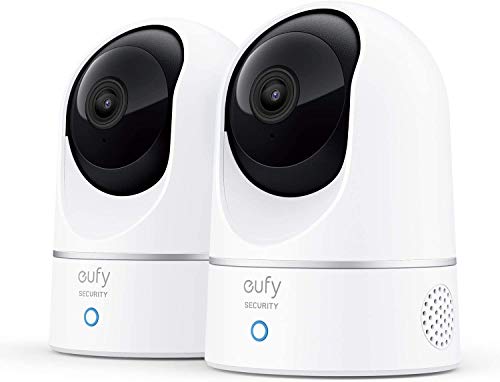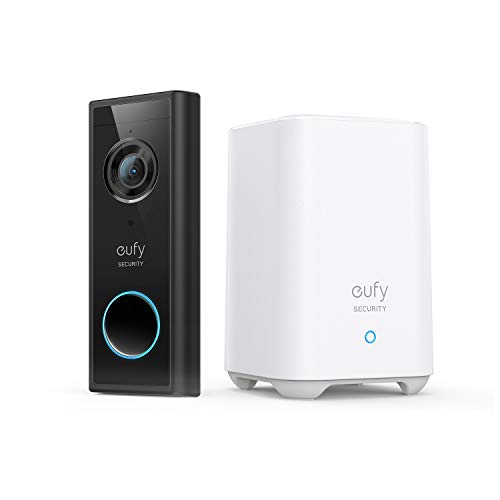
Installing a security camera outside your home or business is an excellent way to enhance your security measures and deter potential intruders. However, knowing how to properly mount a security camera is crucial for optimal performance and coverage. In this article, we will guide you through the steps necessary to mount a security camera outside.
1. Choose the right location: Before mounting your security camera, carefully select the location that offers the best vantage point. Consider areas with high foot traffic, entrances/exits, and blind spots. Make sure the camera has a clear line of sight and isn’t obstructed by any objects.
2. Prepare the mounting surface: Ensure that the mounting surface is sturdy and capable of supporting the weight of the camera. Clean the area to remove any dirt, dust, or debris that could affect the camera’s performance. Use a level to ensure that the mounting surface is flat and even.
3. Attach the mounting bracket: Securely attach the mounting bracket to the wall or surface. Use screws and anchors suitable for the mounting surface type. Make sure the mounting bracket is level and properly aligned. Use a level to double-check the positioning.
4. Mount the camera: Once the mounting bracket is securely attached, carefully mount the camera onto the bracket. Follow the manufacturer’s instructions to ensure proper installation. Ensure that all connections are secure and that the camera is aligned correctly for optimal coverage.

5. Test and adjust: After mounting the camera, test its functionality by connecting it to a power source and viewing the footage. Adjust the camera’s position and angle as needed to achieve the desired coverage. Consider testing the camera at different times of the day to account for varying lighting conditions.
By following these steps, you can effectively mount a security camera outside and enhance the security of your property. Remember to always prioritize safety and consult the manufacturer’s instructions for specific guidance related to your camera model.
Choosing the Right Location
When it comes to mounting a security camera outside, choosing the right location is crucial. Here are some factors to consider:
Visibility
Choose a location where the camera will have a clear view of the area you want to monitor. Avoid placing it behind obstacles such as trees or buildings that may obstruct the camera’s field of view. Ensure that the camera is not pointed directly at the ground or the sky, as this may result in capturing unnecessary footage.
Coverage
Determine the areas you want the camera to cover. If you need to monitor a large area, consider using a wide-angle lens or positioning the camera at a higher vantage point. For specific areas, such as entrances or driveways, place the camera closer to ensure better coverage.

Accessibility
Ensure that the camera is easily accessible for maintenance and adjustments. This includes being able to reach it for cleaning, changing batteries or power sources, and adjusting the angle or direction of the camera. However, be cautious of placing the camera within easy reach of potential tampering or vandalism.
Consider these factors when choosing the right location for your outdoor security camera. By selecting the optimal position, you can maximize its effectiveness and ensure the safety and security of your property.
Ensuring Proper Mounting
When it comes to mounting security cameras outside, it is crucial to ensure that they are properly mounted. This ensures optimal performance and protection. Here are some tips to help you ensure proper mounting:
- Choose the right location: Before mounting your security camera, carefully choose a location that provides the best view of the area you want to monitor. Consider factors such as line of sight, lighting conditions, and potential obstructions.
- Use sturdy mounting hardware: To ensure that your security camera stays in place, use high-quality and sturdy mounting hardware. This will prevent your camera from being easily tampered with or knocked out of position.
- Consider weather resistance: Outdoor security cameras need to withstand various weather conditions. Make sure that the mounting hardware and camera itself are weather-resistant. This will protect your camera from rain, dust, and extreme temperatures.
- Angle the camera appropriately: It is important to angle your security camera properly for the best view. Adjust the camera’s angle so that it covers the desired area without any blind spots. Test the camera’s view before fully securing it in place.
- Ensure proper wiring: If your security camera requires wiring, make sure to plan the wiring properly. Conceal the wires as much as possible to prevent tampering or damage. Use appropriate weatherproof connectors and cables to protect the wiring from the elements.
- Regularly check and clean: Once your security camera is properly mounted, make it a habit to regularly check and clean it. This will help maintain optimal performance and prevent any build-up of dirt or debris that can obstruct the camera’s view.
By following these tips, you can ensure that your security camera is properly mounted outside, providing reliable surveillance and peace of mind.
Connecting Power Source
Mounting a security camera outside requires a reliable power source to ensure continuous operation. Here are some steps to guide you through the process of connecting a power source:

Step 1: Choose the Power Supply
Before connecting the security camera, determine the type of power supply that is compatible with your camera model. Most outdoor security cameras use either AC power or DC power. AC power requires an electrical outlet nearby, while DC power can be supplied by batteries or a power adapter.
Step 2: Locate the Power Input
Once you have identified the power supply, locate the power input on the security camera. This is typically a small round socket or a terminal block where the power source will be connected.
Step 3: Prepare the Power Cable
If your power source requires a cable, ensure that it is long enough to reach from the camera to the power supply. Cut the cable to the desired length if necessary, and strip the insulation from the ends to expose the wires.
Step 4: Connect the Power Source
With the power cable prepared, connect the positive and negative wires to the corresponding terminals on the camera’s power input. The positive wire is typically red or marked with a “+” symbol, while the negative wire is usually black or marked with a “-” symbol. Ensure that the connections are secure to prevent any power interruptions.
Step 5: Test the Power Connection
After connecting the power source, plug it into an electrical outlet or turn on the battery if applicable. Verify that the security camera powers on and functions properly. If the camera does not turn on, double-check the power connections and ensure that the power source is functioning correctly.

By following these steps, you can successfully connect a power source to your outdoor security camera. This will provide the necessary power to keep your camera running and monitoring your desired location.
Setting Up Wi-Fi Connection
Setting up a Wi-Fi connection for your outdoor security camera is essential for seamless monitoring and remote access to your camera feed. Follow these steps to establish a stable and secure Wi-Fi connection:
1. Selecting a Wi-Fi-enabled Camera:
Ensure that the security camera you choose supports Wi-Fi connectivity. Look for cameras with built-in Wi-Fi or models that can be connected to a Wi-Fi module.
2. Placing the Camera:

Find an optimal location for your camera outside, preferably within reach of your Wi-Fi network. Ensure that there are no obstructions such as walls or large objects that may interfere with the Wi-Fi signal.
3. Connecting to Power:
Connect your security camera to a power source using the provided power adapter. Make sure the power source is conveniently located near the camera and can be easily accessed.
4. Accessing Camera Settings:
Using the camera’s accompanying mobile app or web interface, access the camera’s settings menu. Look for the Wi-Fi settings or network settings option.

5. Connecting to Wi-Fi:
In the Wi-Fi settings, select your home Wi-Fi network from the available networks list. Enter the correct Wi-Fi password when prompted.
6. Testing the Connection:
After entering the Wi-Fi credentials, the camera will attempt to establish a connection to your Wi-Fi network. Wait for the camera to connect to your Wi-Fi network and ensure that the connection is stable.
7. Remote Access and Monitoring:

Once the connection is established, you can use the camera’s mobile app or web interface to remotely access the camera feed and monitor the surrounding area from anywhere with an internet connection.
8. Troubleshooting:
If you encounter any issues during the Wi-Fi setup process, refer to the camera’s user manual for troubleshooting tips. Common issues include incorrect Wi-Fi credentials, poor Wi-Fi signal strength, or compatibility issues with your Wi-Fi network.
By following these steps, you can set up a reliable Wi-Fi connection for your outdoor security camera, ensuring seamless monitoring and access to your camera’s feed.
Adjusting Camera Angle
Properly adjusting the camera angle is crucial to ensure optimal surveillance coverage. Here are some steps to help you adjust the angle of your security camera:
- Position the camera at a high point: Mount the camera at a height where it can capture the desired area without any obstructions. This will help maximize the camera’s field of view and minimize blind spots.
- Angle the camera downwards: Tilt the camera downwards to focus on the desired area. This will help capture a clear view of any activities or individuals within the camera’s range.
- Consider the lighting conditions: Take into account the lighting conditions of the area where the camera is mounted. Adjust the angle and position of the camera to minimize glare or backlighting, which could affect the quality of the recorded footage.
- Test the camera’s view: After adjusting the camera angle, test its view by monitoring the footage. Make any necessary adjustments to ensure that the camera captures the desired area and provides clear and detailed images.
- Secure the camera in place: Once you have found the optimal angle, secure the camera in place using the appropriate mounting brackets and screws.
By following these steps, you can ensure that your security camera is properly angled to provide effective surveillance coverage for your outdoor space.
Accessing Video Feed
Once you have successfully installed and mounted your security camera outside, you will need to know how to access the video feed. Here is a step-by-step guide on how to do it:
-
Make sure that your security camera is properly connected to your home network. This usually involves connecting the camera to your router using an Ethernet cable or connecting it wirelessly using your Wi-Fi network.
-
Once the camera is connected, you will need to find its IP address. This can usually be done by accessing your router’s settings and looking for the connected devices section. The IP address should be listed next to the camera’s name. If you can’t find the IP address this way, you may need to consult the camera’s manual or contact the manufacturer for assistance.
-
Once you have the IP address, open a web browser on your computer or mobile device and enter the IP address in the address bar. Press Enter to navigate to the camera’s web interface.
-
You will be prompted to log in with your camera’s username and password. Enter the correct credentials to access the camera’s settings and video feed.
-
Once you are logged in, you should be able to see the live video feed from your camera. Depending on the camera and its features, you may have access to additional settings and features, such as motion detection, recording options, and the ability to view playback of recorded footage.
-
To ensure the security of your camera and video feed, it is recommended to change the default username and password to a strong and unique combination. This will help protect against unauthorized access.
Following these steps will allow you to easily access the video feed from your security camera and monitor your outdoor area for any potential threats or suspicious activities.
Securing the Camera
Once you have determined the ideal location for your security camera outside, it is essential to ensure its proper security to prevent any unauthorized tampering or theft. Here are some tips for securing your camera:
1. Mounting Options: Choose a sturdy mounting option that provides stability and durability. Wall mounts or pole mounts are commonly used for outdoor security cameras.
2. Weatherproof Housing: Invest in a weatherproof housing to protect your camera from harsh weather conditions such as rain, snow, or direct sunlight. This will also help to extend the camera’s lifespan.
3. Tamper-Proof Casing: Look for cameras with tamper-proof casings that are designed to deter any attempts to disable or remove the camera without authorization.
4. Locking Mechanisms: Consider using locking mechanisms or brackets with built-in locks to secure the camera in place and prevent easy access for potential thieves or vandals.
5. Concealed Wiring: Hide the camera’s wiring as much as possible to prevent it from being cut or tampered with. This will help maintain the camera’s functionality and deter any attempts to disable it.
6. Regular Maintenance: Continuously check and maintain the camera’s condition to ensure it is functioning properly. Clean the lens regularly and inspect the mounting hardware for any signs of wear or damage.
By following these tips, you can ensure the security and longevity of your outdoor security camera, providing you with peace of mind and reliable surveillance for your property.
FAQ,
What do I need to consider when mounting a security camera outside?
When mounting a security camera outside, there are several things you need to consider. First, you need to determine the best location for the camera where it can capture the desired area without any obstructions. Second, you need to ensure that the camera is protected from the elements, so you may need to purchase a weatherproof housing or choose a camera that is already designed for outdoor use. Third, you need to make sure that you have a power source nearby or that the camera is compatible with wireless power options. Finally, you should also consider the security and accessibility of the camera to prevent tampering or theft.
Can I install a security camera outside myself?
Yes, you can install a security camera outside yourself. Many security cameras come with DIY installation instructions that make it easy for homeowners to set up the cameras themselves. However, it is important to carefully read and follow the instructions provided by the manufacturer to ensure proper installation. Additionally, you may need basic tools such as a drill, screws, and a ladder to mount the camera securely. If you are uncomfortable with the installation process or unsure of your ability to do it correctly, it is recommended to hire a professional installer to ensure the camera is properly mounted and functioning.