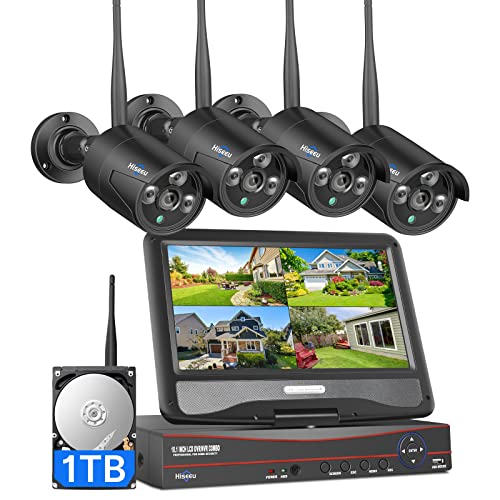
When it comes to securing your home, installing security cameras is an excellent idea. They provide an extra layer of protection, allowing you to monitor your property and deter potential intruders. However, before you can install security cameras, you need to pre-wire your house properly.
Pre-wiring your house for security cameras is an essential step that shouldn’t be overlooked. It involves running the necessary cables and wires through your walls and ceilings before installing the cameras. This pre-wiring process ensures a neater and more reliable installation, as well as saves you the hassle of dealing with exposed cables later.
So, how do you pre-wire your house for security cameras?
First, begin by planning the camera locations. Assess the areas of your property that you want to monitor and determine the optimal positions for the cameras. Consider factors such as the line of sight, coverage angle, and potential obstructions.
Next, gather all the necessary tools and materials, including cables, wires, connectors, and a drill. Measure and mark the spots where you want to install the cameras. Use a stud finder to locate the studs in your walls, as they will provide necessary support for mounting.

Planning the Layout
Before starting the pre-wiring process for security cameras, it is essential to plan the layout of your surveillance system. This will help you determine the number of cameras needed, their optimal positioning, and the wiring requirements. Here are some steps to consider when planning the layout:
- Identify the areas that require surveillance: Assess your home or property and identify key areas that need to be monitored, such as entrances, driveways, backyard, and common spaces.
- Determine the number of cameras: Based on the areas you have identified, determine the number of cameras needed. Consider the field of view, camera resolution, and coverage area to ensure sufficient coverage.
- Select optimal camera locations: Determine the best locations for each camera to maximize coverage and minimize blind spots. Consider factors like camera mounting height, line of sight, and obstructions.
- Create a camera wiring plan: Once you have decided on camera locations, plan the wiring routes. Consider the distance between each camera and the closest power source or recording device. Opt for concealed wiring whenever possible to enhance security and aesthetics.
- Choose the appropriate cables: Depending on your surveillance system requirements, select the appropriate cables for your cameras. This may include coaxial cables, Ethernet cables, or power cables. Ensure that you choose high-quality cables that can handle the transmission needs and support your camera resolution.
- Consider future expansion: If you anticipate expanding your surveillance system in the future, take that into account during the planning stage. Install extra conduits or cables to accommodate additional cameras or devices.
By carefully planning the layout of your security camera system, you can ensure efficient installation, optimal coverage, and a professional-looking setup. Invest time in this planning stage to save time and effort during the actual pre-wiring process.
Choose Camera Locations
Choosing the right locations for your security cameras is crucial to ensure maximum coverage and effectiveness. Here are a few factors to consider when selecting camera locations:
1. Entry Points
Place cameras near all entry points of your house, such as front and back doors, garage doors, and windows. These areas are the most vulnerable and could be potential points of entry for intruders.
2. Perimeter
Place cameras along the perimeter of your house to monitor the surrounding area and detect any suspicious activity happening outside. This can include backyard, side yards, and driveways.

3. High Traffic Areas
Identify high-traffic areas in your house where people are most likely to pass through. Install cameras in these areas to capture any movement and activities. Examples include hallways, staircases, and living rooms.
4. Valuables
If you have specific valuables or areas of concern, such as a safe, an art collection, or a home office, consider placing cameras to monitor these areas closely. This will help ensure that your most precious possessions are protected.
Keep in mind that it’s important to place cameras at a height and angle that provides a clear view of the area you want to monitor. Test the camera positions before finalizing the installation to make sure you are capturing the needed footage.
Once you have identified the locations, create a schedule and diagram to map out the placement of your security cameras. This will help during the actual installation process and ensure that you have covered all the necessary areas.
| Camera Location | Reason |
|---|---|
| Front door | Monitor who enters and exits the house |
| Back door | Secure the rear entrance of your house |
| Garage | Protect your vehicles and belongings in the garage |
| Windows | Monitor potential points of entry |
| Backyard | Monitor the outdoor area surrounding your house |
| Driveway | Record any vehicles coming or leaving your property |
| Hallways | Monitor movement within your house |
| Staircases | Ensure safety and detect any suspicious activities on the stairs |
| Living room | Monitor the central area of your house |
| Safe or valuable areas | Protect your most precious possessions |
Determine Wiring Pathways
Before you begin pre-wiring your house for security cameras, it’s important to determine the pathways for your wiring. This will help you plan and execute your wiring installation more efficiently.

Here are some steps to help you determine the wiring pathways:
| Step 1: | Inspect your house and identify areas where you want to install security cameras. Consider both indoor and outdoor locations. |
| Step 2: | Sketch a floor plan of your house and mark the desired camera locations. |
| Step 3: | Locate existing wiring infrastructure such as electrical outlets, Ethernet jacks, or cable TV outlets that are near the camera locations. This will help you determine if you can use existing wiring or if you need to run new cables. |
| Step 4: | Choose the type of wiring you want to use for your security cameras, such as Ethernet cables (Cat 5e or Cat 6) or coaxial cables. |
| Step 5: | Plan the cable routes from the camera locations to a central point where you will install the video recorder or network switch. |
| Step 6: | Consider the obstacles you may encounter along the cable routes, such as walls, floors, or ceilings. Determine if you need to drill holes, use conduit, or employ other methods to conceal and protect the wiring. |
| Step 7: | Calculate the amount of cable you will need based on the distances between camera locations and the central point. Add some extra cable for future expansions or changes. |
By following these steps, you will be able to determine the most efficient and effective wiring pathways for your security cameras. This will ensure a seamless installation process and provide you with a reliable security system for your house.
Preparing the House
Before you start installing security cameras in your house, it’s important to properly prepare the house to ensure effective coverage and easy installation. Here are some steps to follow:
1. Determine the Camera Locations
The first step is to decide where you want to place your security cameras. Think about the vulnerable areas of your house, such as entry points or secluded areas, and identify the best locations for surveillance. Common spots include front and back doors, windows, driveways, and garages.
2. Plan the Wiring Routes
Once you have determined the camera locations, plan the wiring routes. Consider how you will route the cables from the cameras to your video recorder or DVR. It’s important to minimize cable visibility and ensure it doesn’t interfere with other household components.

3. Measure and Calculate Cable Lengths
With the camera locations and wiring routes in mind, measure the distances from each camera to the central location where you will place your video recorder. This will help you calculate the cable lengths required for each camera. It’s always better to add extra length to accommodate any unforeseen obstructions or changes.
4. Choose the Right Cables
When pre-wiring your house for security cameras, you will need to choose the right cables. High-quality cables, such as CAT5e or CAT6, are recommended for transmitting video signals over long distances. Consider using pre-made cables or spools of cable for a neater and more organized installation.
5. Install Conduit if Needed
Depending on the complexity of your security camera system and the visibility of cables, you may consider installing conduit. This protective tubing can be used to route and protect the camera cables, giving them additional security and preventing damage. It’s particularly useful for outdoor installations.
6. Create a Wiring Diagram
Before starting the installation, create a wiring diagram that outlines the camera locations, wiring routes, and cable lengths. This will serve as a reference during the installation process and ensure that all cameras are properly connected to the video recorder.
7. Consider Power Requirements
Remember to consider the power requirements for your security cameras. Determine whether you will need to install additional electrical outlets near the camera locations or if you will use Power over Ethernet (PoE) technology to power the cameras through the network cables.

8. Secure the Cables
Once the wiring is complete, make sure to secure the cables properly to prevent them from being easily tampered with. Use cable clips, staples, or cable ties to secure the cables to walls, ceilings, or other structures.
By following these steps and properly preparing your house, you can ensure a smooth and successful installation of security cameras that will provide you with the protection and peace of mind you need.
Prepare Wiring Tools
Before you begin pre-wiring your house for security cameras, it’s important to gather all the necessary tools and equipment. Here are the basic tools you will need:
1. Measuring Tape: A measuring tape will help you accurately measure the distances for the wires and cables.
2. Wire Strippers: Wire strippers are essential for removing the insulation from the wires and exposing the copper conductors.

3. Screwdrivers: You will need a variety of screwdrivers, including Phillips and flat-head, to secure the camera brackets and other components.
4. Drill: A drill with appropriate bits is required to create holes in the walls or ceilings for cable routing.
5. Fish Tape: A fish tape or wire puller is useful for pulling and guiding cables through walls and conduits.
6. Crimping Tool: A crimping tool allows you to attach connectors to the cables securely.
7. RJ45 Connectors: RJ45 connectors are used to terminate Ethernet cables and connect them to the cameras and network devices.

8. Cable Ties: Cable ties or zip ties help organize and secure the cables neatly.
9. Labeling Tools: Labeling tools such as markers or labels can be used to identify and label the cables for easy identification.
10. Camera Mounting Tools: Depending on the type of security cameras you are installing, you may require additional tools such as brackets, mounting screws, and anchors.
Once you have collected all the necessary tools, you will be ready to pre-wire your house for security cameras. Remember to follow safety guidelines and consult professional advice if needed.
| Tool | Quantity |
|---|---|
| Measuring Tape | 1 |
| Wire Strippers | 1 |
| Screwdrivers | Multiple |
| Drill | 1 |
| Fish Tape | 1 |
| Crimping Tool | 1 |
| RJ45 Connectors | As needed |
| Cable Ties | As needed |
| Labeling Tools | As needed |
| Camera Mounting Tools | As needed |
Drill Holes
Drilling holes is an essential step in pre-wiring your house for security cameras. These holes provide the pathway for running the necessary wiring from the camera location to your central point of connection. Before starting the drilling process, it is crucial to have a clear plan of your camera placement and wiring route.
1. Determine the Camera Locations
Decide where you want to install security cameras in and around your house. These locations should provide optimal coverage for monitoring and include points of entry, vulnerable areas, and blind spots. Once you have decided on the positions, mark them clearly.
2. Plan the Wiring Route
Identify the central point where all the camera wires will meet. This point should be easily accessible and close to a power source. Plan the wiring route from each camera location to this central point, considering the shortest and most efficient paths.
Consider the following while planning the wiring route:
| Obstacles | Determine if there are any obstacles such as walls, ceilings, or floors that the wiring needs to pass through. Take note of any firewalls, load-bearing walls, or other structural elements that might require special consideration. |
| Cable Requirements | Based on the camera specifications, determine the type and length of cable you will need. Plan for extra cable length to account for any unexpected twists or turns in the wiring route. |
| Concealment | If you prefer a neat and discreet installation, plan for ways to conceal the cables. This can include running them through walls, under carpets, or in cable management systems. |
By thoroughly planning the camera locations and wiring route, you can ensure a smooth installation process. Once your plan is in place, you can start drilling holes for running the camera wires according to the layout you created.
Running the Wires
Properly running the wires for your security cameras is a crucial step in pre-wiring your house. This will ensure that your cameras are properly connected and can effectively monitor the areas you want to secure. Here are some steps to follow when running the wires:
1. Plan the Camera Locations
Before running the wires, you should first plan the locations where you want to install your security cameras. These locations should provide optimal coverage for the areas you want to monitor. Once you have decided on the camera locations, you can proceed with running the wires.
2. Choose the Right Type of Wire
When selecting the wire for your security cameras, it is important to choose the right type of wire. You should opt for a wire that is suitable for outdoor use and can withstand different weather conditions. The wire should also be able to transmit power and video signals effectively.
You can use a combination of both Ethernet cables and coaxial cables depending on the type of cameras you are installing. Ethernet cables are commonly used for IP cameras, while coaxial cables are used for analog cameras.
3. Use Conduit
In order to protect the wires from damage and make them less visible, it is advisable to run them through conduit. Conduit is a plastic or metal tube that can be installed along the walls or ceilings. It provides a protective covering for the wires and allows for easy access in case you need to make any changes or repairs in the future.
4. Hide the Wires
To maintain a clean and professional look, you should aim to hide the wires as much as possible. You can do this by running the wires along the corners of the room or behind furniture. Additionally, you can use cable clips or wire channels to secure the wires neatly along the walls or baseboards.
5. Use a Cable Tester
Once you have successfully run the wires, it is important to test them to ensure they are properly connected. You can use a cable tester to check if all the connections are secure and if there are any issues with the wiring. This will help you identify any potential problems and make the necessary adjustments before installing the cameras.
Following these steps will help you properly run the wires for your security cameras and ensure a successful installation. With the wires in place, you will be well on your way to securing your home and protecting your property.
Measure and Cut Wires
Before installing security cameras in your house, you need to measure and cut the wires to the appropriate lengths. This step is crucial to ensure that your cameras are properly connected and to avoid any unnecessary wire clutter.
1. Determine the required wire length
Start by planning the placement of your cameras and the location of your recording or monitoring device. Measure the distance between each camera and the recording device to determine the required wire lengths. Make sure to account for the path the wire will take, including any corners or obstacles.
2. Use appropriate wire types
Consider the type of wire you will need for your security system. Depending on the distance, you may need to use different wire gauges to ensure the signal quality remains strong. Thicker wires with lower gauge numbers are generally used for longer distances, while thinner wires with higher gauge numbers are suitable for shorter distances.
Note: It is always a good idea to consult the manufacturer’s specifications or seek professional advice to determine the appropriate wire gauge for your specific security system.
3. Cut the wires
After determining the required wire lengths and choosing the appropriate wire gauge, use wire cutters or strippers to cut the wires to the desired lengths. Make sure to leave a little extra length to allow for any adjustments or unforeseen obstacles during installation.
Tip: It is advisable to mark each wire or use labels to indicate the destination or camera position to simplify the installation process.
By measuring and cutting the wires beforehand, you can save time and ensure a more organized and efficient installation of your security cameras. This careful planning will result in a professional-looking and reliable security system for your house.
Route Wires
Once you have decided on the locations for your security cameras, the next step is to route the wires through your house. This will involve running the wires from the cameras to a central location where your recording device will be located.
1. Plan the route
Start by planning the route for your wires. Consider the most discreet and efficient path to hide the wires from view. You may need to drill holes through floors, walls, or ceilings to run the wires along the desired route.
2. Install conduits
Installing conduits can help protect and organize your wires. Use conduits to guide the wires along the planned route and prevent them from being damaged. Make sure to choose conduits that are appropriate for the type and size of your wires.
When installing the conduits, be careful to avoid obstacles such as electrical wiring or plumbing. Check local building codes and regulations to ensure compliance.
3. Use cable clips or staples
Secure the wires along the route using cable clips or staples. This will prevent the wires from moving or getting tangled. Make sure not to staple or clip too tightly, as this could damage the wires.
4. Label the wires
Label each wire at both ends to keep track of their purpose and destination. This will make it easier to connect the wires to the correct locations in the future.
5. Test the connections
Before completing the wiring process, test the connections to ensure that each camera is properly connected to the central recording device. Check for any signal loss or interruptions that may require adjustments or repairs.
By carefully routing the wires in your house, you can ensure a clean and efficient installation of your security camera system. This will not only enhance the effectiveness of your surveillance but also contribute to the overall aesthetics of your home.
| Tips: |
|---|
| – Avoid running wires near high-voltage electrical lines to minimize interference. |
| – Make sure to follow safety guidelines when working with electrical wiring. |
| – If you are unsure about any part of the wiring process, consult a professional. |
Connecting Cameras
Once you have pre-wired your house for security cameras, the next step is to connect the cameras to the appropriate cables and power sources. Follow these steps to ensure a successful connection:
1. Mount the cameras
Start by mounting the cameras in the desired locations around your house. Choose positions that provide a wide coverage of the area while minimizing blind spots. Use a drill and appropriate screws to securely attach the cameras to the walls or ceilings.
2. Connect the cables
Locate the pre-wired cables that you ran during the installation process. These cables will typically consist of a video cable and a power cable. Connect the video cable to the corresponding video input on the back of the camera. The power cable should be connected to the power source, either directly to an outlet or to a power distribution box.
3. Position the cameras
Adjust the position of the cameras as necessary to ensure the desired view. Use the tilt and pan functions, if available, to adjust the angle and direction of the cameras. In some cases, you may need to use additional brackets or mounts to achieve the desired positioning.
Note: It is important to test the cameras before finalizing their positions. Check the view, clarity, and any potential blind spots to ensure optimal coverage.
4. Test the cameras
After connecting the cameras, power them on and check their functionality. Use a monitor or the security camera system’s software to view the live feed from each camera. Ensure that the video quality is clear and that there are no issues with the connection or display.
Pro tip: If you are planning to connect multiple cameras, it is recommended to use a network video recorder (NVR) or a digital video recorder (DVR) to centralize the camera feed and manage the recordings.
By following these steps, you can successfully connect your pre-wired security cameras and ensure effective surveillance of your home.
Connect Wires to Cameras
In order to pre-wire your house for security cameras, you will need to connect the wires to the cameras properly. Follow these steps to ensure a secure and effective connection:
Step 1: Gather the necessary tools
Before you begin, gather the following tools:
- Wire cutters/strippers
- Screwdriver set
- Drill and drill bits
- Electrical tape
Step 2: Prepare the wires
Using wire cutters, strip off about 1 inch of insulation from the end of each wire. This will expose the metal conductor inside the wire.
Step 3: Connect the wires to the cameras
Most security cameras will have two wires: one for power and one for data transmission. Connect the power wire to the appropriate power source, such as a power adapter or power distribution box. Use electrical tape to secure the connection.
Next, connect the data transmission wire to the corresponding port on the camera. This is usually labeled “video” or “data”. Use a screwdriver to secure the connection if necessary.
Step 4: Organize the wires
Once all the wires are connected, use electrical tape or cable ties to bundle and secure them. This will help prevent them from getting tangled or damaged in the future.
Step 5: Test the connection
After all the wires are connected and organized, test the cameras to ensure they are receiving power and transmitting data properly. Monitor the camera feed to make sure everything is working as expected.
By following these steps, you can properly connect the wires to your security cameras and ensure they are ready for use in your pre-wired house.
Connect Wires to Power Source
Once you have determined the locations for your security cameras and run the necessary cables, the next step is to connect the wires to a power source. This will ensure that your cameras have a constant and reliable supply of power to operate effectively.
Here are the steps to connect the wires to a power source:
- Identify the power source: Start by locating the nearest power outlet or junction box that you can safely connect your camera cables to. It is recommended to have a dedicated power outlet for each camera to avoid any potential overload.
- Prepare the wires: Strip the outer insulation of the camera cables to expose the individual wires inside. You will typically find a red wire for positive (+) and a black wire for negative (-) power connections.
- Connect the wires: Insert the exposed red wire into the positive terminal of the power source. This is usually indicated by a “+” symbol. Similarly, insert the exposed black wire into the negative terminal, which is often marked with a “-” symbol. Ensure that the connections are secure and snug.
- Secure the connections: To ensure the wires do not come loose, you can use electrical tape or wire connectors to wrap around the terminals. This will provide added protection and prevent any accidental disconnection.
- Test the power: Once all the connections are made, plug in the power source and ensure that the cameras receive power. Check the camera’s indicator lights or monitor to confirm that they are functioning properly.
By properly connecting the wires to a power source, you will have a reliable and uninterrupted power supply for your security cameras. This is an important step in pre-wiring your house for security cameras and ensuring the effectiveness of your surveillance system.
FAQ,
What is the importance of pre-wiring a house for security cameras?
Pre-wiring a house for security cameras is important because it allows for a clean and organized installation of the cameras. It also ensures that all the necessary cables and wires are properly hidden and protected, reducing the risk of damage or tampering. Pre-wiring also makes it easier to upgrade or expand the security camera system in the future.
What are the basic steps to pre-wire a house for security cameras?
The basic steps to pre-wire a house for security cameras include creating a plan, determining the camera locations, running the necessary wires and cables, and installing junction boxes for connecting the cameras. It is also important to consider factors such as power source, internet connectivity, and the type of security camera system you will be using.
What type of cables should I use for pre-wiring my house for security cameras?
It is recommended to use Category 5e or Category 6 Ethernet cables for pre-wiring a house for security cameras. These cables provide high-speed data transmission and are commonly used for networking purposes. They are also capable of carrying both power and video signals, which makes them ideal for connecting security cameras.
Can I pre-wire my house for security cameras myself, or should I hire a professional?
You can certainly pre-wire your house for security cameras yourself if you have the necessary skills and knowledge. However, it is recommended to hire a professional if you are not confident in doing it yourself. A professional installer will have the expertise to assess your property, plan the camera locations, and ensure that the wiring is done correctly and in compliance with local regulations.