
Getting a blurry image can be frustrating, especially when you’re using a high-quality DSLR camera. Whether you’re a professional photographer or an enthusiastic beginner, capturing sharp and clear photos is essential. The good news is that there are several steps you can take to prevent blurry pictures and improve the overall quality of your images.
1. Ensure proper focus: One of the most common reasons for blurry images is improper focus. Make sure you are focusing on the subject of your photo correctly. Use the autofocus feature of your camera or manually adjust the focus to ensure sharpness.
2. Steady your camera: Handheld shots can result in blurry photos, especially in low light conditions or when using slower shutter speeds. To prevent camera shake, use a tripod or a stable surface to keep your camera steady. This will significantly reduce the chances of blurriness in your images.
3. Adjust your shutter speed: If you’re shooting moving subjects, use a faster shutter speed to freeze the action. A slower shutter speed can cause motion blur, resulting in a blurry image. Experiment with different shutter speeds to find the optimal setting for your specific situation.
4. Use proper lighting: Poor lighting conditions can lead to blurry photos, especially if your camera’s ISO is set too low, forcing it to use a slower shutter speed. Make sure you have enough light to properly expose your image and consider using additional lighting equipment if needed.
5. Check your lens: Dust or smudges on your lens can affect the clarity of your photos. Clean your lens regularly using a microfiber cloth or lens cleaning solution to ensure clear and sharp images. Additionally, avoid touching the front element of the lens with your fingers to prevent oil smudges.
By following these tips, you’ll be well on your way to capturing sharp and clear images with your DSLR camera. Remember, practice makes perfect, so don’t be afraid to experiment and try different techniques to find what works best for you.
How to Avoid Blurry Pictures on Your DSLR Camera
Blurry pictures can be frustrating, especially when using a DSLR camera. However, with a few simple techniques and adjustments, you can prevent blurriness and capture sharp, clear photos every time. Here are some tips to help you avoid blurry pictures on your DSLR camera:
1. Use a Tripod
One of the main causes of blurry pictures is camera shake. By using a tripod, you can keep your camera steady and eliminate this problem. Make sure the tripod is stable and adjust the height to your desired level.
2. Master the Shutter Speed
Understanding and controlling the shutter speed is crucial for sharp images. A faster shutter speed freezes the motion and helps to capture clear photos, while a slower shutter speed can introduce blur. Experiment with different shutter speeds to find the right balance for your desired shot.

3. Maintain Proper Focus
Focusing accurately is vital to capturing sharp images. Use the autofocus feature on your DSLR camera to lock in the focus on your subject. Alternatively, you can switch to manual focus for more control. Take the time to ensure your subject is in focus before taking the shot.
4. Use Image Stabilization
If your lens or camera has image stabilization technology, make sure it is activated. This technology helps to reduce camera shake, resulting in sharper images. Refer to your camera’s manual to learn how to enable this feature.
5. Check Your Aperture
The aperture setting impacts the depth of field and the amount of light entering your camera. A smaller aperture (higher f-number) increases the depth of field, but it also reduces the amount of light. To avoid blurry pictures, select an aperture that allows enough light for your shot while maintaining the desired depth of field.
6. Increase ISO Sensitivity
Higher ISO sensitivity allows your camera to capture more light, which is helpful in low-light situations. However, be careful not to use too high of an ISO setting as it can introduce noise into your images. Find a balance between ISO sensitivity and image quality for sharp results.
By following these tips, you can prevent blurry pictures and capture sharp, clear images with your DSLR camera. Practice and experiment with different settings to find the right combination for your desired shots. Happy shooting!
Tips for Sharp Images
To prevent blurry pictures on your DSLR camera, follow these tips:
- Use a tripod: Keeping your camera steady is crucial for sharp images. A tripod can help eliminate any camera shake caused by handholding the camera.
- Optimize your focus: Make sure your camera is properly focused on the subject. Use manual focus or try different autofocus modes to find the best result.
- Use a fast shutter speed: A fast shutter speed can freeze the motion and reduce the chance of blurry images caused by subject movement or camera shake.
- Check your aperture: Using a smaller aperture (higher f-number) can increase the depth of field and make sure your subject is in focus.
- Keep your ISO low: High ISO settings can introduce noise and reduce image sharpness. Try to keep your ISO as low as possible while maintaining proper exposure.
- Use image stabilization: If your DSLR camera or lens has image stabilization, make sure it is enabled. This feature can help compensate for small movements and improve image sharpness.
- Shoot in good lighting conditions: Sufficient light can help your camera focus faster and improve image sharpness. Avoid shooting in low-light situations or use additional lighting if needed.
- Keep your lens clean: Dust or smudges on your lens can affect the image quality. Regularly clean your lens with a soft cloth or lens cleaning solution to ensure sharp images.
- Practice good technique: Hold the camera steady, avoid sudden movements, and gently press the shutter button to minimize camera shake.
- Use a remote or self-timer: To further reduce camera shake, use a remote shutter release or the self-timer function to trigger the shutter without touching the camera.
By following these tips, you can significantly improve the sharpness of your images captured with a DSLR camera.
Choosing the Right Shutter Speed
The shutter speed is a crucial setting on your DSLR camera that determines how long the camera’s shutter remains open when taking a photo. The chosen shutter speed can greatly affect the sharpness or blurriness of your pictures.
When it comes to preventing blurry pictures, selecting the appropriate shutter speed is essential. Here are a few factors to consider:
1. Subject Motion:

If your subject is in motion, a fast shutter speed is recommended to freeze the action and capture a sharp image. For example, when photographing sports or wildlife, a shutter speed of 1/500th of a second or faster is usually necessary to avoid blur caused by subject movement.
2. Handheld vs. Tripod:
If you are handholding your camera, it is important to choose a shutter speed that compensates for any potential camera shake. As a general rule, the shutter speed should be at least 1/(focal length) of your lens. For instance, if you are shooting with a 50mm lens, your minimum shutter speed should be 1/50th of a second to minimize blurriness caused by hand movement.
However, when using a tripod or other stable support, you can experiment with slower shutter speeds, as the camera is less likely to move. This can be advantageous in low-light situations where a longer exposure is needed.
3. Aperture and ISO:

Keep in mind that the chosen shutter speed must also work in conjunction with the aperture and ISO settings. A wider aperture (smaller f-number) allows more light into the camera, which can help increase the shutter speed. Additionally, raising the ISO sensitivity can allow for faster shutter speeds in low-light conditions.
Overall, understanding and selecting the appropriate shutter speed for the situation is crucial in preventing blurry pictures on your DSLR camera. By considering the subject motion, stability, and adjusting the aperture and ISO settings, you can ensure sharper and more professional-looking photographs.
Importance of Aperture Settings
Aperture is one of the key settings on a DSLR camera that directly affects the sharpness and quality of your photographs. It refers to the size of the lens opening, or the diaphragm, and determines how much light enters the camera. Understanding the importance of aperture settings can greatly help you in preventing blurry pictures.
1. Depth of Field
One of the main advantages of adjusting the aperture setting is the control over the depth of field. Depth of field refers to the range of focus in your image, from the closest object to the furthest. By adjusting the aperture, you can control the depth of field and choose whether to have a shallow or a deep depth of field.
A shallow depth of field, achieved by using a wide aperture (low f-number), allows you to focus on a specific subject while blurring out the background. This technique is often used in portrait photography to create a pleasing bokeh effect and draw attention to the subject. On the other hand, a narrow aperture (high f-number) results in a deep depth of field, making most or all of the image sharp and in focus.

2. Lighting Conditions
The size of the aperture also plays a crucial role in determining the amount of light that enters the camera. A wide aperture allows more light to pass through, making it ideal for low-light situations or when you want to capture fast-moving subjects. In such conditions, using a wide aperture will help you achieve faster shutter speeds, reducing the likelihood of blurry images caused by camera shake or subject movement.
However, in bright lighting conditions, using a wide aperture may result in overexposed images. In these situations, using a narrower aperture can help you reduce the amount of light entering the camera and avoid blown-out highlights. It is essential to find the right balance based on the available lighting conditions and your desired outcome.
3. Sharpening and Lens Aberrations
Aperture settings also play a role in enhancing the sharpness and overall image quality. While lenses typically have their sharpest results at around two to three stops down from their maximum aperture, using extremely narrow apertures can lead to diffraction, which can reduce overall sharpness.
Additionally, different lenses may exhibit various optical aberrations at different aperture settings. For instance, wide-open apertures may result in soft corners, while using small apertures may cause diffraction or increase the visibility of lens-related aberrations.
- Overall, it is advisable to experiment with different aperture settings and understand how they affect the depth of field and image quality in various lighting conditions.
- Remember to consider the specific lens you are using and its characteristics when selecting your aperture settings.
- Always try to strike a balance between achieving the desired depth of field, managing lighting conditions, and maintaining optimal image quality.
By mastering aperture settings, you can significantly improve the sharpness of your images and prevent blurry pictures on your DSLR camera.

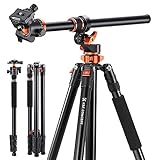
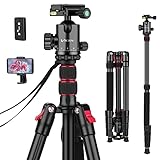
Using a Tripod for Stability
One of the most effective ways to prevent blurry pictures on your DSLR camera is to use a tripod for stability. A tripod provides a secure platform for your camera, eliminating any unwanted camera movements that can contribute to image blur. Here are a few tips on how to use a tripod effectively:
Choosing the Right Tripod
When selecting a tripod, it is important to consider the weight and size of your camera. Look for a tripod that can comfortably support your camera and any additional equipment you may be using, such as a telephoto lens. Make sure the tripod is sturdy and has adjustable legs to accommodate different shooting angles.
Setting Up the Tripod Properly
Before attaching your camera to the tripod, make sure it is set up properly. Adjust the height of the tripod so that the camera is at eye level or the desired shooting height. Ensure that the legs are fully extended and locked in place to provide maximum stability.
Tip: Use a tripod with a built-in bubble level or invest in a separate bubble level to ensure that your camera is perfectly level. This will help prevent any unintentional tilting and contribute to sharper images.
Using a Remote Shutter Release or Self-Timer
When taking a photo with a tripod, minimize camera shake by using a remote shutter release or your camera’s self-timer function. This eliminates the need to physically press the shutter button, which can cause slight camera movements. Set a short delay on the self-timer or use a remote shutter release for even greater stability.
Note: If you don’t have a remote shutter release, you can also use your camera’s timer function to delay the shutter release by a few seconds. This allows any vibrations from pressing the shutter button to settle down before the photo is taken.
By using a tripod for stability, you can greatly reduce the chances of blurry pictures on your DSLR camera. Take the time to set up your tripod properly and use additional tools such as a bubble level or remote shutter release for even better results.
Mastering Focus Techniques
One key factor in preventing blurry pictures with your DSLR camera is understanding and mastering focus techniques. In order to achieve sharp and clear images, consider the following techniques:
1. Autofocus Points: Familiarize yourself with the autofocus points on your camera. Different cameras have varying numbers and layouts of autofocus points. Experiment with different focus points to determine which ones work best for your desired compositions.
2. Focus Modes: DSLR cameras offer various focus modes, such as Single Autofocus (AF-S) and Continuous Autofocus (AF-C). For stationary subjects, use AF-S mode to lock focus once and capture the shot. For moving subjects, switch to AF-C mode to continuously track and maintain focus.
3. Depth of Field (DOF): Understanding how DOF works is crucial for achieving sharp images. By adjusting your aperture, you can control the DOF. For greater depth of field, use a higher f-number (e.g., f/16). For a more shallow DOF and background blur, use a lower f-number (e.g., f/2.8).
4. Manual Focus: In certain situations, manual focus may be more accurate and reliable than autofocus. This is especially true when shooting in low light or when dealing with subjects that have low contrast. Practice using manual focus to ensure your subject is sharp and in focus.
5. Use a Tripod: Camera shake is a common cause of blurry images. By using a tripod or stabilizing device, you can eliminate the risk of hand-held camera shake. This is particularly important when shooting in low light or using longer exposure times.
6. Shutter Speed: Adjusting your shutter speed can also help prevent blur. As a general rule of thumb, use a fast shutter speed (e.g., 1/250 or higher) for capturing fast-moving subjects and a slower shutter speed (e.g., 1/60 or lower) for stationary subjects.
By mastering these focus techniques, you can significantly improve the sharpness and clarity of your DSLR camera images. Experiment with different settings and techniques to find your preferred method for achieving crystal-clear shots.
Preventing Camera Shake
Camera shake is one of the main causes of blurry pictures. It occurs when the camera moves during the exposure, resulting in a loss of sharpness in the image. Here are some tips to help you prevent camera shake and capture sharper photos.
1. Use a Tripod
Using a tripod is one of the most effective ways to eliminate camera shake. It provides a solid and stable base for your camera, minimizing any movement. Make sure to choose a tripod that is sturdy and suits the weight of your camera.
2. Hold the Camera Properly
When handholding your camera, make sure to hold it with both hands. Keep your elbows close to your body to provide more stability. Additionally, avoid gripping the camera too tightly, as this can cause muscle tension that leads to camera shake.
3. Use a Remote Shutter Release
Using a remote shutter release allows you to trigger the camera without touching it, minimizing the risk of camera shake. This is especially useful when shooting with longer exposure times or when using the camera on a tripod.
4. Increase Shutter Speed
A faster shutter speed reduces the chance of camera shake, as it freezes the motion and minimizes the time the camera is exposed to movement. Experiment with different shutter speeds to find the optimal one for your desired shot.
5. Use Image Stabilization
If your camera or lens has image stabilization, make sure it is enabled. Image stabilization compensates for small movements and vibrations, reducing the risk of camera shake. Refer to your camera’s manual to learn how to activate this feature.
6. Control Your Breathing
When taking a photo, be mindful of your breathing. Take a deep breath, hold it, and release the shutter while you are holding your breath. This technique helps minimize any camera shake caused by your own movement.
7. Avoid Handheld Photography in Low Light
In low light situations, camera shake is more likely to occur due to the longer exposure times required. Consider using a tripod or alternative lighting to avoid camera shake in challenging lighting conditions.
By implementing these tips, you can significantly reduce camera shake and capture sharper, more professional-looking photos with your DSLR camera.
Question-answer:
Why are my pictures on my DSLR camera blurry?
If your pictures on your DSLR camera are blurry, there could be several reasons for this. One possible reason is that your camera settings may not be properly adjusted. Make sure that your autofocus is enabled and set correctly, and check if your image stabilization is turned on. Another reason for blurry pictures could be camera shake. To avoid this, use a tripod or stabilize your camera against a solid surface. Lastly, make sure that you are focusing properly and using the appropriate lens for the subject you are photographing.
What can I do to prevent blurry pictures on my DSLR camera?
To prevent blurry pictures on your DSLR camera, there are several steps you can take. Firstly, make sure that your camera settings are properly adjusted. Check that your autofocus is enabled and set correctly, and ensure that your image stabilization is turned on. Additionally, use a tripod or stabilize your camera against a solid surface to minimize camera shake. When taking photos, make sure to focus properly and use the appropriate lens for the subject. Finally, practice holding the camera steady and try to avoid sudden movements while taking the picture.


