
Setting up a bulb camera for your iPhone can be a convenient and effective way to monitor your home or office. Bulb cameras are designed to fit into standard light fixtures and provide a wide-angle view of your surroundings. With the ability to connect to your iPhone via Wi-Fi, you can easily view the live feed and control the camera’s settings right from your smartphone.
To set up a bulb camera for your iPhone, start by screwing the camera into the light fixture of your choice. Make sure it is securely in place before proceeding. Next, download and install the corresponding app for your bulb camera from the App Store. Open the app and follow the instructions to connect the camera to your Wi-Fi network.
Once the camera is connected to your Wi-Fi network, you can pair it with your iPhone by using the app. Follow the on-screen prompts to set up your camera, such as creating a unique username and password. This will ensure that only you have access to the camera’s live feed and settings.
After the initial setup is complete, you can access the camera’s live feed and control its settings directly from your iPhone. The app will provide you with options to rotate the camera, adjust the brightness, and even set up motion detection alerts. With these features, you can easily keep an eye on your property and receive notifications if any suspicious activity is detected.
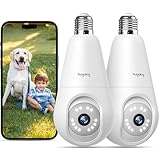
Choosing the Right Bulb Camera for Your iPhone
When it comes to setting up a bulb camera for your iPhone, choosing the right one is crucial. With so many options available on the market, it’s important to consider a few key factors before making your decision.

Compatibility:
One of the first things to consider is the compatibility of the bulb camera with your iPhone. Make sure to check if the camera is specifically designed to work with iPhones and if it supports the operating system version you have on your device. This will ensure a seamless connection and optimal performance.
Resolution:
The resolution of the bulb camera is also an important factor to consider. Higher resolution cameras will provide clearer and more detailed images and videos, allowing you to capture important moments with precision. Look for cameras with at least 1080p resolution for the best results.
Field of View:

The field of view determines how much area the bulb camera can cover. If you want to monitor a large space, look for a camera with a wide field of view or one that has pan and tilt capabilities. This will allow you to have a better view of your surroundings and ensure comprehensive surveillance.
Connectivity:
Consider the connectivity options offered by the bulb camera. Some cameras use Wi-Fi to connect to your iPhone, while others may rely on Bluetooth or both. Make sure the camera has a stable and reliable connection method that is compatible with your iPhone’s connectivity options.
Additional Features:
Lastly, consider any additional features or functionalities that the bulb camera may offer. Some cameras come with built-in motion sensors, night vision capabilities, two-way audio, or even the ability to integrate with smart home systems. These additional features can enhance your surveillance experience and provide added convenience.

By considering these factors when choosing a bulb camera for your iPhone, you can ensure that you select the best camera that suits your needs and preferences. Remember to do thorough research, read reviews, and compare options before making your final decision.
Understanding the Benefits of Bulb Cameras
Bulb cameras, also known as smart light cameras, offer a unique and innovative way to enhance security and surveillance in residential and commercial settings. These cameras are designed to look like ordinary light bulbs but come with built-in video recording capabilities. Here are some of the key benefits of using bulb cameras:
- Discreet Monitoring: The inconspicuous design of bulb cameras allows them to blend seamlessly into any environment. This makes them an ideal solution for those who want to monitor their homes or offices discreetly.
- 360-Degree Coverage: Bulb cameras typically come with a wide-angle lens that provides a 360-degree view of the surroundings. This enables users to monitor a larger area without the need for multiple cameras.
- Remote Access: Most bulb cameras can be accessed and controlled remotely using a smartphone app. This means that users can view live streams, adjust camera settings, and receive alerts from anywhere at any time.
- Night Vision: Many bulb cameras are equipped with infrared LEDs that allow for clear video recording in low-light or no-light conditions. This ensures uninterrupted surveillance even during the night.
- Motion Detection: Bulb cameras often come with motion detection technology, which triggers recording and sends alerts to the user’s phone whenever motion is detected. This helps in capturing any suspicious activity and acts as a deterrent against potential intruders.
- Two-Way Audio: Some bulb cameras feature built-in microphones and speakers, enabling two-way audio communication. This allows users to communicate with people near the camera, which can be useful for security purposes or even for interacting with family members or pets.
In conclusion, bulb cameras offer a range of benefits that make them a valuable addition to any security system. Their discreet design, wide coverage, remote access, night vision, motion detection, and two-way audio capabilities make them an effective and convenient choice for enhanced surveillance and peace of mind.
Checking Compatibility with Your iPhone
Before setting up a bulb camera for your iPhone, it’s important to check its compatibility with your device. The following steps will help you determine if your iPhone can work with a bulb camera:
Step 1: Check the specifications of your iPhone.
Make sure to review the technical specifications of your iPhone model to see if it meets the minimum requirements for the bulb camera. Look for information on camera compatibility, operating system requirements, and any additional features needed for the camera to work properly.
Step 2: Consult the bulb camera’s documentation.
Refer to the user manual or product information provided with the bulb camera. Look for any specific mention of iPhone compatibility or supported iOS versions. This information will help determine if your iPhone is capable of working with the bulb camera.
Step 3: Research the app compatibility.
Bulb cameras often require a companion app to function. Before proceeding, ensure that the app is available for download on the App Store and supports your iPhone model and iOS version. Check the app’s description for any specific compatibility requirements or recommendations.

Step 4: Visit the bulb camera manufacturer’s website.
Check the manufacturer’s website for any additional resources or information regarding compatibility with iPhones. Look for FAQs, support articles, or community forums that may address common compatibility questions or issues.
Step 5: Reach out to customer support.
If you’re still unsure about compatibility or have specific questions about your iPhone and the bulb camera, don’t hesitate to contact the manufacturer’s customer support. They will be able to provide you with accurate information and guidance on setting up the bulb camera with your iPhone.
By following these steps, you can ensure that your iPhone is fully compatible with the bulb camera and proceed with the setup process confidently.

Researching and Comparing Bulb Camera Brands
When setting up a bulb camera for your iPhone, it is important to choose the right brand that suits your needs. With so many options available in the market, it can be overwhelming to make a decision. This article aims to assist you in the process by providing key information on researching and comparing different bulb camera brands.
A bulb camera is a unique type of surveillance camera that looks like a standard light bulb but also serves as a security device. It is designed to provide discreet monitoring and can be easily installed in any standard light socket. Bulb cameras are increasingly popular for home and office security due to their inconspicuous appearance and ease of use.
When researching bulb camera brands, it is important to consider several factors:
| Factor | Description |
|---|---|
| Video Quality | Look for a brand that offers high-resolution video quality for clear and detailed footage. |
| Connectivity | Ensure that the bulb camera brand supports wireless connectivity, allowing you to access and control the camera remotely through your iPhone. |
| Features | Consider the additional features offered by the brand, such as motion detection, two-way audio, and night vision. |
| Compatibility | Check if the bulb camera brand is compatible with the iPhone and its corresponding app for seamless integration. |
| Price | Compare the prices of different bulb camera brands, ensuring that you get value for your money without compromising on quality. |
| Customer Reviews | Read customer reviews and ratings to get an insight into the experiences of other users with the brand’s products. |
By thoroughly researching and comparing different bulb camera brands based on these factors, you can make an informed decision and select the brand that best meets your requirements. Remember to consider your specific needs, budget, and the level of security you desire when choosing a bulb camera brand for your iPhone.
Setting Up a Bulb Camera for Your iPhone
If you have an iPhone and want to set up a bulb camera, you’re in luck! Setting up a bulb camera for your iPhone is a straightforward process that can be easily accomplished with a few simple steps. Here’s what you need to do:

Step 1: Install the Camera App
The first thing you’ll need to do is install the camera app that is compatible with your bulb camera. Head to the App Store on your iPhone and search for the app specifically designed for your camera model. Once you find the app, download and install it onto your device.
Step 2: Connect the Bulb Camera to Your iPhone
To establish a connection between your iPhone and the bulb camera, you’ll need to turn on the camera and put it into pairing mode. This process may vary depending on the camera model, so consult the camera’s user manual for specific instructions. Once the camera is in pairing mode, open the camera app on your iPhone and initiate the pairing process. Follow the on-screen prompts to connect the camera to your iPhone via Wi-Fi or Bluetooth.
Step 3: Configure the Camera Settings
After successfully connecting your iPhone to the bulb camera, you can start configuring the camera settings to your preference. Using the camera app, you can adjust various settings such as image quality, resolution, and motion detection. Take some time to explore the app and familiarize yourself with all the available options.
Step 4: Mount or Place the Bulb Camera
Once the camera settings are configured, you can mount or place the bulb camera in the desired location. Make sure the camera has a clear view of the area you want to monitor. Some bulb cameras come with mounting accessories, while others can be simply placed on a flat surface.
Step 5: Start Monitoring
With everything set up, you’re ready to start monitoring! Open the camera app on your iPhone and access the live feed from the bulb camera. From the app, you can view and record videos, take snapshots, and control any additional features your camera may have.
By following these steps, you can easily set up a bulb camera for your iPhone and enjoy the added security and convenience it offers. Whether you want to keep an eye on your home, office, or any other space, a bulb camera combined with your iPhone can provide peace of mind and enhanced surveillance capabilities.
Installing the App for Your Bulb Camera
Before you can start using your bulb camera with your iPhone, you need to install the dedicated app for it. Follow these steps to complete the installation:
- Open the App Store on your iPhone.
- In the search bar at the top, type in the name of the app for your bulb camera.
- Find the app in the search results and tap on it.
- Tap on the “Get” or “Install” button to download and install the app on your iPhone.
- Wait for the installation to complete, and the app icon will appear on your home screen.
- Go back to your home screen and tap on the app icon to launch it.
Once the app is installed and launched, you will need to follow the on-screen instructions to set up your bulb camera and connect it to your iPhone. This typically involves creating a new account, connecting to your home Wi-Fi network, and pairing the bulb camera with your iPhone.
Make sure to carefully read and follow the instructions provided by the app during the setup process. This will ensure a successful installation and proper functioning of your bulb camera with your iPhone.
Connecting Your Bulb Camera to Your iPhone
Setting up your bulb camera to work with your iPhone is a straightforward process. Follow the steps below to connect your bulb camera to your iPhone:
- Download the dedicated app for your bulb camera from the App Store. Ensure that you are downloading the correct app that is compatible with your specific bulb camera model.
- Once the app is downloaded and installed on your iPhone, open it. You may need to create an account or sign in to an existing account.
- Make sure your bulb camera is properly installed and connected to your Wi-Fi network. Refer to the user manual for instructions on how to set up your bulb camera.
- In the app, tap on the “Add Device” or “Connect New Device” option.
- Follow the on-screen instructions to connect your bulb camera to your iPhone. This usually involves selecting your Wi-Fi network and entering the password.
- Once the connection process is complete, you should see a confirmation message on the app indicating that your bulb camera is successfully connected to your iPhone.
- You can now access the live video feed from your bulb camera on your iPhone by selecting the camera from the app’s home screen.
With your bulb camera successfully connected to your iPhone, you can now enjoy the benefits of remote surveillance and monitoring. Make sure to explore the different features and settings available in the app to customize your experience and maximize the functionality of your bulb camera.
Configuring Settings and Preferences
Once you have installed the bulb camera app on your iPhone, you will need to configure the settings and preferences to ensure that the camera functions properly.
1. Connect the bulb camera to your iPhone:
To begin, make sure that your bulb camera is properly connected to your iPhone. You can do this by following the instructions provided with your camera. Typically, this involves connecting the camera to your iPhone via Wi-Fi or Bluetooth.
2. Open the bulb camera app:
Locate the bulb camera app on your iPhone and tap to open it. This will take you to the home screen of the app.
3. Access the settings menu:
In the app’s home screen, look for a gear or settings icon. This will take you to the settings menu where you can configure various options for your bulb camera.
4. Adjust the camera’s resolution:
One of the important settings to configure is the camera’s resolution. This determines the quality of the images and videos captured by the camera. Look for an option in the settings menu that allows you to adjust the resolution. Choose the highest resolution available for the best image quality.
5. Set up motion detection:
If your bulb camera supports motion detection, you can enable this feature in the settings menu. This will allow the camera to detect any movement and send you notifications on your iPhone. Look for an option related to motion detection and follow the on-screen instructions to set it up.
6. Enable night vision:
If your bulb camera has night vision capabilities, you will need to enable this feature in the settings menu. This will allow the camera to capture clear images and videos even in low light conditions. Look for an option related to night vision and turn it on.
7. Customize notification preferences:
If you want to receive notifications on your iPhone whenever the bulb camera detects motion or any other event, you can customize your notification preferences in the settings menu. Look for an option that allows you to customize notifications and choose your desired settings.
8. Save your settings:
After you have configured all the desired settings, make sure to save them. Look for a save or apply button in the settings menu and tap on it to save your changes.
By following these steps, you can easily configure the settings and preferences for your bulb camera on your iPhone. Make sure to refer to the user manual or contact the manufacturer for specific instructions related to your camera model.
Understanding the App Features and Functionality
The bulb camera app for iPhone comes with a variety of features and functionality that allows you to make the most out of your device’s capabilities. From live streaming to remote access, here’s a breakdown of what you can expect:
| Feature | Functionality |
| Live Streaming | You can easily access the live feed from your bulb camera directly on your iPhone. This allows you to monitor your home or office in real time and be aware of any potential security threats. |
| Two-Way Audio | The app enables two-way audio communication, allowing you to listen and speak through the bulb camera. This is particularly useful for home security purposes or for checking in on loved ones. |
| Motion Detection | The app utilizes motion detection technology, which triggers an alert on your iPhone whenever any movement is detected within the camera’s field of view. This ensures that you stay informed of any suspicious activities. |
| Remote Access | The app allows you to remotely access and control your bulb camera using your iPhone. You can adjust camera settings, change the viewing angle, or even pan and tilt the camera as needed. |
| Cloud Storage | The app offers secure cloud storage options that enable you to store and access your camera footage remotely. This ensures that your recorded videos are safely protected and can be accessed whenever needed. |
With these features and functionality, the bulb camera app for iPhone provides a comprehensive solution for your security and monitoring needs. Whether you’re looking to enhance the security of your home or monitor your office remotely, this app offers the tools you need to stay connected and in control.
Troubleshooting Common Issues with Bulb Cameras on iPhone
Setting up a bulb camera on your iPhone can provide added security and convenience for your home or office. However, there may be times when you encounter certain issues that can hinder the smooth operation of your camera. Here are some common problems and their possible solutions:
1. Connection Issues:
If you’re having trouble connecting your bulb camera to your iPhone, make sure that both devices are connected to the same Wi-Fi network. Additionally, ensure that the camera’s firmware is up to date. If you’ve recently changed your Wi-Fi network, reset the camera and set it up again with the new network information.
2. Poor Image Quality:
If you’re experiencing blurry or distorted images from your bulb camera on your iPhone, check if the camera lens is clean and free from any obstructions. Adjust the camera angle and distance to improve the image quality. If the issue persists, it may be due to a hardware problem, so contact the manufacturer for further assistance.
3. Infrared Night Vision Problems:
If the infrared night vision feature is not working properly on your bulb camera, check if the night vision mode is enabled in the camera settings on your iPhone. Ensure that there are no obstructions blocking the infrared lights on the camera. If the problem continues, try restarting both the camera and your iPhone.
4. App Compatibility Issues:
If you’re unable to access the bulb camera’s features or settings through the companion app on your iPhone, verify that the app is up to date. If not, update the app to the latest version from the App Store. If the issue persists, check if the app is compatible with your iPhone model and iOS version.
5. Power and Battery Problems:
If your bulb camera is not turning on or the battery drains quickly, ensure that the camera is properly connected to a power source. Check if the power adapter is working correctly and try using a different power outlet. If the battery issue persists, it may be necessary to replace the camera’s battery or contact the manufacturer for further troubleshooting steps.
By following these troubleshooting steps, you can resolve common issues with bulb cameras on your iPhone and enjoy a seamless experience with your security camera system.
Question-answer:
What is a bulb camera and why would I need it for my iPhone?
A bulb camera is a type of security camera that is shaped like a light bulb and can be screwed into a regular light socket. It allows you to monitor your home or office from your iPhone, giving you peace of mind and added security.
How do I connect the bulb camera to my iPhone?
To connect the bulb camera to your iPhone, you need to download the companion app from the App Store. Then, follow the instructions provided in the user manual to connect the camera to your home Wi-Fi network. Once the camera is connected, you can access its live feed through the app on your iPhone.
Can I control the bulb camera from my iPhone?
Yes, you can control the bulb camera from your iPhone through the companion app. The app allows you to adjust the camera’s settings, such as motion detection sensitivity and recording options. You can also view the live feed, playback recorded footage, and receive notifications on your iPhone when the camera detects any motion or sound.
Does the bulb camera have night vision?
Yes, most bulb cameras have built-in night vision capabilities. This means that they can capture clear footage even in low-light or complete darkness. You can still monitor your home or office at night through the live feed on your iPhone, without needing any additional lighting.
Is it possible to view the footage recorded by the bulb camera on my iPhone?
Yes, you can view the footage recorded by the bulb camera on your iPhone. The companion app allows you to access the camera’s storage and playback the recorded videos. You can also save the videos to your iPhone’s internal storage or cloud storage for future reference or sharing with others.


