
In the digital age, cameras have become an integral part of our lives. We use them to capture precious moments, document our experiences, and express our creativity. But have you ever wondered how a digital camera actually processes an image?
At its core, a digital camera is essentially a computer with a lens. When you press the shutter button, light enters the camera through the lens and hits the image sensor. The image sensor consists of millions of tiny light-sensitive elements called pixels. Each pixel captures the intensity of light that falls on it and converts it into an electrical signal.
Once the image sensor has captured the light, the camera’s processor goes to work. It takes the electrical signals from the pixels and processes them using a complex algorithm. This algorithm is designed to enhance the image, correct any imperfections, and apply various settings such as white balance, exposure, and color saturation.
Understanding how digital cameras process images
A digital camera is a complex device that captures and processes images in a way similar to how the human eye works. By understanding the basic steps involved in the image processing pipeline, we can gain a better appreciation of how digital cameras produce high-quality photographs.
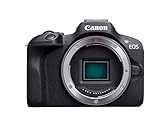
Image Sensor
The first step in the image processing pipeline is capturing the image using an image sensor. Most digital cameras use a type of image sensor called a Charge-Coupled Device (CCD) or a Complementary Metal-Oxide-Semiconductor (CMOS). These sensors convert light into electric signals that can be further processed.

The image sensor is made up of millions of tiny light-sensitive elements called pixels. Each pixel captures the intensity of light that falls on it, and these individual pixel values create the overall image.
Digital Image Processing
Once the image is captured by the sensor, it goes through a series of digital image processing steps. These steps include demosaicing, noise reduction, color correction, and image enhancement.
Demosaicing involves interpolating the colors of each pixel, as color sensors typically capture only one color per pixel. This process combines neighboring pixels to estimate the missing colors, resulting in a full-color image.
Noise reduction algorithms are applied to remove any unwanted elements or artifacts in the image, such as sensor noise or image blur.
Color correction ensures that the colors in the image appear accurate and natural. This step involves adjusting the color balance, saturation, and contrast of the image.

Image enhancement techniques can be applied to improve the overall quality and appearance of the image. This may include sharpening details, adjusting brightness and contrast, or adding special effects.
Image Compression
Once the image has been processed, it is usually compressed to reduce the file size for storage or transmission. Common image compression algorithms include JPEG and PNG, which remove redundant information and optimize the image data.
Understanding the image processing pipeline of a digital camera can help us appreciate the complexity and artistry involved in capturing and producing high-quality photographs. By combining advanced technology with careful image processing techniques, digital cameras allow us to capture and preserve our visual memories with stunning detail and clarity.
Image capture: how a digital camera captures light
A digital camera captures light to create an image using a process called image capture. This process involves several steps, starting with the camera lens.
The camera lens focuses the incoming light onto an image sensor, which is usually a charged coupled device (CCD) or a complementary metal-oxide-semiconductor (CMOS) sensor. These sensors consist of millions of tiny light-sensitive elements called pixels.
When light hits the pixels, it creates an electrical charge proportional to the intensity of the light. This charge is then converted into a digital signal by an analog-to-digital converter (ADC).
The digital signal is then processed by the camera’s image processor, which applies various adjustments and enhancements to the image. These adjustments can include sharpening, noise reduction, color correction, and exposure compensation.
The processed digital image is then stored in the camera’s memory card or internal storage. It can be viewed on the camera’s LCD screen or transferred to a computer or other devices for further editing or printing.
In summary, a digital camera captures light through its lens, focuses it onto an image sensor, converts the light into digital signals, processes the signals to enhance the image quality, and stores the final image for viewing or further manipulation.
Image processing: turning captured data into a digital image
When you take a photo with a digital camera, the camera’s image sensor captures the light that enters through the camera’s lens. This captured light is then converted into electrical signals, which are referred to as “raw data”.

This raw data is usually in a format specific to the camera’s image sensor, and it needs to be processed in order to create a digital image that can be viewed and edited.
Digital image processing steps:
- Demosaicing: The raw data captured by the camera’s image sensor is usually in a Bayer pattern. This means that each pixel in the sensor only captures either red, green, or blue light. Demosaicing is the process of interpolating the missing color information for each pixel, resulting in a full-color image.
- White balance adjustment: This step ensure that the colors in the image appear natural by adjusting the overall color temperature. It helps remove any color casts caused by the lighting conditions at the time of the photo.
- Tone mapping: This step adjusts the brightness and contrast of the image to ensure that details in both the highlight and shadow areas are preserved. This helps create a more visually appealing image.
- Color correction: The raw data may also undergo color correction to ensure accurate color representation. This includes adjusting the saturation, hue, and overall color balance of the image.
- Noise reduction: Digital cameras often capture some level of noise in the image, especially in low-light conditions. Noise reduction algorithms are applied to remove or reduce this unwanted noise, resulting in a cleaner image.
- Sharpening: This step enhances the perceived sharpness of the image by applying algorithms that increase contrast along edges. It helps improve the overall clarity of the image.
Once all these processing steps are applied to the raw data, a final digital image is generated. This image can then be saved in various file formats, such as JPEG or PNG, and can be further edited or shared with others.
White balance: adjusting colors for accurate representation
White balance is a crucial aspect of digital camera image processing, helping to ensure that the colors in a captured image are represented accurately. Different light sources emit light at different color temperatures and have different color casts. These variations can make the colors in an image appear unrealistic or skewed.
The white balance adjustment compensates for these variations by effectively neutralizing the color cast and adjusting the colors in the image to be closer to what the human eye perceives as true white. This ensures that the colors in the image are reproduced faithfully and accurately.
Most digital cameras offer several white balance settings, such as Auto, Daylight, Cloudy, Shade, Tungsten, Fluorescent, and Custom. These settings allow photographers to select the appropriate white balance adjustment based on the lighting conditions they are shooting in.

Auto white balance
Auto white balance is a commonly used setting in digital cameras, especially for general photography. This setting allows the camera to automatically analyze the lighting conditions and adjust the white balance accordingly.
Manual white balance
Some cameras also offer the option for manual white balance adjustment. This requires the photographer to manually set the white balance based on a known reference point, such as a neutral gray or white card. This method can provide more precise control over the white balance adjustment and is often used in professional photography.
The white balance adjustment is typically applied to the RAW data captured by the camera’s image sensor before it is processed and saved as a JPEG or other image format. The camera’s image processing algorithms interpret the white balance adjustment to ensure accurate color reproduction in the final image.
White balance is an essential tool in digital camera image processing, allowing photographers to capture images with accurate and realistic colors. Understanding and using the appropriate white balance setting can greatly enhance the overall quality of the captured images.
Noise reduction: improving image quality
Noise in digital images can occur due to various factors such as sensor limitations, high ISO settings, low light conditions, and compression artifacts. This noise can degrade the image quality and affect the overall sharpness and clarity of the captured photos. To address this issue and improve the visual appeal of the images, digital cameras employ noise reduction techniques.

Types of noise
There are two primary types of noise that can be present in digital images:
- Chromatic noise: This type of noise mainly appears as unwanted colored speckles or pixels scattered across the image. It is caused by electrical interference or signal amplification issues within the camera.
- Luminance noise: Luminance noise is characterized by a grainy or speckled appearance in the image. It is caused by the random variations in the captured light intensity, resulting in an overall loss of image detail.
Noise reduction techniques
Digital cameras employ various noise reduction techniques to reduce the impact of noise and improve the image quality. Some of these techniques include:
| Technique | Description |
|---|---|
| Hardware-based noise reduction | This technique involves incorporating noise reduction capabilities directly into the camera’s sensor and image processing system. It reduces noise at the source and produces cleaner images. |
| Software-based noise reduction | This technique involves using advanced algorithms to analyze and remove noise from the captured image during post-processing. It utilizes complex mathematical calculations to identify and reduce noise while preserving image details. |
| Long exposure noise reduction | In long exposure photography, noise can become more prominent due to the extended exposure time. This technique involves capturing a dark frame immediately after the original exposure and using it to subtract the noise from the image. |
By employing these noise reduction techniques, digital cameras are able to minimize the impact of noise and produce high-quality, visually appealing images.
Image compression: storing and sharing digital images efficiently
Digital images can occupy a significant amount of storage space, making it essential to use image compression techniques to reduce their size without compromising on quality. These techniques enable users to store and share images more efficiently, whether it’s through online platforms or offline storage devices.
Image compression involves the reduction of the file size of an image, achieved by eliminating redundant and irrelevant data while preserving the essential details. This is typically done using two types of compression: lossless and lossy compression.

Lossless compression algorithms reduce the file size of an image without compromising on the original quality. This technique achieves compression by identifying and eliminating redundant data within the image file. Lossless compression is commonly used for images that need to be preserved in their original form, such as medical images or archival purposes. Although lossless compression results in smaller file sizes, the amount of compression achieved is usually limited.
On the other hand, lossy compression algorithms achieve higher compression ratios by selectively removing data that is less noticeable to the human eye. This technique takes advantage of the limitations of human perception to remove redundant or less important information. Lossy compression is commonly used for images that do not require perfect reproduction, such as photographs or web images.
To understand image compression better, let’s take a look at an example using the JPEG (Joint Photographic Experts Group) compression algorithm. The JPEG algorithm uses a combination of lossy and lossless compression techniques to achieve high compression ratios.
| Step | Description |
|---|---|
| 1 |
Convert the image from RGB color space to YCbCr color space. This conversion separates the image into three channels: luminance (Y), and two chrominance channels (Cb and Cr). |
| 2 |
Divide the image into small blocks of pixels, typically 8×8 pixels. |
| 3 |
Apply the discrete cosine transform (DCT) to each block of pixels. The DCT converts the pixel values into frequency coefficients, representing the image’s spatial frequency content. |
| 4 |
Quantize the transformed coefficients by dividing them by a quantization table. This step introduces the lossy compression aspect, as the quantization reduces the precision of the coefficients, resulting in data loss. |
| 5 |
Apply lossless compression techniques, such as Huffman encoding, to further reduce the file size. |
By combining these steps, the JPEG algorithm achieves high compression ratios while maintaining an acceptable level of image quality. However, it’s worth noting that each image compression algorithm has its strengths and weaknesses, and the choice of algorithm depends on the specific requirements of the application.
In conclusion, image compression plays a crucial role in storing and sharing digital images efficiently. Whether it’s through lossless compression for preserving image fidelity or lossy compression for reducing file sizes, these techniques enable users to optimize their storage and sharing capabilities without compromising on image quality.
Final output: viewing and printing digital images
Once the digital camera has processed the captured image, it is ready for viewing and printing. There are several ways to view and print digital images, each offering different levels of quality and convenience.
1. Viewing on a computer or smartphone
One of the most common ways to view digital images is by using a computer or smartphone. Digital images can be easily transferred from the camera to a computer or smartphone using a USB cable or wireless transfer methods. Once transferred, the images can be viewed using image viewer software or applications.
Image viewer software allows users to browse through the images, zoom in and out, rotate them, and even perform basic editing tasks like cropping and adjusting brightness. This method also allows for easy sharing of images through email, social media platforms, or messaging apps.
2. Printing at home
Another option for viewing digital images is to print them at home. Many printers on the market today are capable of printing high-quality photos directly from digital files. To print an image, the file is transferred to the computer connected to the printer, and the print settings are adjusted according to the desired final result.
Printing at home gives users complete control over the printing process, allowing them to choose the type of paper, adjust color settings, and make other customizations. However, it requires the necessary equipment and supplies, such as a printer and photo paper.
3. Printing at a photo lab
If printing at home is not an option or if users prefer professional-quality prints, they can take their digital images to a photo lab. Photo labs offer a wide range of printing services, from standard prints to large-format prints, photo books, and customized photo products.
To print at a photo lab, users usually need to transfer the digital images to a USB drive or upload them to the lab’s website. Once at the lab, the images are printed using professional-grade printers and high-quality paper to ensure accurate colors and sharp details.
Printing at a photo lab may require additional costs and time compared to printing at home, but it offers the advantage of professional expertise and high-quality results.
In conclusion, digital images processed by a digital camera can be viewed and printed in various ways, depending on the user’s preferences. Whether it’s viewing on a computer or smartphone, printing at home, or printing at a photo lab, technology has made it easier than ever to enjoy and share digital photographs.
Question-answer:
How does a digital camera capture an image?
A digital camera captures an image by using a sensor that converts light into electrical signals. When the shutter button is pressed, the camera’s sensor exposes the image sensor to light, which is then converted into a digital signal.
What happens after the image is captured by the digital camera?
After the image is captured, it is processed by the camera’s image processor. This processor applies various algorithms and settings to enhance the image quality and correct any imperfections. It also compresses the image to reduce its file size.
How does the image processor in a digital camera work?
The image processor in a digital camera works by analyzing the electrical signals captured by the image sensor. It applies various algorithms to enhance the image, such as adjusting the brightness, contrast, and color. It also reduces noise and sharpens the image for better clarity. The image processor then compresses the image to reduce its file size while maintaining as much detail as possible.
Does the digital camera process the image in real-time or after the photo is taken?
Most digital cameras process the image in real-time as the photo is being taken. This allows the photographer to preview the image on the camera’s LCD screen and make adjustments to exposure or composition if needed. The image processing continues after the photo is taken to further enhance the image quality.


