
Photography has come a long way since the advent of digital cameras. These small and sleek devices have revolutionized the way we capture moments and memories. But have you ever wondered how a digital camera actually takes a photo? Let’s delve into the inner workings of this modern marvel.
At its core, a digital camera is essentially a sophisticated computer that has been optimized for one specific purpose: capturing and storing images. The process begins when you press the shutter button. This action activates the camera’s sensor, which is a component made up of millions of tiny light-sensitive cells called pixels.
When light enters the camera through the lens, it passes through a complex series of optics and lands on the sensor. Each pixel on the sensor measures the intensity of the light it receives and converts it into an electrical signal. These signals are then processed by the camera’s image processor, which translates them into a digital representation of the scene you are photographing.
But how does the camera turn these electrical signals into a visible image? This is accomplished through a process called demosaicing. The image processor takes the raw data from the sensor and applies a sophisticated algorithm to reconstruct a full-color image. This algorithm uses information from surrounding pixels to fill in the missing color information, resulting in a sharp and vibrant photograph.
Once the image has been processed, it is stored on the camera’s memory card or internal storage. From there, you can transfer it to a computer or share it with others using a variety of digital platforms. The convenience and versatility of digital cameras have made them the preferred choice for photographers of all skill levels.

The Basics of Digital Camera Photography
Modern digital cameras have revolutionized the way we capture and preserve our memories. Understanding the basics of digital camera photography is essential for capturing high-quality images.
1. Image Capture Process
When you press the shutter button on your digital camera, several actions take place to capture a photo. Firstly, the camera’s lens focuses the light reflected off the subject onto a digital image sensor. The image sensor is made up of millions of tiny light-sensitive pixels that convert the light information into an electronic signal.
Next, the camera’s processor processes the electronic signal, transforming it into a digital image. This image is then stored on a memory card or internal memory for later retrieval and viewing.
2. Exposure
Exposure refers to the amount of light that reaches the image sensor during the capture process. It is determined by three main factors:
- Aperture: The size of the camera’s lens opening, which regulates the amount of light that enters the camera.
- Shutter speed: The length of time the camera’s shutter is open, allowing light to reach the image sensor.
- ISO sensitivity: The camera’s sensitivity to light. Higher ISO values are more sensitive to light but can introduce noise in the image.
3. Composition
Composition is the arrangement of elements within a photograph. It plays a crucial role in creating visually appealing and impactful images. Some key composition techniques include:
- Rule of thirds: Dividing the image into nine equal parts using two horizontal and two vertical lines, and placing the subject along these lines or at their intersections.
- Leading lines: Using lines within the image to guide the viewer’s eyes towards the main subject or point of interest.
- Foreground/background elements: Including elements in the foreground or background to add depth and context to the image.
By understanding the basics of digital camera photography, you can improve your skills and take stunning photos that capture the essence of a moment.
Understanding Digital Cameras
A digital camera is a complex device that allows you to capture and store images digitally. It has revolutionized the way we take and share photos, offering convenience and flexibility that traditional film cameras cannot match.
At the heart of a digital camera is the image sensor, which is responsible for capturing the light and converting it into digital signals. The most common type of image sensor used in digital cameras is the CMOS (Complementary Metal-Oxide-Semiconductor) sensor, although some high-end cameras use CCD (Charge-Coupled Device) sensors.
When you press the shutter button on a digital camera, a series of events takes place. The camera’s autofocus system adjusts the lens to ensure a sharp image, while the metering system determines the appropriate exposure settings. The camera’s microprocessor then calculates the optimal settings based on the light conditions and the desired composition.
Once the optimal settings have been determined, the camera opens the aperture to allow light to enter through the lens. The light passes through a series of lens elements that focus it onto the image sensor. The sensor captures the light in the form of tiny electrical charges, which are then converted into digital signals.

The digital signals are processed by the camera’s image processor, which applies various adjustments such as white balance, contrast, and sharpness. The processed image is then saved onto a memory card or internal memory, ready to be viewed or transferred to a computer for further editing and sharing.
Modern digital cameras also offer a range of features and settings to enhance the photographic experience. These include autofocus modes, exposure modes, scene modes, and various creative filters. Additionally, many cameras have built-in Wi-Fi or Bluetooth capabilities, allowing for wireless transfer of photos and remote control functionality.
In conclusion, digital cameras have revolutionized the way we capture and share moments. Understanding how they work can help you take better photos and make the most of the advanced features they offer.
Optical Components of a Digital Camera
A digital camera uses various optical components to capture a photo. These components work together to form a high-quality image, allowing photographers to capture memorable moments with clarity and detail. Here are some of the key optical components found in a digital camera:
Lens
The lens is perhaps the most important optical component of a digital camera. It focuses incoming light onto the image sensor, allowing it to capture the scene. Digital cameras typically have interchangeable lenses, which give photographers the flexibility to choose the appropriate lens for different types of photography, such as wide-angle, telephoto, or macro photography.

Shutter
The shutter is another critical component that controls the exposure time of the image sensor to light. When the shutter button is pressed, the shutter opens briefly to allow light to reach the image sensor. The length of time the shutter remains open determines the amount of light that reaches the image, which affects the overall exposure of the photo.
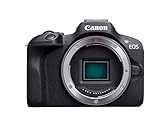
Image Sensor
In digital cameras, the image sensor plays a crucial role in converting light into electrical signals. The two main types of image sensors used in digital cameras are the CCD (Charge-Coupled Device) and the CMOS (Complementary Metal-Oxide-Semiconductor) sensor. These sensors capture the light that passes through the lens, turning it into a digital image that can be stored and processed.
Microprisms and Fresnel Lens
Microprisms and Fresnel lenses are additional optical components used to aid in focusing. Microprisms are small prisms that help the photographer determine whether an image is in focus by creating a split image effect. Fresnel lenses are thin, lightweight lenses that can be layered to create complex shapes and focus light more efficiently.

In summary, the optical components of a digital camera, including the lens, shutter, image sensor, microprisms, and Fresnel lenses, work together to capture and produce high-quality digital images. Understanding how these components function is essential for photographers to create stunning and professional-looking photos.
Image Formation in a Digital Camera
A digital camera uses a series of complex mechanisms to capture and form an image. The following steps outline the process of how a digital camera takes a photo:
1. Light enters the camera: When you press the shutter button, light enters the camera through the lens.
2. Lens focuses the light: The lens of the camera focuses the incoming light onto the image sensor. The image sensor is a highly sensitive electronic device that converts light into electrical signals.
3. Image sensor captures the light: The image sensor captures the light and converts it into electrical signals. Each pixel on the image sensor corresponds to a specific color and intensity value.

4. Analog-to-digital conversion: The electrical signals from the image sensor are then converted from analog to digital format. This conversion allows the camera to process and store the image digitally.
5. Image processing: The digital camera applies various image processing techniques to enhance the captured image. This may include adjusting brightness, contrast, color balance, and reducing noise.
6. Image storage: Once the image has been processed, it is stored onto a memory card or internal memory of the camera. The size and resolution of the image determine the amount of storage space required.
7. Displaying the image: The camera’s LCD screen or electronic viewfinder allows you to preview and review the captured image. This helps to ensure the desired composition and quality of the photo.
8. Image transfer: The digital camera may have options for transferring the captured image to a computer or other devices. This allows for further editing, sharing, and printing of the digital photo.

With these steps, a digital camera is capable of capturing and forming high-quality images. The technology continues to advance, providing photographers with ever-improving image quality and features.
The Role of the Image Sensor
The image sensor is a crucial component of a digital camera that plays a key role in capturing and converting light into an electrical signal, which is further processed to produce a digital photograph. Without the image sensor, the camera wouldn’t be able to capture the image.
There are two main types of image sensors used in digital cameras: CCD (charge-coupled device) and CMOS (complementary metal-oxide-semiconductor). Both types function by converting light into an electrical charge, but they do so in slightly different ways.
CCD Image Sensor
A CCD image sensor consists of an array of tiny light-sensitive elements called photosites or pixels. Each pixel is capable of capturing and storing electrical charges proportional to the amount of light that falls on it. The charges accumulate in a capacitor located beneath each pixel.
When the camera’s shutter button is pressed, the sensor is exposed to light, and the charges in each pixel accumulate as the light hits them. After a certain duration, known as the exposure time, the accumulated charges in each pixel are transferred from the photosites to the image sensor’s output circuitry, which converts the charges into a voltage signal.
The voltage signals from the output circuitry are then processed, amplified, and digitized by an analog-to-digital converter (ADC), resulting in a digital representation of the captured image. This digital image can be further adjusted, edited, and saved by the camera’s image processing software.
CMOS Image Sensor
A CMOS image sensor also consists of an array of photosites, but each pixel has an individual amplifier, allowing for on-chip analog-to-digital conversion. This design makes CMOS sensors more power-efficient and faster than CCD sensors.
Instead of transferring the charges from each pixel to an output circuitry, CMOS sensors read the voltage signals directly from each pixel’s amplifier, one line at a time, using a process called column-parallel readout. The voltage signals are then processed and converted into a digital format.
CMOS sensors also offer additional functionalities compared to CCD sensors, such as the ability to capture video, higher frame rates, and on-chip noise reduction techniques. These features make CMOS sensors ideal for applications where speed and versatility are important factors.
In conclusion, the image sensor is a crucial component of a digital camera that converts light into an electrical signal, which is further processed to produce a digital photograph. Whether it’s a CCD or CMOS sensor, both types play a vital role in capturing high-quality images and videos.
Image Capture Process in a Digital Camera
A digital camera uses a complex set of mechanisms and technologies to capture high-quality images. The image capture process involves several steps that work together to produce a photograph:
1. Light enters the lens: When you press the shutter button on your digital camera, the lens opens up, allowing light to enter. The lens focuses the incoming light onto the image sensor. The quality of the lens plays a crucial role in determining the sharpness and clarity of the final image.
2. Light strikes the image sensor: The image sensor, which is typically a CMOS or CCD chip, is located behind the lens. When the light hits the image sensor, each photosite on the sensor converts the incoming light into an electrical signal. These photosites are responsible for capturing the intensity and color of the light at each point in the image.
3. Analog-to-digital conversion: The electrical signals generated by the image sensor need to be converted into a digital format that can be processed and stored. The analog-to-digital converter (ADC) in the camera performs this task. It samples the electrical signals and assigns digital values to them, representing the brightness and color information of each pixel.
4. Image processing: After the analog-to-digital conversion, the camera’s image processor applies various algorithms and adjustments to enhance the image quality. These adjustments can include noise reduction, sharpening, color correction, and other enhancements to produce a visually pleasing image.
5. Storage: Once the image processing is complete, the digital camera stores the captured image in a memory card or internal memory. The image file format can vary depending on the camera settings, but common formats include JPEG, RAW, and TIFF. The storage capacity of the memory card determines the number of images that can be captured before offloading or transferring them to a computer.
6. Display and output: Many digital cameras have a built-in LCD screen that allows you to preview and review the captured images. You can also connect the camera to a computer or other devices to transfer and view the images on a larger screen. The camera may also provide options for printing or sharing the images directly from the device.
Overall, the image capture process in a digital camera is a complex interplay of optics, electronics, and software. Understanding these steps can help you appreciate the advancements and capabilities of modern digital cameras.
Digital Camera Autofocus Mechanism
The autofocus mechanism of a digital camera is a crucial feature that helps the camera focus correctly on the subject before capturing an image. It allows users to obtain sharp and clear images without the need for manual focus adjustments.
Phase Detection Autofocus (PDAF)
One commonly used autofocus mechanism in digital cameras is Phase Detection Autofocus (PDAF). This method utilizes a dedicated autofocus sensor or a specialized phase detection module integrated into the camera’s image sensor.
When the photographer half-presses the shutter button, the PDAF system measures the phase difference between the light entering through different areas of the lens. By analyzing the phase difference, the camera can determine the extent of focus adjustments needed to achieve accurate focus. The autofocus motor then adjusts the lens accordingly.
PDAF is known for its speed and accuracy, making it suitable for capturing fast-moving subjects such as sports or wildlife photography.
Contrast Detection Autofocus (CDAF)
Another commonly used autofocus mechanism is Contrast Detection Autofocus (CDAF). This method works by measuring the contrast of the subject within the camera’s image sensor.
When the photographer half-presses the shutter button, the camera analyzes the contrast levels of different areas in the frame. It then makes incremental focus adjustments until it finds the point where the highest contrast occurs. Once the highest contrast point is found, the camera knows that it has achieved proper focus.
CDAF tends to be slower than PDAF, especially in low-light conditions or when capturing moving subjects. However, CDAF is known for its high accuracy, making it suitable for situations where precise focus is required, such as portrait photography.
Many digital cameras combine both PDAF and CDAF systems to leverage the advantages of each mechanism, resulting in improved overall autofocus performance.
Image Processing in a Digital Camera
A digital camera captures images using a combination of hardware and software. The process involves various steps, including image acquisition, image compression, and image storage. This article will discuss the image processing techniques employed by digital cameras to produce high-quality photos.
Image Acquisition
The image acquisition stage is where the actual photo is captured. A digital camera has a sensor composed of millions of light-sensitive pixels. When the shutter button is pressed, the camera’s lens focuses light onto the sensor, and each pixel measures the intensity of light hitting it. This information is then converted into an electrical signal for further processing.
Image Compression
After acquisition, the raw image data needs to be processed to reduce file size and storage requirements. This is done through image compression techniques. Compression algorithms, such as JPEG (Joint Photographic Experts Group), analyze the image’s visual content and store it in a more efficient format. The trade-off is that some details may be lost due to the removal of redundant or less important image data.
Image Processing Algorithms
To enhance the quality of the photo, digital cameras employ various image processing algorithms. These algorithms improve sharpness, color accuracy, and noise reduction. Some common techniques include:
|
|
Image Storage
Once the image has been processed, it is saved onto a memory card or internal storage of the digital camera. The file format used can vary, with common formats including JPEG, RAW, and TIFF. The choice of format depends on factors such as image quality, file size, and the intended use of the photo.
In conclusion, image processing in a digital camera involves the stages of image acquisition, compression, applying various algorithms for enhancement, and finally storing the processed image. These processes work together to produce high-quality photos that capture the beauty of the world around us.
File Formats and Compression in Digital Cameras
When taking a photo with a digital camera, the image captured is typically stored as a file on a memory card or internal storage. There are different file formats and compression methods used by digital cameras to store these images efficiently without compromising quality.
File Formats
One of the most common file formats used in digital cameras is JPEG (Joint Photographic Experts Group). JPEG is a lossy compression format, meaning that it reduces file size by removing certain information from the image. This can result in a slight loss of quality, but the tradeoff is a smaller file size, making it easier to store and share photos.
Another file format commonly used in digital cameras is RAW. RAW files contain unprocessed image data directly from the camera’s image sensor, preserving all the details and allowing for more flexibility in post-processing. RAW files are larger in size compared to JPEG, and they require specialized software to view and edit.
Compression
Compression is the process of reducing the size of a file by encoding it in a more compact form. Digital cameras often use a combination of lossy and lossless compression methods to optimize file size while minimizing quality loss.
JPEG compression, as mentioned earlier, is a lossy compression method. It achieves smaller file sizes by discarding certain image information that is not considered critical to human perception. The level of compression can be adjusted by the user, with higher compression resulting in smaller file sizes but potentially more noticeable quality loss.
In contrast, RAW files typically use lossless compression or no compression at all, which allows for the preservation of all the original image data. This results in larger file sizes compared to JPEG but ensures no loss of image quality during compression.
Some digital cameras also support other file formats like TIFF (Tagged Image File Format) and PNG (Portable Network Graphics). TIFF is a lossless compression format that maintains high image quality but results in larger file sizes. PNG is also a lossless compression format, mainly used for web images and graphics.
It is important to note that image quality and file size often go hand in hand. Choosing the right file format and compression method depends on the intended use of the photos and the available storage capacity.
Saving and Sharing Digital Photos
Once you have taken a photo using a digital camera, it is important to save and share it so that you can preserve your memories and showcase your work. There are several ways to save and share digital photos, depending on your preferences and needs.
Saving Digital Photos
When it comes to saving digital photos, the most common format is JPEG (Joint Photographic Experts Group). JPEG is a lossy compression format that reduces the file size of the photo without significantly affecting its quality. Saving your photos as JPEG files allows you to save storage space on your camera or computer while still maintaining a good level of image quality.
In addition to JPEG, other common file formats for saving digital photos include PNG (Portable Network Graphics) and TIFF (Tagged Image File Format). PNG files offer lossless compression, meaning that they preserve all the details and quality of the original image, but they tend to be larger in file size compared to JPEG. TIFF files are also lossless and offer the highest quality, but they can result in large file sizes.
When saving your digital photos, it is recommended to create a folder or directory structure to organize your files. This way, you can easily find and access your photos later. You can name the folders based on events, dates, or any other criteria that make sense to you.
Sharing Digital Photos
Once your photos are saved, you can share them with others using various methods. Here are some common ways to share digital photos:
| Method | Description |
|---|---|
| You can attach your photos to an email and send them to your friends or family members. Make sure to resize the photos if needed to reduce the file size and make them easier to upload and download. | |
| Social Media | You can upload your photos to social media platforms such as Instagram, Facebook, or Twitter. This allows you to share your photos with a larger audience and receive feedback and comments. |
| Cloud Storage | You can store your photos in cloud storage services like Google Drive, Dropbox, or Microsoft OneDrive. This way, you can access your photos from anywhere and easily share them with others by providing them with a link. |
| Prints | If you prefer a physical copy of your digital photos, you can print them using a photo printer or by visiting a professional printing service. This allows you to display your photos in frames or create photo albums. |
Regardless of how you choose to save and share your digital photos, it is important to always keep backups of your files to prevent data loss. Regularly backing up your photos ensures that even if something happens to your camera or computer, you won’t lose your precious memories.
Question-answer:
How does a digital camera capture an image?
A digital camera captures an image by using a sensor to convert the light that enters the lens into an electrical signal, which is then processed and stored as a digital file.
What is the role of the lens in a digital camera?
The lens in a digital camera focuses the incoming light onto the sensor, allowing for the creation of a clear and detailed image.
What is the purpose of the image sensor in a digital camera?
The image sensor in a digital camera plays a crucial role in capturing the image. It converts the light that passes through the lens into electrical signals, which are then processed to create a digital image.
How are digital photos stored in a camera?
Digital photos are stored in a camera’s memory card or internal storage. The captured image is converted into a digital file format, such as JPEG or RAW, and saved onto the storage medium for later retrieval or transfer to a computer.
What happens after a photo is captured by a digital camera?
After a photo is captured by a digital camera, it goes through various processing stages. These include digital signal processing to enhance the image quality, compression to reduce file size, and saving the image onto a memory card or internal storage for future access.


