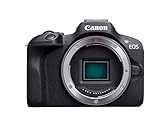
A DSLR camera, short for Digital Single-Lens Reflex camera, is a type of digital camera that uses a mirror mechanism to allow photographers to see exactly what they are capturing through the lens. This technology has become increasingly popular among amateur and professional photographers due to its ability to produce high-quality images.
The process of how a DSLR camera works can be broken down into several steps. The first step involves the lens, which is responsible for focusing the light onto the sensor. The lens is attached to the camera body and can be swapped out to accommodate different photography needs.
Once the light passes through the lens, it enters the camera body and hits a mirror. This mirror is positioned at a 45-degree angle and reflects the light up into a prism, which then redirects the light through the viewfinder. The mirror allows the photographer to see a real-time image of what they are capturing.
When the shutter button is pressed, the mirror flips up and out of the way, allowing the light to hit the image sensor directly. The image sensor is a small chip inside the camera that converts the light into a digital signal, creating a digital image. The quality and size of the image sensor are important factors in determining the overall image quality of the camera.
Understanding DSLR Cameras
A DSLR camera, short for Digital Single-Lens Reflex camera, is a popular choice among professional photographers and enthusiasts alike. Its advanced features and high-quality image capture capabilities make it a versatile tool for capturing stunning photographs.
Components of a DSLR Camera
A DSLR camera consists of several key components that work together to produce exceptional images:
| Component | Description |
|---|---|
| Camera body | The main structure of the camera where all the components are housed. |
| Lens | The part through which light enters the camera and focuses onto the image sensor. |
| Mirror | Reflects light from the lens onto the optical viewfinder, allowing the photographer to compose the shot. |
| Image sensor | Captures the light that has passed through the lens, converting it into a digital image. |
| Shutter | Controls the duration of time that the image sensor is exposed to light. |
| Viewfinder | Allows the photographer to see the scene and compose the shot. |
| Processor | Handles the image data captured by the image sensor and processes it into a final image. |
How a DSLR Camera Works
When the photographer looks through the viewfinder and presses the shutter button, several actions take place:
- The photographer composes the shot through the optical viewfinder, aligning the subject.
- When the shutter button is pressed, the mirror flips up, allowing light to pass through the lens and onto the image sensor.
- The image sensor captures the light and converts it into a digital image.
- The image data is then processed by the camera’s processor.
- The final image is saved onto a memory card for further editing and viewing.
It is through this series of steps that a DSLR camera is able to produce high-quality, detailed images that are cherished by photographers worldwide.
The Basic Components of a DSLR Camera
A DSLR (Digital Single-Lens Reflex) camera is composed of several key components that work together to capture high-quality photographs. Understanding these components is essential for anyone looking to learn how a DSLR camera works.
1. Body: The body of a DSLR camera is the main frame that houses all the internal components. It is typically made of a durable material like plastic or metal and is designed to be comfortable to hold and easy to use.

2. Lens: The lens is a crucial part of the camera that allows light to enter and hit the image sensor. DSLR cameras have interchangeable lenses, which means you can switch out the lens depending on your specific needs. Different lenses offer various focal lengths and apertures, allowing for versatile and creative photography.
3. Mirror and Prism: Inside a DSLR camera, there is a mirror positioned at a 45-degree angle. This mirror reflects the light coming through the lens upwards, passing it through a prism, and ultimately into the viewfinder. This allows photographers to preview the image and make adjustments before capturing the photo.
4. Shutter: The shutter is responsible for controlling the amount of time the image sensor is exposed to light. When the shutter button is pressed, the shutter opens, allowing light to reach the image sensor and capture the scene. After a predetermined amount of time, the shutter closes, ending the exposure.
5. Image Sensor: Located behind the mirror, the image sensor is the digital equivalent of traditional film in film cameras. It converts the light that enters the camera into an electrical signal, which is then processed into a digital image. The image sensor plays a crucial role in determining the quality and resolution of the final photograph.
6. Viewfinder: The viewfinder is an optical device that allows photographers to frame the shot by looking through it. It provides a real-time view of the scene and helps photographers compose their photographs accurately.

7. Controls and Settings: DSLR cameras feature a variety of controls and settings that allow photographers to customize their shooting experience. These include buttons, dials, and menus that enable adjustments such as exposure, focus, white balance, and shooting mode.
Understanding the basic components of a DSLR camera is the first step in learning how to use it effectively. By familiarizing yourself with these components, you can gain greater control over your photography and experiment with different techniques to capture stunning images.
Step 1: Capturing Light
A DSLR camera works by capturing light through its lens and converting it into a digital image. This process involves several key steps:
- Light enters the camera: When you press the shutter button on a DSLR camera, the mirror flips up, allowing light to enter through the lens. The lens gathers and focuses the incoming light onto the camera’s image sensor.
- Image sensor: The image sensor is a crucial component of a DSLR camera. It detects and records light to create a digital image. There are two main types of image sensors used in DSLR cameras: CCD (Charge-Coupled Device) and CMOS (Complementary Metal-Oxide-Semiconductor). Both sensors serve the same purpose, but CMOS sensors are more commonly used due to their lower power consumption and faster data transfer speeds.
- Light to electrical signals: As the light hits the image sensor, it causes the individual cells on the sensor to generate an electrical charge. The brighter the light, the stronger the charge. This process converts the incoming light into electrical signals.
- Analog to digital conversion: The electrical signals generated by the image sensor are initially in analog form. To enable further processing and storage, these analog signals need to be converted into digital data. An analog-to-digital converter (ADC) within the camera performs this conversion by assigning digital values to the varying strengths of the electrical signals.
- Image processing: Once the analog signals are converted into digital data, the camera’s internal processor analyzes and adjusts the captured image. This image processing may involve adjustments to contrast, brightness, color balance, and other parameters, depending on the settings and modes chosen by the photographer.
By following this step-by-step process, a DSLR camera is able to capture light and convert it into high-quality digital images.
Step 2: Focusing the Image
After the light passes through the lens and enters the camera body, the next step is to focus the image. This is done using a system of mirrors and sensors inside the camera.

When you look through the viewfinder of a DSLR camera, you see an optical image that is reflected by a mirror positioned at a 45-degree angle. This mirror reflects the image upwards onto a focusing screen, where you can see the preview of the image.
When you press the shutter button halfway down, the camera’s autofocus system kicks in. It uses a number of sensors, usually located on the bottom of the camera body, to analyze the image and determine the focus point.
The autofocus system works by measuring the contrast of the image at different points. It looks for areas of high contrast, such as edges, and tries to pinpoint the point of maximum contrast within the frame. Once it has identified the focus point, it adjusts the lens to bring that point into focus.
DSLR cameras usually offer different autofocus modes, allowing you to choose between automatic selection, manual selection, or a combination of both. In automatic selection mode, the camera will select the focus point based on its own algorithms. In manual selection mode, you can manually select the focus point using the camera’s controls.
Some newer DSLR cameras also feature advanced autofocus systems, such as phase detection autofocus (PDAF) or hybrid autofocus (HAF). These systems use additional sensors and technology to improve autofocus speed and accuracy.

Once the image is focused, you can proceed to the next step of capturing the image by fully pressing the shutter button. The camera will then record the focused image onto the camera’s memory card.
Step 3: Controlling the Aperture
One of the key elements in a DSLR camera that allows you to control the amount of light entering the camera is the aperture. The aperture is a small opening within the lens that can be adjusted to either let in more or less light. It works similar to the iris of the eye, expanding or contracting to control the amount of light that passes through.
The aperture is measured in f-stops, and each f-stop value corresponds to a specific diameter of the aperture opening. A wider aperture, represented by a smaller numerical f-stop value (e.g., f/1.8), allows more light to enter the camera. On the other hand, a narrower aperture, represented by a larger numerical f-stop value (e.g., f/16), restricts the amount of light that enters.
Controlling the aperture not only affects the amount of light that reaches the camera’s image sensor but also impacts the depth of field (DOF) in the resulting image. Depth of field refers to the range of distance in a photograph that appears sharp and in focus. A wider aperture (smaller f-stop value) results in a shallower depth of field, where the subject is in focus while the background is blurred. On the contrary, a narrower aperture (larger f-stop value) produces a deeper depth of field, bringing more of the background into focus along with the subject.
Modern DSLR cameras usually have a dedicated ring on the lens that allows you to adjust the aperture manually. In addition to manual control, there are also semi-automatic and automatic modes where the camera sets the aperture based on the light conditions and other settings, such as aperture priority (Av) mode or program mode (P).
Using the Aperture for Creative Effects
Besides controlling the exposure and depth of field, the aperture can be used creatively to achieve certain effects in your photographs. By deliberately manipulating the aperture size, you can create beautiful bokeh, which refers to the soft, out-of-focus areas in the background of an image. A wider aperture (small numerical f-stop) can create a more pronounced bokeh effect, while a narrower aperture (large numerical f-stop) will diminish it. This technique is often used in portrait photography or when capturing subjects against busy backgrounds.
The aperture also plays a role in determining the starburst effect, where point light sources in an image appear as distinct rays. This effect can be achieved by using a very narrow aperture (e.g., f/22) and capturing light sources such as streetlights or the sun.
Step 4: Shutter Speed Settings
Shutter speed is one of the key settings on a DSLR camera that controls the amount of time the camera’s shutter remains open. It plays a crucial role in determining the exposure of your photos, as well as capturing motion.
The shutter speed is measured in fractions of a second and can range from as fast as 1/8000th of a second to as slow as several seconds or even minutes, depending on the camera model. Slower shutter speeds allow more light to enter the camera, while faster shutter speeds let in less light.
When you choose a faster shutter speed, it freezes action and prevents motion blur, making it ideal for capturing fast-moving subjects or getting sharp shots when handheld. On the other hand, slower shutter speeds create motion blur, which can be used creatively to convey a sense of movement, capture light trails, or create long exposure effects.

It’s important to note that the longer the shutter speed, the more susceptible your photos may be to camera shake. To minimize this, it’s recommended to use a tripod or other stabilization methods when using slower shutter speeds.
Most DSLR cameras offer a range of predefined shutter speed settings, typically indicated as fractions of a second such as 1/200, 1/500, and so on. In addition to these preset options, most cameras also provide a “bulb” mode that allows you to manually control the length of time the shutter remains open. In bulb mode, the shutter stays open for as long as you hold down the shutter release button.
Experimenting with different shutter speed settings allows you to capture a variety of creative effects in your photographs, whether it’s freezing action or emphasizing motion. By understanding how to control the shutter speed, you can take full advantage of your DSLR camera’s capabilities and produce stunning images.
Step 5: Image Processing
Once the light enters the camera through the lens and reaches the image sensor, the DSLR camera begins the process of converting the light into a digital image. Image processing is a crucial step in capturing and producing high-quality photographs.
Demosaicing
The image sensor in a DSLR camera is made up of millions of tiny pixels, each capable of recording the intensity of light in a specific color channel, such as red, green, or blue. However, the sensor does not capture full-color information for each pixel simultaneously. Instead, it uses a process called demosaicing to interpolate the missing color values. This process involves analyzing the neighboring pixels to estimate the appropriate color values for each pixel.
Noise Reduction
During the image capture process, various sources of electronic and environmental noise can affect the quality of the image. To improve the image’s clarity and reduce unwanted noise, DSLR cameras employ noise reduction algorithms. These algorithms analyze the image pixel by pixel, identifying and reducing random noise while preserving the essential image details.
In addition to reducing noise, the camera’s image processing also aims to enhance the overall image quality through various techniques like sharpening, contrast adjustment, and color correction.
| Technique | Description |
|---|---|
| Sharpening | Increases the apparent sharpness and clarity of the image by enhancing edge contrast. |
| Contrast Adjustment | Alters the tonal range of the image to improve the visual separation of objects and details. |
| Color Correction | Adjusts the color balance and saturation to ensure accurate and vibrant reproduction of colors. |
Once the image processing stage is complete, the digital image is ready to be stored on a memory card and viewed or edited using various software tools.
Question-answer:
What is a DSLR camera?
A DSLR camera stands for Digital Single Lens Reflex camera. It is a type of camera that uses a digital imaging sensor to capture and store images. The main feature of a DSLR camera is its ability to allow the photographer to change lenses and have full control over various settings like aperture, shutter speed, and ISO.
How does a DSLR camera work?
A DSLR camera works by using a combination of a mirror and a prism to reflect light coming through the lens into the viewfinder. When the shutter button is pressed, the mirror flips up, allowing the light to hit the image sensor directly. The image sensor captures the light and converts it into a digital image that is then stored on a memory card.


