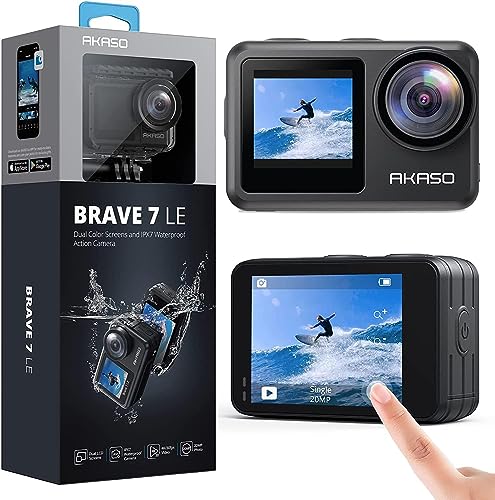
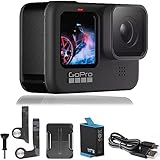
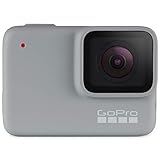
GoPro cameras have revolutionized the world of action photography, allowing adventurers to capture their wildest moments with stunning clarity. However, with all that power comes the need for proper photo management. If you’re the proud owner of a GoPro Hero 7 camera and need to erase photos from it, you’ve come to the right place.
Before diving into the process of erasing photos, it’s important to note that deleting images from your GoPro Hero 7 is irreversible. Once the photos are gone, there’s no way to recover them. Therefore, it’s essential to double-check and make sure you’re deleting the right photos.
To erase photos from your GoPro Hero 7 camera, follow these simple steps:
- Step 1: Turn on your GoPro Hero 7 camera and navigate to the playback view mode.
- Step 2: Use the rear touchscreen or the side mode button to scroll through your photos and select the ones you want to erase. You can identify the selected photos by the checkmark icon displayed on them.
- Step 3: Once you’ve selected the photos you want to delete, press the trash can icon on the touchscreen or the mode button to confirm the deletion. A confirmation message will appear asking if you’re sure you want to delete the selected photos.
- Step 4: Press the trash can icon again to confirm the deletion and permanently erase the selected photos from your GoPro Hero 7 camera.
Remember to exercise caution when deleting photos from your GoPro Hero 7 camera, as there’s no way to retrieve them once they’re gone. It’s always a good idea to transfer your photos to a computer or backup device before deleting them from your camera, to ensure you have a copy in case of unexpected loss or damage.
By following these easy steps, you’ll be able to erase photos from your GoPro Hero 7 camera with confidence, clearing up space for new adventures and unforgettable moments.

Methods for Erasing Photos from GoPro 7 Camera
If you want to erase photos from your GoPro 7 camera, there are a few different methods you can use. Whether you want to delete individual photos or remove all the photos at once, here are some ways to do it:
Delete photos one by one using the camera menu
One method to erase photos from your GoPro 7 camera is to delete them one by one using the camera menu. Here’s how:
- Turn on your GoPro 7 camera and go to the gallery or playback mode.
- Select the photo you want to delete using the arrow keys.
- Press the delete button, usually represented by a trash bin icon.
- Confirm the deletion when prompted.
- Repeat these steps for each photo you want to erase.
Delete all photos at once using the camera menu
If you want to delete all the photos on your GoPro 7 camera at once, you can use the camera menu to accomplish this. Follow these steps:
- Turn on your GoPro 7 camera and go to the settings menu.
- Select the “Format SD Card” option.
- Confirm the formatting when prompted. This will erase all the photos and other data on your SD card.
Keep in mind that formatting the SD card will delete all the photos, videos, and other files on it, so make sure you have a backup of any important data before proceeding with this method.
By following these methods, you can easily erase photos from your GoPro 7 camera. Whether you choose to delete them one by one or format the SD card, make sure to double-check your selection before confirming the deletion to avoid losing any important photos.
Using the GoPro Mobile App
The GoPro Mobile App is a convenient way to erase photos from your GoPro 7 camera directly from your smartphone. Follow these simple steps to delete unwanted photos:
| Step | Action |
|---|---|
| 1 | Download and install the GoPro Mobile App from the App Store (iOS) or Google Play Store (Android). |
| 2 | Open the app and sign in to your GoPro account. If you don’t have an account, create one by tapping on “Sign Up”. |
| 3 | Ensure that your GoPro 7 camera is turned on and connected to your smartphone via Wi-Fi or Bluetooth. |
| 4 | Tap on the camera icon at the bottom-center of the app to access the camera controls. |
| 5 | Browse through your camera’s media by swiping left or right on the screen. |
| 6 | Tap on the photo you want to delete to open it in full view. |
| 7 | Tap on the delete icon (trash can) located at the bottom-right corner of the screen. |
| 8 | Confirm the deletion by tapping “Delete” when prompted. |
| 9 | Repeat steps 6-8 for any additional photos you want to erase. |
Using the GoPro Mobile App provides a quick and efficient way to erase unwanted photos from your GoPro 7 camera without the need for a computer or removing the SD card. It allows you to easily manage your camera’s media directly from your smartphone, making it convenient for on-the-go editing and sharing.
Connecting the GoPro 7 Camera to a Computer
When it comes to erasing photos from your GoPro 7 camera, one of the easiest ways to do so is by connecting it to your computer. This allows you to view, manage, and delete the photos directly from your computer’s file explorer or photo management software. Follow the steps below to connect your GoPro 7 camera to a computer:
Step 1: Prepare your GoPro 7 camera
Make sure your GoPro 7 camera is turned off before connecting it to your computer. Double-check that the camera’s battery has enough charge or ensure that it is connected to a power source via a USB cable.
Step 2: Connect the camera to your computer
Take the USB cable that came with your GoPro 7 camera and connect one end to the camera’s USB port. Next, plug the other end into an available USB port on your computer.
Note: At this point, you may need to verify whether your computer recognizes the connected GoPro 7 camera. Some computers will automatically detect the camera, while others may require you to manually select the USB connection mode on your camera.
Step 3: Access the GoPro files
Once your GoPro 7 camera is connected to your computer, you can access its files by opening the file explorer or photo management software on your computer. Look for the connected device or removable storage, and click on it to access the GoPro’s files.
If you are using a Windows computer:
– Open the File Explorer by pressing the Windows key + E on your keyboard.
– In the left sidebar of the File Explorer, locate and click on “This PC” or “My Computer.”

– Look for the connected GoPro camera under the “Devices and drives” section.
If you are using a Mac computer:
– Open a Finder window by clicking on the Finder icon in your dock.
– In the left sidebar of the Finder window, locate and click on the GoPro camera under the “Devices” section.
Note: If you are having trouble finding the connected camera, ensure that it is in the correct USB connection mode (such as “MTP” or “PTP”), which can usually be found in the camera’s settings menu.

Step 4: Delete the photos
With the GoPro 7 camera’s files accessible on your computer, you can browse through the photos and select the ones you want to delete. Right-click on the unwanted photo and select “Delete” from the context menu. Confirm the deletion if prompted.
Note: It is important to be cautious when deleting files from your GoPro 7 camera. Make sure you have backed up any important photos before deleting them, as deleted files cannot be recovered from the camera’s memory.
By following these steps, you can easily connect your GoPro 7 camera to your computer and erase photos directly from the device. Remember to safely disconnect the camera from your computer once you have finished deleting the desired photos.
Deleting Photos using the GoPro Settings
If you want to erase photos from your GoPro 7 camera, you can easily do it by using the camera’s built-in settings. Follow the steps below to delete photos:
Step 1: Accessing the Settings
Turn on your GoPro 7 camera and navigate to the settings menu. You can access the settings by swiping down from the top of the camera’s touchscreen.

Step 2: Selecting the Media Gallery
In the settings menu, look for the option labeled “Media” or “Gallery.” Tap on it to access the media gallery where all your photos and videos are stored.
Step 3: Choosing the Photos to Delete
In the media gallery, you will see a list of all the photos and videos on your GoPro 7 camera. Scroll through the gallery and locate the photos you want to erase. You can use the touchscreen to navigate and zoom in on the photos for a better view.
Step 4: Deleting the Photos
Once you have selected the photos you want to delete, tap on the delete button, usually represented by a trash bin icon. A confirmation message will be displayed asking if you want to delete the selected photos. Confirm the deletion to remove them from your GoPro 7 camera.
Step 5: Checking for Deleted Photos
To ensure that the photos have been successfully deleted, navigate back to the media gallery and verify that the selected photos are no longer visible.
By following these simple steps, you can easily erase photos from your GoPro 7 camera using the camera’s built-in settings. Remember to double-check the photos you want to delete before confirming the deletion to avoid accidentally erasing important memories.
| Advantages | Disadvantages |
|---|---|
| – Convenient and quick | – Permanent deletion, cannot be recovered |
| – No need for external devices or software | – Requires manual selection of each photo to be deleted |
Clearing the GoPro 7 Camera’s SD Card
One important aspect of using a GoPro 7 camera is managing the storage space on its SD card. As you capture videos and photos, the card can quickly fill up, requiring you to erase old files to free up space for new content. In this guide, we’ll walk you through the process of clearing the GoPro 7 camera’s SD card.
Step 1: Connect the Camera to a Computer
To clear your GoPro 7 camera’s SD card, start by connecting the camera to a computer using a USB cable. Ensure that the camera is powered on.
Step 2: Access the SD Card
Once the camera is connected to your computer, it should appear as a removable storage device. Open the file explorer or Finder on your computer and locate the GoPro 7 camera’s SD card.
Step 3: Delete Files
Navigate to the SD card’s directory and locate the files you want to delete. You can select individual files or folders by clicking on them. To select multiple files at once, hold down the Ctrl key (or Command key on Mac) while clicking on the files.
With the files selected, right-click on them and choose the “Delete” option. Confirm the deletion if prompted.
Step 4: Empty the Recycle Bin (Windows) or Trash (Mac)
After deleting the files, you will need to empty the Recycle Bin (Windows) or Trash (Mac) to completely remove them from your computer’s storage.
Step 5: Safely Disconnect the Camera
Once the SD card is cleared, safely disconnect the camera from your computer by ejecting it or using the “Safely Remove Hardware” option. This will ensure that all files are properly saved and prevent data corruption.
| Warning: |
|---|
| Before deleting any files, make sure that you have transferred any important content to a secure location, such as a computer, external hard drive, or cloud storage. Once the files are deleted, they cannot be recovered from the SD card. |
By following these steps, you can easily clear the GoPro 7 camera’s SD card, making room for new adventures and memories. Remember to regularly manage your storage space to ensure optimal performance of your GoPro 7 camera.
Transferring Photos to a Cloud Storage
If you want to ensure the safety and accessibility of the photos captured on your GoPro 7 camera, it is recommended to transfer them to a cloud storage service. Cloud storage offers many advantages, including data backup, remote access, and easy sharing with others.
Selecting a Cloud Storage Service
There are numerous cloud storage services available, each with its own features and pricing plans. Popular options include Google Drive, Dropbox, and OneDrive. Consider factors such as storage capacity, file types supported, and the ability to automatically back up new photos from your GoPro camera.
Uploading Photos
After choosing a cloud storage service, you will need to create an account and install the corresponding application on your computer or mobile device. Once you have done this, follow these steps to upload your GoPro 7 camera photos:
| 1. | Connect your GoPro 7 camera to your computer using a USB cable or remove the camera’s memory card. |
| 2. | Open the cloud storage application and sign in to your account. |
| 3. | Create a new folder or select an existing one to store your GoPro photos. |
| 4. | Click on the “Upload” button or drag and drop the photos from your GoPro 7 camera or memory card into the chosen folder. |
| 5. | Wait for the upload process to complete. Depending on the number and size of the photos, this may take some time. |
| 6. | Once the upload is finished, you can access your GoPro photos from any device with an internet connection by logging into your cloud storage account. |
Remember to regularly back up your GoPro 7 camera photos to the cloud storage service to ensure their security and prevent data loss. With cloud storage, you can have peace of mind knowing that your valuable memories are protected and easily accessible whenever you need them.
Formatting the Camera’s Storage
If you want to erase all photos from your GoPro 7 camera, one useful option is to format the camera’s storage. Formatting the storage will permanently delete all the data, including photos and videos, from the camera’s internal memory or SD card.
Before Formatting:
Before formatting the camera’s storage, it is highly recommended to backup all your important photos and videos that you want to keep. Once you format the storage, the data cannot be recovered.
Steps to Format the Camera’s Storage:
Follow these steps to format the storage on your GoPro 7 camera:
| Step 1: | Turn on the camera and navigate to the Settings menu. |
| Step 2: | Scroll down and select the “Preferences” option. |
| Step 3: | Scroll down and select the “Reset” option. |
| Step 4: | Select the “Format SD Card” or “Format Storage” option. |
| Step 5: | Confirm the action and wait for the formatting process to complete. |
| Step 6: | Once the formatting is complete, all the data on the camera’s storage will be erased. |
It is important to note that formatting the storage will not only erase the photos and videos, but also any other settings or preferences that you have customized on your GoPro 7 camera. After formatting, you will need to set up the camera again according to your preferences.
Using Third-Party Software for Photo Erasing
If you want to erase photos from your GoPro 7 camera, you can use third-party software to make the process quick and easy. There are several options available, each with its own features and capabilities. Here are a few popular choices:
|
1. Adobe Photoshop |
Adobe Photoshop is a well-known and widely-used software for photo editing. It offers advanced features for erasing unwanted elements from photos, including the Content-Aware Fill tool which can intelligently remove objects while seamlessly filling in the background. |
|
2. GIMP |
GIMP, an acronym for GNU Image Manipulation Program, is a free and open-source software with powerful tools for photo retouching and editing. It includes features like the Clone Stamp tool and Healing Brush tool that can be used to erase unwanted elements from photos. |
|
3. PicMonkey |
PicMonkey is an online photo editing software that provides a user-friendly interface and a variety of editing options, including a feature called Clone. With Clone, you can erase unwanted objects or people from your GoPro 7 photos by simply brushing over them. |
When using any third-party software for photo erasing, it is important to familiarize yourself with the tools and features available. Make sure to follow the software’s instructions and practice on a copy of your photo before making permanent changes. By using these software options, you can easily and effectively erase unwanted photos from your GoPro 7 camera.
Additional Tips for Erasing Photos from GoPro 7 Camera
If you’re looking to erase photos from your GoPro 7 camera, here are some additional tips to help you get the job done:
1. Double-check before erasing: Before deleting any photos from your GoPro 7, make sure to double-check the images you want to erase. This can help avoid accidentally deleting important memories.
2. Use the camera’s delete option: The GoPro 7 camera has a built-in delete option that allows you to erase photos directly from the device. To use this feature, navigate to the photo you want to delete, press the delete button, and confirm the deletion. This is a convenient way to delete photos without needing to connect your camera to a computer.
3. Use the GoPro app: If you prefer to erase photos using your smartphone or tablet, you can utilize the GoPro app. Simply connect your camera to the app, select the desired photos, and choose the delete option. This method can be useful if you’re away from your computer and want to free up space on your camera.
4. Consider formatting the SD card: If you want to erase all the photos on your GoPro 7 camera, you might consider formatting the SD card. Formatting will delete all data on the card, so make sure to first back up any important photos. To format the SD card, go to the camera settings, select the format option, and follow the instructions.
5. Use a computer: If you prefer to manage your photos on a computer, you can connect your GoPro 7 camera to your PC or Mac using a USB cable. Once connected, navigate to the camera’s folder on your computer, select the photos you want to erase, and delete them. This method gives you more control and allows you to organize and manage your photos efficiently.
With these additional tips, you’ll be able to erase your unwanted photos from your GoPro 7 camera with ease. Just remember to double-check before deleting and consider using the camera’s delete option or a computer for a more personalized photo management experience.
Question-answer:
Can I recover deleted photos from my GoPro 7 camera?
No, once you delete photos from your GoPro 7 camera, they cannot be recovered. It is important to make sure you have backed up any important photos before deleting them from your GoPro 7 camera.