
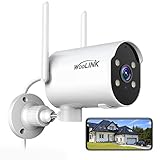
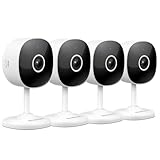
With the increasing popularity and affordability of WiFi security cameras, many homeowners are considering installing them to enhance the security of their properties.
Installing WiFi security cameras may seem like a daunting task, especially for those who are not tech-savvy. However, with the advancements in technology and user-friendly interfaces, setting up these cameras has become easier than ever before.
One of the main advantages of WiFi security cameras is that they do not require complex wiring or drilling holes in your walls. This means that you can install them yourself without the need for professional help, saving both time and money.
Moreover, most WiFi security cameras come with detailed installation guides and user-friendly mobile apps that make the setup process a breeze. These guides provide step-by-step instructions that walk you through the entire installation process, from connecting the camera to your home WiFi network to mounting it in the desired location.
Installing Wifi Security Cameras: A Step-by-Step Guide
Installing wifi security cameras can provide you with peace of mind knowing that your property is being monitored 24/7. While it may seem daunting at first, with the right equipment and proper instructions, the installation process can be relatively straightforward. This guide will walk you through the steps to install wifi security cameras in your home or business.
Before You Begin
Before starting the installation process, there are a few things you should consider:
- Choose the right location: Determine the areas you want to monitor and select suitable locations for your cameras. This will ensure maximum coverage and effectiveness.
- Check your wifi signal strength: Make sure that your wifi signal is strong enough to support the cameras. Weak signal strength can cause connection issues and poor video quality.
- Read the camera’s instructions: Familiarize yourself with the camera’s manual and specifications to ensure proper installation and functionality.
Step 1: Mounting the Cameras
The first step is to mount the cameras in the desired locations:
- Using a drill, create holes for the mounting screws.
- Attach the mounting brackets or bases to the walls or ceilings using the screws provided.
- Secure the cameras to the brackets or bases, ensuring they are tight and stable.
- Adjust the angle and direction of the cameras to cover the desired areas.
Step 2: Connecting the Cameras
Once the cameras are mounted, it’s time to connect them to your wifi network:
- Connect the power adapter to each camera and plug it into an electrical outlet.
- Follow the camera’s instructions to connect it to your wifi network. Typically, this involves using a smartphone app or a computer.
- Enter your wifi network’s SSID and password when prompted.
- Wait for the cameras to establish a connection with your wifi network, which may take a few minutes.
Step 3: Setting Up the Monitoring System
With the cameras connected, it’s time to set up the monitoring system:
- Download and install the camera’s associated app on your smartphone or computer.
- Launch the app and follow the on-screen instructions to add the cameras to your account.
- Configure the camera settings, such as motion detection, recording schedules, and notifications, according to your preferences.
- Test the camera feeds to ensure they are streaming properly and adjust any settings if necessary.
Step 4: Monitoring and Maintenance
Once the installation and setup are complete, you can start monitoring your property:

- Regularly check the camera feeds to ensure they are functioning correctly.
- Keep the cameras clean and free from obstructions to maintain optimal performance.
- Update the camera firmware and app regularly to benefit from the latest features and security enhancements.
By following these steps, you can successfully install wifi security cameras and enhance the security of your premises. Remember to consult the specific instructions provided with your cameras for any additional steps or troubleshooting advice.
Choosing the Right Spot for Your Cameras
When installing wifi security cameras, it is crucial to choose the right spot to maximize their effectiveness. Here are some factors to consider:
- Visibility: Ensure that the camera has a clear line of sight to the area you want to monitor. Avoid positioning it behind objects that may obstruct its view, such as trees or fences.
- Height: Mount the camera at an appropriate height to capture a wide angle of view. Generally, positioning it around 8 to 10 feet above the ground provides a good perspective.
- Lighting conditions: Evaluate the lighting conditions in the area. If it is too bright or too dark, it may affect the camera’s ability to capture clear footage. Consider installing additional lighting if necessary.
- Power source: Ensure that there is a power source nearby for the camera to connect to. If there is no nearby outlet, you may need to use extension cables or consider wireless battery-powered cameras.
- Wi-Fi signal strength: Check the Wi-Fi signal strength in the area where you plan to install the camera. Weak signal strength may result in poor video quality or connectivity issues. Consider using Wi-Fi extenders if needed.
- Tamper-proofing: Select a location that is not easily accessible to potential intruders or vandals. Mount the camera on a sturdy surface to prevent anyone from tampering with it.
- Legal considerations: Familiarize yourself with the local laws and regulations regarding the use of security cameras. Be mindful of privacy concerns and avoid installing cameras in areas where individuals have a reasonable expectation of privacy.
By carefully considering these factors, you can ensure that your wifi security cameras are installed in the optimal locations to provide effective surveillance and peace of mind.
Checking Your Network Compatibility
Before installing wifi security cameras, it is essential to check the compatibility of your network. This will ensure that your cameras will work seamlessly and efficiently once installed. Here are the steps to check your network compatibility:
| Steps | Instructions |
|---|---|
| Step 1 | Determine the type of network you have |
| Step 2 | Check the network speed and bandwidth |
| Step 3 | Ensure your network has the necessary security protocols |
| Step 4 | Verify the availability of power outlets near camera locations |
| Step 5 | Consider the range of your network coverage |
By following these steps, you can ascertain if your network is compatible with wifi security cameras. If any issues arise during this process, you may need to make adjustments or upgrades to your network infrastructure to ensure optimal performance of your security system.

Mounting the Cameras on Walls or Ceilings
Once you have chosen the ideal locations for your security cameras, the next step is to mount them securely on walls or ceilings. It is important to properly install and position the cameras to ensure optimal coverage and functionality.
Before mounting the cameras, make sure to gather all the necessary tools and equipment, such as a drill, screws, and a measuring tape. Additionally, consult the camera’s user manual for any specific instructions or recommendations on installation.
Start by determining the mounting height and angle for each camera. Ideally, the cameras should be positioned at an elevated location to provide a wider field of view and reduce the risk of tampering. Consider mounting the cameras on the corners of the building or in areas that cover the main entrances and critical points of your property.
When mounting the cameras on walls, use a drill to make holes for the screws. Make sure the holes align with the mounting holes on the camera bracket. Securely attach the cameras by inserting the screws through the bracket and into the wall. Tighten the screws to ensure the cameras are firmly in place.
If mounting the cameras on ceilings, you may need to use a ladder or a step stool to reach the desired height. Similar to wall mounting, drill holes in the ceiling that align with the camera bracket. Attach the camera to the ceiling by inserting the screws through the bracket and into the pre-drilled holes.

After mounting the cameras, double-check that they are securely attached and properly aligned. Adjust the camera angle if needed to ensure the desired field of view. It is also important to conceal any exposed wires or cables for a neater installation.
Remember to test the cameras once they are mounted to ensure they are capturing clear video footage and are properly connected to your Wi-Fi network. You may need to adjust the camera settings or troubleshoot any connectivity issues before the cameras are fully operational.
Mounting Wi-Fi security cameras may require some technical expertise and physical effort, but with proper planning and careful installation, you can enhance the security of your property and have peace of mind knowing you have reliable surveillance coverage.
Connecting the Cameras to Power Sources
Connecting wifi security cameras to power sources is a crucial step in the installation process. Without power, the cameras will not be able to function properly and capture surveillance footage.
Before connecting the cameras to power sources, it is important to determine the appropriate power supply for your specific cameras. Some wifi security cameras require a direct power connection using a power adapter, while others can be powered through a PoE (Power over Ethernet) connection.
If your cameras require a power adapter, you will need to locate a nearby electrical outlet or use an extension cord to reach the desired location. Make sure the power source is easily accessible and not obstructed by any objects that could potentially damage the power cord.
Once you have identified the power source, plug the power adapter into the outlet and connect the other end to the camera’s power input port. It is important to ensure a secure connection to avoid any power interruptions.
If your cameras can be powered through a PoE connection, you will need a PoE switch or injector. The PoE switch or injector should be connected to your network router or modem using an Ethernet cable. Then, connect the camera to the PoE switch or injector using another Ethernet cable. This will provide power to the camera while also transmitting data over the network.
When connecting the cameras to power sources, always follow the manufacturer’s instructions and guidelines. Be mindful of any safety precautions and ensure that the power source is compatible with your cameras.
Once the cameras are properly connected to power sources, you can proceed with configuring and setting up the wifi security cameras to complete the installation process.

Pairing the Cameras with Your Wifi Network
Installing wifi security cameras is a great way to keep your house or business safe. However, before you can start using them, you need to pair the cameras with your wifi network. This process might seem intimidating at first, but it can be relatively straightforward if you follow these steps:
1. Choose a Central Location: To ensure a strong and consistent wifi signal, select a central location for your cameras within the range of your wifi router.
2. Power on the Camera: Plug in the camera to a power source and wait until it is fully powered on. This may take a few minutes. The camera’s indicator lights will typically indicate when it is ready for pairing.
3. Download and Open the Camera’s App: Most wifi security cameras come with a companion app that allows you to pair and manage the cameras. Download the app from the manufacturer’s website or your device’s app store, and then open it.
4. Create an Account: Follow the on-screen prompts to create an account on the camera’s app. This account will allow you to access and control your cameras remotely.

5. Connect to Your Wifi Network: Within the app, navigate to the settings or wifi section and select the option to connect the camera to your wifi network. You’ll need to enter your network’s name (SSID) and password. Follow the prompts to complete the setup process.
6. Pair the Camera: Once the camera is connected to your wifi network, follow the app’s instructions to pair the camera with your account. This typically involves scanning a QR code on the camera or entering a unique pairing code.
7. Test the Connection: After pairing, the camera should automatically connect to your wifi network. You can test the connection by accessing the camera through the app and checking if the live feed is available.
Please note that the exact steps may vary depending on the brand and model of your wifi security cameras. Refer to the manufacturer’s instructions for detailed guidance on pairing your specific cameras.
Once you have successfully paired your wifi security cameras with your wifi network, you can start enjoying the benefits of remote monitoring and surveillance. Keep in mind that it’s important to regularly update the firmware of your cameras to ensure optimal performance and security.

Adjusting Camera Angles and Positions
Once you have installed your WiFi security cameras, it is important to adjust their angles and positions for optimal coverage. Here are some tips to help you get the best results:
1. Mount the camera at the right height: Make sure to mount your camera at an appropriate height to capture the desired area. If the camera is placed too high, it may not be able to capture important details, while placing it too low can result in limited coverage.
2. Position the camera strategically: Consider the specific areas you want to monitor and adjust the camera’s position accordingly. Place it in a spot where it can capture the whole area without any obstructions.
3. Tilt and pan the camera: Most WiFi security cameras allow you to adjust their angles. Tilt the camera up or down to change the vertical coverage, and pan it left or right to change the horizontal coverage. Experiment with different angles to find the optimal position.
4. Eliminate glare and reflections: Avoid placing your camera near windows or other sources of bright light, as this can cause glare and reflections, making it difficult to see the captured footage. Adjust the camera’s position to minimize any unwanted light sources.
5. Test the camera’s coverage: Once you have adjusted the camera’s angles and position, test its coverage by checking the live feed on your smartphone or computer. Make sure that the important areas are well-covered and there are no blind spots.
By following these tips, you can ensure that your WiFi security cameras are properly positioned for optimal coverage and surveillance. Remember to periodically check and readjust the angles and positions if needed to maintain the best performance.
Configuring Camera Settings and Preferences
Once you have successfully installed your wifi security camera, it is essential to configure the camera settings and preferences to meet your specific needs. These settings will allow you to customize the camera’s functionality and ensure it is optimized for your security requirements.
1. Connect to the camera’s interface:
Access the camera’s interface by typing its IP address into a web browser on a device connected to the same wifi network. This will bring you to the camera’s login page, where you will need to enter the default username and password provided by the manufacturer.

2. Adjust camera resolution:
Most wifi security cameras offer different resolution options. Higher resolutions provide sharper and more detailed footage, but they may also require more bandwidth and storage space. Consider your specific needs and choose a resolution that balances quality and practicality.
3. Set up motion detection:
Motion detection allows your camera to start recording whenever it detects movement in its field of view. Enable this feature and adjust the sensitivity settings to ensure it captures any relevant activity while minimizing false alarms. Consider setting up email or push notifications to receive alerts whenever motion is detected.
4. Configure recording preferences:
Determine how your camera will record and store footage. You may have options such as continuous recording, scheduled recording, or recording triggered by motion detection. Choose the option that best suits your needs and available storage space. Consider setting up automatic deletion of old files to ensure your storage does not become overwhelmed.
5. Enable remote access:
If you want to monitor your camera’s live feed or access recordings remotely, enable remote access. This typically involves setting up a unique username and password to access the camera’s interface through a mobile app or a web browser from any location.
Remember to save any changes you make in the camera’s settings interface to ensure they take effect.
Testing the Camera Feeds and Video Quality
Once you have successfully installed your WiFi security cameras, it is essential to test the camera feeds and video quality to ensure that everything is working as expected. Here are a few steps to help you with the testing process:
- Connect to the Camera: Ensure that you have a stable internet connection and that your smartphone, tablet, or computer is connected to the same network as the WiFi security camera. This step is crucial as it allows you to access the camera’s live feed.
- Access the Camera’s Live Feed: Open the manufacturer’s app or the web browser interface to access the camera’s live feed. You may need to enter the camera’s IP address or scan a QR code to connect to it.
- Check the Field of View: Verify that the camera’s field of view captures the desired area effectively. Move around the area and ensure that there are no blind spots or areas that the camera cannot cover.
- Assess the Image Quality: Pay attention to the image quality of the camera feed. Look for clarity, sharpness, and color accuracy. If the image appears blurry or distorted, you may need to adjust the camera’s focus or positioning.
- Test Night Vision: If your WiFi security camera has night vision capabilities, activate this feature and check how well the camera captures images in low-light or complete darkness. Ensure that the night vision mode provides sufficient visibility within the camera’s range.
- Check Audio Quality: If your camera has audio capabilities, test the audio quality by listening to the live feed. Ensure that the audio is clear and without any distortions or background noise.
- Verify Motion Detection: Move within the camera’s field of view to trigger the motion detection feature. Check whether the camera accurately detects and alerts you about any movement. Adjust the sensitivity settings if necessary.
- Test Remote Access: If you intend to access the camera feed remotely, for example, while you are away from home, test this feature by connecting to the camera using a different network or a mobile data connection. Make sure the remote access works smoothly without any delays or interruptions.
By thoroughly testing the camera feeds and video quality, you can ensure that your WiFi security cameras are functioning correctly and providing the desired level of security for your home or business.
Setting Up Mobile Viewing and Alerts
Once you have successfully installed your WiFi security cameras, you can set up mobile viewing and receive alerts on your smartphone or tablet. This allows you to monitor your home or office from anywhere, providing you with peace of mind.
1. Download the Mobile App
The first step is to download the mobile app provided by the manufacturer of your WiFi security cameras. This app is usually available on both iOS and Android devices. You can find the app by searching the relevant app store and looking for the manufacturer’s name or the name of the camera model.
2. Connect the Cameras to Your Mobile App
Once you have downloaded the app, launch it and follow the provided instructions to connect your cameras to the app. This usually involves signing in with your account credentials and allowing the app to access your camera’s live feed.
3. Configure Mobile Viewing Settings
After connecting your cameras to the app, you can configure various mobile viewing settings. This includes customizing the layout of your camera feeds, adjusting video quality, and setting up motion detection zones. These settings can be accessed through the app’s settings menu.
4. Enable Mobile Alerts
To receive alerts on your mobile device whenever motion is detected by your WiFi security cameras, you need to enable mobile alerts. This can usually be done within the app’s settings menu. You may also have the option to customize the type of alerts you receive, such as push notifications or email notifications.
5. Test Mobile Viewing and Alerts
Once you have configured your mobile viewing and alerts settings, it is important to test them to ensure they are working correctly. Walk in front of your cameras’ view to trigger motion detection, and check if you receive the expected alerts on your mobile device. Additionally, make sure you can access the live feed of your cameras through the app.
By following these steps, you can easily set up mobile viewing and alerts for your WiFi security cameras. This allows you to stay connected and aware of any activity happening in and around your home or office, no matter where you are.
Troubleshooting Common Installation Issues
If you’re experiencing difficulties installing your Wi-Fi security cameras, here are some common issues and troubleshooting steps to help you resolve them:
1. Weak Wi-Fi Signal: Ensure that your Wi-Fi network covers the area where you want to install the cameras. If the signal is weak in that area, consider adding a Wi-Fi extender or relocating your router.
2. Incorrect Wi-Fi Password: Double-check that you have entered the correct Wi-Fi password during the camera setup process. Incorrect passwords can prevent the cameras from connecting to your network.
3. Camera Placement: Make sure that the cameras are placed within the recommended range of your Wi-Fi network. If they are too far away, it can result in a weak connection and unstable footage.
4. Network Bandwidth: If you have multiple Wi-Fi devices connected to your network, it may be consuming a significant portion of your bandwidth. Consider limiting the number of devices or upgrading your internet plan.
5. Firewall or Network Settings: Check your router’s firewall settings as they may be blocking the cameras’ access to the internet. Disable any security settings that might be preventing the cameras from connecting to your network.
6. Camera Firmware Updates: Ensure that your cameras have the latest firmware updates installed. Outdated firmware can cause compatibility issues and prevent the cameras from functioning properly.
If you are still experiencing issues after following these troubleshooting steps, it may be beneficial to consult the user manual or reach out to the manufacturer’s customer support for further assistance.
FAQ,
How hard is it to install wifi security cameras?
Installing wifi security cameras can vary in difficulty depending on the brand and model of the camera you choose. However, in general, installing wifi security cameras is relatively straightforward and can be done by anyone with basic DIY skills. Most cameras come with detailed instructions and some even have user-friendly mobile apps that guide you through the installation process step-by-step.


