
Installing a security camera system is an essential step in ensuring the safety of your property. With advancements in technology, wired systems have become popular due to their reliability and continuous power supply. But how hard is it to wire a security camera system?
While the process may seem daunting for those without technical expertise, with the right tools and knowledge, it can be a manageable task. It involves running cables, connecting cameras to a central recording device, and configuring the system. Although it may require some time and effort, the peace of mind provided by a wired security camera system makes it worth it.
One of the crucial aspects of wiring a security camera system is planning. This includes determining the ideal camera locations, identifying the type and length of cables needed, and ensuring proper access to power sources. Proper planning not only saves time but also ensures optimal coverage and functionality of the system.
Is Wiring a Security Camera System Difficult?
Wiring a security camera system may seem like a complex task, but with the right knowledge and tools, it can be a manageable project.
When installing a wired security camera system, you will need to run cables from the cameras to the recording device or monitor. This requires planning and understanding of the layout of your property.

First, you will need to determine the best locations for your cameras. This involves considering the areas you want to monitor, such as entry points, driveways, or outdoor spaces. Once you have identified the ideal spots, you will need to decide on the type and length of cables you will need.
Next, you will need to run the cables through walls, ceilings, or conduits to hide them from view. This may involve drilling holes or pulling up carpet to ensure a clean installation. It’s important to handle this step carefully to avoid damaging your property.
After running the cables, you will need to connect them to the cameras and the recording device or monitor. This may involve stripping the wires and using connectors or terminal blocks to establish a secure connection.
Finally, you will need to test the system to ensure everything is working correctly. This includes checking the video feed, adjusting camera angles, and confirming that the recording device or monitor is receiving the footage.
While wiring a security camera system does require some technical skills and patience, it is often a one-time project that can provide long-term peace of mind. If you are uncomfortable with the process, it is advisable to consult a professional installer to ensure a successful installation.

Understanding the Basics
Before attempting to wire a security camera system, it is important to understand the basics of how the system works and what components are required. A security camera system typically consists of several cameras, a digital video recorder (DVR), a power supply, and various cables and connectors.
The cameras are the primary components of the system and are responsible for capturing video footage. They are typically installed in strategic locations to provide optimal coverage of the area being monitored. The number of cameras required depends on the size and layout of the area.
The captured video footage is then transmitted to the DVR, which processes and records the video. The DVR is connected to the cameras using cables, such as coaxial or Ethernet cables, and powered by the power supply. The power supply ensures that all components of the system receive the necessary power to function.
When wiring a security camera system, it is important to carefully plan the placement of the cameras and the routing of the cables. This involves considering factors such as the distance between the cameras and the DVR, the obstacles that may need to be bypassed, and the areas that need to be covered by the cameras.
Proper cable management is also crucial to ensure a clean and organized installation. This may involve using cable clips or conduits to secure and protect the cables from damage or interference. It is also important to use high-quality cables and connectors to ensure optimal performance and reliability.

Overall, wiring a security camera system requires a basic understanding of the components involved and careful planning and installation. While it may seem daunting at first, with the right knowledge and preparation, it can be a manageable task for most individuals.
| Components of a security camera system: |
|
| Important considerations: |
|
Choosing the Right Camera System
When it comes to selecting a security camera system, there are several factors to consider. Whether you are protecting your home, business, or any other property, choosing the right camera system is crucial for ensuring effective surveillance.
1. Purpose: Determine the purpose of installing the security camera system. Are you looking to monitor the inside or outside of your property? Do you need to capture footage during the day, night, or both?
2. Camera Type: There are various camera types available, including dome, bullet, PTZ (Pan-Tilt-Zoom), and wireless. Consider the features and specifications of each type and assess which one is best suited for your needs.
3. Resolution: The quality of the camera’s resolution determines the clarity of the recorded footage. Higher resolution cameras provide clearer images, but they also come at a higher cost. Assess your budget and image quality requirements before making a decision.

4. Field of View: Consider the field of view of the camera. How much area do you need the camera to cover? Wide-angle lenses are suitable for capturing a broader field of view, while narrow-angle lenses offer more detailed images.
5. Storage: Determine how much footage you need to store and for how long. Some camera systems offer built-in storage, while others require an external storage device. Evaluate storage options and choose one that meets your requirements.
6. Connectivity: Check the connectivity options of the camera system. Wired systems require cables for data transmission, while wireless systems rely on Wi-Fi. Consider your infrastructure and choose the connectivity option that suits your setup.
7. Budget: Set a budget for your security camera system. While it’s important to invest in a reliable and high-quality system, it’s also crucial to consider your financial limitations.
8. Additional Features: Assess whether you need any additional features, such as motion detection, remote access, or night vision. These features can enhance the efficiency and effectiveness of your security camera system.
By carefully considering these factors and conducting thorough research, you can choose the right security camera system that meets your specific requirements and provides optimal surveillance for your property.
Planning the Installation
Before beginning the installation of a security camera system, it is important to have a well-thought-out plan in place. This will help ensure that the system is installed correctly and meets the specific needs of the location. Here are some key considerations to keep in mind when planning the installation:
1. Determine the objectives: Begin by identifying the main objectives of installing a security camera system. This could include deterring theft, monitoring activities, or capturing evidence in case of an incident. Clearly define these objectives to guide your installation process.
2. Assess the location: Conduct a thorough assessment of the location where the security cameras will be installed. Take note of potential blind spots, areas that require enhanced monitoring, and any challenges that may impact the installation process.
3. Choose the right camera types: Selecting the appropriate camera types is crucial in meeting your objectives. Consider factors such as the desired field of view, resolution, night vision capabilities, and weatherproofing when choosing the right cameras for your system.

4. Determine camera placement: For optimal coverage, carefully determine the placement of each camera. Consider the coverage area, angles, and potential obstructions. This will ensure maximum effectiveness of your security camera system.
5. Plan the wiring: Decide on the best wiring method for your installation. This may include running cables through walls, ceilings, or conduits. Ensure that the wiring is hidden and secure, protecting it from tampering or damage.
6. Consider storage and monitoring: Determine how the footage will be stored and accessed. This could involve using a video recorder, cloud storage, or network-attached storage. Additionally, plan how you will monitor the cameras, whether it be through a dedicated monitor or a smartphone application.
7. Seek professional assistance if needed: If you are unsure about any aspect of the installation process, or if it is a complex system, consider seeking professional assistance. They can provide valuable advice and ensure that the system is installed correctly.
By carefully planning the installation of your security camera system, you can ensure that it is effectively deployed and meets the specific needs of your location.

Gathering the Necessary Tools
Before you embark on the task of wiring a security camera system, it is important to make sure you have all the necessary tools to complete the job efficiently and effectively. This will ensure that you have everything you need at hand and can avoid any unnecessary delays or frustrations.
1. Camera System
The first and most obvious tool you will need is the security camera system itself. This typically includes the cameras, a Digital Video Recorder (DVR) or Network Video Recorder (NVR), and any additional cables or connectors required for installation. Before purchasing a camera system, it’s important to determine the number of cameras needed and the type of system that best suits your needs, whether it’s a wired or wireless system.
2. Power Supply
To power the cameras and the recording device, you will need a power supply. This can be a plug-in adapter or a power distribution box, depending on the number of cameras you have. Make sure to choose a power supply that meets the voltage and current requirements of your camera system.
3. Cables and Connectors
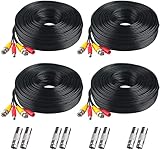
Proper wiring is crucial for the overall performance and reliability of your security camera system. You will need various cables and connectors to connect the cameras to the recording device and power supply. Common types of cables include coaxial cables, Ethernet cables, and power cables. Make sure to measure the cable lengths accurately to ensure you have enough to reach each camera’s desired location.
4. Mounting Hardware
To install your security cameras, you will need mounting brackets or other hardware to securely affix them to walls, ceilings, or other surfaces. Different types of cameras may require specific mounting options, so make sure to choose the appropriate hardware for your camera model.
5. Tools
In addition to the specific equipment mentioned above, you will need a set of general tools to assist with the installation process. This may include a power drill, screwdrivers, a cable crimper, wire strippers, a level, and a ladder or step stool. Having these tools on hand will make the installation process much smoother and more efficient.
By gathering all the necessary tools upfront, you can ensure a smooth and successful installation of your security camera system. Having everything you need within reach will save you time and frustration, allowing you to focus on setting up your system and enhancing your security measures.
Running the Cables
Running the cables for a security camera system can be one of the most challenging aspects of the installation process. It requires careful planning and consideration of various factors to ensure that the cables are installed properly and efficiently.
1. Determine the optimal cable routes: Before running the cables, it is important to determine the best routes for them. This involves assessing the layout of the area where the cameras will be installed and identifying potential obstacles or obstructions that may need to be avoided. It may be necessary to drill holes or use conduit to conceal the cables and protect them from damage.
2. Measure and cut the cables: Once the routes have been determined, measure the distance between the camera locations and the recording device. Add some extra length to allow for flexibility during the installation. Cut the cables to the appropriate length using cable cutters, making sure to leave enough slack for any necessary adjustments.
3. Connect the cables: Depending on the system, the cables may need to be connected to power sources, video recorders, or network devices. Follow the manufacturer’s instructions to properly connect the cables. Use cable connectors or connectors specific to your system to ensure secure and reliable connections.
4. Run the cables: Start running the cables along the predetermined routes, using cable clips or wire ties to secure them in place. Take care to avoid stretching or bending the cables too tightly, as this can cause signal loss or damage. Ensure that the cables are properly grounded to minimize the risk of electrical interference.
5. Test the connections: Once all the cables are in place, it is important to test the connections to ensure that everything is working correctly. Use a cable tester or a multimeter to verify that there are no breaks or loose connections. Make any necessary adjustments or repairs before finalizing the installation.
Running the cables for a security camera system requires careful attention to detail and the ability to work with precision. It may be helpful to consult with a professional or refer to the system’s manual for specific instructions and recommendations.
Mounting the Cameras
Mounting the cameras is an essential step in setting up a security camera system. It ensures that the cameras are positioned correctly to capture the desired areas and angles. Here are some key points to consider when mounting your security cameras:
-
Determine the best locations
Before mounting the cameras, you need to determine the best locations for them. Consider the areas where you want surveillance coverage and identify any blind spots. It is recommended to mount the cameras at elevated positions to minimize the chances of tampering.
-
Choose the right mounting equipment
Once you have identified the camera locations, you need to select the right mounting equipment. There are various types of camera mounts available, such as wall mounts, ceiling mounts, and pole mounts. Choose the one that best suits your needs and ensures stable positioning of the cameras.
-
Check the camera angles
Before drilling any holes or mounting the cameras, it is crucial to check the camera angles. Ensure that the cameras are pointing towards the desired areas with the correct field of view. Adjust the camera angles if needed to get the best surveillance coverage.
-
Securely mount the cameras
When mounting the cameras, make sure they are securely attached to the mounting equipment. Use appropriate screws, bolts, or brackets to ensure stability. Test the camera mounting to ensure they are properly secured.
-
Consider environmental factors
Take into account any environmental factors that could affect the camera’s performance. Consider factors such as weather conditions, potential obstructions, and lighting conditions. Choose cameras that are suitable for the environment where they will be mounted.
By following these steps and paying attention to the details, you can ensure that your security cameras are properly mounted and positioned for optimal surveillance coverage.
Connecting and Configuring the System
Once you have chosen and purchased your security camera system, the next step is to connect and configure it. While it may seem intimidating at first, wiring a security camera system can be a manageable task with the right guidance and preparation.
1. Plan the Camera Placement
Before you begin the installation process, it is important to plan the placement of your cameras. Consider the areas you want to monitor and the ideal angles for capturing the best footage. Make sure the cameras are positioned in a way that covers the most vulnerable points of your property.
2. Assemble the Components
Start by assembling all the components of your security camera system. This typically includes the cameras, cables, power supply, and a digital video recorder (DVR). Carefully unpack each component and ensure that all the necessary parts are included.
Pro tip: Read the instruction manual thoroughly to familiarize yourself with the components and their functions.
3. Connect the Cameras
Begin by connecting the cameras to the DVR. Depending on the type of system you have, this step may involve connecting the cables from each camera to the appropriate input ports on the DVR. Make sure the connections are secure and tightly fitted.
Pro tip: If your cameras are wireless, follow the manufacturer’s instructions to connect them to the DVR wirelessly.
4. Connect to Power
After connecting the cameras, you will need to provide power to them. This often involves plugging in a power adapter or connecting the cameras to a power source using the cables provided.
Pro tip: Consider using a surge protector to protect your cameras from power surges and outages.
5. Configure the System
Once the cameras are connected and powered, you will need to configure the system. This typically includes setting up the DVR, configuring the recording settings, and adjusting any necessary parameters.
Pro tip: Use the instruction manual or online tutorials provided by the manufacturer to guide you through the configuration process.
6. Test the System
After completing the setup and configuration, it is crucial to test the system to ensure everything is functioning properly. Verify that the cameras are capturing clear footage, the DVR is recording, and the remote viewing app or software is working as intended.
Pro tip: Test the system regularly to identify any issues early on and make any necessary adjustments or repairs.
By following these steps and taking your time to properly connect and configure your security camera system, you can ensure that your property is protected and monitor with ease.
FAQ,
How difficult is it to wire a security camera system?
Wiring a security camera system can vary in difficulty depending on the complexity of the system and the location where the cameras will be installed. For simple systems with a few cameras, it can be relatively easy to wire the cameras to a central recording device or monitor. However, for larger systems with multiple cameras and more complex wiring requirements, it can be more challenging and time-consuming.
What steps are involved in wiring a security camera system?
Wiring a security camera system typically involves several steps. First, you need to plan the camera locations and determine the best routes for the cables. Then, you will need to run the cables from the cameras to the central recording device or monitor, taking care to ensure the cables are securely hidden or protected. Next, you will need to connect the cables to the appropriate ports on the recording device or monitor. Finally, you will need to test the system to ensure all cameras are functioning properly and the recording device or monitor is receiving the video feed.


