
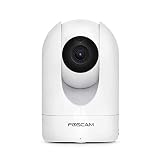
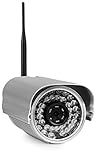
If you own a Foscam wireless IP camera and want to access its live feed from your iPhone, you’ve come to the right place. Foscam cameras offer high-quality video monitoring and can be easily accessed from your smartphone, providing you with peace of mind and enhanced security.
Before you can access your Foscam camera from your iPhone, you need to make sure you have a stable internet connection and have installed the Foscam app on your device. The Foscam app is available for free on the App Store and provides a user-friendly interface for managing and viewing your camera’s live feed.
Once you have the Foscam app installed, follow these simple steps to access your wireless IP camera from your iPhone:
- Launch the Foscam app on your iPhone and sign in to your Foscam account or create a new one if you haven’t done so already.
- Tap on the “Add Camera” button to begin the setup process.
- Follow the on-screen instructions to connect your iPhone to your Foscam camera’s Wi-Fi network. Make sure you are within range of your camera’s signal.
- Once connected, return to the Foscam app and tap on the “Refresh” button to find your camera.
- Select your camera from the list of available devices and enter the camera’s username and password.
- Tap on the “Connect” button to establish a live connection to your Foscam camera.
That’s it! You should now be able to access your Foscam wireless IP camera’s live feed from your iPhone. The Foscam app offers a range of features, including the ability to view multiple cameras, adjust camera settings, and receive motion detection alerts.
With your Foscam camera and iPhone working together, you can easily keep an eye on your home, office, or any other location without needing to be physically present. Enjoy the convenience and peace of mind that comes with accessing your Foscam camera from your iPhone!

Setting Up Foscam Wireless IP Camera
Setting up your Foscam wireless IP camera allows you to monitor your home or office from anywhere using your iPhone. Follow these simple steps to get started:
Step 1: Connect the Camera to Your Network
First, you need to connect your Foscam wireless IP camera to your local network. To do this, follow the instructions provided with your camera to connect it to your Wi-Fi network. Make sure the camera is within range of your Wi-Fi router.
Step 2: Install the Foscam App on Your iPhone
Next, you’ll need to download and install the Foscam app on your iPhone. Open the App Store on your iPhone and search for “Foscam”. Download and install the app.
Step 3: Configure the Camera Settings
Once you have installed the app, open it and click on the “Add New Camera” button. Follow the on-screen instructions to configure your camera settings. You will need to enter the camera’s IP address, username, and password. Consult the camera’s manual for these details.
Step 4: Access the Camera Feed
After you have configured the camera settings, you can access the camera feed from your iPhone. Open the Foscam app, and you will see a list of available cameras. Tap on the camera you want to access, and you will be able to view the live feed from the camera on your iPhone.
With your Foscam wireless IP camera set up, you can now monitor your home or office remotely using your iPhone. Enjoy the peace of mind that comes with being able to keep an eye on things from anywhere!
| Benefits of using a Foscam Wireless IP Camera: |
|---|
| 1. Remote monitoring from anywhere using your iPhone |
| 2. Easy setup and configuration process |
| 3. High-quality live feed for clear visuals |
| 4. Peace of mind knowing your property is secure |
Connecting Foscam Camera to iPhone
Connecting your Foscam wireless IP camera to your iPhone allows you to easily monitor your home or office remotely. Here are the steps to set up your Foscam camera on your iPhone:
Step 1: Download the Foscam App
First, you need to download and install the Foscam app on your iPhone. You can find it in the App Store by searching for “Foscam” and selecting the official Foscam app.
Step 2: Connect the Camera to Your Wi-Fi Network
Next, you need to connect your Foscam camera to your Wi-Fi network. Follow the camera’s setup instructions to connect it to your home or office Wi-Fi network. Make sure the camera and your iPhone are connected to the same network.
Step 3: Launch the Foscam App
Once your camera is successfully connected to the Wi-Fi network, launch the Foscam app on your iPhone.

Step 4: Add Your Camera to the App
In the Foscam app, tap on the “Add Camera” button to add your camera to the app. Enter the camera’s username and password, and follow the on-screen instructions to complete the setup process.
Step 5: Access Your Camera on Your iPhone
After adding your camera to the app, you can access it on your iPhone. Tap on the camera’s thumbnail in the app to start the live video stream. You can also adjust camera settings, view recordings, and receive motion alerts through the app.
By following these steps, you can easily connect your Foscam wireless IP camera to your iPhone and enjoy remote monitoring. Remember to keep your camera’s firmware updated for the best performance and security.
| Benefits of Connecting Foscam Camera to iPhone: |
|---|
| 1. Remote monitoring of your home or office |
| 2. Easy access to live video stream on your iPhone |
| 3. Ability to adjust camera settings and view recordings |
| 4. Receive motion alerts for enhanced security |
Accessing Foscam Camera Remotely
Accessing your Foscam wireless IP camera remotely provides you with the convenience and peace of mind of monitoring your property from anywhere using your iPhone. Follow the steps below to remotely access your camera:
Step 1: Set Up Foscam Camera
Make sure your Foscam camera is properly set up and connected to your Wi-Fi network. Follow the manufacturer’s instructions to connect the camera to your network and ensure it is working correctly.

Step 2: Configure Port Forwarding
To access your camera remotely, you need to configure port forwarding on your router. Log in to your router’s settings and locate the port forwarding section. Add a new rule to forward the camera’s IP address and port to an external port.
Step 3: Obtain Your External IP Address
To access your camera remotely, you need to know your external IP address. You can visit websites such as whatismyip.com to obtain this information.
Step 4: Install Foscam App
On your iPhone, open the App Store and search for the Foscam app. Download and install the app onto your device.
Step 5: Configure Foscam App
Launch the Foscam app on your iPhone. Tap on the settings icon and select “Add New Camera”. Enter a name for your camera and fill in the required information, including the camera’s IP address, port number, username, and password. Tap “Save” to save your settings.
Now you can remotely access your Foscam camera from your iPhone using the Foscam app. Open the app, select your camera from the list, and you will be able to view the camera’s live feed and control its settings.

Downloading Foscam App on iPhone
To access your Foscam wireless IP camera from your iPhone, you will need to download the Foscam app from the App Store. The Foscam app allows you to view and control your camera remotely from your iPhone.
Follow these steps to download the Foscam app on your iPhone:
- Open the App Store on your iPhone.
- Tap on the “Search” tab at the bottom of the screen.
- In the search bar, type “Foscam” and tap the search button.
- From the search results, look for the Foscam app and tap on it.
- Tap the “Get” button next to the app to start downloading it.
- Wait for the app to download and install on your iPhone.
- Once the installation is complete, tap on the “Open” button to launch the Foscam app.
After opening the Foscam app, you will need to follow the app’s setup wizard to connect your camera to your iPhone. This usually involves entering your camera’s IP address, username, and password. Once the setup is complete, you should be able to access your Foscam wireless IP camera from your iPhone and view the live video feed or control the camera’s settings remotely.
Configuring Foscam Camera on iPhone
To access your Foscam wireless IP camera from your iPhone, you need to configure it properly. Follow the steps below to set up your camera:
Step 1: Connect the camera to your network
Connect your Foscam camera to your Wi-Fi network using the provided instructions. Make sure the camera is within the network’s range and has a stable connection.
Step 2: Install the Foscam app
On your iPhone, open the App Store and search for “Foscam” to find and install the official Foscam app. Once the app is installed, open it from your home screen.
Step 3: Add your camera to the app
Open the Foscam app and tap on the “Add camera” button. Enter a name for your camera and its login credentials, if required. Tap on the “Next” button once you have entered the details.
Step 4: Choose your camera model
On the next screen, select your Foscam camera model from the list. If you are unsure about the model, check the documentation or the label on the camera for reference. Tap on the “Next” button to proceed.
Step 5: Configure camera settings
Follow the on-screen prompts to configure the camera settings. This may include entering the camera’s IP address, port number, and other network details. Consult the camera’s manual or documentation for the specific settings required. Once the settings are entered, tap on the “Next” button.
Step 6: Connect to your camera
After completing the setup process, the Foscam app will attempt to connect to your camera. Wait for the app to establish a connection, which may take a few seconds. Once connected, you will see the live feed from your Foscam camera on the app’s home screen.

Now, you can remotely access your Foscam wireless IP camera from your iPhone using the Foscam app. You will be able to view the live video feed, control camera movements (if supported), and adjust settings as needed.
Viewing Foscam Camera Footage on iPhone
If you have a Foscam wireless IP camera and an iPhone, you can easily view the camera footage directly from your iPhone. Follow the steps below to access the camera and view the live video feed on your iPhone.
Step 1: Install the Foscam App
The first step is to install the Foscam app on your iPhone. Open the App Store and search for “Foscam” to find and download the app. Once the app is installed, open it and proceed to the next step.
Step 2: Add Camera to the App
After opening the Foscam app, tap on the “Add” button to add your camera to the app. Enter the necessary details, such as the camera’s IP address, port number, username, and password. You can find this information in the camera’s settings or documentation. Once the details are entered, tap on “Save” to add the camera to the app.
Step 3: View Live Video Feed
Once the camera is added to the app, you can view the live video feed on your iPhone. Simply tap on the camera from the app’s home screen to access the camera’s live feed. You can control various settings, such as zoom and tilt, from the app to adjust the camera’s view as needed.
Step 4: Other App Features
In addition to viewing the live video feed, the Foscam app offers other features to enhance your camera viewing experience. You can take snapshots, record videos, and even listen to the audio from the camera’s built-in microphone. The app also allows you to access recorded footage, customize motion detection settings, and receive push notifications for any detected events.
By following these simple steps, you can easily access your Foscam wireless IP camera and view the camera footage on your iPhone. Enjoy the convenience of monitoring your camera from anywhere using your iPhone and the Foscam app.
| Benefits | Considerations |
|---|---|
|
|
Controlling Foscam Camera Features on iPhone
If you own a Foscam wireless IP camera and want to control its various features from your iPhone, you’re in luck! Foscam provides a dedicated iPhone app that allows you to access and control your camera with ease.
To get started, you’ll need to download and install the Foscam app from the App Store. Once the app is installed, follow these steps to control your camera’s features:
| Step 1 | Launch the Foscam app on your iPhone. |
| Step 2 | Tap the “+” button to add your camera to the app. |
| Step 3 | Enter the necessary information, including the camera’s IP address, port number, username, and password. |
| Step 4 | Tap “Save” to add the camera to your app. |
| Step 5 | Once the camera is added, you’ll be able to control various features, such as pan, tilt, zoom, and audio. These controls can usually be found in the app’s interface. |
With the Foscam app, you can easily view live video feed from your camera, adjust its settings, and even receive motion detection alerts on your iPhone. The app provides a user-friendly interface that makes accessing and controlling your Foscam camera’s features a breeze.
Whether you want to monitor your home, keep an eye on your pets, or enhance your security, the Foscam app for iPhone allows you to take full control of your Foscam wireless IP camera from the convenience of your smartphone.
Troubleshooting Common Foscam Camera Issues on iPhone
Using a Foscam wireless IP camera with your iPhone can provide you with peace of mind and security, but sometimes you may encounter problems. Here are some common issues that users face and steps to troubleshoot them:
No Connection to Camera:
If you are unable to connect to your Foscam camera from your iPhone, try the following:
- Ensure that your camera is properly set up and connected to your Wi-Fi network.
- Check your internet connection on your iPhone and make sure it is working properly.
- Double-check the camera’s IP address and port settings to ensure they are entered correctly in the Foscam app on your iPhone.
- Restart both your camera and your iPhone to reset any potential connection issues.
Poor Image Quality:
If you are experiencing poor image quality when viewing your Foscam camera on your iPhone, consider the following:
- Check your camera’s resolution settings and adjust them if necessary. Higher resolutions may result in clearer images but can also require more bandwidth.
- Make sure that your camera lens is clean and free from any dirt or smudges that may affect image quality.
- If you are using the camera in low light conditions, enable the camera’s night vision mode for better image quality.
Connection Drops or Freezes:
If your Foscam camera’s connection frequently drops or freezes on your iPhone, try these troubleshooting steps:
- Check the signal strength of your Wi-Fi network. A weak signal can cause connection issues.
- Move your camera closer to your Wi-Fi router to strengthen the signal.
- Ensure that there are no obstacles between your camera and the router that may interfere with the signal.
- Update the firmware of your camera and the Foscam app on your iPhone to the latest versions to fix any known bugs or issues.
By following these troubleshooting steps, you can solve common Foscam camera issues and enjoy seamless access to your camera from your iPhone.
Question-answer:
What is a Foscam wireless IP camera?
A Foscam wireless IP camera is a type of security camera that can connect to a wireless network and be accessed remotely over the internet. It allows users to monitor their premises from anywhere using a mobile device or computer.
How can I access my Foscam wireless IP camera from an iPhone?
To access your Foscam wireless IP camera from an iPhone, you can use the Foscam mobile app. First, download and install the app from the App Store. Then, open the app and add your camera by following the on-screen instructions. Once added, you can view the camera’s live feed, playback recorded videos, and adjust camera settings directly from your iPhone.


