Have you ever wondered how you can keep an eye on your home or office while you’re away? With the advancement in technology, it is now possible to access your security camera footage remotely through the internet. This allows you to monitor your property and ensure its safety no matter where you are.
Accessing your security camera via the internet may seem complicated, but it is actually quite simple. All you need is a stable internet connection and a few easy steps to get started. In this article, we will guide you through the process of accessing your security camera remotely, so you can have peace of mind knowing that your property is protected.
Firstly, you need to make sure that your security camera system is internet-enabled. This means that it should have an IP (Internet Protocol) address and be connected to your home or office network. Once you have confirmed this, you can proceed to set up remote access.
To access your security camera remotely, you will need to configure your router to allow incoming connections. This involves enabling port forwarding, which allows data to be sent and received between your security camera and your device over the internet. It is important to note that the steps for enabling port forwarding may vary depending on your router brand and model. However, most routers have similar settings, which can be found in the router’s web interface.
How to Connect to a Security Camera Remotely
Connecting to your security camera remotely allows you to monitor your property from anywhere in the world. Whether you want to keep an eye on your home, office, or any other premises, remote access to your security camera provides peace of mind and added security.

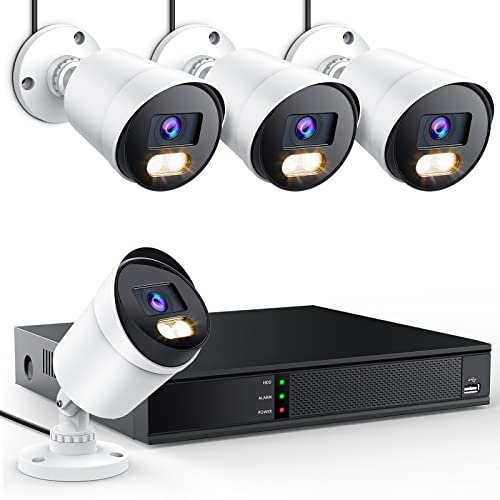
1. Choose the Right Security Camera
Before you can connect to a security camera remotely, make sure you have the right camera for the job. Look for a camera with remote access capabilities, such as an IP camera or a Wi-Fi-enabled camera. These cameras are designed to be accessed over the internet and will offer the necessary features for remote viewing.
2. Set Up Port Forwarding
In order to connect to your security camera remotely, you’ll need to set up port forwarding on your router. This involves opening up a specific port on your router’s settings to allow incoming connections from the internet. Consult your router’s manual or manufacturer’s website for detailed instructions on how to set up port forwarding.
3. Obtain Your Camera’s IP Address
Before you can connect to your security camera remotely, you’ll need to know its IP address. You can usually find this information in the camera’s settings or documentation. Make note of the IP address as well as the port number you configured for port forwarding.
4. Configure Remote Access
Once you have your camera’s IP address and port number, you’ll need to configure remote access on your computer or mobile device. This typically involves downloading and installing the camera manufacturer’s remote access software or app. Follow the instructions provided by the manufacturer to add your camera and connect it to your remote access account.
5. Test Your Connection
After configuring remote access, it’s important to test your connection to ensure everything is working properly. Launch the remote access software or app and try connecting to your camera using the IP address and port number. If successful, you should be able to see a live feed from your security camera on your computer or mobile device.

| Benefits of Remote Access |
|---|
| 1. Monitor your property from anywhere |
| 2. React quickly to any suspicious activity |
| 3. Keep an eye on your loved ones or pets |
| 4. Enhance security and peace of mind |
Choose the Right Security Camera
When it comes to securing your property and keeping an eye on what’s happening, having a security camera is essential. However, with so many options available, it can be overwhelming to choose the right one. Here are some factors to consider when selecting a security camera:
| Feature | Description |
|---|---|
| Resolution | Look for cameras with high resolution to ensure clear and detailed footage. High definition (HD) or ultra-high definition (UHD) cameras provide better image quality. |
| Field of View | Consider the field of view (FOV) of the camera. A wider FOV allows you to monitor a larger area, while a narrower FOV provides more focused surveillance. |
| Indoor vs Outdoor | Determine whether you need an indoor or outdoor security camera. Outdoor cameras should be weatherproof and equipped with night vision capabilities. |
| Power Source | Choose between wired or wireless cameras. Wired cameras require a power source and are more reliable, while wireless cameras are easier to install and offer flexibility in placement. |
| Connectivity | Consider how you want to access the camera. Cameras with internet connectivity allow you to view the footage remotely using a smartphone or computer. |
| Storage | Decide on the type of storage you prefer. Some cameras offer cloud storage, while others have built-in memory or support external storage devices like SD cards or hard drives. |
| Additional Features | Look for additional features such as motion detection, two-way audio, pan-tilt-zoom (PTZ) capabilities, and remote control to enhance the functionality of your security camera. |
By considering these factors, you can choose a security camera that meets your specific requirements and provides you with peace of mind knowing that your property is protected.
Set Up Your Network
Before you can access your security camera via the internet, you need to set up your network correctly. Follow these steps:
1. Connect your security camera to your router
Start by connecting your security camera to your router using an Ethernet cable. Plug one end of the cable into the camera’s network port and the other end into an available port on your router.
2. Configure your camera’s network settings
Access your camera’s configuration interface through a web browser or a dedicated software provided by the manufacturer. Follow the instructions in the user manual to configure the camera’s network settings. Make sure to assign a static IP address to the camera and set up the correct gateway address and subnet mask.

3. Set up port forwarding
Next, you need to set up port forwarding on your router. This allows you to access your camera from outside your local network. Open your router’s configuration interface by entering its IP address in a web browser. Navigate to the port forwarding settings and create a new port forwarding rule for your camera’s IP address. Specify the external and internal ports, usually 80 for HTTP or 443 for HTTPS.
4. Enable DDNS
If your internet connection has a dynamic IP address, you will need to enable Dynamic DNS (DDNS) to ensure your camera can always be accessed using a domain name. Sign up for a free DDNS service and follow their instructions to set up your DDNS account. Enter the DDNS account information in your camera’s settings to associate the domain name with your camera’s IP address.
5. Test the remote access
Once you have completed the network setup, you should be able to access your security camera remotely. Open a web browser and enter the DDNS domain name or your router’s public IP address followed by the port number specified in the port forwarding settings. Log in with your camera’s credentials, and you should see the live video feed.
| Network Setup Checklist: |
|---|
| ✔ Connect camera to router with Ethernet cable |
| ✔ Configure camera’s network settings |
| ✔ Set up port forwarding on router |
| ✔ Enable DDNS |
| ✔ Test remote access |
Enable Port Forwarding on Your Router
To access your security camera remotely over the internet, you will need to enable port forwarding on your router. This will allow incoming connections to reach your camera’s IP address.
Here are the steps to enable port forwarding on most routers:

Step 1: Open your router’s configuration page. This can usually be done by typing the router’s IP address into your web browser.
Step 2: Login to your router’s configuration page using the administrator username and password. If you haven’t changed these, they are often set to the default values specified by the manufacturer. Consult your router’s documentation or the manufacturer’s website for the default login information.
Step 3: Locate the port forwarding section in your router’s configuration page. This may be under a “Security” or “Advanced” tab.
Step 4: Add a new port forwarding rule. Enter a name for the rule (e.g., “Camera Access”), the IP address of your security camera, the port number you want to forward (typically 80 for HTTP or 554 for RTSP), and the protocol (TCP or UDP) for the rule.
Step 5: Save your changes and exit the router’s configuration page.

Once you have successfully enabled port forwarding on your router, you should be able to access your security camera remotely over the internet. To do this, you will need to enter your router’s public IP address in a web browser or a security camera app, followed by the port number you specified in the port forwarding rule.
Note: It is important to keep your router’s firmware up to date and use strong, unique passwords for both your router’s configuration page and your security camera’s login.
Create a Static IP Address
When accessing your security camera via the internet, it’s important to have a static IP address. A static IP address ensures that your camera’s network address remains the same, even after you restart your router or modem. This is crucial for seamless remote access to your camera.
Why do you need a static IP address?
A static IP address is necessary because most Internet Service Providers (ISPs) assign dynamic IP addresses to their customers. Dynamic IP addresses can change every time you reconnect to the internet or restart your network equipment. If your IP address changes, it becomes difficult to access your security camera remotely.
How to set up a static IP address?
To create a static IP address, you need to access your router’s configuration settings. The process may vary depending on the router brand and model, but here are the general steps:

- Open a web browser and type your router’s IP address into the address bar. The IP address is usually mentioned on a sticker or can be found in the router’s documentation.
- Enter your username and password to log in to the router’s admin page.
- Navigate to the network settings or DHCP settings section.
- Look for an option to assign a static IP address and click on it.
- Enter the desired IP address, subnet mask, and gateway address. Remember to choose an IP address that falls within the range of your router’s subnet.
- Save the changes and restart your router.
Once you have set up a static IP address, you can go back to your security camera’s settings and configure the necessary port forwarding or virtual server settings to ensure proper internet connectivity. With a static IP address, you will be able to access your security camera from anywhere in the world with ease.
Install the Security Camera Software
To access your security camera via the internet, you will need to install the appropriate software on your computer or mobile device. The software provided by the manufacturer of the security camera is typically designed to work with their specific models and systems.
Here are the steps to install the security camera software:
Step 1: Check System Requirements
Before installing the software, make sure your computer or mobile device meets the system requirements specified by the manufacturer. This includes the operating system version, processor, memory, and storage space.
Step 2: Download the Software
Visit the manufacturer’s website or contact their support for the software download link. Download the software package according to your operating system (Windows, macOS, or mobile platforms). Make sure to download the latest version to ensure compatibility and access to the latest features.

Step 3: Install the Software
Once the software package is downloaded, locate the installer file and double-click to run it. Follow the on-screen instructions to complete the installation process. You may need to accept the license agreement and choose the installation location.
After the installation is complete, the security camera software will be ready to use.
Step 4: Configure the Software
Launch the security camera software and follow the setup wizard or configuration guide provided by the manufacturer. This will involve connecting to your security camera system by entering its IP address or scanning its QR code. You may need to provide login credentials or customize the settings according to your preferences.
Once the software is configured, you can access your security camera via the internet by launching the software and logging in with your credentials.
Remember to keep the software up to date by regularly checking for updates on the manufacturer’s website or through the software’s built-in update feature.
| Benefits of Installing Security Camera Software |
|---|
| 1. Remote Access: By installing the security camera software, you can access your cameras from anywhere with an internet connection. This allows you to monitor your property while you’re away or even check in on your pets. |
| 2. Recording and Playback: The software usually provides the ability to record video footage from your security cameras and play it back at a later time. This can be helpful for reviewing events or incidents that occurred. |
| 3. Motion Detection Alerts: Many security camera software applications offer motion detection capabilities. This means that if the camera detects any movement, you can receive alerts on your computer or mobile device. This can help you quickly respond to potential security threats. |
| 4. Multiple Camera Management: If you have multiple security cameras installed, the software allows you to manage and view them all from one interface. This makes it easier to monitor and control your entire surveillance system. |
Configure Remote Access
Setting up remote access to your security camera is essential if you want to monitor your premises when you are away. Follow these steps to configure remote access:
1. Check the camera’s documentation
Refer to the user manual or online documentation provided by the camera manufacturer. It should have detailed instructions on how to enable remote access for your specific model.
2. Configure port forwarding
By default, security cameras communicate through specific ports on your router. To enable remote access, you need to configure port forwarding on your router. Access your router’s settings and locate the port forwarding section. Add a new port forwarding rule for the specific ports used by your camera.
It is recommended to assign a static IP address to your camera within your local network. This ensures that the camera’s IP address remains the same, even after a restart or power outage.
3. Set up dynamic DNS
Most home internet connections have dynamic IP addresses, which can change over time. To easily access your camera remotely, set up a dynamic DNS (DDNS) service. This service associates a hostname with your changing IP address. Choose a DDNS provider and create an account. Configure your router to update the DDNS service whenever your IP address changes.
4. Enable remote access
Once you have completed the previous steps, you can now enable remote access on your camera. Access the camera’s settings through its web interface or mobile app. Enter the necessary information such as the DDNS hostname or your router’s public IP address.
5. Test remote access
After enabling remote access, test it by accessing the camera from a device outside your local network. Enter the DDNS hostname or your router’s public IP address in a web browser or the camera’s mobile app. Log in using your camera’s credentials and ensure that the live video feed is accessible remotely.
| Common Issues and Troubleshooting |
|---|
| Incorrect port forwarding settings. Double-check that you have correctly configured port forwarding on your router. |
| Firewall blocking access. Ensure that your firewall is not blocking the incoming connection from the internet. |
| Internet connection issues. Verify that your internet connection is stable and has sufficient bandwidth for remote access. |
| DDNS not updating. If your IP address changes and the DDNS is not updated, remote access may not work. Check your router’s settings and the DDNS service configuration. |
| Camera firmware updates. Regularly check for firmware updates for your camera to ensure optimal performance and security. |
Connect to Your Security Camera Remotely
Being able to access your security camera remotely provides a sense of security and peace of mind. Whether you’re away on vacation or just want to check in on your home or office, accessing your security camera remotely is easy and convenient. Here are some steps to connect to your security camera remotely:
Step 1: Set up your camera for remote viewing
First, you need to make sure that your security camera is set up for remote viewing. This typically involves configuring your camera’s settings to enable remote access. Consult your camera’s user manual or the manufacturer’s website for specific instructions on how to do this. You may need to change some network settings, such as setting up port forwarding or enabling UPnP (Universal Plug and Play).
Step 2: Create a unique web address or use an app
Once your camera is set up for remote viewing, you need to create a unique web address or use a mobile app to access your camera. Most cameras come with their own web interface or mobile app that you can use for this purpose. Consult your camera’s manual or the manufacturer’s website to find out how to create a web address or download the app.
If you’re creating a web address, you may need to set up a dynamic DNS (Domain Name System) service. This allows you to assign a hostname to your camera’s IP address, making it easier to access remotely.
Step 3: Access your camera remotely
Once you have your unique web address or app set up, you can access your camera remotely. Simply enter the web address in your browser or open the app on your mobile device, and sign in using the username and password associated with your camera. From there, you should be able to view live footage, adjust camera settings, and access any recorded footage.
It is important to note that accessing your security camera remotely may require a stable internet connection and sufficient bandwidth. Additionally, make sure to keep your camera’s firmware up to date and change the default login credentials to ensure the security of your camera and your privacy.
By following these steps, you can easily connect to your security camera remotely and keep an eye on your property no matter where you are.
FAQ,
What is a security camera?
A security camera is a device that captures and records video footage to monitor and protect a specific area. It is commonly used for surveillance purposes in homes, businesses, and public spaces.
How can I access my security camera via the internet?
To access your security camera via the internet, you need to follow a few steps. Firstly, ensure that the camera is connected to your home or office network. Then, set up port forwarding on your router to allow remote access. Next, obtain the public IP address of your network. Finally, use a web browser or specific software provided by the camera manufacturer to access the camera feed remotely using the IP address.
Are there any security risks involved in accessing my security camera via the internet?
Yes, there are potential security risks involved in accessing your security camera via the internet. If not properly secured, unauthorized individuals may be able to access your camera feed, compromising your privacy and security. It is important to take precautions such as enabling strong passwords, using encryption, and regularly updating the camera firmware to mitigate these risks.


