GoPro Quik is a powerful software that allows you to edit and showcase your adventures seamlessly. However, before you can start using this amazing tool, you need to add your camera to it. Adding a camera to GoPro Quik is a straightforward process that can be done in a few simple steps.
In this article, we will guide you on how to add a camera to GoPro Quik and get ready to unleash your creative editing skills.
Step 1: Install GoPro Quik
The first step is to install the GoPro Quik software on your computer. Simply visit the official GoPro website and download the appropriate version for your operating system. Once the installation is complete, launch the software and sign in to your GoPro account or create a new one.
Step 2: Connect Your Camera

Now, it’s time to connect your camera to your computer. Use the USB cable that came with your GoPro and connect it to a USB port on your computer. Make sure your camera is turned on and set to the appropriate mode for transferring files. Once the connection is established, GoPro Quik should detect your camera automatically.
Note: If your camera is not being detected, try using a different USB port or cable. You can also check if there are any software updates available for your camera.
Step 3: Add Your Camera to GoPro Quik
After the connection is established, GoPro Quik will prompt you to add your camera. Click on the “Add Camera” button or navigate to the “Devices” section in the software’s settings. Select your camera from the list of available devices and follow the on-screen instructions to complete the process.
That’s it! Your camera is now successfully added to GoPro Quik, and you can start importing and editing your footage with ease. Enjoy the seamless workflow and unleash your creativity with this powerful editing tool!

What is GoPro Quik?
GoPro Quik is a free editing software that allows you to create stunning videos and share them with your friends and family. With a user-friendly interface and powerful features, GoPro Quik makes video editing a breeze.
Whether you’re a beginner or an experienced videographer, GoPro Quik has something for everyone. It offers a range of editing tools, including the ability to trim and cut videos, add music and transitions, and apply filters and effects.
GoPro Quik also allows you to import footage from a variety of sources, including GoPro cameras, smartphones, and digital cameras. You can then easily organize and sort your footage, making it quick and easy to find the clips you want to use in your video.
Key Features of GoPro Quik:
- Automatic video editing: GoPro Quik analyzes your footage and creates an edited video for you, complete with music and effects.
- Customizable templates: If you prefer to take a more hands-on approach, GoPro Quik also offers a range of customizable templates for you to choose from.
- Easy sharing: Once you’ve finished editing your video, GoPro Quik makes it simple to share your creation on social media platforms like Facebook, Instagram, and YouTube.
Whether you’re creating a travel video, a family video, or a sports highlight reel, GoPro Quik is the perfect tool to bring your footage to life. So why wait? Download GoPro Quik today and start creating amazing videos.
Why add a camera to GoPro Quik?
GoPro Quik is a versatile software that allows you to easily view, edit, and share your GoPro footage. By adding a camera to GoPro Quik, you can enhance your editing capabilities and make the most out of your GoPro footage.

Here are a few reasons why adding a camera to GoPro Quik is beneficial:
1. Seamless Integration
By adding your camera to GoPro Quik, you can seamlessly import your footage into the software. This eliminates the need for manual file transfers and saves you time. With the camera connected, you can effortlessly access and organize your files within the Quik interface.
2. Advanced Editing Features
GoPro Quik offers a range of advanced editing features that can take your footage to the next level. By connecting your camera, you can unlock additional editing options, such as adjusting color settings, adding music or sound effects, and applying filters or effects. These features allow you to create professional-looking videos with ease.
Additionally, by connecting your camera, you can take advantage of Quik’s automatic editing capabilities. The software can analyze your footage and intelligently create stunning edits, complete with transitions and music, in just a few clicks.
3. Convenient Sharing
Once you’ve edited your footage in GoPro Quik, you can easily share it with others. By adding a camera, you can directly upload your videos to social media platforms, such as YouTube or Instagram, or share them with friends and family via email or messaging apps.
GoPro Quik also offers the option to create and customize video templates, making it easy to create consistent content for your vlogs, social media channels, or personal projects.
In conclusion, adding a camera to GoPro Quik enhances your editing experience, provides advanced editing features, and allows for convenient sharing of your content. By combining the power of your camera with the capabilities of Quik, you can create impressive videos that capture your adventures in a unique and professional way.
Step 1: Connecting your camera
Before you can add a camera to GoPro Quik, you need to make sure that your camera is properly connected to your computer. Here are the steps to do that:
- Connect your camera to your computer using a USB cable.
- Make sure that your camera is turned on.
- On your computer, open GoPro Quik.
- In the GoPro Quik app, click on the “Add Media” button.
- Select your connected camera from the list of options.
- Follow the on-screen instructions to complete the connection process.
Once your camera is successfully connected to GoPro Quik, you will be able to import and edit your photos and videos directly from your camera using the app.
Gather the necessary equipment
Before starting the process of adding a camera to GoPro Quik, it is important to gather all the necessary equipment. This will ensure a smooth setup process and enable you to start using your camera with GoPro Quik right away.

Camera
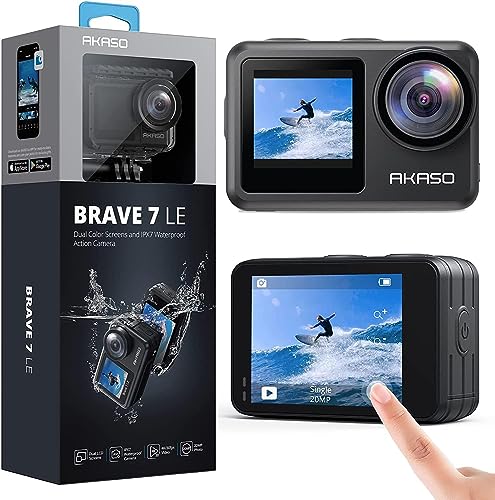
The first and most important piece of equipment you will need is a compatible camera. GoPro Quik is compatible with various GoPro camera models, so make sure you check if your camera is supported. Refer to the GoPro website or the camera’s user manual to determine if your camera model can be used with GoPro Quik.
USB Cable
In order to connect your camera to your computer, you will need a USB cable. This cable will allow you to transfer the footage from your camera to your computer and import it into GoPro Quik. Make sure you have the appropriate USB cable for your camera model.
Computer
An essential component for adding a camera to GoPro Quik is a computer. Make sure you have a computer that meets the system requirements for running GoPro Quik. Check the GoPro website for the specific system requirements.
With these three main components, you will have everything you need to add a camera to GoPro Quik. Once you have gathered the necessary equipment, you can move on to the next steps of the process.
Connect your camera to your computer
Before you can add a camera to GoPro Quik, you need to connect your camera to your computer. Follow the steps below to get started:

Step 1: Check the camera compatibility
Make sure that your camera is compatible with GoPro Quik. Check the list of supported cameras on the official GoPro website.
Step 2: Connect the camera
Connect your camera to your computer using the USB cable that came with it. Make sure the camera is powered on.
Step 3: Open GoPro Quik
Launch the GoPro Quik application on your computer. If you don’t have it installed, you can download it for free from the official GoPro website.
Step 4: Select your camera
In the GoPro Quik application, click on the “Add Media” button. A window will pop up displaying all the available cameras connected to your computer. Select your camera from the list.
Step 5: Import media
Once you’ve selected your camera, GoPro Quik will automatically import the media files from your camera to the application. This process may take some time depending on the size of the files.

Congratulations! You have successfully connected your camera to GoPro Quik. You can now start editing and sharing your GoPro footage with ease.
| Benefits of connecting your camera to GoPro Quik |
|---|
| 1. Quick and easy access to your GoPro media files |
| 2. Ability to edit and customize your footage |
| 3. Seamless sharing options with friends and family |
| 4. Automatic organization and backup of your media files |
Step 2: Importing media to GoPro Quik
A. Connecting your camera:
1. Turn on your GoPro camera and ensure it is in a compatible mode, such as “Photo” or “Video”.
2. Connect your GoPro camera to your computer using a USB cable. Make sure both ends of the cable are securely plugged in.
Note: Some cameras may require an adapter or additional attachment to connect to the computer.
B. Opening GoPro Quik:
1. Launch the GoPro Quik application on your computer.
2. If prompted, sign in to your GoPro account. If you don’t have an account, you can create one by clicking on the “Sign Up” option.
Note: The GoPro Quik application is available for Windows and macOS operating systems.
C. Importing media:
1. In the GoPro Quik application, click on the “Import” tab located at the top of the screen.
2. Select your GoPro camera from the list of detected devices.
3. Click on the “Import Files” button to start importing media from your camera to GoPro Quik.
Note: GoPro Quik will automatically detect and import all media files from your camera, such as photos and videos.
4. Wait for the import process to complete. The progress bar in the GoPro Quik application will indicate the status of the import.
5. Once the import is finished, you can view and manage your media files in the “Media” tab of GoPro Quik.
D. Disconnecting your camera:
1. Safely eject your GoPro camera from your computer to avoid any data loss.
2. Unplug the USB cable from your GoPro camera.
Note: Always disconnect your camera properly to prevent any potential damage to the camera or data corruption.
Launch GoPro Quik
To add your camera to GoPro Quik, you first need to launch the GoPro Quik application on your device. Follow the instructions below:
- Ensure that your camera and device are both turned on and connected to each other.
- Locate the GoPro Quik app on your device and tap on its icon to open the application.
- Once the GoPro Quik app is launched, you will be greeted with the home screen.
Launching GoPro Quik on iOS
If you are using an iOS device (such as an iPhone or iPad), follow these steps:
- Swipe left or right on your device’s home screen to find the GoPro Quik app icon.
- Tap on the GoPro Quik app icon to open the application.
Launching GoPro Quik on Android
If you are using an Android device, follow these steps:
- Tap on the app drawer icon on your device’s home screen (usually located at the bottom-center).
- Scroll through the app list to find the GoPro Quik app icon.
- Tap on the GoPro Quik app icon to open the application.
Once the GoPro Quik app is open, you can proceed with adding your camera to the application and accessing its features.
Select the import option
Once you have connected your camera to the GoPro Quik application, you need to select the import option on the home screen.
Step 1: Open the GoPro Quik application on your device.
Step 2: On the home screen, you will see various options. Look for the import option, which is usually represented by an icon or text.
Step 3: Tap on the import option to access the import settings.
Step 4: In the import settings, you may have the option to select specific files or folders to import. Choose the desired files or folders that you want to import to the GoPro Quik application.
Note: The import settings may vary depending on the device and the version of the GoPro Quik application you are using.
Once you have selected the import option and chosen the desired files or folders, the GoPro Quik application will start importing the media from your camera. You may need to wait for the import process to complete depending on the size and quantity of the files.
After the import process is finished, you can access and edit your media within the GoPro Quik application.
Step 3: Organizing your media
Once you have added your camera to GoPro Quik, it’s important to organize your media for easy access and editing. Follow these steps to get started:
1. Create folders:
Create folders on your computer or external storage device to store your GoPro media. You can create separate folders for different shooting sessions or events to keep things organized.
2. Rename your files:
GoPro cameras often name files based on date and time, which can make it difficult to find specific footage. Rename your files with descriptive names that will help you quickly identify what’s in each file.
For example, if you went on a hiking trip, you can rename your files to something like “Hiking Trip – Day 1”, “Hiking Trip – Day 2”, and so on. This will make it easier for you to find and organize your footage later.
Remember to save your renamed files in the folders you created in the previous step.
3. Create subfolders:
If you have different types of media, such as photos and videos, you can create subfolders within your main folders to further organize your files.
For example, within your “Hiking Trip” folder, you can create a subfolder called “Photos” and another subfolder called “Videos”. This way, you can separate your media types and easily locate what you need.
4. Backup your media:
It’s always a good idea to backup your media files to avoid any potential loss. Make sure to regularly back up your files to a separate storage device or cloud storage service.
By following these steps and organizing your media, you’ll be able to easily find and access your GoPro footage when using GoPro Quik.
Create a new album
Adding a camera to GoPro Quik allows you to organize and manage your media files conveniently. One way to keep your files organized is by creating a new album.
Here are the steps to create a new album in GoPro Quik:
- Open GoPro Quik: Launch the GoPro Quik application on your device.
- Navigate to the Media Library: Click on the “Media Library” tab located at the bottom of the screen.
- Click on the “+” icon: Look for the “Add Album” button, usually represented by a “+” icon, and click on it.
- Enter a name for the album: A dialog box will appear, prompting you to enter a name for the new album. Type in a descriptive name to help you easily identify its contents.
- Save the new album: After entering the album name, click on the “Save” or “Create” button to create the album.
Note: You can also add media files directly to the new album by dragging and dropping them into the album within GoPro Quik.
Now you have successfully created a new album in GoPro Quik, allowing you to better organize and manage your camera’s media files.
Question-answer:
What is GoPro Quik?
GoPro Quik is a free video editing software that allows you to edit and create professional-looking videos using the footage from your GoPro camera.
Can I add a camera other than a GoPro to GoPro Quik?
No, GoPro Quik is specifically designed to work with GoPro cameras. It may not be compatible with other camera brands.