If you are looking to enhance the security of your property, installing additional security cameras can be a great option. One of the key aspects of setting up these cameras is the wiring. In this article, we will guide you through the process of adding additional security camera Cat5 wiring, ensuring that you have a comprehensive surveillance system in place.
Step 1: Plan your camera placement
Before you begin adding the Cat5 wiring, it is crucial to plan the placement of your security cameras. Identify the areas of your property that need monitoring and determine the ideal locations for the cameras. Consider factors such as coverage, angles, and potential obstacles.
Step 2: Gather the necessary tools and materials
Once you have your camera placement planned out, gather all the tools and materials you will need for the installation. This may include a ladder, a drill, screwdrivers, mounting brackets, Cat5 cables, a crimping tool, and a cable tester. Make sure you have everything on hand before proceeding.

Step 3: Run the Cat5 cables
Start by running the Cat5 cables from the designated camera locations to your desired central point, such as a recorder or a monitor. Use the ladder and the necessary tools to secure the cables along walls, ceilings, or any other appropriate surfaces. Ensure that the cables are protected from any potential damage or interference.
Step 4: Connect the Cat5 cables
Once you have run the Cat5 cables, you will need to connect them to your cameras and your recording device. Strip the cable ends, separate the twisted pairs, and connect them to the appropriate terminals on your cameras using the crimping tool. Likewise, connect the other ends of the cables to the corresponding ports on your recording device.
Step 5: Test the connections

After connecting all the cables, it is essential to test the connections to ensure that they are secure and functioning correctly. Use a cable tester to verify that the signals are flowing correctly and that all the cameras are receiving power. This step will help identify and address any potential issues before completing the installation.
By following these steps, you can successfully add additional security camera Cat5 wiring to your surveillance system. Remember to prioritize safety throughout the process and consult an expert if you encounter any difficulties. With a well-designed and properly installed wiring system, you can enhance the security and peace of mind for your property.
Overview of adding additional security camera CAT5 wiring
When it comes to enhancing the security of your property, adding additional security camera CAT5 wiring can be a beneficial step. CAT5 wiring allows you to connect multiple security cameras to a central hub, enabling you to monitor different areas of your property simultaneously.
Before getting started with adding additional security camera CAT5 wiring, it’s important to have a clear plan in place. This includes identifying the areas where you want to install the new cameras and determining the length of CAT5 cable required for each camera.
Step 1: Gather the necessary tools and materials
Before you begin the process, make sure you have all the necessary tools and materials. This includes:
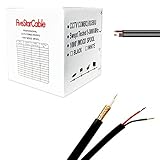
- CAT5 cables
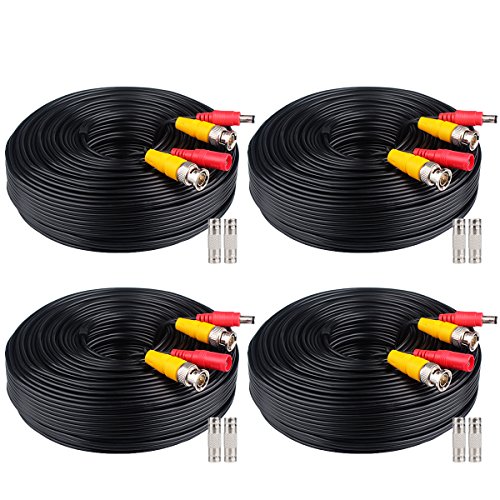
- BNC connectors
- Crimping tool
- Drill and drill bits
- Ethernet faceplate
- Network switch
- Power adapter
Step 2: Plan the camera placement and cable routing
Next, determine the locations where you want to install the additional security cameras. Take into consideration the areas that require surveillance and any potential blind spots. Once you have decided on the camera placement, plan the cable routing to ensure a clean and organized installation.
Step 3: Run the CAT5 cables
Using a drill and appropriate drill bits, create a hole near the camera placement area and another hole near the location of the network switch or recording device. Carefully run the CAT5 cables through the drilled holes, making sure to keep them organized and secure.
Step 4: Install the BNC connectors
Strip the ends of the CAT5 cables and attach the BNC connectors using a crimping tool. Make sure to follow the manufacturer’s instructions for proper installation. The BNC connectors will allow you to connect the cameras to the network switch or recording device.
Step 5: Connect the cameras and test the setup
Connect each camera to the CAT5 cables using the BNC connectors. Once all the cameras are connected, plug the CAT5 cables into the network switch or recording device. Power on the cameras and the recording device, then test the setup to ensure all the cameras are working properly and displaying clear footage.
By following these steps, you can successfully add additional security camera CAT5 wiring to your property and enhance your overall security measures. Remember to always prioritize your safety and consider consulting a professional if needed.

Disclaimer: The information provided in this article is for informational purposes only and should not be considered as professional advice. Always exercise caution and consult a professional when dealing with electrical installations.
Planning the installation process
Before starting the installation of additional security camera CAT5 wiring, it is important to plan out the process to ensure a smooth and efficient setup. Here are some key steps to consider during the planning phase:
- Identify camera locations: Determine the areas where you want to install the additional security cameras. This could include entrances, high-risk areas, or blind spots. Consider the field of view and coverage each camera needs to provide.
- Assess cable route: Evaluate the cable routing options from the main recording location to each camera. This involves identifying the most direct and discreet path to minimize cable visibility and potential damage.
- Measure cable length: Measure the distance between the main recording location and each camera to determine the required cable length. Add some extra length for flexibility and any unexpected obstacles.
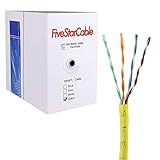
- Choose cable type: Select the appropriate CAT5 or CAT6 cable for the installation. Consider factors such as the maximum cable length supported, whether it needs to be shielded or unshielded, and the outdoor or indoor use.
- Plan cable management: Decide how to manage and organize the cables to maintain a neat and professional installation. This may involve using cable trays, conduits, or cable clips to secure the cables.
- Check power source: Ensure there is a reliable power source near each camera location. If needed, plan for the installation of power outlets or consider using power-over-ethernet (PoE) cameras.
- Consider connectivity: Determine how the security cameras will be connected to the network or recording device. This may involve adding a network switch or configuring wireless connectivity.
- Review local regulations: Familiarize yourself with any local building codes or regulations related to security camera installations. Ensure compliance with privacy laws and obtain any necessary permissions.
By taking the time to plan the installation process, you can ensure that the additional security camera CAT5 wiring is installed effectively and meets your surveillance needs.
Gathering the necessary tools and materials
Before you start adding additional security camera Cat5 wiring, it’s important to gather all the necessary tools and materials. Having everything on hand will make the installation process much smoother and more efficient. Here’s a list of what you’ll need:
- Cat5 Ethernet cable
- Wire strippers
- Network connectors (RJ45)
- Crimping tool
- Drill with appropriate drill bits
- Wall plates
- Screwdriver
- Tape measure
- Stud finder
- Fish tape or wire-pulling tool
- Power drill
- Ladder or step stool (if necessary)
- Camera mounting bracket or hardware
- Camera power supply
- Camera monitor or DVR system
- Cable clips or tie wraps
Make sure to double-check your camera and security system specifications to ensure you have all the necessary tools and materials for your specific setup. Once you have everything ready, you can move on to the next steps in adding additional security camera Cat5 wiring.

Identifying the camera locations
Before starting the process of adding additional security camera CAT5 wiring, it is important to identify the locations where the cameras will be installed. This step will help determine the length of CAT5 cable needed and ensure that each camera is properly positioned for maximum security coverage.
Start by assessing the areas that require surveillance. Look for vulnerable entry points such as doors, windows, and any other potential points of intrusions. Additionally, consider areas that are more prone to theft or vandalism, such as parking lots, storage areas, or outdoor facilities.
Measure the distances between each camera location and the central point where the security system will be installed. This will help determine the total length of CAT5 cable needed for the project. Be sure to add extra length to each measurement to allow for any unexpected obstacles or changes in placement during the installation process.
Label each camera location with a unique identifier, such as numbers or letters, to make it easier to reference during the wiring process. This will help ensure that each camera is correctly connected to the corresponding port on the central system.
Consider factors such as lighting conditions and camera visibility when determining the camera locations. Avoid placing cameras in areas with glare from direct sunlight or in spots where the camera view may be obstructed by objects or vegetation. It is also important to position the cameras at angles that provide the best possible field of view to capture any potential threats.
By taking the time to carefully identify the camera locations, you can ensure that the additional security camera CAT5 wiring is installed in the most effective and efficient manner. This will provide enhanced security and peace of mind for your property and its occupants.
Running the cat5 cables
Before running the cat5 cables, it is important to plan the path they will take to ensure proper installation and functionality. Here is a step-by-step guide for running the cat5 cables:
Gather the necessary tools and materials
Before starting the installation, make sure you have all the tools and materials needed. This includes cat5 cables of the required length, RJ45 connectors, a crimping tool, a network tester, wire cutters, and a screwdriver.
Plan the cable route
Determine where you want to install your security cameras and plan the cable route accordingly. Take into consideration the distance between the cameras and the monitoring station, as well as any obstacles that may be in the way.
Measure and cut the cables
Measure the length of the cable route and cut the cat5 cables accordingly. It is recommended to leave some extra length to allow for any unforeseen obstacles or changes in the layout.
Begin running the cat5 cables along the planned route. Use cable clips or other appropriate fasteners to secure the cables in place and prevent them from getting tangled or damaged.
Once the cables are in place, connect one end of each cable to the security camera and the other end to the monitoring station. Use RJ45 connectors and a crimping tool to make the connections secure.
After all the cables are connected, use a network tester to test the connections and ensure that everything is working properly. This will help identify any issues or faults that need to be addressed before completing the installation.
Once the cables are properly installed and tested, secure and organize them using cable ties or other suitable methods. This will help maintain a neat and professional appearance while also preventing any accidental damage or disconnection.
By following these steps, you can safely and effectively run cat5 cables for your additional security cameras.
Mounting the cameras securely
When it comes to adding additional security camera CAT5 wiring, it is essential to mount the cameras securely to ensure optimal performance and surveillance coverage. Here are the steps to mount the cameras securely:
1. Choose the right mounting location
Before mounting the cameras, carefully choose the right location for each camera. Consider the areas that require surveillance coverage and ensure that the cameras have an unobstructed view of those areas.
2. Gather the necessary tools
Make sure you have the necessary tools before starting the mounting process. You will need a power drill, screws, a screwdriver, and a ladder or step stool if the cameras need to be mounted at a higher position.
3. Install mounting brackets
Most security cameras come with mounting brackets. Attach the brackets to the desired location using the power drill and screws. Make sure the brackets are stable and securely fastened to the wall or ceiling.
4. Attach the cameras
After the mounting brackets are in place, attach the cameras to the brackets. Follow the instructions provided by the camera manufacturer to securely attach the cameras to the brackets. Double-check that the cameras are firmly attached and not loose.
5. Adjust the camera angles
Once the cameras are attached, adjust their angles to ensure the desired surveillance coverage. Use the rotational capabilities of the cameras to position them correctly. Test the cameras’ views by monitoring the live feed on a connected device.
6. Conceal the wiring
To maintain a clean and professional installation, conceal the CAT5 wiring. Use cable clips or wire channels to hide the wiring along the wall or ceiling. Avoid placing the wiring in areas where it may be easily accessible or prone to damage.
By following these steps, you can ensure that your additional security cameras are securely mounted, providing effective surveillance and peace of mind.
Terminating the cat5 cables
Terminating the cat5 cables is an essential step in adding additional security camera wiring. Properly terminating the cables ensures a reliable and secure connection between the cameras and the recording device.
Tools and materials needed:
- Wire cutters/strippers
- RJ45 connectors
- Crimping tool
- Ethernet tester (optional)
Steps to terminate cat5 cables:
- Start by stripping the outer jacket of the cat5 cable, using wire cutters or strippers. Be careful not to damage the internal wires.
- Arrange the internal wires according to the T568B wiring standard, which is commonly used for Ethernet connections. The order of the wires should be: orange-white, orange, green-white, blue, blue-white, green, brown-white, brown.
- Trim the wires to ensure they are all of equal length, and then insert them into the RJ45 connector. Make sure each wire goes into its corresponding slot in the connector.
- Once the wires are properly inserted, use a crimping tool to firmly secure the RJ45 connector onto the cat5 cable. Apply enough pressure to ensure a secure and reliable connection.
- Repeat the above steps for each end of the cat5 cable.
After terminating the cat5 cables, it is recommended to test the connections using an Ethernet tester. This will help ensure that each camera is properly connected and transmitting data to the recording device.
Testing the Camera Connection and Functionality
Once you have finished adding the additional security camera cat5 wiring, it is important to test the camera connection and functionality to ensure everything is functioning properly. Here are the steps to follow:
-
Power on the Camera and Check for Lights
Make sure the camera is properly powered on. Check for any indicator lights on the camera to ensure it is receiving power.
-
Connect the Camera to the DVR or Monitoring Device
Connect the Ethernet cable from the camera to the appropriate port on the DVR or monitoring device.
-
Access the Camera’s Interface
Open a web browser on a computer connected to the same network as the camera. Enter the camera’s IP address into the browser’s address bar. This will allow you to access the camera’s interface.
-
Check the Live Feed
Once you have accessed the camera’s interface, look for a live feed of the camera’s view. Make sure the feed is clear and there are no issues with the video quality.
-
Test Camera Functions
Try out different camera functions, such as panning, tilting, and zooming (if applicable). Also, test any other features that the camera may have, such as motion detection or night vision.
-
Review Recording and Storage
If your camera is set up for recording, review the recorded footage to ensure it is being properly stored and accessible.
By following these steps, you can ensure that the additional security camera cat5 wiring has been successfully installed and the camera is functioning correctly.
Organizing and managing the wiring
When adding additional security camera Cat5 wiring, it is important to properly organize and manage the cables to ensure a clean and efficient installation. Here are some tips for organizing and managing your wiring:
- Plan and map out your wiring: Before starting the installation, plan out the locations and routes for your security camera Cat5 wiring. This will help you determine the length of cable you need and the best path to run the cables.
- Use cable management solutions: Utilize cable management solutions such as cable ties, clips, and raceways to secure and organize your wiring. These solutions help keep the cables neat and prevent them from becoming tangled or damaged.
- Label your cables: Labeling your cables can greatly simplify maintenance and troubleshooting in the future. Use cable labels or markers to clearly identify each cable and its purpose.
- Create a structured cabling system: Organize your wiring into structured bundles or groups based on their purpose or location. This will make it easier to identify and manage specific cables when needed.
- Keep cables away from power sources: To avoid interference and ensure reliable performance, keep your security camera Cat5 wiring separate from power cables. Cross them at right angles whenever possible to minimize the risk of interference.
- Use surge protection devices: Install surge protection devices to safeguard your security camera system from power surges and lightning strikes. This will help protect both the cameras and the wiring from potential damage.
- Regularly inspect and maintain your wiring: Periodically inspect your wiring to check for any signs of wear, damage, or loose connections. Clean and organize your cables as needed to maintain a tidy and efficient setup.
By following these tips, you can ensure that your additional security camera Cat5 wiring is properly organized and managed, providing you with a reliable and secure surveillance system.
FAQ,
Why should I consider adding additional security camera cat5 wiring?
Adding additional security camera cat5 wiring can help to enhance the coverage and effectiveness of your security camera system. This allows you to have more cameras in different areas of your property, providing better surveillance and reducing blind spots.
What is the process of adding additional security camera cat5 wiring?
The process of adding additional security camera cat5 wiring involves several steps. First, you need to determine the areas where you want to install the additional cameras. Then, you need to plan the cable routing and make sure you have the necessary tools and materials, including the cat5 cables, connectors, and a crimping tool. Next, you need to run the cables through walls, ceilings, or conduits, and connect them to the cameras and the recording device. Finally, you need to test the connections and make any necessary adjustments.
What are the basic tools and materials required for adding additional security camera cat5 wiring?
The basic tools and materials required for adding additional security camera cat5 wiring include cat5 cables, connectors (RJ45), a crimping tool, a cable tester, a power drill, a fish tape or wire puller, a screwdriver, mounting brackets or housings for the cameras, and cable clips or zip ties for cable management.
Can I add additional security camera cat5 wiring to an existing system?
Yes, you can add additional security camera cat5 wiring to an existing system. You need to make sure that the recording device has enough ports to connect the additional cameras. If not, you may need to use a network switch with Power over Ethernet (PoE) support to expand the number of available ports.
What are some tips for running cat5 cables when adding additional security camera wiring?
When running cat5 cables for additional security camera wiring, it is important to plan the cable routing carefully to minimize visible cables and potential hazards. Some tips include using conduits or cable raceways to hide the cables, using cable clips or zip ties to secure the cables along walls or ceilings, and using a fish tape or wire puller to guide the cables through tight spaces or inside walls. It is also recommended to label or color-code the cables to easily identify their purpose or destination.


