Streamlabs is a powerful tool for live streaming and content creation, allowing users to customize their stream with various overlays, alerts, and widgets. One popular feature of Streamlabs is the ability to add different sources to your stream, such as webcams, microphones, and video game footage. But what if you want to add your GoPro camera to your stream?
Adding a GoPro camera to Streamlabs can enhance your live streaming experience, allowing you to capture high-quality, action-packed footage from unique angles. Whether you’re live streaming an adrenaline-fueled outdoor adventure or showcasing your skills in an extreme sport, incorporating your GoPro camera into your stream can take it to the next level.
To add your GoPro camera to Streamlabs, you will need to use a capture card. A capture card acts as a bridge between your GoPro camera and your computer, allowing you to capture and stream the camera’s video feed in real-time. Make sure to choose a capture card that is compatible with both your GoPro camera and your computer’s operating system.
Once you have your capture card, connect your GoPro camera to it using an HDMI cable. Then, connect the capture card to your computer using a USB cable. Launch Streamlabs and go to the settings menu. Navigate to the “Sources” tab and click on the “+” button to add a new source. Select “Video Capture Device” from the list of options.

In the settings for the video capture device, choose the capture card as the device and adjust any other settings as needed. You can also use this menu to enable or disable audio capture from your GoPro camera. Once everything is set up, click “OK” to add the GoPro camera as a source in Streamlabs.
Now, you can resize and position the GoPro camera feed within your stream layout, just like any other source in Streamlabs. You can also add additional overlays or effects to enhance the visuals from your GoPro camera. Experiment with different layouts and angles to find the setup that works best for your stream.
With your GoPro camera added to Streamlabs, you can now start live streaming with the high-quality footage and the unique perspective it provides. Whether you’re live streaming gaming, vlogging, or any other type of content, adding a GoPro camera can take your stream to the next level and captivate your audience.
Adding GoPro Camera to Streamlabs
If you want to enhance your live streams or recordings with the stunning visuals captured by your GoPro camera, you can easily add it to Streamlabs. Streamlabs is a powerful streaming software that allows you to integrate various devices and sources into your live streams or video recordings.
Step 1: Prepare Your GoPro Camera
Before you begin the integration process, make sure your GoPro camera is properly set up and connected to your computer. Ensure that the camera is powered on and functioning correctly.
Step 2: Install Streamlabs
If you haven’t already, download and install Streamlabs on your computer. Streamlabs is compatible with both Windows and macOS operating systems. Once the installation is complete, launch the software and log in to your Streamlabs account.
Step 3: Add GoPro Camera as a Video Source
In Streamlabs, click on the “Sources” tab located in the lower-left corner of the interface. Then, click on the “+” icon to add a new source. From the dropdown menu, select “Video Capture Device.”
A new window will appear. In the “Device” dropdown menu, choose your GoPro camera from the list of available devices. You can also adjust the resolution and frame rate settings according to your preferences.
Once you’ve configured the settings, click on the “OK” button to add the GoPro camera as a video source in Streamlabs.
Step 4: Customize the GoPro Camera Source
After adding the GoPro camera as a video source, you can customize its properties. Right-click on the newly added source in the Sources panel and select “Properties.”

In the properties window, you can make adjustments to the video settings such as brightness, contrast, and saturation. You can also crop the video or apply filters to enhance the visuals captured by your GoPro camera.
Once you’ve made all the desired adjustments, click on the “OK” button to save the changes.
Step 5: Start Streaming or Recording
Now that you’ve successfully added and customized your GoPro camera source in Streamlabs, you can start streaming your live content or hit the record button to start recording your videos.
Make sure to test your setup before going live or recording important content to ensure everything is working as expected.
With your GoPro camera added to Streamlabs, you can now enjoy the outstanding visuals it captures and take your live streams or video recordings to the next level!

Required Equipment and Software
Before you can add your GoPro camera to Streamlabs, you will need to have the following equipment and software:
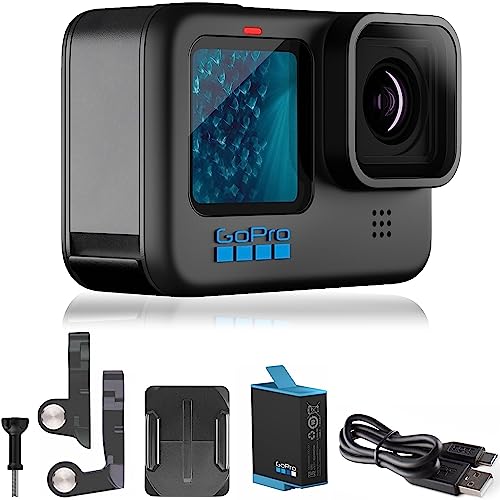
1. GoPro Camera
You will need a GoPro camera to capture the video footage that you want to stream. Make sure that your camera is in good working condition and is capable of live streaming.
2. Computer
You will need a computer to connect your GoPro camera and run the necessary software. Make sure that your computer meets the minimum system requirements for streaming and that it has a USB port to connect your GoPro camera.
3. USB Cable
You will need a USB cable to connect your GoPro camera to your computer. Make sure that the cable is compatible with your GoPro camera and that it is in good working condition.
4. Streamlabs OBS
You will need to download and install Streamlabs OBS on your computer. Streamlabs OBS is a free and popular streaming software that allows you to customize your stream and overlay graphics, as well as add sources like your GoPro camera.

5. GoPro Webcam Utility
To use your GoPro camera as a webcam with Streamlabs OBS, you will need to download and install the GoPro Webcam Utility. This software allows you to connect your GoPro camera to your computer and use it as a video source in streaming applications like Streamlabs OBS.
6. Power Source
Make sure that your GoPro camera is fully charged or connected to a power source during the streaming session. Streaming can use up a lot of battery, so it is important to have a reliable power source to avoid any interruptions during your stream.
Once you have all the necessary equipment and software, you can proceed to the next steps to add your GoPro camera to Streamlabs.
Connecting GoPro Camera to Computer
If you want to add your GoPro camera to Streamlabs, you first need to connect it to your computer. Here are the steps to do it:
|
Step 1:
AKASO Brave 4 Pro 4K30FPS Action Camera - 131ft Underwater Camcorder Waterproof Camera with Touch...
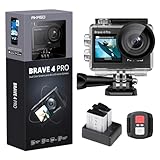
$109.99
4 new from $109.99
1 used from $90.67
as of April 9, 2024 5:08 am
Amazon.com
|
Make sure your GoPro camera is turned on and in the appropriate mode for streaming. For example, if you want to stream using OBS Studio, set your camera to Video mode. |
|
Step 2: |
Using a micro HDMI cable, connect your GoPro camera to your computer. One end of the cable should be inserted into the HDMI port on your camera, while the other end goes into an available HDMI input on your computer. |
|
Step 3: |
Once the connection is established, your computer should recognize the GoPro camera as a video source. You may need to install the necessary drivers or software provided by GoPro. |
|
Step 4: |
In Streamlabs or any other streaming software, select the GoPro camera as the video source. You should now be able to preview the camera feed and include it in your stream. |
|
Step 5: |
Adjust the settings in Streamlabs to optimize the GoPro camera output for your stream. You can modify the resolution, frame rate, and other parameters according to your preferences. |
By following these steps, you can successfully connect your GoPro camera to your computer and start using it in Streamlabs for streaming purposes.

Launching Streamlabs
Once you have set up your GoPro camera and ensured it is connected to your computer, you can launch Streamlabs to start adding it to your stream.
Follow these steps to launch Streamlabs:
| Step 1 | Open the Streamlabs application on your computer. |
| Step 2 | Enter your Streamlabs credentials to log in to your account. If you don’t have an account, you can create one by clicking on the “Sign Up” button. |
| Step 3 | After logging in, the Streamlabs dashboard will appear. This is where you can customize your stream and add different sources, such as your GoPro camera. |
Now that you have successfully launched Streamlabs, you are ready to proceed with the next steps to add your GoPro camera to your stream.
Adding GoPro Camera as a Video Source
If you have a GoPro camera and want to use it as a video source in Streamlabs, you can easily achieve that by following these simple steps:
Step 1: Connect your GoPro Camera
First, make sure your GoPro camera is fully charged and turned on. Connect it to your computer using the USB cable that came with the camera.
Step 2: Install GoPro Webcam Utility
Next, visit the GoPro website and download the GoPro Webcam Utility software. Install the software on your computer by following the on-screen instructions.
Step 3: Enable Webcam Mode on your GoPro Camera
Now, enter the Webcam Mode on your GoPro camera. To do this, power on your camera and swipe down on the back screen. Select the “Preferences” option, then select “Camera” and scroll down to find “USB Connection” and choose “GoPro Connect”.
Step 4: Open Streamlabs and Add GoPro as a Video Source
Launch Streamlabs on your computer and go to the “Sources” tab. Click on the “+” icon and select “Video Capture Device” from the drop-down menu. Name the new source as GoPro or any other name you prefer, and click “OK”. In the next window that appears, select “GoPro Camera” from the “Device” drop-down menu and click “OK”.
That’s it! You have successfully added your GoPro camera as a video source in Streamlabs. You can now use it to record or stream your content with ease!
Adjusting Video Settings in Streamlabs
Once you have successfully added your GoPro camera to Streamlabs, you may want to adjust the video settings to ensure the best streaming experience. Here are the steps to do so:

- Open Streamlabs: Launch Streamlabs on your computer and log in to your account.
- Go to Settings: Click on the gear icon at the top right corner of the Streamlabs window to open the settings menu.
- Select Video: In the settings menu, select the “Video” tab.
- Choose GoPro Camera: Under the “Camera” section, choose your GoPro camera from the drop-down menu. Make sure your GoPro camera is connected and powered on.
- Adjust Video Quality: Use the sliders under the “Video Quality” section to adjust the brightness, contrast, saturation, and sharpness of the video feed from your GoPro camera. It is recommended to experiment with these settings to find the desired look for your stream.
- Configure Resolution and FPS: Under the “Resolution” section, choose the desired resolution and frames per second (FPS) for your stream. The available options may vary based on the capabilities of your GoPro camera.
- Apply Changes: Once you have made the desired adjustments, click on the “Apply” button to save the changes.
By following these steps, you can easily adjust the video settings in Streamlabs to optimize your stream quality when using your GoPro camera.
Testing GoPro Camera Stream
Before adding your GoPro camera to Streamlabs, it is essential to test the camera stream to ensure it works correctly. Follow the steps below to test your GoPro camera stream:
- Make sure your GoPro camera is powered on and connected to your computer via USB.
- Open a web browser and navigate to the GoPro camera’s live stream URL. This URL can usually be found in the camera’s settings or user manual.
- If prompted, enter the username and password for your GoPro camera’s live stream.
- Once you have accessed the live stream URL, you should see a video feed from your GoPro camera. Check if the video quality and frame rate are satisfactory.
- Try switching between different modes and settings on your GoPro camera to see if the live stream updates accordingly.
- Check if there are any delays or lags in the live stream. If there are, try adjusting the camera settings or your internet connection to improve the stream’s performance.
- Test different scenarios, such as moving the camera, changing lighting conditions, or zooming, to assess the stream’s stability and quality in various situations.
- Pay attention to any error messages or issues that may occur during the test. Take note of these issues so you can troubleshoot them when adding the camera to Streamlabs.
By thoroughly testing your GoPro camera stream, you can ensure its reliability and performance when integrating it with Streamlabs for your streaming needs.
Configuring Audio for GoPro Camera Stream
When adding your GoPro camera to Streamlabs, it’s important to configure the audio settings properly to ensure high-quality sound during your streams. Follow the steps below to set up the audio for your GoPro camera stream:
Step 1: Connect Your GoPro Camera
Make sure your GoPro camera is connected to your computer via USB or using a capture card. Ensure that the camera is properly recognized by your computer before proceeding to the next steps.
Step 2: Choose the GoPro Camera as Audio Input
Open Streamlabs on your computer, and go to the settings menu. In the settings, navigate to the audio section. Under the audio input dropdown menu, select your GoPro camera as the desired audio source for your stream.
Note: The name of your GoPro camera may vary depending on the model and settings.
Step 3: Adjust Audio Levels
After selecting your GoPro camera as the audio input source, you may need to adjust the audio levels to ensure optimal sound quality. Use the audio mixer in Streamlabs to control the volume levels of your GoPro camera’s audio.
Tip: It’s recommended to do a test stream and monitor the audio levels during playback to make any necessary adjustments.
Step 4: Enable Audio Monitoring
To monitor the audio from your GoPro camera while streaming, enable audio monitoring in Streamlabs. This will allow you to hear the audio in real-time and make any adjustments if needed.
Important: Make sure to use headphones or an external speaker to avoid audio feedback or echo.
By following these steps, you can configure the audio settings for your GoPro camera stream in Streamlabs. Remember to test your setup before going live to ensure everything is working correctly.
Optimizing Video Quality and Performance
To ensure the best quality and performance when using a GoPro camera with Streamlabs, follow these tips:
1. Check and update your GoPro firmware:
Make sure your GoPro camera is running the latest firmware version. Check the GoPro website for any available updates and install them before starting your streaming session.
2. Use a compatible capture card:
Connect your GoPro camera to your computer using a capture card that is compatible with both the camera and Streamlabs. This will allow for the best video quality and low latency streaming.
3. Set the correct video settings on your GoPro:
Configure your GoPro camera to the appropriate video settings for streaming. Set the resolution, frame rate, and other settings according to your preference and the requirements of your streaming platform.
4. Optimize your computer settings:
Ensure that your computer is capable of handling the video streaming process. Close any unnecessary programs or applications that may use up system resources. Adjust the power settings to prioritize performance over battery life.
5. Properly mount and position your GoPro camera:
Mount your GoPro camera securely and position it at the desired angle and distance for your stream. Consider using a tripod or other stabilizing equipment to minimize camera shake and ensure a steady video feed.
6. Test the video quality and performance:
Before going live, perform a test stream to ensure that the video quality and performance are satisfactory. Make any necessary adjustments to the camera settings or streaming configuration to achieve the desired results.
7. Monitor your stream and make adjustments as needed:
During your stream, keep an eye on the video quality and performance. If you notice any issues such as lag, frame drops, or poor image quality, adjust the camera or streaming settings accordingly to improve the overall experience for your viewers.
By following these optimization tips, you can enhance the video quality and performance when using a GoPro camera with Streamlabs, providing your audience with a smooth and enjoyable streaming experience.
Tips and Troubleshooting
If you are having trouble adding your GoPro camera to Streamlabs, consider following these tips and troubleshooting steps:
1. Ensure that your GoPro camera is connected properly to your computer via USB. Make sure that the camera is turned on and in the correct mode for streaming.
2. Check if your computer recognizes the GoPro camera. Go to the Device Manager on your computer and look for any warnings or errors related to the camera. If there are any issues, try uninstalling and reinstalling the GoPro drivers.
3. Verify that your GoPro camera is compatible with Streamlabs. Double-check the Streamlabs website or user manual to confirm that your specific model is supported.
4. Make sure that you have the latest version of Streamlabs installed on your computer. Check for any available updates and install them if necessary.
5. Try using a different USB cable or port. Sometimes, connectivity issues can be resolved by using a different cable or connecting to a different USB port on your computer.
6. Restart both your GoPro camera and your computer. Sometimes, a simple restart can resolve any temporary issues or conflicts.
7. If you are still experiencing issues, it may be helpful to reach out to the Streamlabs support team or the GoPro customer support for further assistance. They may be able to provide specific troubleshooting steps based on your situation.
By following these tips and troubleshooting steps, you should be able to successfully add your GoPro camera to Streamlabs and start streaming with it.
Question-answer:
What is Streamlabs?
Streamlabs is a popular streaming software that allows users to broadcast their live streams on platforms like Twitch, YouTube, and Facebook.
Why would I want to add a GoPro camera to Streamlabs?
Adding a GoPro camera to Streamlabs can enhance the production value of your live streams. A GoPro camera offers high-quality video and wide-angle shots, making it ideal for capturing action-packed content.
How can I connect my GoPro camera to Streamlabs?
To connect your GoPro camera to Streamlabs, you will need to use a capture card or a video capture device. Connect the HDMI output of your GoPro to the input of the capture card, and then connect the capture card to your computer. Once connected, you can select the GoPro as a video source in Streamlabs.
Are there any specific settings I need to adjust in Streamlabs to use a GoPro camera?
Yes, there are some settings you may need to adjust in Streamlabs to use a GoPro camera. You will need to go to the “Settings” menu in Streamlabs and select “Video.” From there, you can choose the resolution and frame rate of your GoPro camera. Make sure to match the settings in Streamlabs with the settings on your GoPro for optimal performance.
Can I use multiple GoPro cameras with Streamlabs?
Yes, you can use multiple GoPro cameras with Streamlabs by connecting each camera to a separate capture card or video capture device. In Streamlabs, you can then select each camera as a separate video source and switch between them during your live streams.


