
If you want to enhance the security of your home, adding a security camera to your Alexa smart home system can be a great choice. By integrating a security camera with Alexa, you can easily access and monitor your camera’s feed using voice commands and the Alexa app. Whether you want to keep an eye on your home while you’re away or simply want to have an extra layer of security, setting up a security camera with Alexa is a straightforward process.
The first step is to ensure that your security camera is compatible with Alexa. Most popular security camera brands such as Ring, Arlo, and Nest offer compatibility with Alexa. You can check the manufacturer’s website or product documentation to confirm if your camera is Alexa-compatible. Once you have confirmed compatibility, you can proceed with the setup process.
To add a security camera to Alexa, open the Alexa app on your smartphone or tablet. If you don’t have the app, you can download it for free from the App Store or Google Play Store. In the app, go to the “Devices” tab and click on the “+” icon to add a new device. Select “Camera” from the options and follow the on-screen instructions to connect your security camera to Alexa.
During the setup process, you may be prompted to install the manufacturer’s app for your security camera. This app is usually required to connect and configure the camera. Follow the instructions provided by the manufacturer to install and set up the app. Once the app is installed, you can link it with your Alexa account through the Alexa app. This allows you to control and access your camera’s feed using Alexa voice commands or the Alexa app.
Once your security camera is successfully linked with Alexa, you can use voice commands such as “Alexa, show me the living room camera” to view the live feed on any Alexa-enabled device with a screen. You can also create routines or smart home automation scenarios to integrate your security camera with other Alexa-compatible devices. For example, you can set up a routine that turns on the lights and starts recording when motion is detected by the camera.

Adding a security camera to Alexa can greatly enhance your home security and provide you with peace of mind. By following these steps and ensuring compatibility, you can easily integrate your security camera with the Alexa smart home system and enjoy the convenience of controlling and accessing your camera’s feed using voice commands.
What is Alexa?
Alexa is the intelligent personal assistant developed by Amazon. It is capable of voice interaction, music playback, making to-do lists, setting alarms, providing real-time information, and more. Alexa uses natural language understanding and machine learning to respond to voice commands and perform tasks.
With Alexa, you can control various smart devices in your home, including security cameras. By connecting your security camera to Alexa, you can monitor your home or office from anywhere using just your voice. Alexa provides a convenient and hands-free way to access the live feed of your security camera and receive alerts for any suspicious activities.
Adding a security camera to Alexa requires setting up the device using the manufacturer’s instructions and enabling the corresponding Alexa skill. Once the camera is connected to Alexa, you can use voice commands to view the camera feed on compatible devices, such as an Amazon Echo Show or a Fire TV.
With the integration of security cameras and Alexa, you can enhance the security of your premises and have peace of mind knowing that you can easily access and monitor your camera feed using the power of voice control.
What are security cameras?
Security cameras, also known as surveillance cameras or CCTV cameras, are devices that capture and record video footage of a specific area or location. These cameras are commonly used for monitoring and providing surveillance in both residential and commercial settings.
Security cameras are an integral part of any robust security system. They act as additional eyes on the premises and can deter criminal activities, as well as provide valuable evidence in case of any incidents. With advancements in technology, modern security cameras have become more sophisticated, featuring high-definition video recording, motion detection, night vision capabilities, and remote access.
When installed strategically, security cameras can cover various areas such as entrances, hallways, parking lots, and outdoor spaces, enhancing overall security and peace of mind. They can be wired or wireless, with the latter offering more flexibility in terms of installation and placement.
In recent years, security cameras have also become compatible with voice assistants like Amazon Alexa. This integration allows users to view live video feeds or recorded footage from their security cameras using voice commands. By adding security cameras to Alexa, users can conveniently monitor their surroundings and ensure the safety of their homes or businesses.
Step 1: Choose the right security camera
Choosing the right security camera is an important first step in adding it to Alexa. There are several factors to consider when making your decision.

1. Indoor or outdoor: Determine whether you need a camera for indoor or outdoor surveillance. Outdoor cameras should be weatherproof and able to withstand the elements.
2. Wired or wireless: Decide whether you want a wired or wireless camera. Wired cameras provide a more stable connection, while wireless cameras offer easier installation and flexibility in placement.
3. Resolution: Consider the camera’s resolution. Higher resolution cameras will provide clearer images and better details.
4. Field of view: Determine the field of view you require. Some cameras offer a wide-angle lens, allowing you to monitor a larger area.
5. Night vision: Decide whether you need a camera with night vision capabilities. This is essential for monitoring in low light or at night.

6. Two-way audio: Consider whether you want a camera with two-way audio capability. This allows you to communicate with people near the camera.
7. Smart features: Look for cameras that offer additional smart features, such as motion detection, facial recognition, and integration with other smart home devices.
8. Compatibility: Make sure the camera you choose is compatible with Alexa. Check if it supports Alexa Skills or has a dedicated Alexa skill for seamless integration.
Take your time to research and compare different security cameras before making a decision. It’s important to choose a camera that meets your specific surveillance needs and works well with your Alexa device.
Consider your needs
Before adding a security camera to Alexa, it is important to consider your specific needs and requirements. There are a few key factors to consider:

1. Location
Think about where you want to install the security camera. Is it an indoor or outdoor camera? Do you need a camera that can be mounted on a wall or ceiling?
2. Coverage
Consider the coverage area you need. Are you looking to monitor a large outdoor space or just a small room? This will help determine the type and number of cameras you will need.
3. Features
Make a list of the features that are important to you. Do you need night vision capabilities? Two-way audio? Motion detection? Make sure the security camera you choose has the features that meet your needs.
By considering these factors, you can narrow down your options and choose a security camera that is compatible with Alexa and meets your specific requirements.
Research different brands
Before adding a security camera to Alexa, it’s important to research different brands to find the one that best suits your needs. Here are some popular brands to consider:

1. Ring
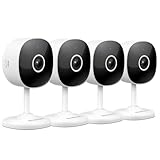
Ring is a well-known brand that offers a wide range of security cameras. One of their popular products is the Ring Spotlight Cam, which comes with built-in motion sensors and a siren alarm. Ring cameras can be easily integrated with Alexa, allowing you to control them with voice commands. They also offer cloud storage options for storing footage.
2. Arlo
Arlo is another popular brand known for its wireless security cameras. Their cameras offer HD video quality, motion detection, and night vision. Arlo cameras can be connected to Alexa for voice control and can also be integrated with other smart home devices. They offer both local and cloud storage options.
3. Nest
Nest is a brand that offers a range of security cameras, including indoor and outdoor options. Their cameras provide clear video quality, two-way audio, and advanced motion detection. Nest cameras can be controlled with Alexa and can also be integrated with other Nest products, such as thermostats and doorbells. They offer cloud storage options for storing footage.
When researching different brands, consider factors such as camera features, compatibility with Alexa, storage options, and pricing. Reading customer reviews and comparing specifications can help you make an informed decision about which brand and model to choose.
| Brand | Features | Compatibility with Alexa | Storage Options |
|---|---|---|---|
| Ring | Built-in motion sensors, siren alarm | Yes | Cloud storage |
| Arlo | HD video quality, motion detection, night vision | Yes | Local and cloud storage |
| Nest | Clear video quality, two-way audio, advanced motion detection | Yes | Cloud storage |
Step 2: Set up your security camera
Once you have selected a compatible security camera that works with Alexa, you can proceed with the setup process. Follow the steps below to set up your security camera:

| 1. | Start by downloading and opening the app that is associated with your security camera. This app will allow you to access and control your camera. |
| 2. | Follow the instructions provided by the app to create an account or log in to your existing account. |
| 3. | After logging in, navigate to the settings or device setup section of the app. |
| 4. | Choose the option to add a new device or camera to your account. |
| 5. | Make sure your security camera is powered on and connected to your Wi-Fi network. |
| 6. | Follow the on-screen instructions to connect your security camera to your Wi-Fi network. |
| 7. | Once connected, give your security camera a name or label for easy identification. |
| 8. | Enable any additional features or settings that you prefer, such as motion detection or notifications. |
| 9. | Verify that your security camera is now working properly within the app. |
After completing these steps, your security camera should be successfully set up and ready to connect to Alexa. Proceed to the next step to learn how to connect your security camera to Alexa.
Find a Suitable Location
When adding a security camera to Alexa, finding the right location for your camera is crucial to ensure optimal surveillance coverage. Here are a few things to consider when choosing a suitable location:
- Identify the areas you want to monitor: Start by determining the areas you want your security camera to cover. This could include entryways, hallways, or specific rooms.
- Ensure proper placement: Mount the camera at a height and angle that provides a clear view of the desired area while maximizing coverage. Avoid obstructions such as walls or trees that may hinder the camera’s line of sight.
- Consider lighting conditions: Take into account the lighting conditions of the chosen location. Ensure that there is adequate lighting for the camera to capture clear footage, especially during nighttime.
- Protect from weather elements: If you plan to install the camera outdoors, make sure it is weatherproof and resistant to elements such as rain, snow, or extreme temperatures.
- Secure the camera: Ensure that the location you choose for the camera provides sufficient security against vandalism or tampering.
- Check Wi-Fi signal strength: Place the camera within range of a strong Wi-Fi signal to ensure reliable connectivity with Alexa and avoid any potential connectivity issues.
By carefully considering these factors, you can find a suitable location for your security camera that maximizes its effectiveness and functionality when integrated with Alexa.
Connect the camera to power and/or Wi-Fi
Before you can use your security camera with Alexa, you’ll need to connect it to power and/or Wi-Fi. Here are the steps to do so:
1. Connect the camera to power:
First, locate the power adapter that came with your camera. Plug one end of the power adapter into the camera and the other end into a nearby power outlet. Make sure the camera is receiving power by checking for any indicator lights on the camera.
2. Connect the camera to Wi-Fi:
If your camera has built-in Wi-Fi capabilities, you’ll need to connect it to your home Wi-Fi network. Here’s how:
a. Open the camera’s app:
Launch the camera’s mobile app on your smartphone or tablet. If you haven’t installed the app yet, you can download it from your device’s app store.
b. Create an account or log in:
If this is your first time using the camera’s app, you’ll need to create an account. Follow the on-screen instructions to set up an account. If you already have an account, log in using your credentials.
c. Add your camera to the app:
Once you’re logged in, look for an option to add a new camera or device. Follow the app’s instructions to add your camera to the app. This usually involves scanning a QR code or selecting the camera model from a list.
d. Connect to your Wi-Fi network:
The app will prompt you to connect your camera to your home Wi-Fi network. Follow the app’s instructions to select your network and enter your Wi-Fi password. Once your camera is connected to the Wi-Fi network, you should see a confirmation message or indicator light on the camera.
With your camera now connected to power and Wi-Fi, you’re ready to proceed with setting up the camera with Alexa. This typically involves enabling the camera’s skill or integration in the Alexa app and linking your camera account. Refer to your camera’s user manual or the manufacturer’s website for specific instructions on how to do this.
Step 3: Connect your security camera to Alexa
Now that your security camera is set up and connected to your home network, it’s time to integrate it with Alexa for seamless monitoring and control.
To connect your security camera to Alexa, follow these steps:
- Open the Amazon Alexa app on your smartphone or tablet.
- Tap on the menu icon in the upper left corner of the screen.
- Select “Skills & Games” from the menu.
- Search for the manufacturer’s skill or app for your security camera and tap on it.
- Tap on the “Enable” button to enable the skill or app.
- Follow the on-screen instructions to link your security camera account to Alexa.
Once you have successfully linked your security camera to Alexa, you can use voice commands to view the camera feed on your Amazon Echo Show or Echo Spot. For example, you can say “Alexa, show me the living room camera” to view the live feed from your security camera.
In addition to live viewing, you can also use Alexa to control certain features of your security camera. For example, you can say “Alexa, turn off the kitchen camera” to disable the camera temporarily.
Remember to check the specific commands and features supported by your particular security camera manufacturer and skill or app. Some cameras may have additional capabilities such as motion detection or two-way audio that you can also control with Alexa.
With your security camera connected to Alexa, you can have peace of mind knowing that you can monitor and control your home’s security effortlessly using just your voice.
Enable the security camera skill
To add your security camera to Alexa, you need to enable the corresponding skill on your Alexa device. The skill allows Alexa to communicate with your security camera and access its features.
Here are the steps to enable the security camera skill:
Step 1: Open the Alexa app
Start by opening the Alexa app on your smartphone or tablet. Ensure that you have a stable internet connection as well.
Step 2: Go to the Skills & Games section
In the Alexa app, tap on the menu button at the top-left corner of the screen. From the menu, select the “Skills & Games” option.
Step 3: Search for the security camera skill
In the Skills & Games section, you will find a search bar at the top. Type in the name of the security camera skill you want to enable and tap on the search icon.
Step 4: Select and enable the skill
From the search results, find the security camera skill you want to use and select it. You will be taken to the skill’s details page. Tap on the “Enable” button to enable the skill on your Alexa device.
Step 5: Link your security camera account
After enabling the skill, you will be prompted to link your security camera account with Alexa. Follow the on-screen instructions to log in to your security camera account and authorize Alexa to access your camera’s video feed and other features.
Once you have successfully linked your account, you can now control your security camera using Alexa voice commands.
Note: The specific steps may vary depending on the brand and model of your security camera and the Alexa app version you are using. Always refer to the user manual or support documentation provided by the camera manufacturer for detailed instructions.


