
Security cameras are an essential tool for protecting your home or business from theft and vandalism. However, it’s important to ensure that your cameras are correctly positioned and angled to maximize their effectiveness. By adjusting the angle of your security cameras, you can eliminate blind spots and capture clear footage of any suspicious activity. In this article, we will guide you through the steps to adjust the angle of your security camera.
Step 1: Evaluate the Camera’s Field of View
Before you adjust the angle of your security camera, it’s crucial to assess its current field of view. Take a moment to observe the camera’s coverage area and identify any areas that are out of the camera’s line of sight. These blind spots can be potential vulnerabilities, so it’s important to adjust the angle to cover these areas.
Tip: If you’re unsure of the camera’s field of view, refer to the camera’s user manual or consult with a professional.
Step 2: Identify the Desired Coverage Area
Once you’ve assessed the camera’s current field of view, determine the desired coverage area. This may include entrances, driveways, parking lots, or any areas of particular concern. By focusing on these specific areas, you can ensure that your security camera is capturing the most crucial footage.
Tip: Consider the camera’s range and focal length when identifying the desired coverage area.
Step 3: Adjust the Camera’s Angle
With the desired coverage area in mind, it’s time to adjust the angle of your security camera. This can usually be done by loosening the camera’s mounting bracket and physically moving it to the desired position. As you adjust the angle, periodically check the camera’s live feed to ensure that the view is optimal and there are no more blind spots.
By following these steps, you can effectively adjust the angle of your security camera and optimize its coverage. Remember to periodically check your camera’s position to ensure it is still capturing the necessary footage. With the right angle, your security camera will serve as a valuable deterrent and provide you with peace of mind.

Understanding Security Camera Placement
When it comes to securing your property, one of the most important factors to consider is the placement of your security cameras. Proper camera placement can make a significant difference in the effectiveness of your surveillance system and can help deter potential intruders.
Consider the following factors when determining where to place your security cameras:
- Entrances and Exits: It is essential to have security cameras monitoring all entrances and exits to your property. This includes doors, windows, and any other potential points of entry. By capturing activity at these points, you can identify who is coming and going and detect any suspicious behavior.
- High-Risk Areas: Identify any high-risk areas on your property, such as the parking lot or storage areas. These areas are more prone to criminal activity and should be monitored closely. Placing security cameras in these locations can help you capture evidence if an incident occurs and provide valuable information to law enforcement if needed.
- Coverage and Overlapping: Ensure that your security cameras provide sufficient coverage of the areas you want to monitor. Avoid any blind spots where intruders could go undetected. It is also beneficial to have overlapping coverage between cameras to eliminate any potential blind spots and provide a more comprehensive view of the area.
- Height and Angle: The height and angle of your security cameras are crucial for capturing clear footage. Mount the cameras at a height that allows for a broad view of the area while ensuring they are out of reach from potential tampering. Adjust the angle of the cameras to focus on the desired area efficiently.
- Weather Conditions: Consider the weather conditions in your area when placing security cameras. Ensure that the cameras are protected from rain, snow, and direct sunlight, as these elements can affect the clarity of the footage. Use weatherproof cameras to withstand various weather conditions.
- Visibility: Consider whether you want your security cameras to be clearly visible or discreetly hidden. Visible cameras can act as a deterrent to potential intruders, while hidden cameras can provide covert surveillance. The choice depends on your specific security needs.
By carefully considering these factors and strategically placing your security cameras, you can maximize the effectiveness of your surveillance system and enhance the overall security of your property.
Importance of Proper Camera Angle
Having the proper camera angle is crucial when it comes to security cameras. It is not simply about pointing the camera in the right direction, but also about finding the optimal height and angle to maximize coverage and capture potential evidence. Here are a few reasons why the correct camera angle is important:
1. Enhanced Surveillance
By positioning security cameras at the correct angle, you can enhance your surveillance capabilities. A well-placed camera can provide a clear and comprehensive view of the area it is monitoring. This ensures that no blind spots or areas of importance are missed, improving the overall effectiveness of your security system.

2. Deterrence
The presence of security cameras is often enough to deter potential criminals. However, if the cameras are not correctly positioned, they may not be effective in deterring illegal activity. By adjusting the camera angle to cover the desired areas, you send a clear message that your property is monitored and protected.
Note: It is also important to ensure that the cameras are clearly visible to further enhance their deterrent effect.
3. Identification and Evidence Gathering
Proper camera angles are essential for capturing clear and identifiable images or video footage. Incorrect angles can result in distorted images or ommitting important details, making it difficult to identify individuals or gather reliable evidence. Adjusting the camera angle helps to ensure that potential intruders or incidents are captured accurately.
Tip: Consider the specific needs of each surveillance area when adjusting the camera angle. For example, place cameras at eye-level in entryways or cover blind spots with additional cameras.
Remember, the camera angle is a vital aspect of your security camera setup. Take the time to adjust and test different angles to find the best positioning for your specific needs. Proper camera angle can significantly enhance your overall security and provide peace of mind.

Factors to Consider for Ideal Camera Position
When adjusting the angle of your security camera, it’s important to take into account several factors to ensure the ideal camera position. These factors can greatly affect the effectiveness of your security system and provide the maximum coverage for your surveillance needs.
1. Field of View
The field of view is the area that the camera is capable of capturing and monitoring. It is important to position the camera in a way that covers the desired area without any blind spots. Consider the size and layout of the area you want to monitor and adjust the angle of the camera accordingly.
2. Height
The height at which the camera is mounted plays a significant role in capturing clear and useful footage. Mounting the camera too high can result in a broader view but may compromise the level of detail. Conversely, mounting it too low may limit the field of view. Find a balance that provides a clear view of the desired area while capturing sufficient detail.
3. Lighting Conditions
The lighting conditions in the area where the camera is positioned can greatly affect the quality of the footage. Ensure that the camera is not facing directly into a light source as it can result in washed-out images or glare. Additionally, consider the lighting conditions during different times of the day and adjust the camera’s position accordingly to optimize image quality.
4. Obstructions
Check for any potential obstructions that may impede the camera’s view. Trees, shrubs, or other objects can block the captured footage or trigger false alarms due to constant movements. Trim any foliage or move obstacles that may obstruct the camera’s line of sight to ensure clear and uninterrupted monitoring.

5. Privacy Concerns
Considering privacy concerns is important when positioning your security camera. Avoid pointing the camera towards private areas such as bedrooms, bathrooms, or personal spaces of others. Ensure that the camera only captures public areas or areas that require constant monitoring for security purposes.
6. Weatherproofing
If the camera is installed outside, it is crucial to consider the camera’s weatherproofing features. Ensure that the camera is protected from rain, snow, dust, or any extreme weather conditions that may damage the device or affect its performance. Adjust the camera’s angle to avoid exposure to direct rain or excessive sunlight.
By considering these factors, you can determine the ideal camera position that maximizes the efficiency and effectiveness of your security camera system. Regularly review and adjust the camera’s angle as needed to adapt to any changing conditions or monitoring requirements.
Tips for Adjusting Camera Angle
When it comes to setting up security cameras, the angle at which they are positioned plays a crucial role in capturing clear and effective footage. Here are some helpful tips for adjusting the camera angle:
1. Consider the Field of View
Before you start adjusting the camera angle, think about the area you want to monitor. Determine the field of view you want to capture, whether it’s a narrow view of a specific entry point or a wider view of an entire room. This will help you position the camera at the right angle to cover the desired area.

2. Aim for a Balanced Coverage
When positioning your security camera, try to achieve a balanced coverage by placing it at an angle that allows it to cover all important areas. Avoid extreme angles or pointing the camera towards a wall or ceiling, as this can limit its effectiveness. Find a position where you can capture both the entry points and the general area you wish to monitor.
Pro Tip: If you want to cover a larger area or multiple angles, consider installing multiple cameras to ensure comprehensive coverage.
3. Test the Camera Angle
Once you think you have the camera positioned correctly, take the time to test the angle. Monitor the live footage from the camera and make any necessary adjustments based on what you see. Look for blind spots, glare from lights, or obstructions that could hinder the camera’s coverage. This will help you fine-tune the camera’s angle for optimal performance.
Note: Make sure to follow the manufacturer’s instructions for adjusting the camera angle to avoid any damage to the device.
By following these tips, you can ensure that your security cameras are properly positioned to capture the footage you need and provide effective surveillance. Remember to regularly check and adjust the camera angle as needed to maintain optimal performance.

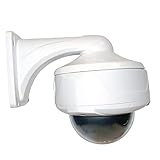
Using Camera Mounts
Camera mounts are a great tool to help you adjust the angle of your security camera. There are a variety of camera mounts available on the market, including wall mounts, ceiling mounts, and pole mounts.
When choosing a camera mount, it is important to consider the specific needs of your security camera. If you need to mount your camera on a wall, a wall mount would be the most suitable option. Wall mounts are designed to securely attach your camera to a wall and allow for easy adjustment of the camera’s angle.
If you need to mount your camera on a ceiling, a ceiling mount would be the best choice. Ceiling mounts are designed to securely attach your camera to the ceiling and allow for easy adjustment of the camera’s angle. They are ideal for surveillance in areas such as offices, retail stores, and warehouses.
Pole mounts are another option for mounting your security camera. Pole mounts are designed to securely attach your camera to a pole and allow for easy adjustment of the camera’s angle. They are commonly used for outdoor surveillance, such as in parking lots or around the perimeter of a building.
When installing a camera mount, it is important to follow the manufacturer’s instructions for proper installation and adjustment. It is also essential to ensure that the camera mount is securely attached to the wall, ceiling, or pole to prevent any unwanted movement or tampering.
By using camera mounts, you can easily adjust the angle of your security camera to achieve the desired field of view and maximize the effectiveness of your surveillance system.
Mounting Cameras Indoors
When it comes to mounting security cameras indoors, there are a few important factors to consider. The location and angle of the camera can greatly affect its effectiveness in monitoring your property. Here are some tips to help you properly mount your security cameras indoors:
1. Determine the optimal location
Before mounting your indoor security camera, assess the area you want to monitor. Look for areas that provide a clear view of the space you want to capture. It’s important to choose a location that is within the camera’s field of view and minimizes any obstructions, such as walls, furniture, or decorations.
2. Decide on the camera angle
Once you’ve determined the location, consider the angle at which the camera should be mounted. The camera angle will depend on the specific area you want to monitor and the camera’s capabilities. For example, if you want to monitor a hallway, it may be best to mount the camera high up on a wall, capturing a wider view of the area.
Alternatively, if you want to monitor a specific object or entrance, you may need to adjust the camera angle accordingly. Experiment with different angles to find the one that provides the best coverage and visibility for your needs.
3. Mount the camera securely
Once you’ve determined the optimal location and angle, it’s crucial to mount the camera securely. Use screws or brackets that are suitable for the surface you’re mounting the camera to, whether it’s a wall, ceiling, or shelf. Ensure the camera is tightly secured to prevent any accidental movement or tampering.
Pro tip: if you’re uncertain about the best location or angle, you may consider temporarily mounting the camera first to test the coverage and adjust as needed before permanently securing it in place.
Following these steps will help you effectively mount your security cameras indoors. Remember to also consider factors such as lighting and accessibility when choosing the camera’s location. With the right setup, you can ensure optimal security coverage and peace of mind.
Mounting Cameras Outdoors
Installing security cameras outdoors is a crucial step in protecting your property and keeping an eye on any suspicious activities. However, it’s important to properly mount the cameras to ensure optimal coverage and minimize any potential blind spots. Here are some guidelines to follow when mounting your outdoor security cameras:
1. Choose the right location:
Before mounting your cameras, carefully consider the areas that require surveillance. Look for high-traffic areas, entry points, and vulnerable spots around your property. Make sure there are no obstructions and that the cameras have a clear line of sight.
2. Position the cameras strategically:
To maximize the effectiveness of your outdoor security cameras, position them at a high vantage point, such as the eaves of your house or on top of poles. This will provide a broader field of view and reduce the risk of vandalism or tampering.
| Camera Positioning Tips: | Benefits: |
| Place cameras near the corners of your property | Wide coverage and multiple angles |
| Angle cameras downward | Clear view of entrances and lower areas |
| Avoid pointing cameras toward direct sunlight | Prevent glare or washed-out images |
3. Use weatherproof housing:
Outdoor security cameras are exposed to the elements, so it’s essential to choose models with weatherproof housing. This will protect the cameras from rain, snow, dust, and extreme temperatures, ensuring their longevity and performance.
4. Secure the cameras:
Once you’ve determined the ideal location, securely mount the cameras using the appropriate hardware. Avoid any loose or flimsy mounts that can be easily tampered with or knocked out of position.
5. Test the camera angle:
After installing the cameras, check the camera angle and adjust if necessary. You can use a live view from your surveillance system to ensure that important areas are well-covered and there are no blind spots.
By following these guidelines, you can ensure that your outdoor security cameras are properly mounted and positioned, providing you with the best possible surveillance coverage for your property.
Maintaining Privacy with Camera Angles
Maintaining privacy with security camera installations is an important consideration for both individuals and businesses. Properly adjusting camera angles can significantly enhance privacy while still ensuring effective surveillance. By being mindful of privacy concerns, you can maximize the security of your property while respecting the privacy of others.
1. Aim the Cameras Strategically
One way to maintain privacy with security cameras is to aim them strategically. Gently adjust the camera angles to capture the desired areas while minimizing the intrusion on neighbors’ properties or public spaces. By focusing on your property boundaries, you can avoid any unintentional invasion of privacy.
2. Avoid Wide-Angle Views
Avoid using wide-angle lenses on your security cameras. Wide-angle views can inadvertently capture areas beyond the intended surveillance space, increasing the risk of privacy violations. Instead, use narrower angles to concentrate the camera’s field of view on your property and specific surveillance areas.
Pro Tip: Consider installing multiple cameras with narrow angles strategically placed to cover different areas of your property effectively.
3. Use Privacy Filters
To enhance privacy, you can also install privacy filters on your security cameras. These filters can be added to the camera lens and limit the camera’s field of view. Privacy filters allow you to adjust and restrict what the camera can capture, ensuring that only necessary areas are monitored.
Note: Ensure that you are aware of any legal requirements or regulations regarding surveillance camera usage in your area.
By following these tips on camera angles, you can maintain privacy while still benefiting from effective security surveillance. Being mindful of privacy concerns not only respects the rights of others but also creates a safer and more secure environment for everyone involved.
Testing and Adjusting Camera Placement
Once you have installed your security camera, it is important to test and adjust its placement to ensure optimal coverage and effectiveness. Here are some steps to follow:
- Check for blind spots: Walk around the monitored area and identify any blind spots or areas that the camera may not be able to capture. These could be areas blocked by objects, such as trees or buildings, or areas with poor lighting.
- Adjust camera angle: Use the camera’s adjustable mount or bracket to change the angle of the camera. Aim the lens towards the desired area of coverage, making sure it is not pointing too high or too low. Aiming it slightly downward would ensure full coverage of the area.
- Test camera coverage: Once you have adjusted the camera angle, it is important to test its coverage. Ensure that the camera captures the intended area and any potential blind spots have been eliminated. Walk around the monitored area and verify that the camera captures the movements and activities you want to monitor.
- Check lighting conditions: Lighting conditions can greatly affect the performance of security cameras. Test the camera’s performance during different times of the day to ensure adequate lighting. If necessary, install additional lighting in poorly-lit areas to enhance the camera’s visibility.
- Monitor camera feed: After adjusting the camera placement, monitor the camera’s feed for a period of time to ensure it provides the desired results. Pay attention to any areas that may still need adjustment or improvements.
- Consider multiple cameras: Depending on the size and layout of the area you want to monitor, you may need to consider installing multiple cameras for comprehensive coverage. Test each camera individually and make sure they overlap slightly to avoid any blind spots.
By following these steps, you can ensure that your security camera is properly placed and adjusted to provide the best possible coverage and effectiveness in monitoring your property.
FAQ,
Why is it important to adjust the security camera angle?
It is important to adjust the security camera angle to ensure optimal coverage of the area you want to monitor. By adjusting the angle, you can eliminate blind spots and capture the best possible view of the target area.
How do I adjust the security camera angle?
To adjust the security camera angle, first locate the camera and determine its current angle. Use the mounting bracket or screws provided with the camera to loosen and adjust the angle. You may need to experiment with different angles to find the best position. Once you have adjusted the angle, tighten the screws or bracket to secure the camera in place.
What are some factors to consider when adjusting the security camera angle?
When adjusting the security camera angle, there are several factors to consider. First, consider the area you want to monitor and ensure the camera is positioned to capture the desired view. Second, consider the camera’s field of view and adjust the angle accordingly to eliminate blind spots. Finally, consider the mounting height of the camera and ensure it is at an appropriate level for capturing clear footage.
Are there any tips for fine-tuning the security camera angle?
Yes, here are some tips for fine-tuning the security camera angle. First, consider the lighting conditions of the area you want to monitor and adjust the angle accordingly to avoid glare or shadows. Second, test the camera’s view by monitoring the live feed and making adjustments as needed. Finally, consider the camera’s zoom capabilities and adjust the angle to maximize the zoom range if necessary.


