When it comes to securing your property, installing security cameras can be an effective deterrent against unwanted intruders. One common challenge, however, is finding the perfect location to mount your cameras. If you have trees on your property, attaching a security camera to a tree can be a great option.
Mounting a security camera to a tree offers several benefits. Firstly, it provides a higher vantage point, allowing for better surveillance coverage. Secondly, trees can offer a natural camouflage, making it more difficult for potential trespassers to notice the cameras. Lastly, mounting a camera to a tree is a relatively simple and cost-effective solution.
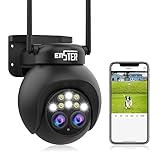
Before attaching a security camera to a tree, there are a few steps you should follow to ensure optimal placement and functionality. First and foremost, you should choose a suitable camera model that is designed for outdoor use and can withstand different weather conditions. Additionally, you should consider the line of sight and the field of view that the camera will have once mounted on the tree.
To attach the camera to the tree, you will need a few tools and supplies such as screws, brackets, and a drill. It is important to securely affix the camera to the tree to prevent it from falling or being tampered with. You should also aim for a location that provides a stable and solid surface for mounting.
By following these steps and considering all the necessary factors, you can successfully attach a security camera to a tree and enhance the security of your property. Remember to regularly check and maintain the camera’s positioning to ensure optimal performance and peace of mind.

Choosing the Right Security Camera for Trees
When it comes to attaching a security camera to a tree, choosing the right camera is crucial. Not all security cameras are designed to be mounted on trees, so it’s important to consider certain factors before making a purchase.
Here are some key considerations to keep in mind when selecting a security camera for trees:
- Weatherproofing: The security camera should be specifically designed to withstand outdoor conditions. Look for cameras that are weatherproof, dustproof, and have an IP65 or higher rating.
- Mounting options: Check if the camera comes with a mounting bracket or strap that can be easily attached to a tree. It’s also helpful if the camera has a wide pan and tilt range to ensure optimal viewing angles.
- Power source: Determine how the camera will be powered. Options include battery-operated cameras, solar-powered cameras, or cameras that need to be connected to a power source. Consider the availability of power supply near the tree.
- Camera features: Look for features that suit your needs, such as high-resolution video quality, night vision capabilities, motion detection, and two-way audio communication. These features can enhance the effectiveness of your outdoor surveillance system.
- Wireless connectivity: Consider whether you want a wireless camera or if you prefer one that requires a wired connection. Wireless cameras are generally easier to install and offer more flexibility in terms of camera placement.
By taking these factors into account, you can choose the right security camera that is specifically designed for mounting on trees. This will ensure that your camera remains securely attached and provides reliable surveillance for your outdoor space.
Assessing the Surroundings for Camera Placement
When selecting a tree to attach your security camera, it is crucial to assess the surroundings to ensure optimal placement. Here are some factors to consider:
1. Line of Sight
Ensure that the selected tree provides a clear line of sight to the area you want to monitor. Avoid trees with dense foliage or branching patterns that can obstruct the camera’s view. Opt for a tree that offers a good vantage point and unobstructed visibility.

2. Height and Stability
Consider the height and stability of the tree before attaching your camera. Ensure that the tree is tall enough to cover the desired monitoring area, but not too tall that it becomes difficult to install or maintain the camera. Additionally, choose a tree that is sturdy and unlikely to sway or bend in strong winds or adverse weather conditions.
3. Accessibility
Make sure that the selected tree is easily accessible for camera installation and maintenance. You should be able to reach the tree comfortably and safely, as well as have easy access to the camera for adjustments or repairs if needed.
4. Lighting Conditions
Consider the lighting conditions in the area when choosing a tree for camera placement. Avoid trees in areas with excessive glare, as it can affect the camera’s clarity and image quality. Additionally, select a tree located in an area with consistent lighting conditions to ensure reliable video footage.
5. Distance from Power Source
Take into account the distance between the selected tree and a power source. Ensure that the tree is within range of an electrical outlet or that you have a suitable power supply option available. Avoid positioning the camera too far away from the power source, as it can lead to cable length limitations and potential power issues.
By carefully assessing the surroundings for camera placement, you can ensure that your security camera is positioned optimally for maximum coverage and effectiveness.

Gathering the Necessary Equipment
Before you start attaching a security camera to a tree, it is important to gather all the necessary equipment. Here are the items you will need:
1. Security Camera
The first and most important item you will need is a security camera. Make sure to choose a camera that is suitable for outdoor use, as it will be exposed to the elements. Look for a camera with features such as night vision and motion detection to maximize its effectiveness.
2. Mounting Bracket
A mounting bracket is essential for securely attaching the camera to the tree. Make sure to choose a bracket that is compatible with your camera and can withstand the weight and movement of the camera.
3. Screws and Anchors
To attach the mounting bracket to the tree, you will need screws and anchors. Choose screws and anchors that are suitable for outdoor use and can withstand weather conditions and the weight of the camera.
4. Drill and Drill Bits
A drill and drill bits are necessary for creating holes in the tree to secure the mounting bracket. Make sure the drill bits are suitable for drilling into wood without causing damage to the tree.
5. Cables and Connectors
To power the security camera and connect it to a monitoring system, you will need cables and connectors. Choose cables and connectors that are durable and weatherproof to ensure reliable performance.
Once you have gathered all the necessary equipment, you will be ready to proceed with attaching the security camera to the tree.
Preparing the Tree for Camera Installation
Before attaching a security camera to a tree, it is important to properly prepare the tree to ensure a secure and stable installation. Follow these steps to prepare the tree:
Choosing a Suitable Tree
First and foremost, choose a tree that is robust, healthy, and capable of supporting the weight of the security camera. Look for a tree that has a strong and sturdy trunk, without any signs of disease or rot.
Tip: Opt for a tree with limbs or branches that are at an appropriate height for camera installation, roughly 6 to 8 feet above the ground. This will provide an optimal viewing angle for the camera while minimizing the risk of tampering or damage.

Clearing the Surrounding Area
Before installing the security camera, clear the surrounding area of any branches, foliage, or other obstructions that may interfere with the camera’s field of view. This will ensure that the camera has an unobstructed view and captures clear footage.
Tip: Use pruning shears or a small saw to trim any overhanging branches or vegetation that could potentially block the camera’s line of sight.
Securing the Camera Mount
Once the tree is ready, securely attach the camera mount to the selected branch or trunk using sturdy straps or clamp mounts. Ensure that the mount is tightly fastened to prevent unnecessary movement or instability.
It is important to note that the camera mount should be positioned in a way that allows for optimal viewing angle, coverage, and range based on your specific security needs.
Tip: Consider using adjustable mounts that allow for easy positioning and fine-tuning of the camera angle after installation, ensuring the best possible view.

By properly preparing the tree for camera installation, you can ensure a secure and stable setup, maximizing the effectiveness of your security camera system.
Mounting the Camera Bracket to the Tree
Once you have selected the ideal spot on the tree for your security camera, it’s time to mount the camera bracket securely. Follow these steps to ensure a successful installation:
- Clean the area: Before attaching the bracket, make sure to clean the surface of the tree with a brush or a cloth. This will remove any dirt or debris that could prevent a tight fit.
- Position the bracket: Place the camera bracket against the tree trunk at the desired height. Make sure it is level.
- Mark the holes: Use a marker or a pencil to mark the spots where you will be drilling holes for the screws. It’s recommended to have at least two holes on each side of the bracket for stability.
- Drill the holes: Carefully drill the marked holes using a drill bit that matches the size of the screws provided with your camera bracket. Be cautious not to damage the tree in the process.
- Secure the bracket: Align the holes on the bracket with the drilled holes and insert the screws. Tighten them with a screwdriver until the bracket feels firmly attached to the tree.
- Test the stability: Gently shake the bracket to ensure that it is securely fastened to the tree. If there is any wobbling, tighten the screws further or consider using larger screws if necessary.
Now that the camera bracket is securely mounted to the tree, you are ready to attach your security camera and set it up according to the manufacturer’s instructions. Keep in mind that it’s essential to periodically check the stability of the bracket, especially during extreme weather conditions, to ensure the camera remains in place and captures high-quality footage.
Securing the Camera to the Bracket
Once you have positioned the bracket onto the tree trunk, it is time to attach the security camera. This step is crucial in ensuring that the camera stays in place for reliable monitoring.
Begin by aligning the camera’s mounting holes with the corresponding holes on the bracket. Insert the screws provided into the holes and tighten them using a screwdriver or a drill. Ensure that the camera is securely attached to the bracket to prevent any possible movement.

For added stability, it is recommended to use a lock nut or a washer with the screws. This will prevent the screws from becoming loose over time due to the camera’s weight or environmental factors.
Once the camera is securely attached to the bracket, gently adjust its position to achieve the desired angle of view. Make sure that the camera lens is facing the area you want to monitor and that there are no obstructions blocking its line of sight.
Remember to double-check the camera’s connections after securing it to the bracket. Ensure that all cables are properly connected and that the camera is receiving power. Test the camera’s functionality by checking the live feed on your monitoring device before leaving the installation site.
Note: It is important to periodically check the camera’s attachment to the bracket to ensure that it remains secure over time. This is especially important in areas with strong winds or if the tree trunk experiences any movement.
Following these steps will help you properly secure the camera to the bracket, ensuring reliable and effective surveillance of your property.

Adjusting the Camera Angle for Optimal Coverage
Once you have securely attached your security camera to the tree, it’s important to adjust the camera angle to ensure the best possible coverage of your surrounding area. Here are a few tips to help you achieve optimal angle adjustment:
1. Test the Camera’s Field of View
Before finalizing the camera angle, it’s a good idea to test the camera’s field of view. This will help you identify any blind spots and make necessary adjustments. Walk around your property and observe the camera’s coverage to ensure it captures the desired areas.
2. Consider the Height
The height at which you mount the camera on the tree can greatly impact its field of view. Mounting it too high may reduce the visibility of objects closer to the ground, while mounting it too low may limit its coverage. Aim for a height that provides a balance between capturing a wide area and obtaining clear visuals.
Keep in mind that adjusting the camera angle may require you to climb the tree or use a ladder. Make sure to prioritize your safety and follow proper ladder safety guidelines.
3. Account for Distortion
Camera lenses can sometimes produce distorted images, especially at extreme angles. To minimize distortion, avoid angling the camera too far to the side. Instead, position it to face the desired area directly. This will result in clearer and more accurate footage.
4. Ensure Reliable Power and Connectivity
While adjusting the camera angle, make sure that it remains connected to a reliable power source and that it maintains a strong Wi-Fi signal if it is a wireless camera. This will ensure uninterrupted surveillance and prevent any blind spots due to power or connectivity issues.
By following these tips, you can adjust the camera angle for optimal coverage and enhance the effectiveness of your security camera system in monitoring your property.
Protecting the Camera from Weather Conditions
When attaching your security camera to a tree, it is essential to take into consideration the weather conditions it will be exposed to. By protecting the camera from harsh weather, you can ensure its longevity and optimal performance. Here are some tips to protect your camera:

1. Choose the Right Camera Housing
Investing in a weatherproof camera housing can provide extra protection against rain, snow, and extreme temperatures. Ensure that the housing is compatible with your camera model and offers features like waterproof sealants and UV protection.
2. Install the Camera at an Appropriate Height
Mounting the camera at an appropriate height can help minimize its exposure to heavy rain or snow. It is recommended to place the camera at least 10-12 feet above the ground to avoid direct contact with precipitation. This height also helps improve the camera’s field of view.
3. Consider Using Protective Covers
Using a weather-resistant cover or shelter can provide additional protection for your camera. These covers are designed to shield the camera from rain, wind, and other weather elements. Opt for covers made from durable materials like polycarbonate or aluminum.
Note: Ensure that the protective cover does not obstruct the camera’s vision or impede its functionality.
In conclusion, protecting your security camera from weather conditions is vital for maintaining its performance and durability. By selecting the right camera housing, installing it at an appropriate height, and considering the use of protective covers, you can safeguard your camera and ensure its reliability in various weather conditions.
Testing the Camera Functionality
Once you have successfully mounted your security camera to the tree, it is essential to test its functionality to ensure that it is working correctly. Follow these steps to test the camera:
1. Power On the Camera
Ensure that the camera is properly connected to a power source. Plug in the power cable and turn on the camera.
2. Check the Camera’s Indicator Lights
Most security cameras have indicator lights that show their power and status. Check if the camera’s indicator lights are on and functioning correctly. This will indicate that the camera has power and is ready for use.
3. Access the Camera’s Live Feed
Depending on the type of camera you have, you may need to access the camera’s live feed through a mobile app, a web browser, or a dedicated monitoring device. Follow the manufacturer’s instructions to access the live feed.
4. Test Camera Movements
Verify that the camera can move smoothly in all intended directions. Use the camera’s control interface or app to pan, tilt, and zoom the camera. Ensure that the movements are responsive and that the camera’s field of view covers the desired area.
5. Check Image Quality
Assess the image quality of the camera by observing the live feed. Pay attention to the clarity, resolution, and colors of the captured footage. Ensure that the camera provides a clear and detailed image that meets your requirements.
6. Test Night Vision
If your security camera is equipped with night vision capabilities, test this feature by turning off the lights in the testing area. Verify that the camera’s night vision mode activates and provides clear footage in low-light conditions.
7. Evaluate the Recording and Storage Options
Check if the camera is correctly recording and storing the footage. Review the recording settings and storage options available. Make sure that the camera is saving and storing the recorded footage according to your preferences.
8. Test Motion Detection
Verify the camera’s motion detection capabilities by moving in front of the camera. Observe if the camera detects the movement and triggers the appropriate response, such as sending a notification or starting a recording.
9. Check Remote Access
If you intend to access the camera remotely, test this feature by connecting to the camera’s live feed through the designated remote access method. Ensure that the remote access is secure and that you can view the camera’s feed without any issues.
By following these steps, you can ensure that your security camera is fully functional and ready to provide reliable surveillance for your desired area.
Monitoring and Maintaining the Camera
Once you have successfully attached your security camera to a tree, it is important to regularly monitor and maintain it to ensure optimum performance and reliability. Here are a few key steps to follow:
- Check the camera regularly: Make it a habit to inspect the camera regularly to ensure it is securely attached to the tree and hasn’t been tampered with. Look out for any physical damage or signs of wear and tear that may affect its functionality.
- Adjust the camera angle: Depending on the area you want to monitor, you may need to adjust the camera angle. It’s a good idea to periodically review the camera’s positioning to ensure it is capturing the desired field of view.
- Clean the camera lens: Over time, dirt, dust, and debris can accumulate on the camera lens, affecting the image quality. Clean the lens regularly using a soft, lint-free cloth to remove any smudges or obstructions.
- Test the camera’s functionality: Perform regular test recordings to ensure that the camera is functioning as expected. Check the video feed, audio, motion detection, and any other features that are essential for your surveillance needs.
- Monitor battery levels: If your security camera is battery operated, monitor the battery levels regularly. Replace or recharge the batteries as necessary to ensure uninterrupted surveillance.
- Secure the camera against theft: Since the camera is mounted on a tree, it may be vulnerable to theft. Consider using a security cable or lock to secure the camera and deter potential thieves.
- Update camera firmware: Manufacturers often release firmware updates to enhance camera performance and add new features. Check for firmware updates periodically and follow the manufacturer’s instructions to update the camera’s firmware.
By regularly monitoring and maintaining your security camera, you can ensure reliable and effective surveillance of your property.
FAQ,
What are the steps to attach a security camera to a tree?
Attaching a security camera to a tree can be done in a few simple steps. First, find a suitable location on the tree where the camera will have a good view of the area you want to monitor. Then, use a strap or mount specifically designed for attaching cameras to trees. Wrap the strap securely around the tree trunk, making sure it is tight enough to hold the camera in place. Finally, attach the camera to the strap or mount, making sure it is securely fastened. Test the camera to ensure it is positioned correctly and capturing the desired footage.
What type of strap or mount should I use to attach a security camera to a tree?
When attaching a security camera to a tree, it is important to use a strap or mount specifically designed for this purpose. Look for straps or mounts that are weather-resistant and able to withstand outdoor conditions. It is recommended to choose a strap or mount that is adjustable and secure, allowing you to easily position the camera at the desired angle. Additionally, some straps or mounts may have camouflage patterns or colours to help blend the camera with the tree’s surroundings, reducing visibility.
Can I attach a security camera to any type of tree?
In general, you can attach a security camera to most types of trees. However, it is important to consider the size, stability, and branch arrangement of the tree before attaching the camera. Large, sturdy trees with strong branches are ideal for mounting a security camera. Avoid attaching the camera to small or weak trees that may not be able to support its weight or withstand wind and weather conditions. It is also important to choose a tree that provides a clear line of sight to the area you want to monitor, without obstruction from other trees or objects.