
Photography is an art form that has been revolutionized by digital technology. With the advent of digital cameras, anyone can become a photographer. But have you ever wondered how cameras work? Have you ever wanted to build your own camera?
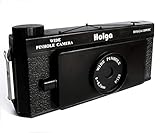
One of the most fascinating types of cameras is the pinhole camera. A pinhole camera is a simple camera with no lens. Instead of using a lens to focus light onto the film or image sensor, it uses a small hole to create a sharp image. This type of camera is often used in educational settings to teach the basics of photography.
In this article, we will guide you through the process of building your own pinhole camera. We will show you what materials you need and provide step-by-step instructions. By the end of this article, you will have a fully functional pinhole camera that can capture unique and captivating images.
Choosing the right materials for a digital pinhole camera
When building a digital pinhole camera, it is important to carefully select the right materials to ensure the best possible results. Here are some considerations to keep in mind:
1. Camera body: Start by selecting a sturdy and light material for the camera body, such as cardboard or wood. It should be able to hold the camera components securely in place.

2. Pinhole material: The pinhole is the heart of the camera and determines the image quality. Consider using a metal sheet with a small, precise hole. Alternatively, you can use a thin piece of aluminum foil and poke a tiny pinhole into it.
3. Lightproof material: To prevent light leaks, the camera body needs to be lined with a lightproof material. Black felt or craft foam work well for this purpose and can be easily attached using glue or tape.
4. Lens material: While a pinhole camera doesn’t have a lens, you can experiment with different transparent materials to achieve interesting effects. Try using a piece of acrylic or clear plastic to add a unique touch to your images.
5. Film or image sensor: Depending on whether you want to capture analog or digital images, you will need to choose the appropriate medium. Traditional pinhole cameras use film, while digital pinhole cameras use an image sensor.
6. Mounting options: Think about how you want to mount your camera. You can attach a tripod screw to the camera body or incorporate any other mounting mechanism that suits your needs.

By carefully considering these materials, you can build a digital pinhole camera that is not only functional but also capable of producing high-quality and unique images.
Understanding the principles of a pinhole camera
A pinhole camera is a simple camera design that operates on the principles of light and optics. It works by allowing light to pass through a small hole, or pinhole, creating an image on a photosensitive surface located inside the camera.
Here are some key principles to understand about how a pinhole camera works:
-
Light and optics
In a pinhole camera, light travels in straight lines. When the pinhole is small, only a small amount of light can enter the camera, resulting in a sharper image. This is known as the principle of diffraction. The pinhole acts as a lens, creating an inverted image on the photosensitive surface.
-
Focusing and depth of field
Unlike traditional cameras with adjustable lenses, pinhole cameras have an infinite depth of field. This means that objects at different distances from the camera will all appear in focus. However, due to the small size of the pinhole, there is a trade-off between the sharpness of the image and the amount of light captured.
-
Exposure time
Since only a small amount of light enters the pinhole camera, longer exposure times are required to capture enough light to create a well-exposed image. This makes pinhole photography suitable for still subjects and long-exposure photography.
By understanding these principles, you can better appreciate the unique qualities and creative possibilities of a pinhole camera.
Building the body of a digital pinhole camera
When building a digital pinhole camera, the first step is to create its body. The body serves as the base for attaching the lens and housing the digital image sensor.
Here is a step-by-step guide on how to build the body of a digital pinhole camera:
- Start by gathering the necessary materials, such as a small cardboard box, a ruler, a craft knife, and glue.
- Measure and mark the dimensions of the image sensor on one side of the cardboard box. This will determine the size of the opening for the sensor.
- Carefully cut out the marked opening using a craft knife.
- Create a pinhole on the opposite side of the box by poking a small hole using a pin or needle. This will act as the lens for capturing the images.
- Next, determine the focal length of the pinhole camera by measuring the distance from the pinhole to the image sensor. This will help in achieving sharp focus.
- Create a small compartment inside the box to house the image sensor. This can be done by cutting and gluing pieces of cardboard or foam board.
- Securely attach the image sensor inside the compartment, ensuring that it aligns with the opening cut out earlier.
- Add additional compartments for a battery and an SD card if desired.
- Close the box and reinforce any seams or edges with glue to ensure a light-tight construction.
Once the body of the digital pinhole camera is built, it is ready for further customization and use. This includes attaching the lens cap, adding a viewfinder, or painting the camera body to personalize its appearance.
By following these steps, you can construct the body of a digital pinhole camera that is ready to capture unique and creative images.
Installing a digital sensor in a pinhole camera
Transforming a traditional pinhole camera into a digital pinhole camera requires the installation of a digital sensor. This step is crucial, as it allows the camera to capture images and store them digitally. Here’s a step-by-step guide on how to install a digital sensor in a pinhole camera:
Gather the necessary materials
Before starting the installation process, make sure you have the following materials:

| 1. Pinhole camera body |
| 2. Digital sensor |
| 3. Appropriate adapter for the digital sensor (if necessary) |
| 4. Small screwdriver set |
| 5. Tweezers |
| 6. Anti-static wrist strap |
| 7. Microfiber cloth |
Prepare the pinhole camera
Clean the pinhole camera body using a microfiber cloth, ensuring that there is no dust, debris, or fingerprints on the camera surface. This step is essential to avoid any interference with the digital sensor during installation.
Open the pinhole camera
Using a small screwdriver set, carefully unscrew any screws that hold the pinhole camera body together. Gently separate the camera body into its main components, exposing the internal cavity of the camera.
Install the digital sensor
Take the digital sensor and examine it to identify the appropriate mounting orientation. Place the digital sensor into the camera body, aligning it with the pinhole opening. If necessary, use an adapter to ensure a secure fit.
Secure the digital sensor
Once the digital sensor is correctly positioned, use a screwdriver to secure it in place. Be cautious not to overtighten the screws, as this may damage the sensor or the camera body.
Reassemble the pinhole camera
With the digital sensor securely installed, carefully reassemble the pinhole camera. Align the camera body components and reinsert any screws that were removed earlier. Make sure all screws are tightened sufficiently to hold the camera together.

And there you have it – your pinhole camera is now equipped with a digital sensor, ready to capture images digitally! Experiment with different settings and techniques to get the most out of your digital pinhole camera.
Adjusting the focal length and aperture of a pinhole camera
When building a digital pinhole camera, adjusting the focal length and aperture is crucial to capturing the perfect image. The focal length determines the distance between the pinhole and the image sensor, while the aperture controls the amount of light that enters the camera.
To adjust the focal length, you can either move the image sensor closer or further away from the pinhole. This distance will affect the focus and depth of field of your images. Experimenting with different focal lengths can result in unique effects, from close-ups with a shallow depth of field to landscapes with a larger depth of field.
When it comes to adjusting the aperture, you can modify the size of the pinhole. A smaller aperture will restrict the amount of light entering the camera, resulting in a larger depth of field. On the other hand, a larger aperture will allow more light to pass through, but with a shallower depth of field.
It’s important to note that adjusting the focal length and aperture will require some trial and error. You may need to experiment with different distances from the pinhole to the image sensor and various pinhole sizes to achieve the desired results. Don’t be afraid to try different combinations until you find the perfect settings for your pinhole camera.

Remember, building a digital pinhole camera is all about creativity and experimentation. Adjusting the focal length and aperture allows you to capture unique and artistic images that showcase the beauty of this analog photography technique in a digital world.
Capturing images with a digital pinhole camera
A digital pinhole camera is a unique and fascinating tool for capturing images. Instead of a traditional lens, it uses a tiny pin-sized hole to create images by allowing light to pass through and hit the digital sensor. This technique results in dreamy and ethereal images that have a distinct and artistic quality.
To capture images with a digital pinhole camera, you need to follow a few steps:
- Prepare your camera: Set up your digital pinhole camera by ensuring that the pinhole is clean and free from dust or debris. You can also experiment with different sizes of pinholes to achieve different effects.
- Choose your subject: Select a subject or scene that you want to capture. Keep in mind that pinhole cameras have a large depth of field, meaning that everything in the frame will be in focus, from the closest object to the farthest.
- Set up your shot: Position your camera on a tripod or steady surface to avoid any blurring or camera shake. Compose your shot by framing your subject and considering the angles and perspectives that will create an interesting image.
- Adjust the exposure: Since pinhole cameras have very small apertures, you will need to use longer exposure times to allow enough light to reach the sensor. Experiment with different exposure settings to achieve the desired level of brightness and detail.
- Capture the image: Once you have everything set up, press the shutter button and allow the camera to expose the sensor for the desired duration. Avoid moving the camera or your subject during the exposure to avoid any blurring.
- Review and edit: After capturing the image, transfer it to your computer and review it. Pinhole camera images often have a unique charm, but you can further enhance them using photo editing software to adjust the contrast, saturation, or apply artistic filters.
Using a digital pinhole camera can be a rewarding and creative experience. Experiment with different subjects, exposure times, and techniques to explore the unique possibilities of this technique. With practice and patience, you can create stunning and captivating images that showcase your artistic vision.
Editing and enhancing images from a pinhole camera
Once you have captured images with your digital pinhole camera, you can take your photography to the next level by editing and enhancing your images. This allows you to correct any imperfections, adjust the lighting and colors, and add creative effects to make your photos truly unique.

1. Choosing the right editing software
There are several popular software options available for editing digital images, such as Adobe Photoshop, Lightroom, GIMP, and Pixlr. Choose the one that suits your needs and budget, and install it on your computer.
2. Importing your images
Connect your camera to your computer using a USB cable, or insert the memory card into a card reader. Open your chosen editing software and import the images from your camera or memory card. Create a new project or folder to store your edited images.
3. Basic editing adjustments
Start by making basic adjustments to your images, such as cropping, straightening, and resizing. This will help you focus on the main subject and eliminate any unnecessary elements in the frame.
4. Correcting exposure and color
Pinhole camera images may have unpredictable exposure and color shifts, so it’s important to correct these in the editing process. Use the exposure adjustment tools to brighten or darken your image, and the white balance tools to correct any color casts.
5. Enhancing details and sharpness
Pinhole camera images tend to have a soft and dreamy quality, but you can enhance the details and sharpness of your image in post-processing. Use the sharpening tools and adjust the clarity and contrast to bring out fine details without overdoing it.
6. Adding creative effects
One of the advantages of digital editing is the ability to add creative effects to your images. Experiment with filters, overlays, and textures to give your photos a unique look and feel. Don’t be afraid to try different effects and see what works best for each image.
7. Saving and exporting your edited images
Once you are satisfied with your edits, save your images in a high-quality format such as JPEG or TIFF. You can also choose to export your images for web use or printing, adjusting the resolution and file size accordingly.
Editing and enhancing images from a pinhole camera allows you to unleash your creativity and transform your photographs into stunning works of art. With the right tools and techniques, you can take full control of the editing process and bring your vision to life.
Tips and tricks for using a digital pinhole camera
Using a digital pinhole camera can be a fun and creative way to capture unique and artistic photographs. Here are some tips and tricks to help you get the best results:
1. Choose the right lighting conditions
The pinhole camera works best in bright lighting conditions, as the small aperture can only let limited light in. Choose a sunny or well-lit area for your photoshoot to ensure clear and vibrant images.
2. Experiment with exposure times
The exposure time determines how long you keep the shutter open. The longer the exposure time, the more light enters the camera, resulting in brighter and more detailed images. Experiment with different exposure times to achieve the desired effects.
3. Use a tripod
Due to the long exposure times required, it is advisable to use a tripod to avoid camera shake and blurry images. A stable surface will ensure sharp and crisp photographs.
4. Get close to your subject
The pinhole camera has a fixed focal length, so it is best to get as close to your subject as possible. This will result in sharper and more defined images. Experiment with different distances to find the right composition.
5. Embrace the unique aesthetic of pinhole photography
Pinhole photography has a distinct and dreamy aesthetic with soft focus and vignetting. Embrace the imperfections and unique qualities of pinhole images. They can capture a sense of nostalgia and artistic flair.
By following these tips and tricks, you can make the most of your digital pinhole camera and create stunning and imaginative photographs. Happy shooting!
Question-answer:
What is a pinhole camera and how does it work?
A pinhole camera is a simple camera without a lens. It works by using a small hole to project an image onto a surface inside the camera. The light from the scene outside the camera enters through the hole and creates an inverted image on the opposite side of the camera.
What materials do I need to build a digital pinhole camera?
To build a digital pinhole camera, you will need a body for the camera (which can be made from materials like cardboard or wood), a digital image sensor (such as the one from a digital camera or a webcam), a pinhole (which can be made by poking a small hole in a piece of aluminium foil or a thin metal sheet), and a way to attach the pinhole to the camera body.
How can I ensure the best image quality with a digital pinhole camera?
To get the best image quality with a digital pinhole camera, it is important to have a small, high-quality pinhole. The pinhole should be clean and free from any debris or scratches. Additionally, using a large image sensor and positioning it at the correct distance from the pinhole can help improve image quality.
Can I use a digital pinhole camera for professional photography?
A digital pinhole camera can be a fun and unique tool for photography, but it may not provide the same level of image quality and control as professional cameras with lenses. While it can be used creatively in certain situations, it may not be suitable for all professional photography needs.


