
Do you want to build your own security camera using a Raspberry Pi Zero W? This compact and powerful single-board computer is the perfect tool for creating a DIY surveillance system at home or in your office. In this guide, we will walk you through the process of setting up and configuring a security camera with live video streaming capabilities.
What you will need:
- Raspberry Pi Zero W: The heart of the security camera system, this tiny but mighty computer will serve as the brain of your project.
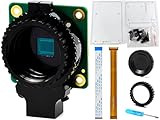
- Camera module: You will need a compatible camera module that can be easily connected to the Raspberry Pi Zero W board.
- MicroSD card: Make sure you have a high-quality microSD card with enough storage capacity to store the recorded videos.
- Power supply: Choose a suitable power supply to provide sufficient power to the Raspberry Pi Zero W and the camera module.
- Case: We recommend getting a case for your Raspberry Pi Zero W to protect it from physical damage and dust.
- Internet connection: To enable live video streaming, you will need a stable internet connection.
Step 1: Set up your Raspberry Pi Zero W
Ensure that your Raspberry Pi Zero W is properly set up and running the latest version of the Raspbian operating system. Install any necessary updates and configure the Wi-Fi settings. You may also need to enable the camera module in the Raspberry Pi configuration settings.
Step 2: Connect the camera module
Connect the camera module to the CSI (Camera Serial Interface) connector on the Raspberry Pi Zero W board. Make sure it is securely attached and positioned in the right direction. You may need to refer to the camera module manufacturer’s documentation for detailed instructions.
Step 3: Install the necessary software
Install the required software packages and libraries to enable video streaming and recording. You can use popular open-source software like Motion or VLC to achieve this. Follow the installation instructions provided by the software developers and make any necessary configurations.
Step 4: Configure the security camera settings
Customize the settings of your security camera according to your preferences. This may include adjusting the resolution, frame rate, motion detection sensitivity, and defining the storage location for recorded videos. Make sure to secure your camera with a strong password and restrict access to unauthorized users.
Step 5: Test and optimize your security camera
Test your security camera by monitoring the live video feed and ensuring that it is functioning correctly. Adjust the camera position if needed and optimize the settings to match your specific requirements. You can also explore advanced features like remote access, email notifications, and integrating with other home automation systems.
By following these steps, you can easily build your own security camera using a Raspberry Pi Zero W. Whether you want to keep an eye on your property, monitor your baby’s room, or enhance the security of your workspace, this DIY project allows you to have full control over your surveillance system. Get started today and enjoy the peace of mind that comes with knowing you can rely on your custom-built security camera!
What you need to build a security camera with Raspberry Pi Zero W
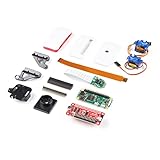
To build a security camera with Raspberry Pi Zero W, you will need the following items:
- Raspberry Pi Zero W board
- MicroSD card (at least 8GB)
- Power supply (5V, 2.5A)
- Raspberry Pi Zero W camera module
- Camera cable (for connecting the camera module to the board)
- USB WiFi dongle (optional if your Raspberry Pi Zero W doesn’t have built-in WiFi)
- USB keyboard and mouse (for initial setup)
- HDMI cable or adapter (for connecting Raspberry Pi Zero W to a monitor)
- Monitor or TV screen (with HDMI input)
- Ethernet cable (optional if you want to connect Raspberry Pi Zero W to the internet using a wired connection)
Once you have gathered all the necessary items, you can proceed with setting up your security camera using Raspberry Pi Zero W.

Hardware requirements for Raspberry Pi Zero W security camera
To build a security camera using Raspberry Pi Zero W, you will need the following hardware:
- Raspberry Pi Zero W: You will need the latest version of Raspberry Pi Zero W, which comes with built-wifi and Bluetooth capabilities. This will serve as the main controller for your security camera.
- MicroSD card: You will need a high-quality microSD card with a minimum storage capacity of 8GB to install the operating system and store recorded footage.
- Camera module: Raspberry Pi Camera Module is an essential component for building a security camera. It offers high-definition video and image capturing capabilities.
- Power supply: Make sure to have a reliable power supply for your Raspberry Pi Zero W. A USB power adapter with a 5V output and at least 2A current capacity is recommended.
- IR LEDs: In order to capture footage in low-light conditions, infrared (IR) LEDs are essential. Make sure to choose IR LEDs compatible with Raspberry Pi Zero W.
- Micro USB cable: You will need a micro USB cable to connect the power supply to the Raspberry Pi Zero W.
- Enclosure: To protect your Raspberry Pi Zero W and camera module, consider using an enclosure. There are various options available, including acrylic cases and 3D-printed enclosures.
- Network connection: To view and access your security camera remotely, you will need a stable network connection. You can either use Wi-Fi or connect via Ethernet.
By gathering the above hardware components, you will have everything you need to build your own security camera using Raspberry Pi Zero W.
Preparations for setting up the security camera
Before setting up the security camera using Raspberry Pi Zero W, there are a few things you need to prepare:
1. Raspberry Pi Zero W
The Raspberry Pi Zero W is a compact and affordable single-board computer that is perfect for building a security camera system. Ensure you have the Raspberry Pi Zero W board, power adapter, and SD card.
2. Camera module
You will need a camera module compatible with Raspberry Pi Zero W. The camera module allows you to capture images and videos for surveillance purposes.

3. SD card with operating system
Insert a microSD card into your computer and download the latest version of the Raspberry Pi operating system. Use an imaging tool to flash the operating system onto the SD card.
4. Connect to a network
Make sure you have a stable internet connection to set up the security camera. Connect your Raspberry Pi Zero W to your local Wi-Fi network to enable remote access and control.
5. Power supply
Choose a suitable power supply for your Raspberry Pi Zero W. It is recommended to use a power adapter with at least 2.5A output to ensure stable performance.
By gathering these necessary components and completing the preparations, you will be ready to proceed with setting up your security camera using Raspberry Pi Zero W.
Installing and configuring the Raspberry Pi Zero W operating system
Before building your security camera with Raspberry Pi Zero W, you will need to install and configure the operating system on the device. This step is essential to ensure that your Raspberry Pi is up and running.

1. Downloading the operating system
Start by visiting the official Raspberry Pi website (https://www.raspberrypi.org/downloads/) and download the latest version of the Raspberry Pi operating system suitable for the Raspberry Pi Zero W. Make sure to choose the correct operating system image for your device.
2. Flashing the operating system
Once the operating system image is downloaded, you will need to flash it onto a microSD card. To do this, you can use a tool like Etcher (https://www.balena.io/etcher/) which is available for Windows, macOS, and Linux.
- Insert the microSD card into your computer.
- Open Etcher and select the downloaded operating system image.
- Select the target device (the microSD card) and click on “Flash”.
- Wait for the flashing process to complete.
- Once done, safely remove the microSD card from your computer.
3. Configuring the operating system
To configure the operating system, follow these steps:
- Insert the flashed microSD card into the Raspberry Pi Zero W.
- Connect the Raspberry Pi Zero W to a monitor or TV using an HDMI cable.
- Connect a USB keyboard to one of the USB ports on the Raspberry Pi.
- Power on the Raspberry Pi Zero W by connecting a micro USB power supply to it.
- Wait for the Raspberry Pi to boot up.
4. Initial setup
After the Raspberry Pi has booted up, you will need to go through the initial setup process:
- Select your desired language and keyboard layout.
- Set the timezone and country.
- Change the default password for the Raspberry Pi.
- Connect to your Wi-Fi network (if available).
- Update the software packages by running the following commands in the terminal:
sudo apt update
sudo apt upgrade
Once the initial setup is complete, you can proceed to installing the necessary software and configuring the security camera functionalities on your Raspberry Pi Zero W.
Connecting the camera module to Raspberry Pi Zero W
To set up a security camera using Raspberry Pi Zero W, you will first need to connect the camera module to the Raspberry Pi. Follow these steps:
- Make sure your Raspberry Pi Zero W is turned off.
- Locate the camera connector on the Raspberry Pi Zero W board. The connector is usually located on the opposite side of the USB ports.
- Identify the camera module. It is a small rectangular board with a ribbon cable attached to it.
- Insert the ribbon cable connector into the camera connector on the Raspberry Pi Zero W. Make sure the cable is inserted properly and the metal contacts are aligned.
- Secure the ribbon cable in place by pushing down the plastic clip on the camera connector.
- Once the camera module is connected, you can turn on your Raspberry Pi Zero W.
After completing these steps, your camera module will be successfully connected to your Raspberry Pi Zero W. You can now proceed with configuring the software and setting up the security camera.
Setting up motion detection and recording
Once you have your Raspberry Pi Zero W connected to a camera module, you can proceed with setting up motion detection and recording. This will allow your security camera to capture and store video footage whenever motion is detected.
Step 1: Install Motion
The first step is to install the Motion software on your Raspberry Pi Zero W. Motion is an open-source program that allows you to set up motion detection and recording with a webcam or a Raspberry Pi camera module.
To install Motion, open the Terminal on your Raspberry Pi Zero W and enter the following command:

sudo apt-get install motion
Step 2: Configure Motion
Once Motion is installed, you need to configure it to enable motion detection and specify the settings for video recording.
Navigate to the Motion configuration file by entering the following command in the Terminal:
sudo nano /etc/motion/motion.conf
In the configuration file, you can change various settings such as the detection sensitivity, the output directory for recorded videos, and the maximum duration for video recording.
Make the necessary changes to the configuration file based on your preferences. Save the changes and exit the editor.
Step 3: Start Motion
After configuring Motion, you can start the motion detection and recording process by entering the following command in the Terminal:
sudo service motion start
Once Motion is running, it will monitor the camera feed for any motion detected and automatically record video footage to the specified output directory.
That’s it! You have successfully set up motion detection and recording for your Raspberry Pi Zero W security camera. Now, whenever motion is detected, your camera will capture and store video footage for your security needs.
Accessing the security camera remotely
One of the main advantages of building a security camera with a Raspberry Pi Zero W is the ability to access the camera remotely. This means you can view the camera feed from anywhere as long as you have an internet connection.
To access the security camera remotely, you will need to set up port forwarding on your router. Port forwarding allows the incoming data from the internet to be properly directed to the Raspberry Pi Zero W.
Step 1: Obtain the IP address
Before you can set up port forwarding, you need to know the IP address of your Raspberry Pi Zero W. You can find the IP address by running the command ifconfig on the Raspberry Pi terminal. Note down the IP address for later use.
Step 2: Configure port forwarding
Access your router’s settings by typing its IP address into a web browser. Look for the port forwarding section, which may be under the “Advanced” or “Security” settings. Add a new port forwarding rule with the following information:
- Service Name: Choose any name to identify the camera
- Internal IP Address: Enter the IP address of your Raspberry Pi Zero W
- Internal Port: Enter the port number used by your camera application (e.g., port 8000)
- External Port: Enter the port number you want to use for remote access (e.g., port 8080)
- Protocol: Select “TCP”
Save the changes and exit the router settings. The router will now forward any incoming data on the specified external port to the Raspberry Pi Zero W.
Step 3: Access the camera remotely
On a computer or mobile device connected to the internet, open a web browser and enter your public IP address, followed by a colon and the external port number you specified. For example, if your public IP address is 123.45.67.89 and the external port number is 8080, you would enter 123.45.67.89:8080 in the address bar.
This will connect you to the security camera feed hosted on your Raspberry Pi Zero W. You may need to enter any necessary login credentials or install additional software depending on your camera application.
With remote access set up, you can now check the security camera feed from anywhere with an internet connection, providing you with peace of mind and the ability to monitor your property remotely.
Securing your Raspberry Pi Zero W security camera
When it comes to setting up a security camera using a Raspberry Pi Zero W, it’s important to consider the security of your device. By taking a few extra steps, you can ensure that your camera is protected against unauthorized access and potential vulnerabilities.
Create a strong password
One of the first steps to securing your Raspberry Pi Zero W security camera is to create a strong password for both the device itself and any associated accounts or services. Avoid using common or easily guessable passwords, and consider using a combination of uppercase and lowercase letters, numbers, and special characters. Regularly update your passwords to further enhance security.
Enable firewall protection
Another important security measure is to enable a firewall on your Raspberry Pi Zero W. This will help protect your device from unauthorized access and potential network attacks. Configure your firewall to only allow incoming connections from trusted sources and block any suspicious or unwanted traffic.
Keep your software up to date
Regularly updating the software and firmware on your Raspberry Pi Zero W is essential for maintaining security. New updates often include security patches that address known vulnerabilities. Set up automatic updates or regularly check for updates manually to ensure that your device is running the latest secure versions.
Disable unnecessary services
By disabling any unnecessary services on your Raspberry Pi Zero W, you can reduce its attack surface and minimize the risk of potential vulnerabilities. Only keep services that are essential for the operation of your security camera, and disable or remove any unnecessary or insecure services.
Encrypt your data
To enhance the security of your Raspberry Pi Zero W security camera, consider encrypting your data. This will prevent unauthorized access to your files and ensure that even if your device is compromised, your data remains protected. Explore encryption options such as full disk encryption or file-level encryption depending on your specific needs.
By following these steps, you can significantly improve the security of your Raspberry Pi Zero W security camera. Remember to regularly monitor and update your security measures to stay ahead of potential threats and vulnerabilities.
FAQ,
What is a Raspberry Pi Zero W?
Raspberry Pi Zero W is a small and affordable computer board that is capable of running a variety of projects. It is essentially a scaled-down version of the Raspberry Pi Model B, but with added wireless connectivity.
Is it possible to build a security camera using a Raspberry Pi Zero W?
Yes, it is definitely possible to build a security camera using a Raspberry Pi Zero W. In fact, it is a popular project among DIY enthusiasts. The Raspberry Pi Zero W’s small size, low power consumption, and built-in wireless connectivity make it an ideal choice for this type of project.


