
Do you ever wish you could capture the beauty of the night sky with your iPhone camera? Well, you’re in luck! With a few simple tips and tricks, you can learn how to take stunning photos of stars using your iPhone.
Firstly, you’ll need to find a location away from the city lights and any other sources of light pollution. Light pollution can hinder your ability to capture clear and crisp star photos, so finding a dark and open area is crucial. Look for a high vantage point, such as a hill or a rooftop, where you can have a clear view of the night sky.
Once you’ve found your ideal location, it’s time to set up your iPhone camera for star photography. Start by adjusting the exposure settings on your iPhone. You’ll want to increase the exposure time to allow more light into the camera sensor. To do this, tap on the screen to focus and then swipe up or down to adjust the exposure. Experiment with different exposure times to find the perfect balance between capturing enough light and avoiding overexposure.
Guide to Capturing Stars with Your iPhone Camera
Do you want to capture stunning photos of stars using your iPhone camera? With a few simple tips and tricks, you can elevate your astrophotography game and capture breathtaking shots of the night sky. Here’s a step-by-step guide to help you get started:
1. Choose the Perfect Location
The first step in capturing stars with your iPhone camera is to find a location with minimal light pollution. Head out to a remote area where the night sky is clear and you can see the stars twinkling in all their glory. Avoid areas with streetlights or other sources of artificial light.

2. Set Up Your Equipment
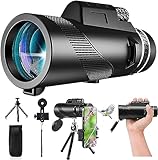
Once you’ve found the perfect location, make sure your iPhone is equipped with the right gear. Attach a tripod to your iPhone to keep it steady during long exposure shots. Additionally, consider using a lens attachment specifically designed for astrophotography to enhance the quality of your photos.
3. Adjust Camera Settings
To capture stars effectively, you’ll need to adjust your camera settings. Open the camera app on your iPhone and switch to manual mode. Now, set a high ISO (around 1600-3200) to make your camera more sensitive to light. Increase the exposure time for long exposure shots, usually between 10-30 seconds, to capture the movement and patterns of the stars.
4. Focus on the Stars
Auto-focus may not work well in low-light conditions, so manually adjust the focus on the stars. Tap on the screen to bring up the focus square, then swipe down to lower the exposure and make the stars more visible. Once you’ve achieved the desired focus and exposure, lock it in place by pressing and holding on the screen until you see the AE/AF Lock indicator.
5. Use a Remote Shutter Release
To prevent any shaking or blurring of your photos, use a remote shutter release or the self-timer function on your iPhone. This will ensure that your camera remains perfectly still during the exposure, resulting in sharper and clearer star photos.
6. Experiment and Edit
Don’t be afraid to experiment with different settings and angles to capture unique and captivating star photos. After capturing your shots, you can enhance them further using photo editing apps like Snapseed or Adobe Lightroom. Adjust the brightness, contrast, and saturation to bring out the true beauty of the stars.

With these tips in mind, you’ll be well on your way to capturing stunning photos of stars with your iPhone camera. Remember to practice patience and have fun exploring the wonders of astrophotography!
Exploring Night Photography
Taking photos at night can be a thrilling and rewarding experience. The night sky offers a magical canvas for capturing stunning images of stars, galaxies, and celestial events. If you’ve ever wondered how to capture those breathtaking shots of stars on your iPhone camera, you’re in the right place.
Here are some essential tips and techniques to help you master the art of night photography:
|
1. Camera Settings:
|
2. Stability:
|
|
3. Find Dark Skies:
|
4. Composition:
|
|
5. Post-Processing:
|
6. Patience and Practice:
|

With these tips in mind, go out and embrace the beauty of the night sky through your iPhone camera. Whether you’re capturing a meteor shower or a starry landscape, night photography can open up a whole new world of creative possibilities. Happy shooting!

Preparing Your iPhone for Night Photography
When it comes to capturing stars on your iPhone camera, there are a few things you can do to ensure the best results. Here are some tips to help you prepare your iPhone for night photography:
1. Clean the lens: Before you start shooting, make sure the lens of your iPhone’s camera is clean. Use a microfiber cloth or lens cleaning solution to remove any fingerprints or smudges that could affect the quality of your photos.
2. Use a tripod: Night photography often requires long exposure times, which means you’ll need to keep your iPhone steady. Invest in a sturdy tripod that can hold your iPhone securely in place. This will help prevent camera shake and ensure sharp, clear photos.
3. Enable Night mode: If you have an iPhone 11 or newer model, you can take advantage of the Night mode feature. This feature automatically optimizes settings for low-light situations, allowing you to capture more details in your night photos.
4. Adjust exposure settings: To capture the stars effectively, you may need to manually adjust the exposure settings on your iPhone camera. Tap on the screen to focus on a star, then swipe up or down to adjust the exposure. Experiment with different settings to find the best balance for your shot.

5. Shoot in RAW: If your iPhone supports it, consider shooting in RAW format instead of JPEG. RAW files contain more data and allow for greater flexibility in post-processing, especially when it comes to enhancing the details of stars in your photos.
6. Experiment with different apps: While the default Camera app on your iPhone is capable of capturing great night photos, you may want to try using third-party apps specifically designed for low-light photography. These apps often offer more manual controls and allow for greater customization of settings.
By following these tips and preparing your iPhone for night photography, you’ll be well-equipped to capture stunning photos of the stars. Remember to be patient and experiment with different settings until you achieve the desired results. Happy shooting!
Understanding the Settings for Night Photography
When it comes to capturing stars on your iPhone camera, understanding the settings for night photography is key to getting the best possible results. There are a few key settings to be aware of that can greatly improve your chances of capturing those stunning starry night shots.
The first setting to consider is the exposure time. Since stars are relatively dim compared to other subjects, a longer exposure time is often necessary to capture them. This allows more light to reach the camera sensor, resulting in brighter and more defined stars. Experiment with longer exposure times to find the optimal duration for your desired effect.

Next, you should adjust the ISO setting. ISO determines the camera’s sensitivity to light, and a higher ISO value can be useful for capturing stars. However, be cautious about setting the ISO too high, as it can introduce unwanted noise into your images. Find a balance between a high enough ISO to capture the stars, while still maintaining good image quality.
The third important setting to consider is the focus. When shooting stars at night, it’s important to set the focus manually, as the auto-focus function may struggle in low light situations. Set your focus to infinity to ensure that the stars appear sharp and clear in your images.
Lastly, consider using a tripod or a stable surface to avoid camera shake during the long exposure. Even slight movements can result in blurry images, so using a tripod can greatly improve the sharpness of your starry night shots.
By understanding and adjusting these settings, you can greatly improve your chances of capturing stunning starry night shots on your iPhone camera. Don’t be afraid to experiment and find the combination of settings that works best for you. With a bit of practice and patience, you’ll soon be capturing amazing photos of the night sky.
Finding the Perfect Location for Capturing Stars
Capturing stunning images of stars with your iPhone camera requires a little planning and preparation. One crucial factor is to find the perfect location that provides excellent visibility of the night sky. Here are a few tips to help you find the ideal spot:

1. Minimize Light Pollution: Light pollution from cities, street lights, and surrounding structures can significantly impact the quality of starry night photos. Choose a location away from urban areas and find a spot where the night sky is relatively free from light pollution.
2. Check Weather Conditions: Cloud cover can obstruct visibility, so it’s essential to check the weather forecast for clear skies. Plan your stargazing session on a night when the weather is predicted to be cloudless or with minimal cloud coverage.
3. Find a Dark Sky Reserve or Park: Dark Sky Reserves and Parks are designated areas that are protected from light pollution, making them ideal for astrophotography. Research and locate any nearby reserves or parks known for their starry night visibility. These areas often have regulations to minimize light pollution.
4. Look for Elevated Areas: Finding an elevated location, such as a hill, mountain, or open field, can provide a better vantage point for capturing stars. Higher elevations can help you avoid obstructions such as buildings and trees, allowing for a clearer view of the night sky.
5. Use Stargazing Apps: There are various stargazing apps available that can help you locate the best spots for capturing stars. These apps use GPS data and light pollution maps to identify areas with optimal visibility. They can also provide information about celestial events and the positions of specific constellations.

By following these tips and finding the perfect location, you can enhance your chances of capturing breathtaking images of stars with your iPhone camera. Remember to check local regulations regarding access to certain locations and always prioritize safety when venturing into unfamiliar areas at night.
Tips for Achieving Sharp Star Images
When trying to capture photos of stars with your iPhone camera, it can be a challenge to achieve sharp and clear images. However, with the right techniques and settings, you can increase your chances of getting stunning star photos. Here are some tips to help you:
1. Use a tripod
Keeping your iPhone steady is crucial for sharp star images. Use a tripod or find a stable surface to place your phone on to eliminate any unwanted movement or shakes.
2. Set a longer exposure time
Stars are faint and require longer exposure times to capture their beauty. In your iPhone camera settings, switch to the “Night Mode” or “Manual” mode and try setting the exposure time to several seconds or even minutes.
3. Adjust the ISO
Higher ISO settings make your camera more sensitive to light, which means brighter star images. However, be cautious as higher ISO settings can introduce more noise into your photos. Experiment with different ISO settings to find a balance between brightness and noise.
4. Use the timer or a remote shutter
To avoid any movement caused by tapping the shutter button on your iPhone directly, use the timer function or a remote shutter. This will help to minimize camera shake and ensure sharper star images.
5. Experiment with different apps
While the built-in camera app on your iPhone can produce great results, there are also many third-party apps available specifically designed for astrophotography. Explore these apps to access more advanced settings and features for capturing stars.
6. Edit your photos
After capturing star images, you can use photo editing apps to enhance the details and colors. Adjust the contrast, brightness, and sharpness to give your star photos an extra boost.
By following these tips and experimenting with different techniques and settings, you’ll be able to capture sharp and breathtaking star images with your iPhone camera.
Editing Your Starry Night Photos for Stunning Results
Once you’ve captured photos of the stars using your iPhone camera, you can take your images to the next level by editing them to enhance their beauty. With a few simple steps, you can transform your starry night photos into stunning works of art.
1. Adjust the Exposure
First, start by adjusting the exposure of your photo. This will allow you to bring out the details of the stars and make them more prominent in the image. Use your photo editing app or software to increase the exposure slightly, being careful not to overexpose the image.
2. Enhance the Colors
To make your starry night photos more visually appealing, you can enhance the colors. Increase the vibrance and saturation of the image to make the stars stand out and the night sky appear more vibrant. Be careful not to oversaturate the colors, as this can result in an unrealistic look.
Additionally, you can adjust the white balance to correct any color cast in the image caused by artificial lights or atmospheric conditions. This will help you achieve a more natural and balanced color palette.
3. Reduce Noise
When photographing stars, especially in low-light conditions, noise can be a common issue. To reduce noise in your starry night photos, use the noise reduction tool in your editing app or software. Adjust the settings until you achieve a smooth and clear image without losing too much detail.
Remember, finding the right balance between noise reduction and maintaining image sharpness is essential for stunning starry night photos.
By following these simple editing steps, you can transform your starry night photos into stunning works of art that capture the beauty and awe of the night sky. Experiment with different editing techniques and find the style that best suits your vision.
Question-answer:
Can you catch stars on iPhone camera?
Yes, you can capture stars on iPhone camera. However, to get clear and detailed shots of stars, you will need to use specialized techniques and equipment.
What settings should I use on my iPhone camera to capture stars?
To capture stars on your iPhone camera, you will need to adjust several settings. Firstly, set your exposure time to a longer duration, such as 15-30 seconds. Secondly, lower your ISO to minimize noise in the image. Lastly, use manual focus to ensure the stars appear sharp and clear.
Do I need any additional equipment to capture stars on iPhone camera?
While you can capture stars on your iPhone camera without any additional equipment, using a tripod is highly recommended. A tripod will help stabilize the camera and prevent any blurriness in the images due to camera shake.
Are there any specific locations or conditions that are ideal for capturing stars on iPhone camera?
Yes, there are certain locations and conditions that are more favorable for capturing stars on iPhone camera. Look for areas away from light pollution, such as remote rural areas or high-altitude locations. Additionally, clear and dark nights with minimal cloud cover will provide the best visibility of stars.


