Changing the lens on a digital camera is a simple and essential skill for any photographer. With the ability to switch lenses, you can capture a wide range of subjects and achieve different creative effects. Whether you’re new to photography or have been shooting for years, learning how to change lenses will elevate your skills and open up new possibilities for your photography.
Before you begin, make sure to turn off your camera and remove any accessories that may be attached to it. Take a moment to familiarize yourself with the parts of your camera and the lens. Look for the lens release button, typically located on the camera body near the lens mount. This button allows you to detach the lens from the camera.
To remove the lens, press and hold the lens release button while gently rotating the lens counterclockwise. Once the lens is detached, place it on a clean and stable surface, making sure it is protected and not exposed to dirt or dust. Now it’s time to attach the new lens.
When attaching a lens, align the red or white dot on the lens with the corresponding mark on the camera body. This ensures that the lens is properly aligned and securely attached. Gently insert the lens into the camera mount and rotate it clockwise until it clicks into place. Give the lens a gentle tug to make sure it is firmly attached.
After attaching the new lens, you can turn on your camera and start shooting. Take some time to explore the new lens and experiment with its capabilities. Remember to always handle lenses with care and avoid touching the glass elements as much as possible to prevent smudges and damage.
Changing lenses may seem intimidating at first, but with practice, it becomes a quick and seamless process. By mastering this skill, you can take your photography to the next level and capture stunning images with different perspectives and focal lengths. So go ahead, grab your camera and start exploring the world of lens interchangeability!
Preparing to Change the Lens
Changing the lens on a digital camera requires careful preparation and attention to detail. Before you start, make sure you have the right tools and a clean, dust-free environment. Here are the steps to follow:
1. Gather the necessary tools: You will need a lens cloth or clean microfiber cloth, a lens cap, and the new lens you plan to install. It’s a good idea to have a small blower or air bulb to remove any dust from the camera or lens.
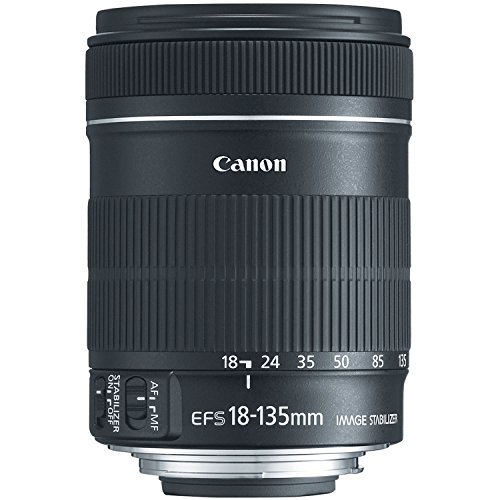
2. Choose the right lens: Select the new lens that best suits your needs and camera model. Make sure it is compatible with your camera and has the right specifications for the type of photography you plan to do.
3. Clean the camera area: Use the blower or air bulb to blow away any dust from the camera body and lens mount. Wipe the camera body with a clean cloth to remove any fingerprints or smudges that may interfere with the lens attachment.

4. Remove the lens cap: Take off the lens cap from the new lens and set it aside in a safe place. Do not touch the front or rear lens elements with your fingers to avoid leaving fingerprint marks.
5. Remove the current lens: Detach the current lens by pressing the lens release button (usually located on the camera body) and twisting the lens counterclockwise until it comes off. Place the lens face down on a clean surface or in its protective case.
6. Prepare the new lens: Before attaching the new lens, inspect it carefully for any dust or debris. Use the blower or air bulb to remove any particles. Clean the lens surface with a lens cloth to ensure it is immaculate before installation.
With these steps completed, you are now ready to attach the new lens to your digital camera. Follow the manufacturer’s instructions for your specific camera model to ensure a secure and proper fit.
Gathering the Necessary Tools
Before you can change the lens on your digital camera, it’s important to gather the necessary tools. Here is a list of essential items you will need:

- A replacement lens: This is the new lens you will be installing. Make sure you have the correct lens for your camera model.
- A lens cleaning cloth: This will be used to clean the lens and remove any dust or smudges.
- A lens cap: This is important to protect your lens when it’s not in use.
- A lens wrench: This tool is specifically designed to remove the lens from your camera body. It ensures a secure grip without damaging the lens or camera.
- A dust blower: This can be used to remove any dust or debris from the camera body or lens.
- A clean, well-lit workspace: It’s important to have a clear area where you can comfortably work on your camera.
Once you have gathered all the necessary tools, you will be ready to proceed with changing the lens on your digital camera. Having the right tools at hand will make the process much smoother and help prevent any accidental damage to your equipment.
Choosing the Right Replacement Lens
When it comes to changing the lens on your digital camera, it’s important to choose the right replacement lens for your needs. Here are some factors to consider when selecting a new lens:
1. Lens Compatibility
The first thing you need to ensure is that the replacement lens is compatible with your camera model. Different camera brands and models have specific lens mounts and connections, so it’s crucial to choose a lens that is designed to fit your camera.
2. Lens Type
There are different types of lenses available, each offering unique features and capabilities. The most common types include:
- Standard Lens: These lenses have a focal length that is similar to the human eye, making them suitable for general photography.
- Wide-Angle Lens: These lenses have a shorter focal length, allowing you to capture a wider field of view. They are great for landscape and architecture photography.
- Telephoto Lens: These lenses have a longer focal length, allowing you to zoom in on distant subjects. They are ideal for wildlife and sports photography.
- Macro Lens: These lenses are designed for close-up photography, allowing you to capture intricate details of small subjects, such as flowers or insects.
3. Focal Length
The focal length of a lens determines the magnification and perspective of the captured image. Shorter focal lengths provide a wider angle of view, while longer focal lengths offer a narrower angle of view with increased zoom capabilities. Consider your photography needs and choose a focal length that suits your shooting style.

4. Aperture
The aperture of a lens determines the amount of light that can enter the camera. A wider aperture (smaller f-number) allows more light to enter, which is beneficial for low-light situations and creating a shallow depth of field. Consider the lighting conditions you typically shoot in and choose a lens with an appropriate aperture range.
5. Budget
Lastly, consider your budget when selecting a replacement lens. Lenses can vary in price based on their brand, quality, and features. Set a budget that you are comfortable with and look for lenses within that price range.
By considering these factors, you can choose the right replacement lens that will enhance your photography experience and allow you to capture stunning images with your digital camera.
Removing the Current Lense
Before replacing the lens on your digital camera, you need to remove the current lens. Follow these steps to safely remove the lens:
Step 1: Power Off the Camera
Before you begin, make sure your camera is turned off. This will help prevent any accidental damage to the camera or lens during the removal process.

Step 2: Detach the Lens Cap
If there is a lens cap attached to the lens, remove it by gently twisting it counterclockwise until it comes off. Set the lens cap aside in a safe place.
Step 3: Locate the Lens Release Button
Look for the lens release button on your camera body. It is typically located near the base of the lens where it connects to the camera body. This button is used to unlock the lens from the camera.
Step 4: Press the Lens Release Button
While holding the camera with one hand, press and hold the lens release button using your other hand. The button may need to be held down continuously while removing the lens.
Step 5: Twist and Remove the Lens
While continuing to hold the lens release button, rotate the lens counterclockwise. Keep turning until the lens is completely unscrewed from the camera body.
Step 6: Store the Lens Safely
Once the lens is removed, place it in a protective case or wrap it in a soft cloth to keep it safe from scratches and dust.

Now that you have successfully removed the current lens, you are ready to install a new lens on your digital camera.
Handling the Lens Carefully
When it comes to changing the lens on your digital camera, it is crucial to handle the lens with extreme care. The lens is a delicate and expensive part of the camera, and mishandling it can lead to damage or even permanent loss of functionality.
1. Clean Your Hands
Before touching the lens, make sure your hands are clean and free from any dirt, oil, or lotion. Even small particles can potentially damage the lens or leave smudges that affect image quality. It is a good practice to wash your hands thoroughly or use a hand sanitizer before proceeding.
2. Remove the Lens Cap
Prior to changing the lens, always remove the lens cap. The lens cap is designed to protect the lens from scratches and dust, but it should be removed before any manipulation. This will provide a clear view of the lens and prevent any obstruction during the process.
Note: Be careful not to misplace or drop the lens cap as it is equally important for protection when the lens is not in use.

3. Hold the Lens Properly
When removing the lens, hold the camera firmly with one hand and use the other hand to twist the lens gently in a counterclockwise direction. Avoid placing unnecessary pressure on the lens or twisting it forcefully, as this can cause damage or misalignment. It is recommended to use a lens removal tool if it is provided with your camera.
Tip: If you are unsure about how to remove the lens, refer to the camera’s instruction manual or seek guidance from a professional.
Following these precautions and handling the lens carefully will help ensure that your digital camera and lens stay in optimal condition, allowing you to capture high-quality photos for years to come.
Aligning the New Lense Correctly
When changing the lense on a digital camera, it is crucial to align the new lense correctly to ensure proper functionality and image quality. Follow these steps to align the new lense correctly:
1. Power off the camera: Before attempting to remove or install a new lense, make sure to power off the camera. This will prevent any accidental damage to the camera and avoid any potential injury.

2. Remove the old lense: Gently twist and remove the old lense counterclockwise. Take care not to force the lense as it may damage the camera’s mount.
3. Inspect the camera mount: Once the old lense is removed, inspect the camera mount for any dirt, dust, or debris. Use a lint-free cloth or a blower brush to remove any particles that may affect the alignment of the new lense.
4. Align the new lense: Carefully align the new lense with the camera mount, ensuring that the electronic contacts match up. The lense should fit snugly into place and rotate smoothly clockwise.
5. Secure the new lense: Once the new lense is aligned correctly, gently twist it clockwise until you feel it lock into place. Avoid applying excessive force or over-tightening the lense.
6. Power on the camera: After securing the new lense, power on the camera to check if it recognizes the new lense. Test the autofocus and zoom functionalities to ensure everything is working properly.
Note: If you encounter any difficulties during the alignment process, consult the camera’s user manual or seek assistance from a professional technician to avoid causing any damage to your camera.
Attaching the New Lens
Once you have selected the new lens for your digital camera, it’s time to attach it. Follow these steps to securely attach the new lens:
Step 1: Safety First
Before you begin, make sure the camera is turned off to avoid any accidental damage.
Step 2: Removing the Cap
Remove the protective lens cap from the camera’s body. This cap can usually be found at the front, covering the lens mount.
Step 3: Removing the Old Lens
To detach the old lens, locate the lens release button typically found on the side of the lens mount. Press and hold this button while gently twisting the lens counterclockwise until it is released from the camera body.

Step 4: Preparing the New Lens
Before attaching the new lens, remove any protective coverings or caps from both ends. It’s important to keep both the front and rear elements of the lens clean and free from dust or debris.
Step 5: Aligning the Lens
Align the mounting indicators on both the camera body and the new lens. These are usually marked with dots or arrows. Carefully position the lens with the mounting indicators aligned.
Step 6: Attaching the Lens
Gently insert the lens into the lens mount, making sure it is securely attached. Rotate the lens clockwise until you hear a click or feel it lock into place.
And voila! You have successfully attached the new lens to your digital camera. Now you’re ready to explore the creative possibilities and capture stunning images with your new lens.
Testing the New Lens
Once you have successfully replaced the lens on your digital camera, it is important to thoroughly test the new lens to ensure it is functioning properly. Here are some steps you can follow to test your new lens:
1. Check the autofocus: Take a few test shots using the autofocus feature of your camera. Make sure the lens is able to focus accurately on the subject. Pay attention to any unusual noises or delays in focusing.
2. Test the image quality: Take some photos in different lighting conditions and at different focal lengths to assess the image quality of the new lens. Inspect the photos for clarity, sharpness, and any signs of distortion or aberrations.
3. Pay attention to the aperture: Test the lens at different aperture settings to ensure that it is working correctly. Check if the aperture blades move smoothly and if the lens accurately adjusts the amount of light entering the camera.
4. Test the zoom functionality: If your new lens has a zoom feature, experiment with different zoom levels to ensure smooth operation. Pay attention to any stiffness or resistance while zooming in or out.
5. Assess the overall performance: Take some time to capture a variety of images using the new lens in different shooting scenarios. Evaluate the overall performance of the lens, considering factors such as autofocus speed, image stabilization, and overall handling.
By following these steps, you can effectively test your new lens and identify any issues early on. If you encounter any problems or notice any abnormalities during the testing process, it is recommended to contact the manufacturer or seek professional assistance.
Adjusting Settings on the Digital Camera
When using a digital camera, it is important to understand how to adjust the settings to achieve the desired results. By making adjustments to settings such as ISO, aperture, and shutter speed, you can have more control over your photos and enhance their quality.
1. ISO Settings
The ISO setting on a digital camera determines its sensitivity to light. A higher ISO setting is ideal for low-light situations, but it may result in more noise or graininess in the image. On the other hand, a lower ISO setting produces cleaner images but may require longer exposures in low-light conditions.
2. Aperture Settings
The aperture setting controls the amount of light that enters the camera through the lens. It is measured in f-stop values, and a lower f-stop value (e.g., f/2.8) means a wider aperture and more light entering the camera. Adjusting the aperture also affects the depth of field, allowing you to control the amount of background blur in your photos.
| ISO Setting | Aperture Setting | Resulting Effect |
|---|---|---|
| High ISO | Wide Aperture | Good for low-light conditions, but potential noise and shallow depth of field. |
| Low ISO | Narrow Aperture | Produces cleaner images, but longer exposures may be required in low-light situations. |
By finding the right balance between ISO and aperture settings, you can capture sharp, well-exposed images without sacrificing image quality.
In addition to ISO and aperture, digital cameras also allow for adjustments in shutter speed, white balance, and other settings. Familiarize yourself with these settings and experiment with different combinations to unleash the full potential of your digital camera.
Storing the Old Lens
After changing the lens on your digital camera, it is important to store the old lens properly to ensure its protection and longevity. Here are some steps to follow:
- Remove any dust or debris from the lens by gently brushing it with a lens brush or using a microfiber cloth.
- Place the lens in a protective case or bag to shield it from scratches or accidental damage.
- If you have the original lens cap, put it back on to provide an extra layer of protection.
- Store the lens in a dry and cool place to prevent moisture or extreme temperature fluctuations.
- Consider investing in a lens storage container or padded camera bag for added protection during transportation or long-term storage.
By following these steps, you can ensure that your old lens remains in good condition and is ready for future use or resale.
Question-answer:
Can I change the lens on my digital camera?
Yes, you can change the lens on a digital camera. Most interchangeable lens cameras have a lens mount that allows you to remove and attach different lenses.
Why would I want to change the lens on my digital camera?
Changing the lens on your digital camera gives you the ability to capture different types of photos and achieve different effects. Different lenses have different focal lengths and characteristics, which can greatly impact the look of your photos.
How do I change the lens on my digital camera?
The process may vary slightly depending on the camera model, but generally, you will need to turn off the camera, press the lens release button (usually located near the lens mount), twist the lens counterclockwise to remove it, and then attach the new lens by twisting it clockwise until it locks into place.
Are there any precautions or steps I need to take when changing the lens?
Yes, there are a few precautions to keep in mind. First, make sure the camera is turned off before removing or attaching the lens. Also, be careful not to touch the glass elements of the lens or the camera’s mirror inside the camera body. Finally, be sure to align the lens properly with the lens mount before twisting it into place to avoid damaging the mount.
Do I need any special tools to change the lens on my digital camera?
No, you do not typically need any special tools to change the lens. Most cameras have a lens release button and mounting system that can be operated by hand. However, it is recommended to refer to your camera’s manual for specific instructions and to use caution when handling the delicate lens and camera components.


