
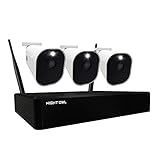
Night Owl security cameras are a popular choice for monitoring your home or business. With their advanced features and high-quality video footage, they provide reliable surveillance around the clock. However, you may find that the default viewing order of your cameras doesn’t suit your needs. Fortunately, changing the viewing order of your Night Owl security cameras is a simple process that can be done with just a few steps.
To change the viewing order of your Night Owl security cameras, you’ll need to access the camera settings through the Night Owl app or software. Start by opening the Night Owl app on your smartphone or the Night Owl software on your computer. Once the app or software is open, navigate to the settings section.
Within the settings menu, you should see an option for camera order or camera layout. This option may be located under the display or video settings. Click on this option to access the camera order settings.
Once you’re in the camera order settings, you should see a list of all your connected Night Owl security cameras. To change the viewing order, simply drag and drop the cameras into the desired sequence. You can rearrange the cameras by clicking and holding the camera icon, then moving it up or down the list.
After you’ve rearranged the cameras to your preference, don’t forget to save your changes. Look for a save or apply button within the settings menu and click on it to apply the new viewing order. Your Night Owl security cameras will now display in the updated sequence, allowing you to easily monitor the areas you value the most.

By following these simple steps, you can easily change the viewing order of your Night Owl security cameras. Whether you want to prioritize certain cameras or rearrange them for a specific purpose, having control over the viewing order gives you the flexibility to customize your surveillance setup to meet your needs.
How to Change Viewing Order of Night Owl Security Cameras
If you have a Night Owl security system installed and want to change the viewing order of your cameras, this guide will provide you with step-by-step instructions. By changing the viewing order, you can customize how the cameras are displayed on your monitor or mobile device.
Step 1: Access the Night Owl System Settings
To start, you need to access the system settings of your Night Owl security system. This can typically be done by logging into the system using the administrator account.
Step 2: Navigate to the Camera Settings
Once you are in the system settings, navigate to the camera settings section. The exact location may vary depending on your specific system, but it is usually found under the “Settings” or “Camera” menu.
Step 3: Rearrange the Camera Order
Within the camera settings, you should see a list of all the cameras connected to your Night Owl system. To change the viewing order, simply click and drag the cameras in the desired order. You can also use the up and down arrows to rearrange the cameras.
Note: The camera numbers or names may be displayed next to each camera, making it easier to identify them.
Step 4: Save the Changes
After rearranging the cameras, make sure to save the changes to apply the new viewing order. Look for a “Save” or “Apply” button within the camera settings, and click on it to confirm the changes.
Note: Depending on your system, you may need to restart the Night Owl system for the changes to take effect.
By following these steps, you can easily change the viewing order of your Night Owl security cameras. Whether you want to prioritize certain cameras or reorganize them for a better viewing experience, customizing the camera order gives you more control over your security system.
Rearranging the Viewing Order on the Night Owl App
If you’re using the Night Owl App to view your security camera footage, you may want to rearrange the order in which the cameras appear. By default, the cameras are listed in the order they were added to the app, but you have the ability to change this to better suit your preferences.

To rearrange the viewing order, follow these simple steps:
- Open the Night Owl App on your mobile device.
- Tap on the menu icon in the top-left corner of the screen to open the menu.
- Scroll down and select “Cameras” from the menu options.
- You will see a list of all the cameras connected to your Night Owl system. To change the viewing order, tap and hold the camera you want to move.
- Drag the camera up or down to the desired position in the list.
- Release your finger to place the camera in its new position.
- Repeat steps 4-6 for each camera you want to rearrange.
- Once you have finished rearranging the cameras, tap the “Save” button to apply the changes.
After following these steps, the viewing order of the cameras on your Night Owl App will be updated to reflect your new preferences. This allows you to organize the cameras in a way that makes it easier for you to monitor specific areas or prioritize certain cameras.
Remember, if you have multiple Night Owl systems or DVRs connected to the app, you will need to repeat these steps for each system to rearrange the viewing order of the cameras on each system.
Note: Some older versions of the Night Owl App may not have this feature. If you don’t see the option to rearrange the cameras, make sure you have the latest version of the app installed on your device.
We hope this guide has been helpful in showing you how to rearrange the viewing order of your Night Owl security cameras on the Night Owl App. Enjoy the customized camera viewing experience!

Modifying the Viewing Order on the Night Owl DVR
If you want to change the viewing order of your Night Owl security cameras on the DVR, you can easily do so by following these steps:
| Step | Description |
|---|---|
| 1 | Access the DVR menu by using the remote control or by connecting a mouse to the DVR. |
| 2 | Navigate to the “Camera” or “Display” section in the menu. |
| 3 | Select the option to modify the viewing order. |
| 4 | A list of available cameras will be displayed. Use the arrow keys or the mouse to select the camera you want to move. |
| 5 | Move the selected camera to the desired position in the viewing order. This can usually be done by pressing the “Up” or “Down” button on the remote control or by dragging and dropping the camera using the mouse. |
| 6 | Repeat steps 4 and 5 for each camera you want to modify. |
| 7 | Once you have finished rearranging the cameras, save the changes and exit the menu. |
By following these steps, you can easily modify the viewing order of your Night Owl security cameras on the DVR, allowing you to prioritize the cameras based on your surveillance needs.
Changing the Camera Sequence on the Night Owl Remote Viewing Software
If you want to change the camera sequence on the Night Owl Remote Viewing Software, follow the steps below:
- Launch the Night Owl Remote Viewing Software on your computer.
- Click on the “Settings” tab at the top of the main interface.
- In the settings menu, select the “Camera” option.
- A table displaying the camera list and their current sequence will appear.
- To change the sequence, simply click on a camera in the list and drag it to its desired position.
- Once you let go of the mouse button, the camera will be placed in the new sequence.
- Repeat steps 5 and 6 for every camera you want to rearrange.
- Once you have arranged the cameras in the desired sequence, click on the “Save” button to save your changes.
- Exit the settings menu and return to the main interface of the Night Owl Remote Viewing Software.
By following these steps, you can easily change the viewing order of your security cameras using the Night Owl Remote Viewing Software. Make sure to save your changes before exiting the settings menu to ensure that the new camera sequence is applied.
Adjusting the Viewing Order through the Night Owl Connect Portal
The Night Owl Connect Portal is a convenient and user-friendly platform that allows you to manage and control your Night Owl security cameras. One of the features it offers is the ability to change the viewing order of your security cameras. This can be helpful if you have multiple cameras installed and want to prioritize certain cameras or change the display order to suit your needs.

Step 1: Access the Night Owl Connect Portal
First, ensure that you have the Night Owl Connect app installed on your smartphone or tablet. Open the app and log in to your Night Owl Connect account. If you don’t have an account, create one by following the on-screen instructions.
Step 2: Navigate to Camera Settings
Once you have logged in, tap on the menu icon in the top left corner of the screen. From the menu, select “Camera Settings” to access the camera settings page.
Step 3: Rearrange the Viewing Order
On the camera settings page, you will see a list of your installed cameras and their current viewing order. To rearrange the order, simply tap and hold on the camera you want to move. Drag it to the desired position in the list. Repeat this step for each camera until you have rearranged them according to your preference.
Note that the camera at the top of the list will be displayed first in the Night Owl Connect app.
Step 4: Save and Apply Changes
After you have adjusted the viewing order, tap on the “Save” or “Apply” button to save the changes. The Night Owl Connect Portal will update the viewing order of your cameras accordingly.
It’s that simple! By following these steps, you can easily adjust the viewing order of your Night Owl security cameras through the Night Owl Connect Portal. Enjoy the convenience and flexibility of customizing your camera display to suit your specific needs.
Reordering Cameras Using the Night Owl Security System Interface
If you’re using the Night Owl Security System, reordering the cameras is a simple process that can be done directly from the system’s interface. This allows you to arrange the cameras in a way that best suits your needs and preferences.
Step 1: Accessing the Night Owl System Interface
Start by accessing the Night Owl System Interface. This is typically done by opening a web browser and entering the IP address or domain associated with your Night Owl system.
Step 2: Logging In
Once you have accessed the Night Owl System Interface, log in using your username and password.
Step 3: Navigating to Camera Settings
Once logged in, navigate to the camera settings section. This can usually be found in the main dashboard or under a “Settings” tab.

Step 4: Selecting the Reorder Option
Within the camera settings, look for an option that allows you to reorder the cameras. This might be labeled as “Reorder,” “Camera Order,” or similar. Click on this option to proceed.
Step 5: Rearranging the Cameras
When the reorder option is selected, a list of all your installed cameras will be displayed. You can now rearrange the order of the cameras by dragging and dropping them into the desired positions. The position of the cameras in the list determines the viewing order.
Step 6: Saving the Changes
Once you have rearranged the cameras to your liking, click on the save or apply button to save the changes. The new viewing order will now be reflected in the live video feed and any recordings made by the Night Owl System.
By following these steps, you can easily change the viewing order of your Night Owl Security System cameras, allowing you to prioritize certain cameras and improve your overall surveillance setup.
Customizing the Viewing Order Through the Night Owl CMS Software
If you have Night Owl security cameras installed at your premises and want to change the viewing order, you can easily do so through the Night Owl CMS (Central Management Software) application. Night Owl CMS allows you to customize and manage your security cameras with ease.
To change the viewing order of your Night Owl security cameras, follow these steps:
- Launch the Night Owl CMS software on your computer.
- Log in using your username and password.
- Once logged in, navigate to the “Camera List” tab.
- Look for the camera whose viewing order you want to modify.
- Right-click on the camera and select “Camera Config”.
- A new window will open, displaying the camera’s configuration settings.
- In the configuration settings, locate the “Display Channel” option.
- Click on the drop-down menu next to “Display Channel” and select the desired viewing order for the camera.
- Click “Save” to apply the changes.
By following these steps, you can easily customize the viewing order of your Night Owl security cameras through the Night Owl CMS software. This allows you to prioritize certain cameras or rearrange the order based on your specific needs.
Note: It’s important to note that the specific steps may vary slightly depending on the version of the Night Owl CMS software you are using. However, the general process remains the same.
Make sure to consult the Night Owl CMS software user manual or contact Night Owl’s customer support for more detailed instructions specific to your software version if needed.
How to Change the Camera Sequence on the Night Owl X Mobile App
The Night Owl X Mobile App provides users with the ability to remotely access and view their security cameras from their mobile devices. By default, the app displays the cameras in a specific sequence, but if you want to change the viewing order, you can easily do so with a few simple steps. Follow the instructions below to change the camera sequence on the Night Owl X Mobile App:
Step 1: Launch the Night Owl X Mobile App
Open the Night Owl X Mobile App on your mobile device. If you haven’t already, log in to your account using your username and password.
Step 2: Access the Camera Settings
Once you’re logged in, tap on the menu icon (usually represented by three horizontal lines) in the top-left corner of the app’s home screen. From the menu that appears, select “Settings” to access the camera settings.
Step 3: Rearrange the Camera Sequence
In the camera settings menu, you should see a list of your connected cameras. To change the viewing order, press and hold the camera you want to move. Then, drag and drop it to the desired position in the list.
Step 4: Save the Changes
After you have rearranged the cameras in the desired sequence, tap the “Save” button or icon to save the changes.
Step 5: View the Cameras in the New Sequence
Once you have saved the changes, exit the camera settings menu and go back to the app’s home screen. The cameras should now be displayed in the new sequence based on your changes.
By following these simple steps, you can easily change the camera sequence on the Night Owl X Mobile App and have a customized viewing experience. Whether you want to prioritize certain cameras or group them together, this feature allows you to adjust the display order to meet your specific needs.
Switching the Viewing Order on the Night Owl X HD Security System
If you want to change the viewing order of your Night Owl security cameras on the Night Owl X HD Security System, you can easily do so by following these steps:
Step 1: Access the Night Owl X HD Security System Menu
Begin by accessing the main menu of your Night Owl X HD Security System. You can do this by launching the Night Owl X app on your smartphone or tablet, or by opening the software on your computer.
Step 2: Select the Device and Channel
Once you are in the main menu, select the device and channel that corresponds to the camera whose viewing order you wish to change. This will open the live view of the camera on your screen.
Step 3: Open the Camera Settings
In the live view, locate the settings icon. This can typically be found in the top right corner of the screen, represented by a gear or cog icon. Tap or click on this icon to open the camera settings for the selected camera.
Step 4: Adjust the Viewing Order
Within the camera settings, look for the “Viewing Order” option. This setting may be named differently depending on your Night Owl X HD Security System model. Once you locate the option, tap or click on it to open the viewing order settings.
You will see a list of all the cameras connected to your Night Owl X HD Security System. To change the viewing order, simply drag and drop the cameras in the desired sequence. The camera at the top of the list will be displayed first, followed by the rest of the cameras in the order you set.
Note: Some Night Owl X HD Security Systems may have limitations on the number of cameras that can be viewed simultaneously. If this is the case, make sure to check the user manual or contact Night Owl support for guidance.
Step 5: Save the Changes
After adjusting the viewing order, make sure to save the changes by clicking on the “Save” or “Apply” button. This will update the viewing order for the selected camera.
By following these simple steps, you can easily switch the viewing order of your Night Owl security cameras on the Night Owl X HD Security System. This allows you to customize the display and prioritize the cameras based on your specific needs and preferences.


